zabbix自定义监控mysql主从状态和延迟
zabbix自定义监控mysql主从状态和延迟
zabbix自定义监控mysql主从状态
| 主机IP | 角色 | 主机名 |
|---|---|---|
| 192.168.222.250 | zabbix_server | localhost |
| 192.168.222.251 | zabbix_agentd、mysql从库 | slave |
| 192.168.222.252 | mysql主库 | master |
配置环境监控服务zabbix部署,mysql主从可以看下面的详细的操作mysql进阶,
mysql主从,监控服务zabbix部署和zabbix的基础使用
在agentd客户端被(监控端)也就是mysql从库里面编写脚本,获取mysql主从状态
[root@slave ~]# mkdir -p /scripts/zabbix
[root@slave ~]# cd /scripts/zabbix/
[root@slave zabbix]# vim mysql_MS_sta.sh
[root@slave zabbix]# cat mysql_MS_sta.sh
#!/bin/bash
count=$(mysql   -u root -pxbz123 -e'show slave status\G' 2> /dev/null | grep -E "IO_Running:|SQL_Running:" | grep -c Yes)
//因为mysql使用密码明文登录会有告警,所以用错误重定向将他丢到黑洞里去												(/dev/null)
if [ $count == 2 ];then
         echo "0"  //0没问题
else
         echo "1"  //1没问题
fi
[root@slave zabbix]# chmod +x mysql_MS_sta.sh //赋予权限
[root@slave zabbix]# ./mysql_MS_sta.sh  //测试脚本
0   //没问题
[root@slave zabbix]# vim /usr/local/etc/zabbix_agentd.conf
//编辑/usr/local/etc/zabbix_agentd.conf
UnsafeUserParameters=1   //修改
UserParameter=check_mysql_MS_sta,/bin/bash /scripts/zabbix/mysql_MS_sta.sh    //添加
[root@slave zabbix]# pkill zabbix_agentd
[root@slave zabbix]# zabbix_agentd
//重启zabbix_agentd
在服务端进行测试
[root@localhost ~]# zabbix_get -s 192.168.222.251 -k check_mysql_MS_sta
0
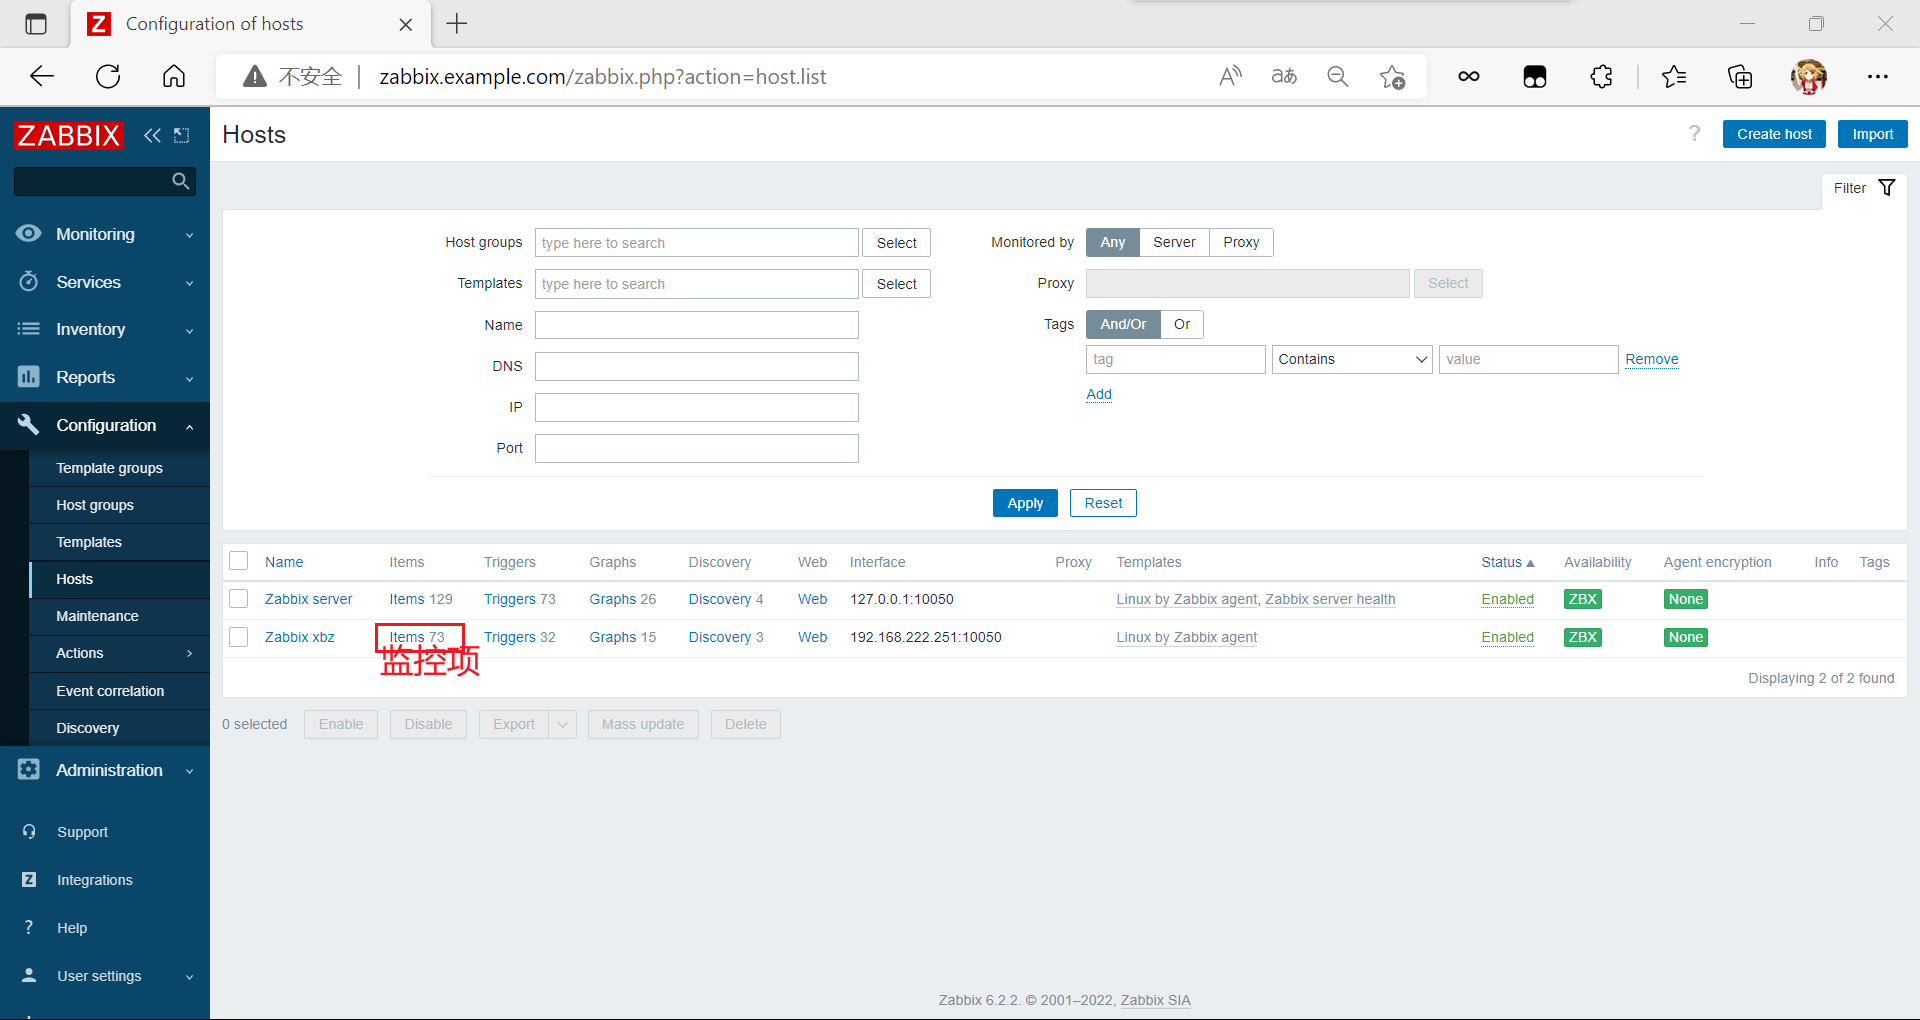
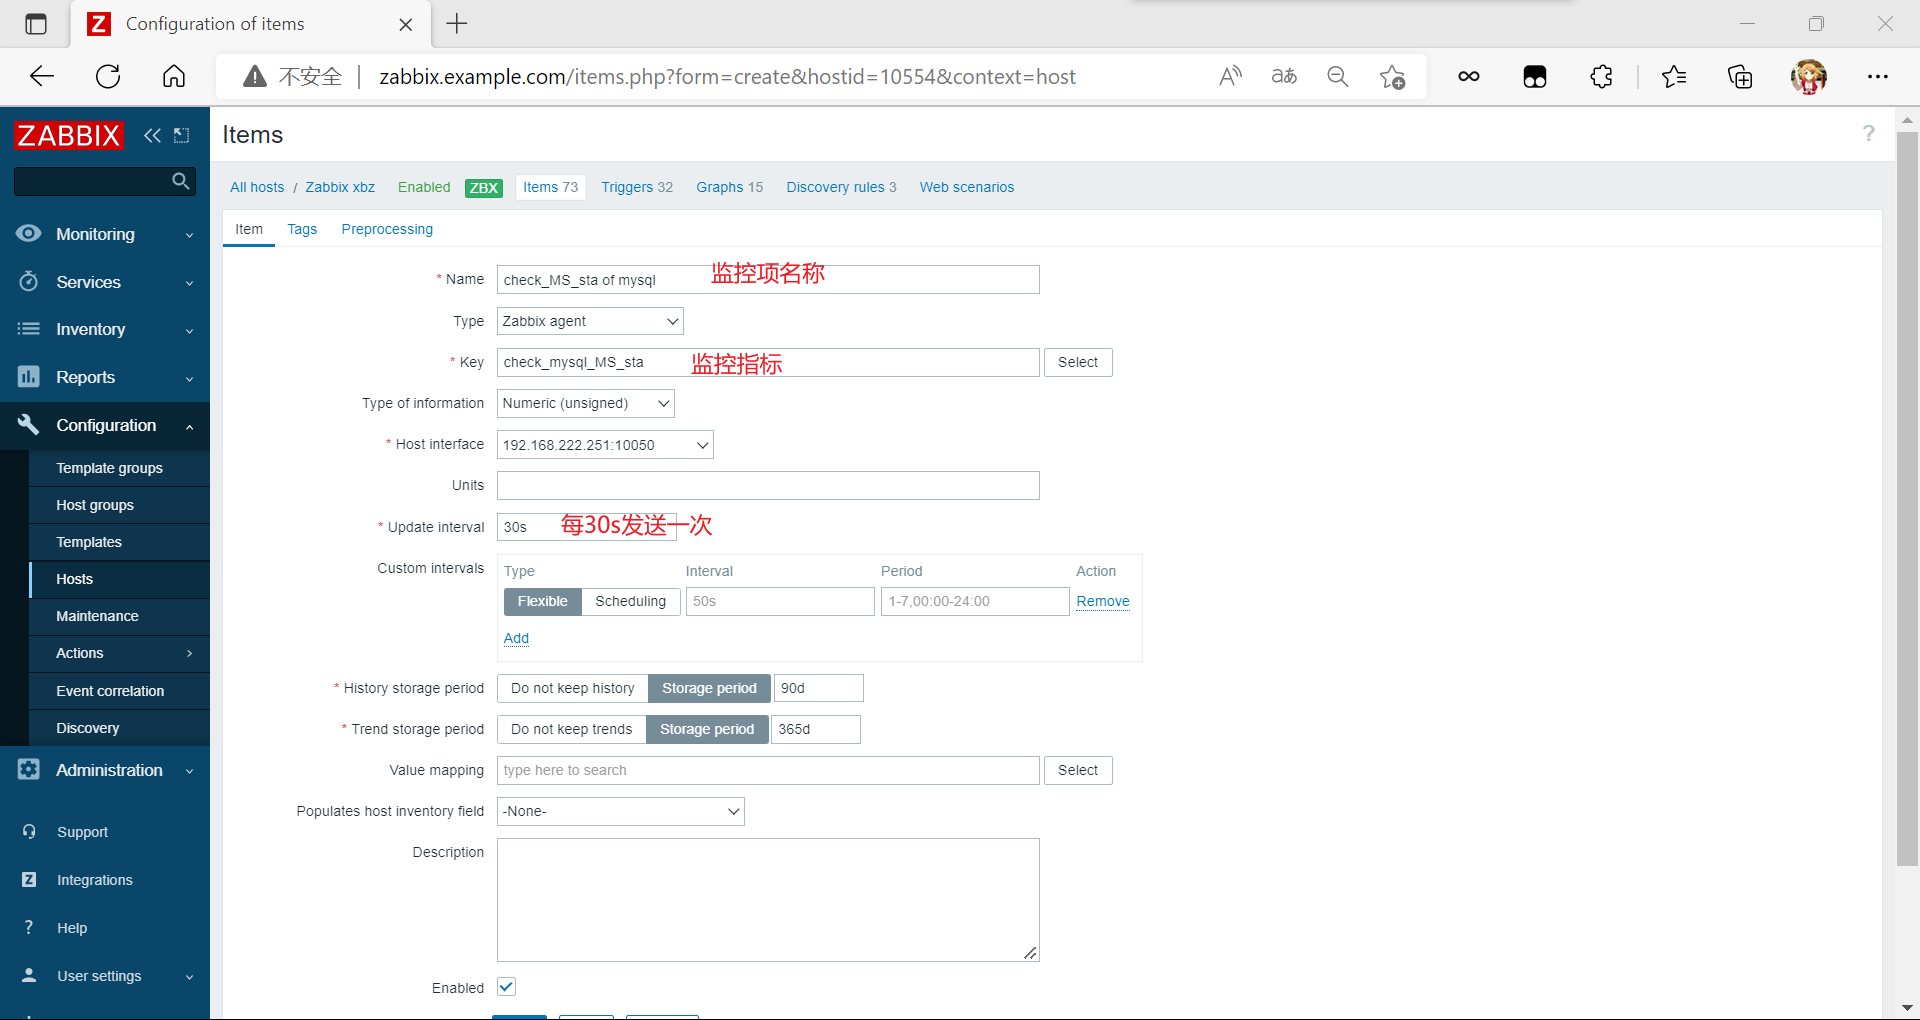
配置监控项

最后点击下面的add(添加)
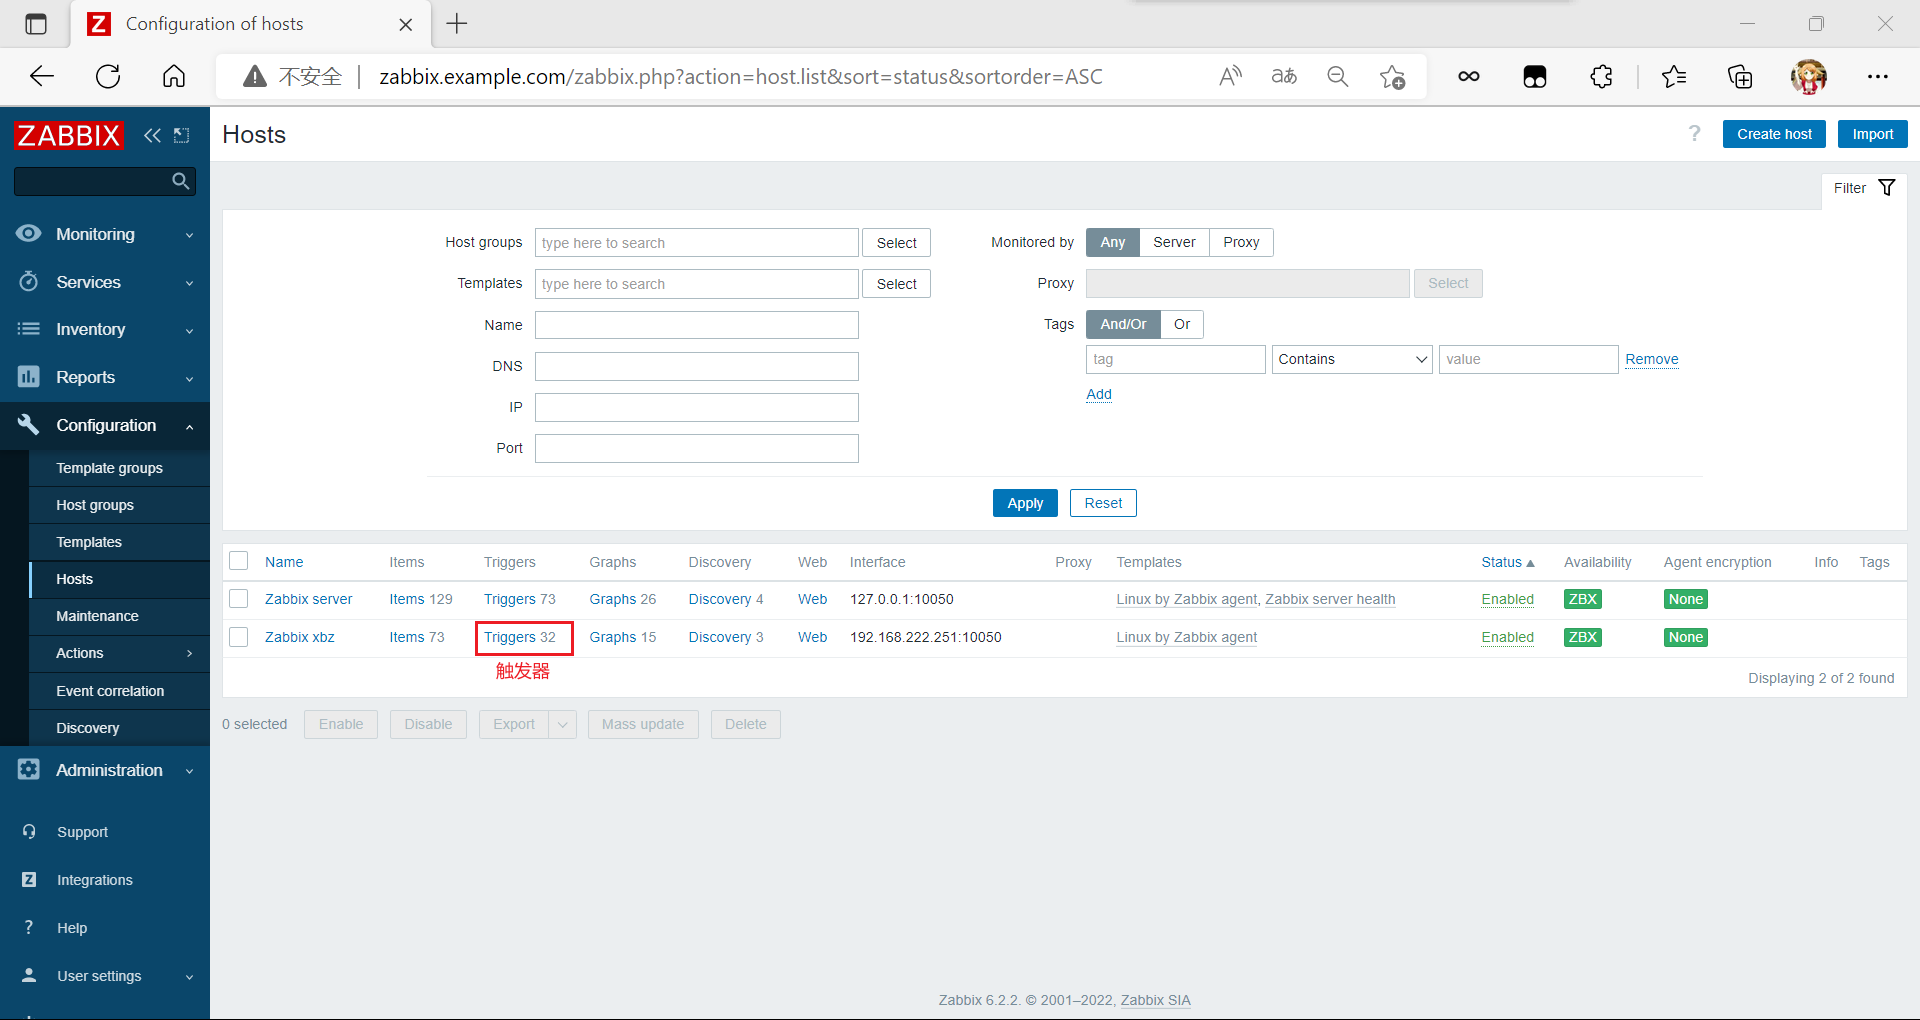
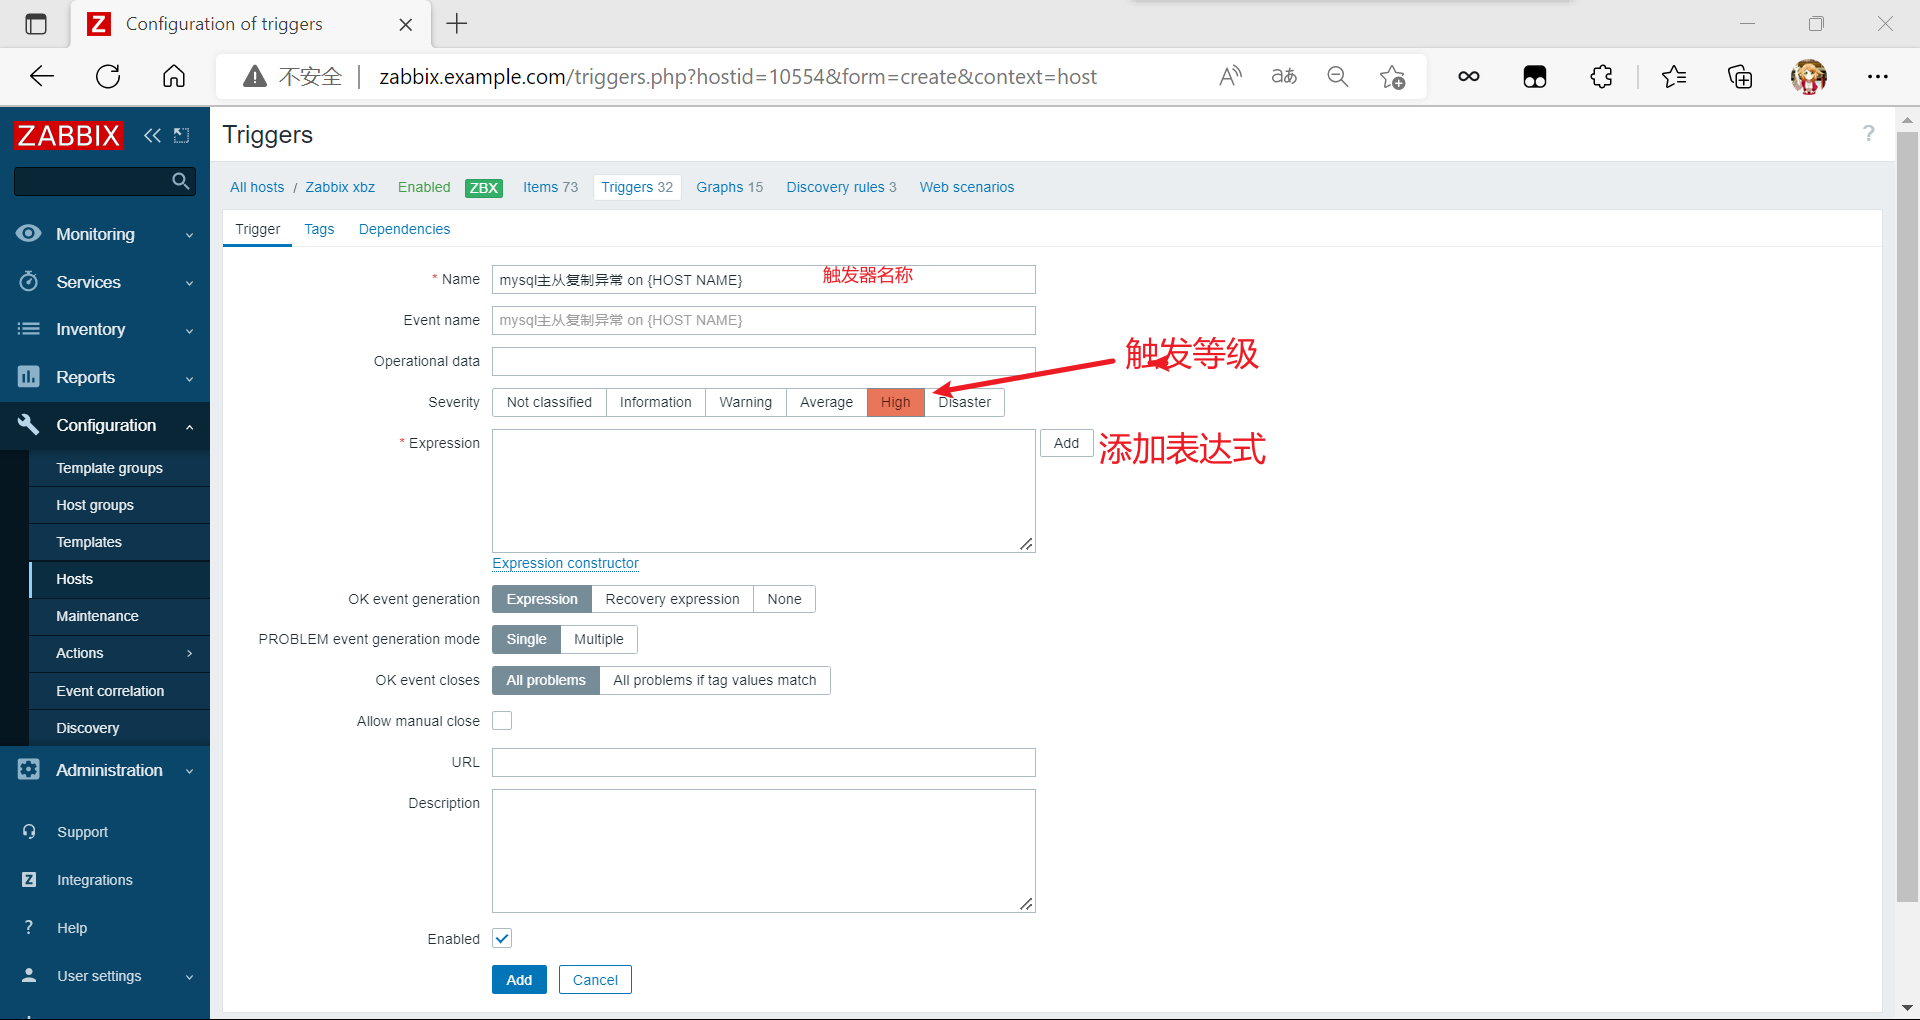
配置触发器

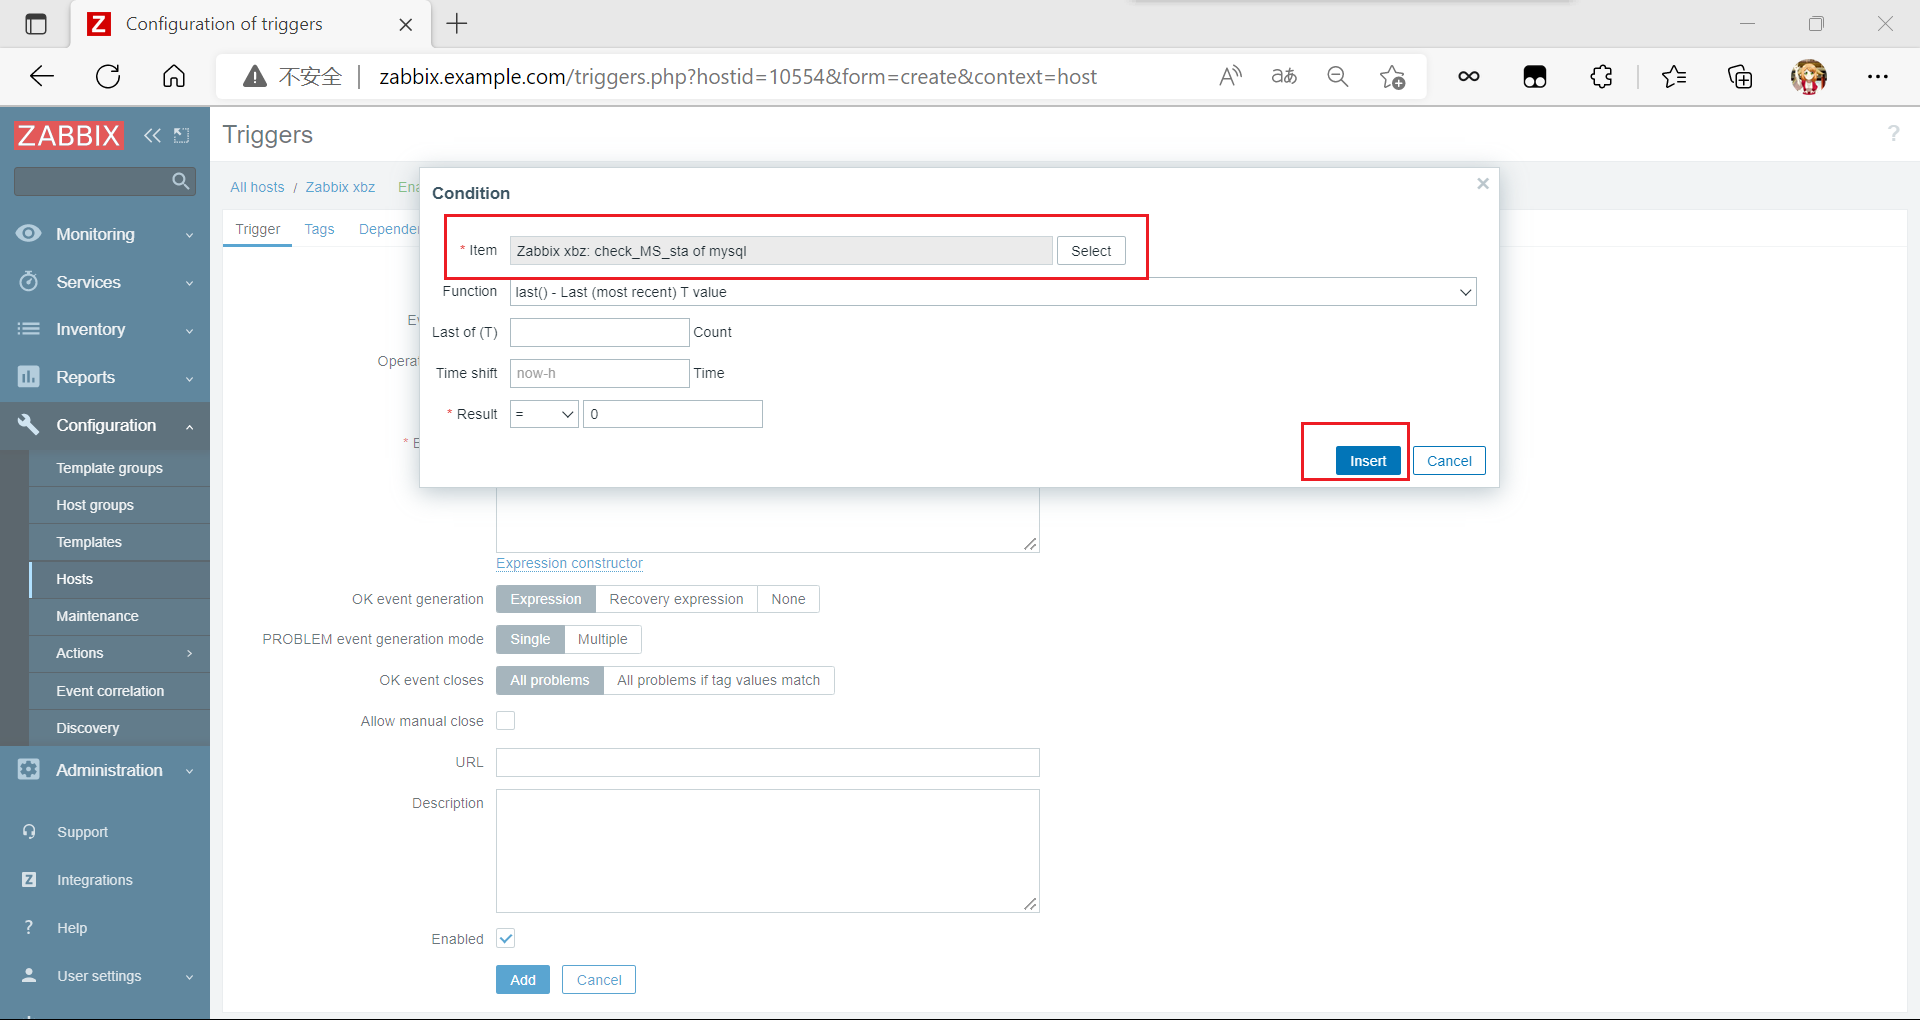

手动触发告警
[root@slave ~]# mysql -uroot -pxbz123
mysql: [Warning] Using a password on the command line interface can be insecure.
Welcome to the MySQL monitor.  Commands end with ; or \g.
Your MySQL connection id is 19
Server version: 5.7.38 MySQL Community Server (GPL)

Copyright (c) 2000, 2022, Oracle and/or its affiliates.

Oracle is a registered trademark of Oracle Corporation and/or its
affiliates. Other names may be trademarks of their respective
owners.

Type 'help;' or '\h' for help. Type '\c' to clear the current input statement.

mysql> stop slave;  //在mysql从库停掉主从复制
Query OK, 0 rows affected (0.00 sec)
mysql> start slave;  //在mysql从库开启主从复制
Query OK, 0 rows affected (0.00 sec)
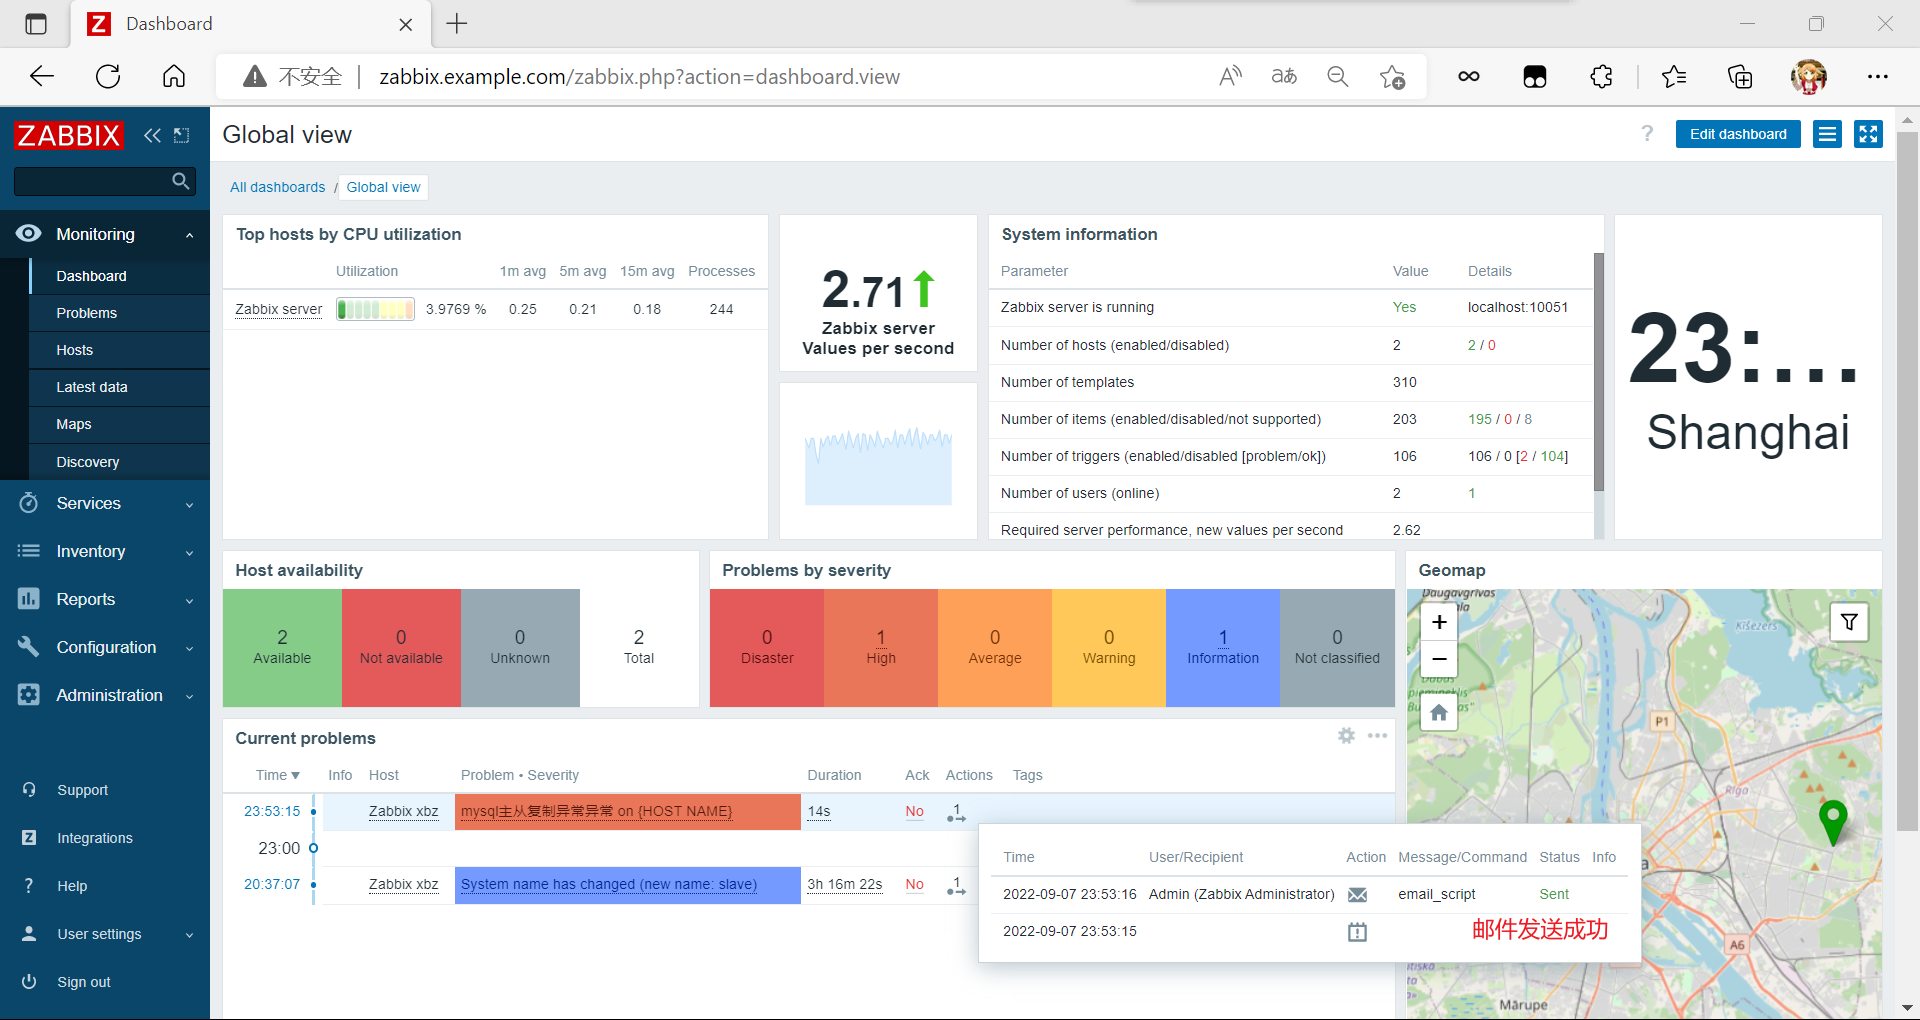
查看邮箱信息

zabbix自定义监控mysql主从延迟
[root@slave ~]# cd /scripts/zabbix/
[root@slave zabbix]# pwd  //查看绝对路径
/scripts/zabbix
[root@slave zabbix]# vim mysql_MS_delay.sh //编写脚本
[root@slave zabbix]# cat mysql_MS_delay.sh
#!/bin/bash
delay=$(mysql -uroot -pxbz123 -e"show slave status\G" 2> /dev/null  | awk '/Seconds_Behind_Master/ {print $2}')

echo $delay
//在agentd客户端(被监控端),也就是mysql从库编写脚本,获取mysql主从延迟数值
[root@slave zabbix]#  chmod +x mysql_MS_delay.sh  //赋予权限
[root@slave zabbix]# ./mysql_MS_delay.sh  //测试效果
0
[root@slave zabbix]# vim /usr/local/etc/zabbix_agentd.conf
UserParameter=check_mysql_MS_delay,/bin/bash /scripts/zabbix/mysql_MS_delay.sh //添加
//编辑zabbix_agentd的配置文件
[root@slave zabbix]# pkill zabbix_agentd
[root@slave zabbix]# zabbix_agentd
//重启zabbix_agentd
在服务端测试
[root@localhost ~]# zabbix_get -s 192.168.222.251 -k check_mysql_MS_delay
0
//没问题
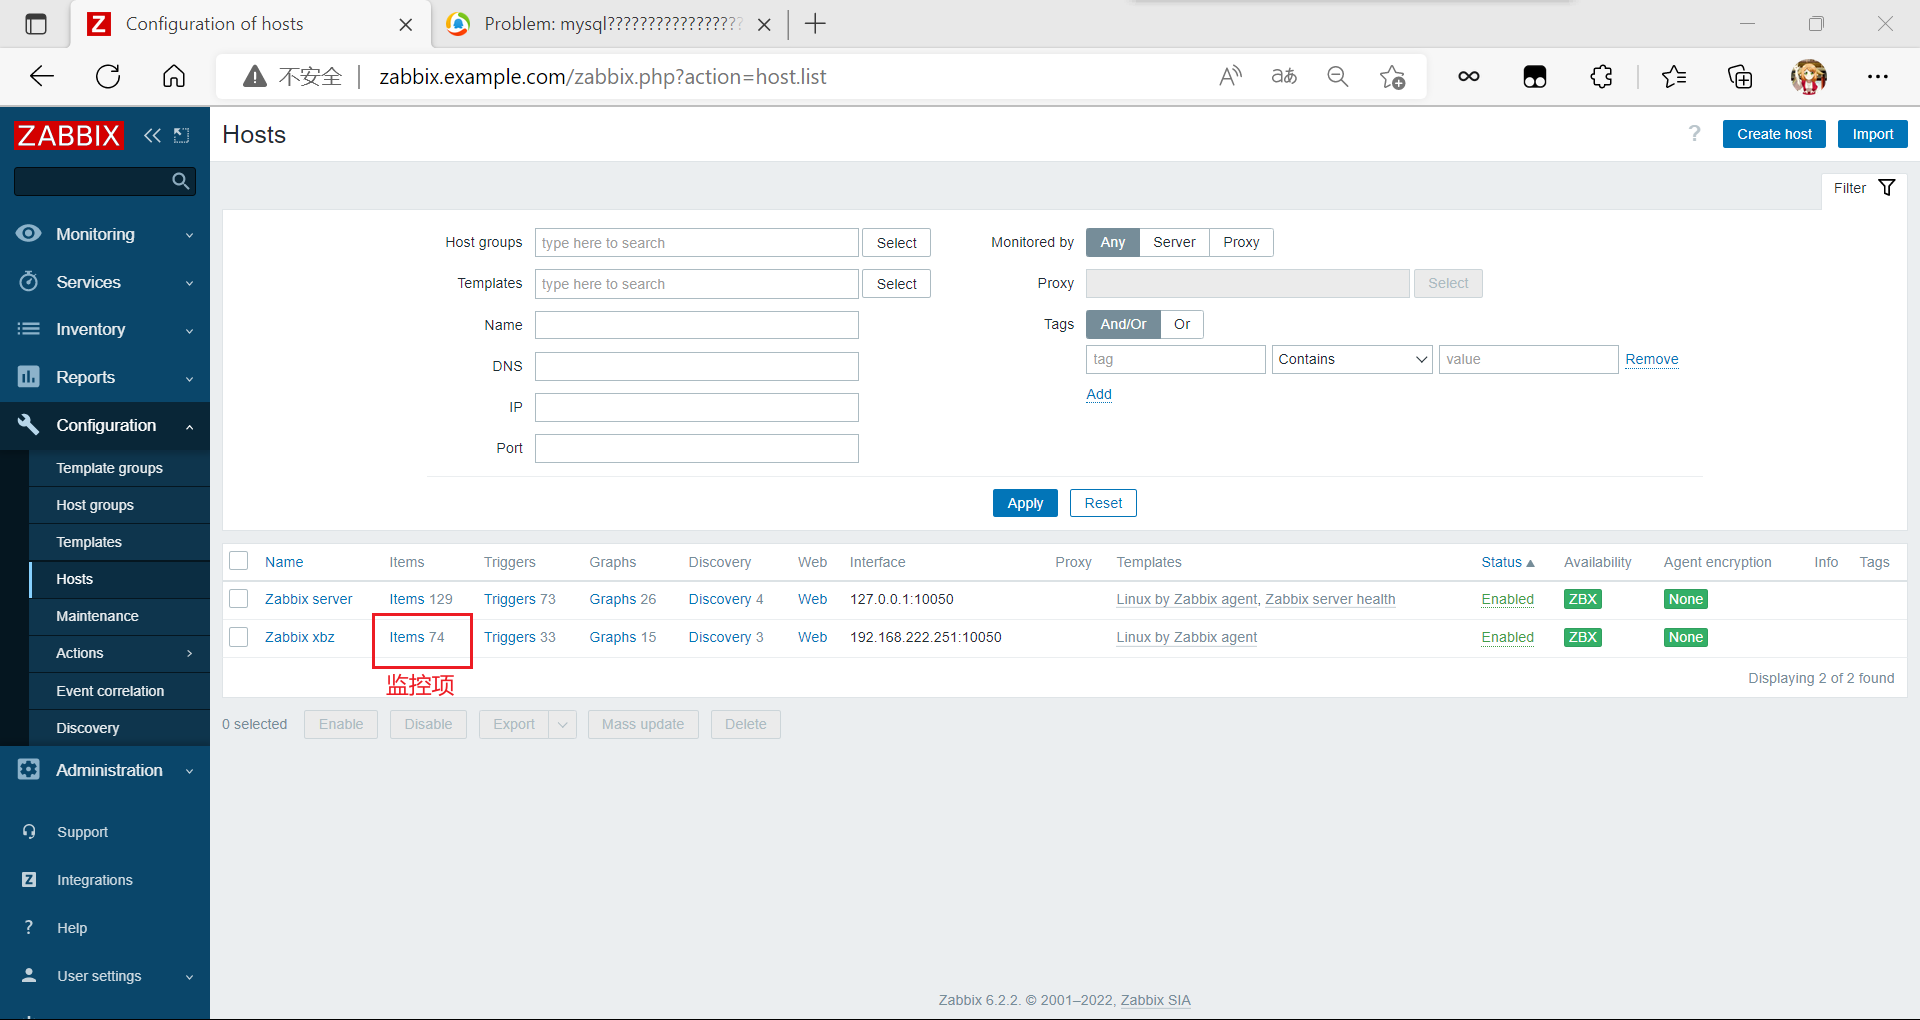
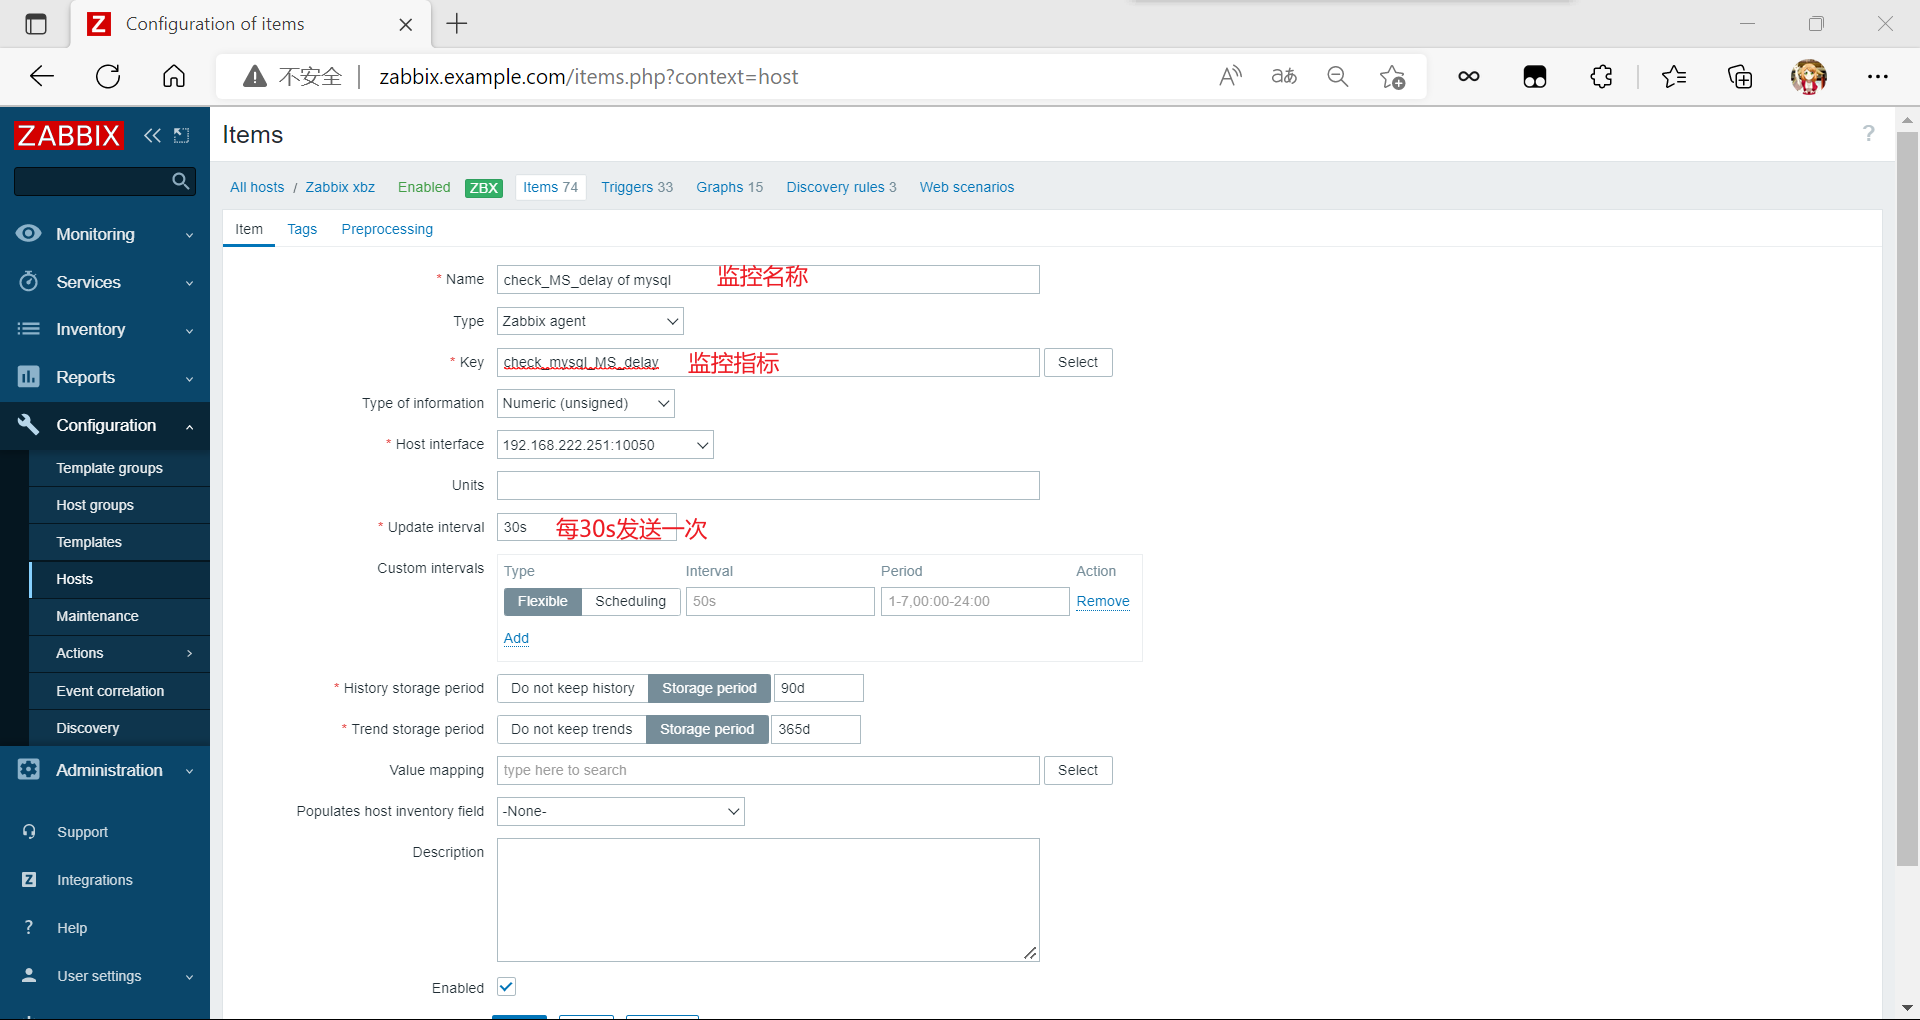
配置监控项

点击下面的add(添加)
配置触发器


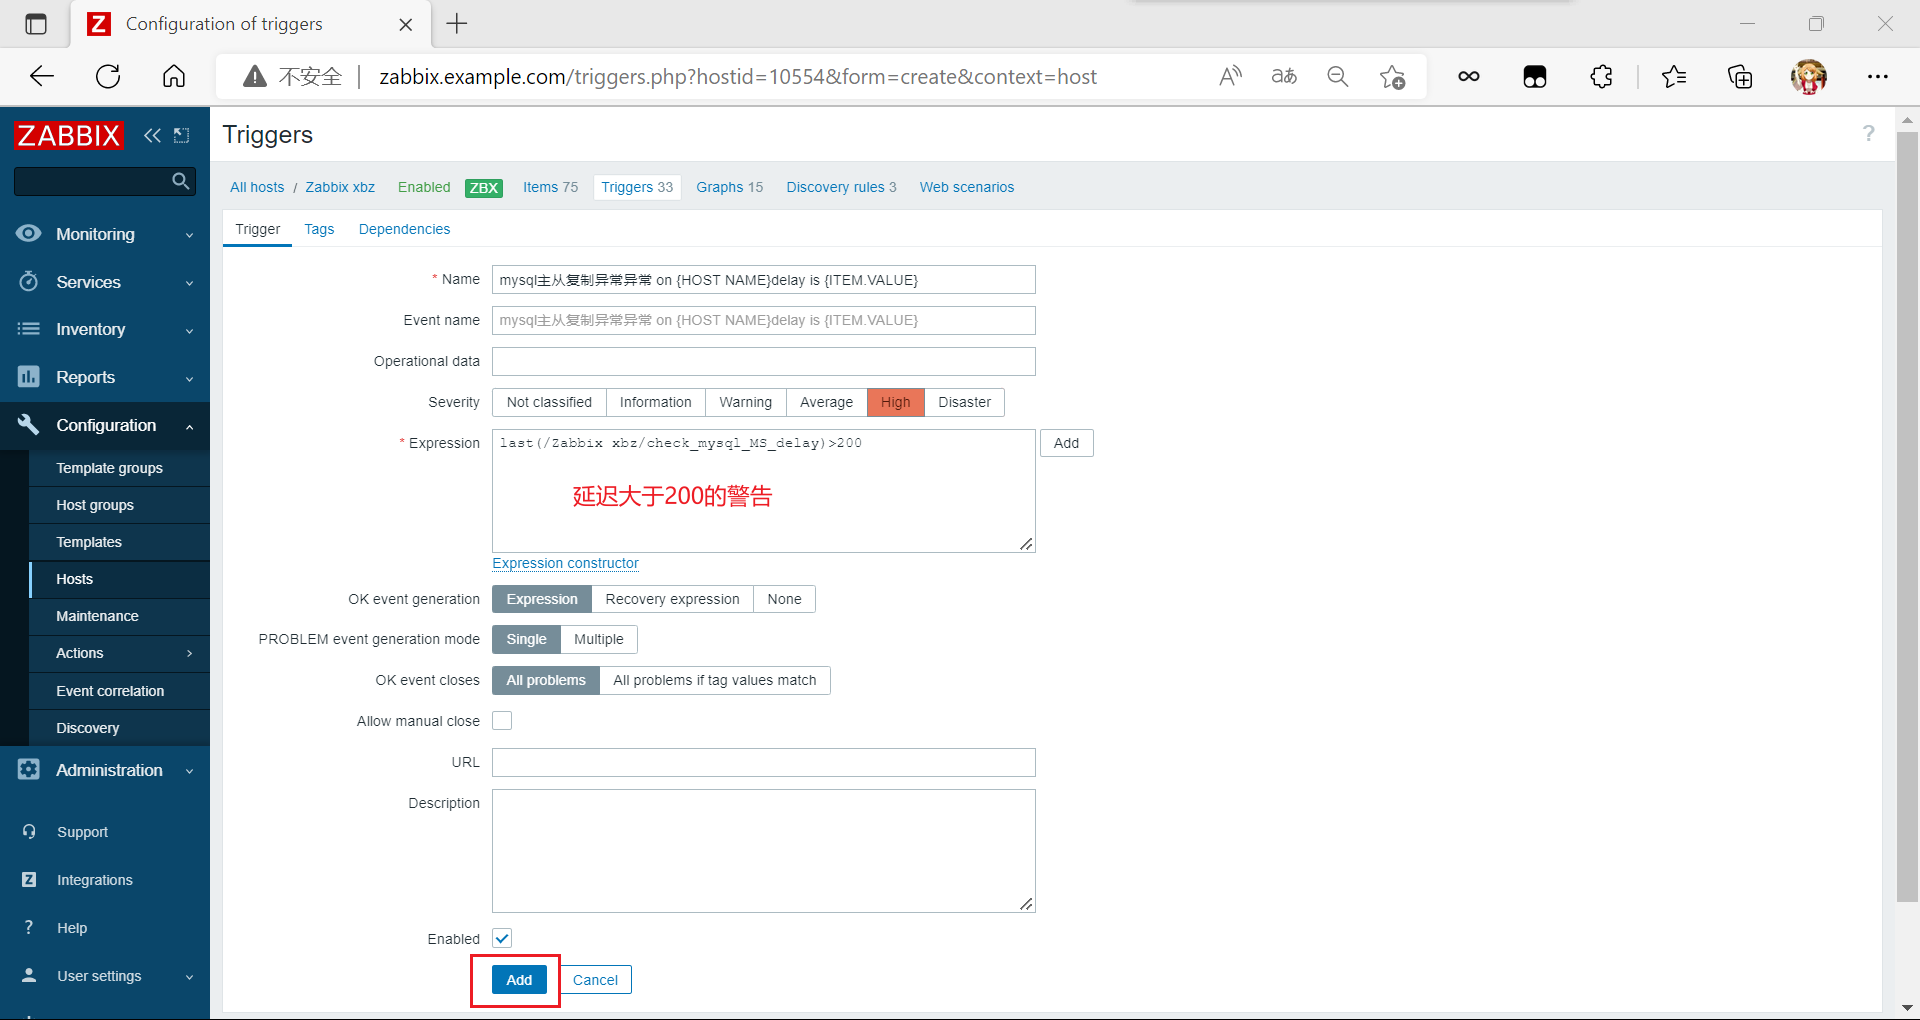
等到mysql主从延迟大于200的时候发出告警(也有可能到不了200,那就默认0)

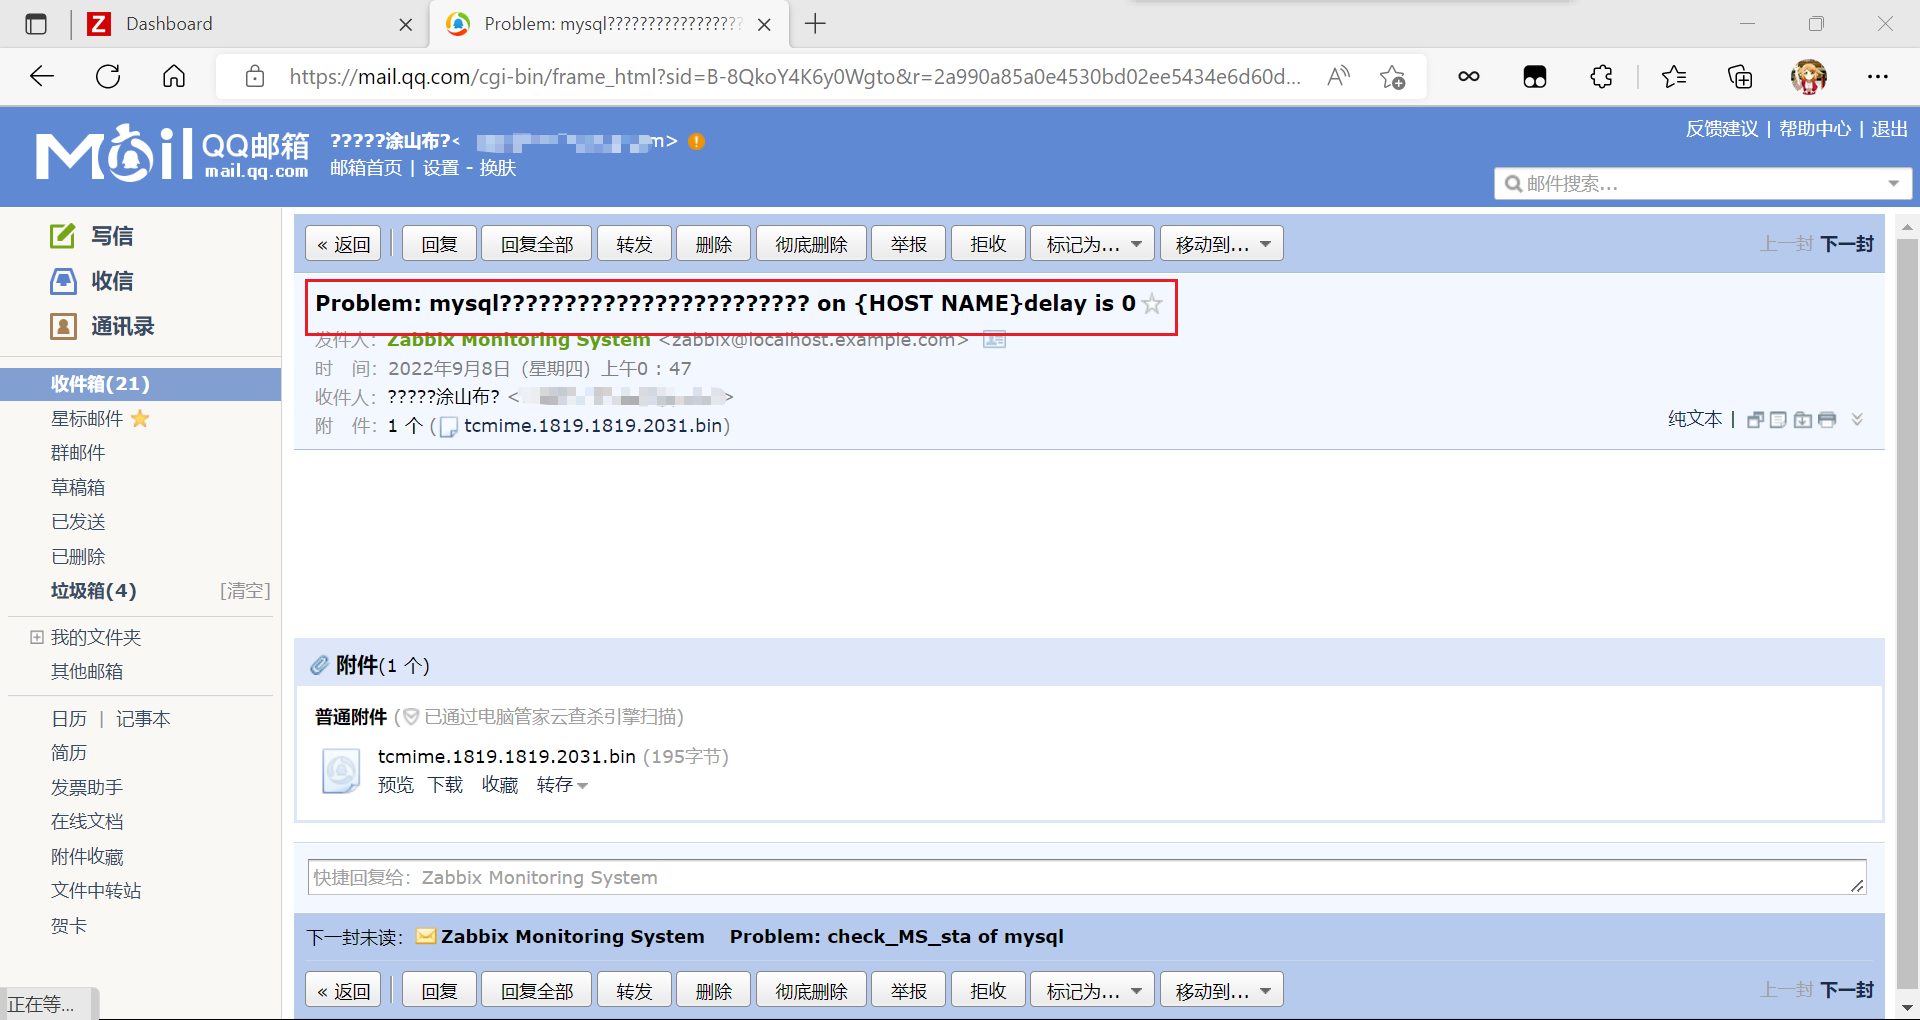
此处我的延迟到不了200,所以我默认0


