uniGUI学习之uniButton设置图标+扁平化CSS(34) 2]uniButton扁平化CSS panel圆角 //自定义CSS在uniGUI 基本操作 控件CLS和ServerModule.CustomCSS都要修改CSS
uniGUI学习之UniStringGrid只某行内容的字体颜色(35) //VCL属性与 CSS 对应关系, 直接修改CSS
UniGUI学习之UniMemo行距控制(41) //修改默认uniGUI的CSS属性 办法, 仅ServerModule.CustomCSS修改CSS
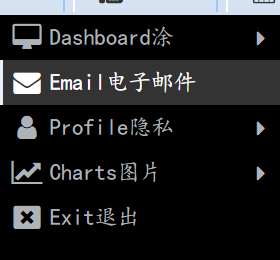
uniGUI之主窗口折叠UI之UniTreeMenu(32-2) 2.3调整行高 2.4改变字体和大小 2.5改变选 中项的 前景色 和 鼠标浮过某项的 前景色
uniGUI学习之uniButton设置图标+扁平化CSS(34) 2]uniButton扁平化CSS

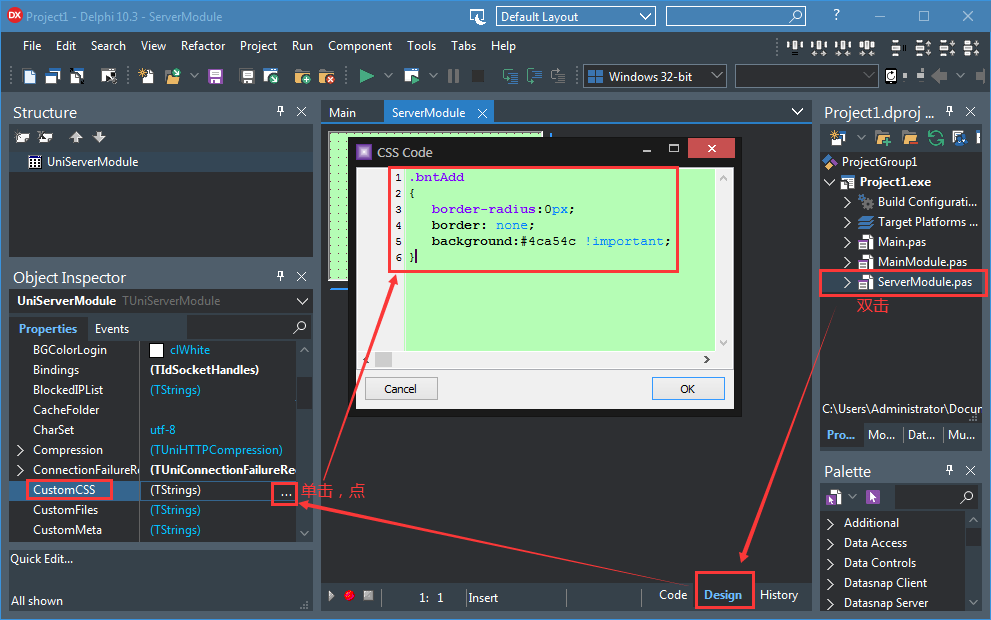
.bntAdd
{
   border-radius:0px;
   border: none;
   background:#4ca54c !important;
}
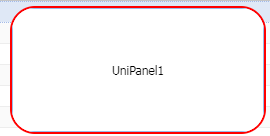
类似地 ,panel圆角
.panelAdd   {
  border: 2px solid red;
  border-radius: 25px;
}
双击右边的ServerModule
回到主界面,在uniButton的LayoutConfig的Cls设为上面的bntAdd
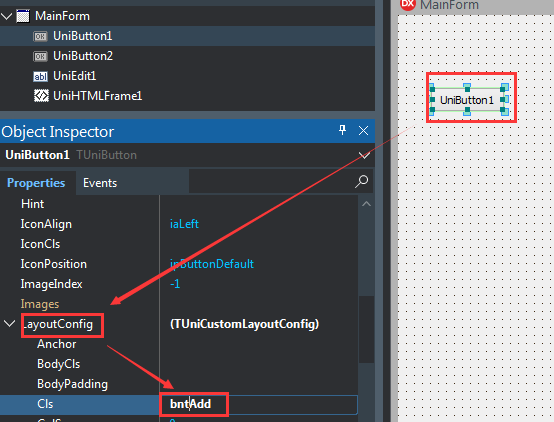 注意前面没有点 号
uniGUI学习之UniStringGrid只某行内容的字体颜色(35)
procedure TMainForm.UniStringGrid1DrawCell(Sender: TObject; ACol, ARow: Integer;
  var Value: string; Attribs: TUniCellAttribs);
begin
// Attribs.Font.Color:=clred;    //等价于CSS里的//color: red;
// Attribs.Font.Size:=20;                     //font-size:  20px;
// Attribs.Font.Name:='楷体';                 //font-family: 楷体 ;
//  Attribs.Font.Style:=[fsBold, fsItalic];  //font-weight: bold; font-style: italic;

//等价于下面的CSS写法

 Attribs.Style.Style := 'color: red; font-size:  20px; font-family: 楷体; font-weight: bold; font-style: italic;  !important';
//边框及背景色 Attribs.Style.Style := 'border: 2px solid green;border-radius: 5px 5px 5px 5px;-moz-border-radius: 5px 5px 5px 5px;background-color: rgb(0,255,255) !important'   // 直接定义样式,分号格开,但最后不要分号

end;
.x-form-text-default  .x-form-textarea{  /*说明 这两个属性要同时修改*/
    line-height: 30px;
}
设置这个 line height就可以了
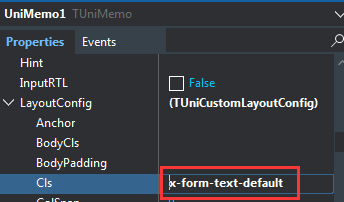 注意前面没有点 号
uniGUI之主窗口折叠UI之UniTreeMenu(32-2) 2.3调整行高 2.4改变字体和大小 2.5改变选 中项的 前景色 和 鼠标浮过某项的 前景色

.x-treelist-nav .x-treelist-item-text {
     line-height: 30px;
}
 .x-treelist-nav .x-treelist-item-icon:before, .x-treelist-nav .x-treelist-item-tool:before, .x-treelist-nav .x-treelist-item-expander {
     line-height: 30px;
}
2.4类似地,同2.3改变字体和大小,在CustomCSS里加入
.x-treelist-nav .x-treelist-item-text {
     font-family:"楷体";
     font-size: 24px;
}
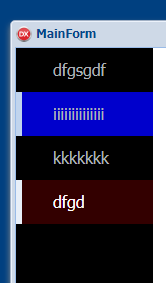
.x-treelist-nav .x-treelist-item-expanded {
    background-color: rgba(0,0,0,0) !important;
}

.x-treelist-nav .x-treelist-item-selected  .x-treelist-row {
    background-color: rgba(0,0,255,0.80) !important;
}/*选 中项的 前景色*/

.x-treelist-nav .x-treelist-row-over{
    background-color: rgba(255,0,0,0.20) !important;
}/*鼠标浮过某项的  前景色*/

.x-treelist-nav .x-treelist-toolstrip {
    background-color: rgba(0,0,0,0) !important;
}

.x-treelist-nav .x-treelist-item-selected .x-treelist-row:before {
    background-color: #FFFF00 !important;
}/*选中项的左边坚条的前景色*/
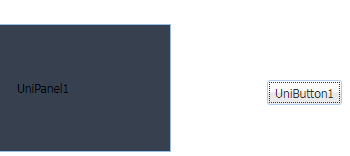
procedure TMainForm.UniButton1Click(Sender: TObject);
begin
  unisession.AddJS('Ext.get("'+ unipanel1.JSId+
  '-body").setStyle({"background-color":"#37404e"})');
end;
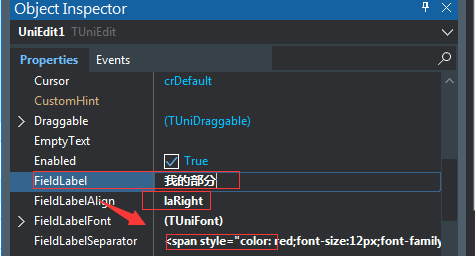
<span style="color: red;font-size:12px;font-family: Arial, sans-serif;margin-left: 2px;">*</span>


【推荐】国内首个AI IDE,深度理解中文开发场景,立即下载体验Trae
【推荐】编程新体验,更懂你的AI,立即体验豆包MarsCode编程助手
【推荐】抖音旗下AI助手豆包,你的智能百科全书,全免费不限次数
【推荐】轻量又高性能的 SSH 工具 IShell:AI 加持,快人一步
· AI与.NET技术实操系列:向量存储与相似性搜索在 .NET 中的实现
· 基于Microsoft.Extensions.AI核心库实现RAG应用
· Linux系列:如何用heaptrack跟踪.NET程序的非托管内存泄露
· 开发者必知的日志记录最佳实践
· SQL Server 2025 AI相关能力初探
· 震惊!C++程序真的从main开始吗?99%的程序员都答错了
· 【硬核科普】Trae如何「偷看」你的代码?零基础破解AI编程运行原理
· 单元测试从入门到精通
· 上周热点回顾(3.3-3.9)
· winform 绘制太阳,地球,月球 运作规律
2018-06-18 JavaScript入门学习(0)相关 软件工具