Gitlab版本控制系统部署
目录
Gitlab版本控制系统部署
第一章、Gitlab基本概述
1、Gitlab介绍
Gitlab是一款开源分布式的版本控制系统,Gitlab是一个利用Ruby on Rails开发的开源应用程序,实现一个自托管的Git项目仓库,可通过Web界面进行访问公开的或者私人的项目Gitlab能够浏览源代码,管理缺陷和注释。
Gitlab功能应用场景:
- 源代码项目管理;
- 源代码版本控制;
Gitlab优势:
- 开源免费、部署简单、维护成本较低、中小型企业非常适合;
- 权限管理,可以实现代码对部分人可见,确保项目的安全性;
- 离线同步,确保我们不在实时依赖网络环境进行代码提交。
2、Gitlab与GitHub区别
- 相同点:Gitlab与GitHub都是给代码做托管服务的,在很大程度上Gitlab是根据GitHub进行仿造出来的;
- 不同点:GitHub创建私有仓库需要进行收费的,Gitlab创建私有仓库则是免费的。
- 对于企业而言,公司并不希望所有员工都能获取所有的源代码,那么Gitlab私有仓库的应用是非常好的选择;而对于需要将源代码暴露给他人或将源代码进行开源,那么GitHub托管平台是很不错的选择。
3、Gitlab服务构成
Gitlab作为一个分布是代码托管平台,必然会有相关服务组件支持其庞大的系统:
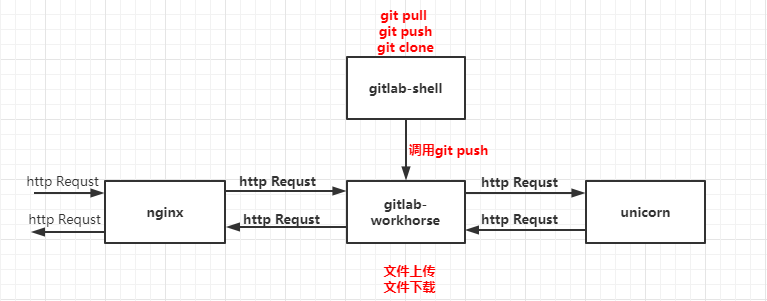
- nginx:作为
gitlab的proxy代理,处理http/https以及静态资源访问请求。 - gitlab-workhorse:用于处理文件上传和下载;
- gitlab-shell:用于处理
git clone、git pull、git push; - Logrotate:用于处理日志的切割和打包等操作;
- Postgresql:用于保存所有的
gitlab数据相关信息; - Redis:用于缓存数据库的信息,加快前台访问速度,以及交互读写。
第二章、Gitlab安装部署
1、Gitlab依赖部署
在CentOS7,下面的命令将在系统防火墙打开HTTP和SSH访问。
yum -y install curl openssh-server postfix wget
2、关闭防火墙、selinux、dnsmasq、swap分区
systemctl disable --now firewalld
systemctl disable --now dnsmasq
systemctl disable --now NetworkManager

# 关闭selinux
setenforce 0
sed -i 's#SELINUX=enforcing#SELINUX=disabled#g' /etc/sysconfig/selinux
sed -i 's#SELINUX=enforcing#SELINUX=disabled#g' /etc/selinux/config

# 关闭swap分区
swapoff -a && sysctl -w vm.swappiness=0
sed -ri '/^[^#]*swap/s@^@#@' /etc/fstab
3、Gitlab组件安装部署
wget https://mirrors.tuna.tsinghua.edu.cn/gitlab-ce/yum/el7/gitlab-ce-12.3.9-ce.0.el7.x86_64.rpm
yum -y localinstall gitlab-ce-12.3.9-ce.0.el7.x86_64.rpm
4、配置Gitlab域名
vim /etc/gitlab/gitlab.rb
external_url 'http://gitlab.xcz.com'
5、配置Gitlab邮箱
配置邮箱的作用:
- 在账号注册时,需要使用邮件验证;
- 后期修改密码时,需要通过邮件修改。
vim /etc/gitlab/gitlab.rb
gitlab_rails['smtp_enable'] = true
gitlab_rails['smtp_address'] = "smtp.qq.com"
gitlab_rails['smtp_port'] = 465
gitlab_rails['smtp_user_name'] = "1355123009@qq.com"		# 发件人邮箱账户
gitlab_rails['smtp_password'] = "wrbddxyjmbvxgeig"		# 发件人邮箱客户端授权码
gitlab_rails['smtp_domain'] = "qq.com"
gitlab_rails['smtp_authentication'] = "login"
gitlab_rails['smtp_enable_starttls_auto'] = true
gitlab_rails['smtp_tls'] = true
gitlab_rails['gitlab_email_enabled'] = true
gitlab_rails['gitlab_email_from'] = '1355123009@qq.com'		# 发件邮箱
gitlab_rails['gitlab_email_display_name'] = 'gitlab'		# 发件人显示名称
6、关闭Gitlab组件
由于Gitlab核心功能是代码托管,因此将额外的组件进行关闭,可以节省资源
vim /etc/gitlab/gitlab.rb
prometheus['enable'] = false
prometheus_monitoring['enable'] = false
alertmanager['enable'] = false
node_exporter['enable'] = false
redis_exporter['enable'] = false
postgres_exporter['enable'] = false
gitlab_exporter['enable'] = false
prometheus_monitoring['enable'] = false
grafana['enable'] = false
7、初始化Gitlab组件
每一次修改Gitlab配置文件都需要进行初始化Gitlab组件。
# 初始化
gitlab-ctl reconfigure
# 查看Gitlab组件状态
gitlab-ctl status
# Gitlab组件启动及关闭命令
gitlab-ctl stop
gitlab-ctl start
gitlab-ctl restart
8、Gitlab密码找回
gitlab-rails console -e production			# 进入密码修改后台
user = User.where(id: 1).first				# id为1的是超级管理员
user.password = 'Gmadmin@123.'				# 密码必须至少8个字符
user.password_confirmation ="Gmadmin@123."		# 再次确认密码
user.save!						# 保存密码
exit							# 退出

9、验证Gitlab组件
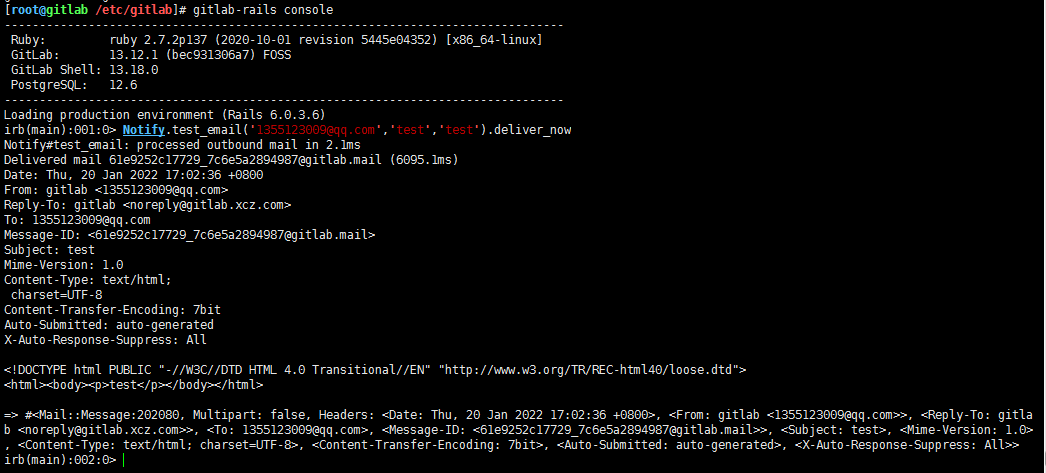
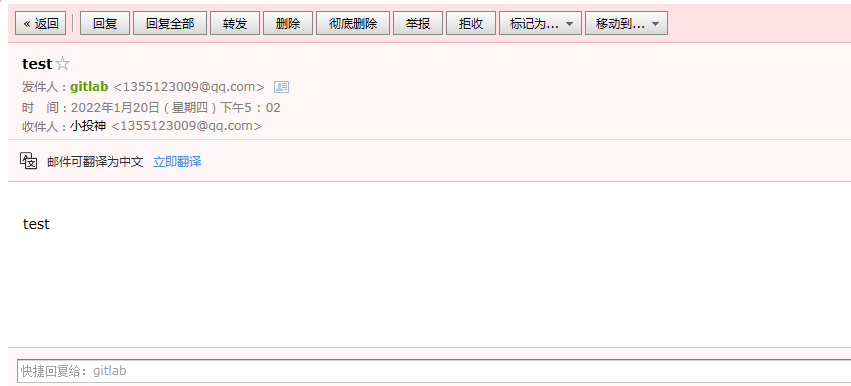
重新初始化后通过gitlab-rails检查Gitlab邮箱是否可以正常使用
gitlab-rails console
Notify.test_email('1355123009@qq.com','test','test').deliver_now
10、登陆Gitlab测试
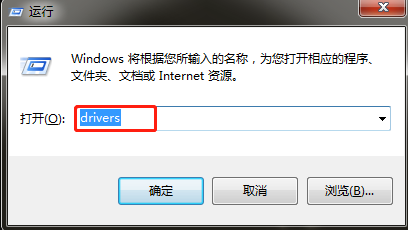
域名配置
Windows键+r输入“drivers”


登陆Gitlab需要配置root超级管理员的密码,然后再登陆。
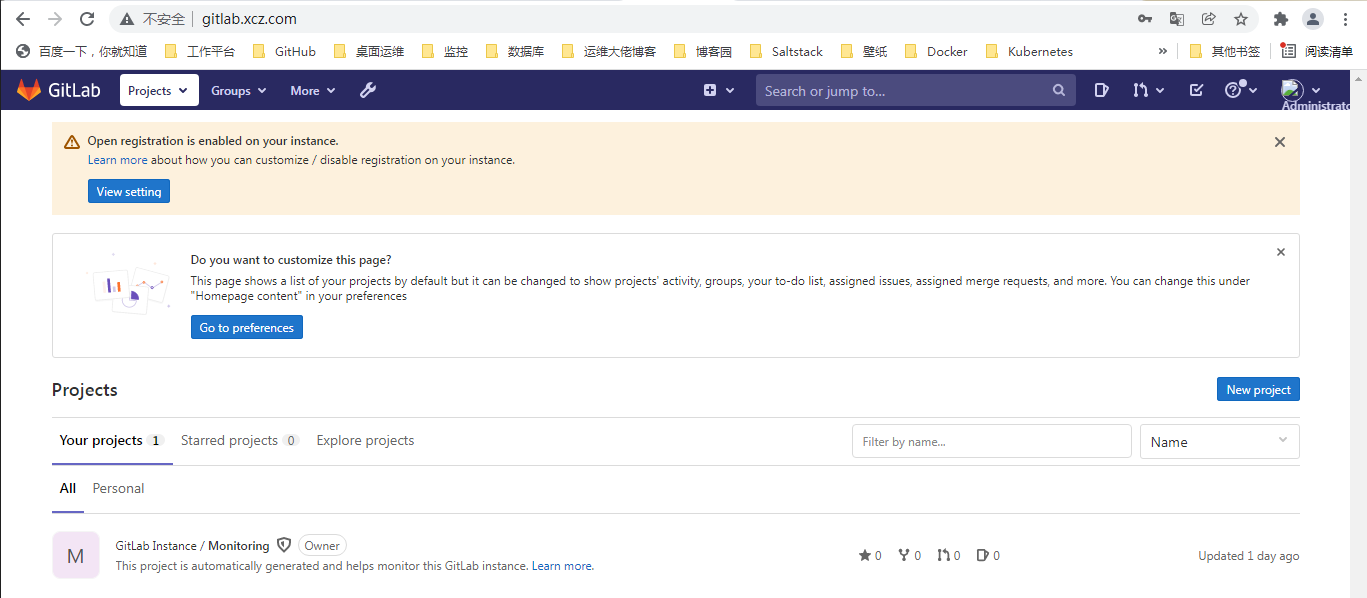
至此,Gitlab代码托管平台部署完毕。
第三章、Gitlab汉化
1、下载安装汉化包
wget https://gitlab.com/xhang/gitlab/-/archive/12-3-stable-zh/gitlab-12-3-stable-zh.zip
unzip gitlab-12-3-stable-zh.zip
2、Gitlab进行汉化
# 1.停止Gitlab所有组件服务
gitlab-ctl stop
# 2.将汉化补丁替换
\cp -r gitlab-12-3-stable-zh/* /opt/gitlab/embedded/service/gitlab-rails/
3、重新初始化Gitlab并验证
gitlab-ctl reconfigure
gitlab-ctl restart
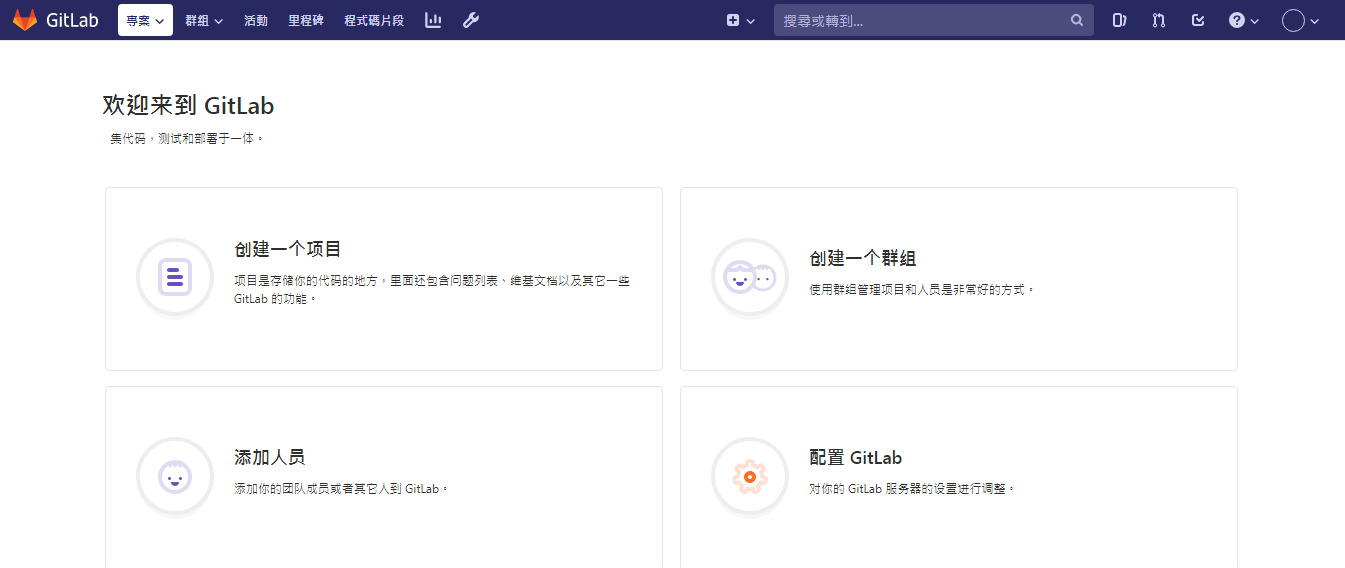
汉化后的效果


 浙公网安备 33010602011771号