

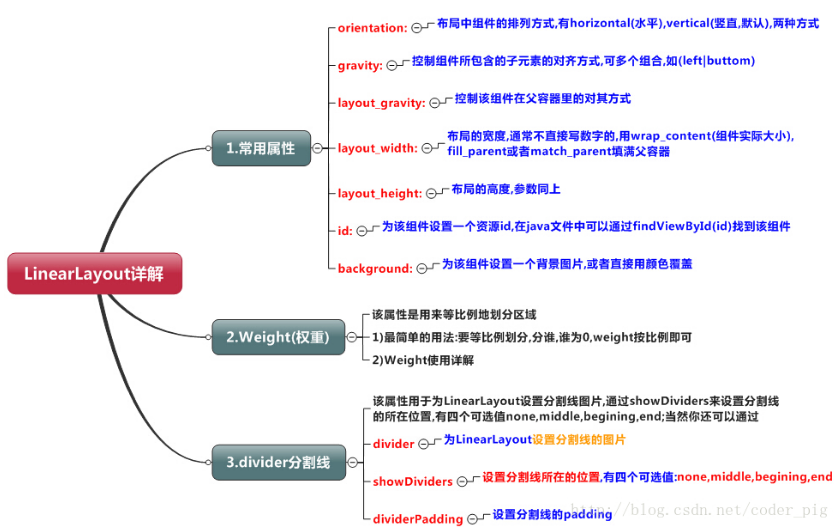
Android中有六大布局,分别是: LinearLayout(线性布局),RelativeLayout(相对布局),TableLayout(表格布局) FrameLayout(帧布局),AbsoluteLayout(绝对布局),GridLayout(网格布局) 而今天我们要讲解的就是第一个布局,LinearLayout(线性布局),我们屏幕适配的使用 用的比较多的就是LinearLayout的weight(权重属性)
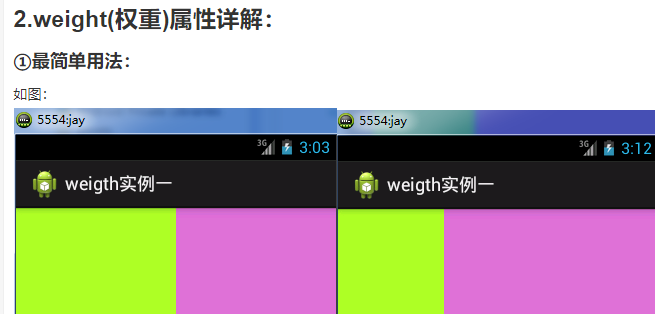
实现代码:

<LinearLayout xmlns:android="http://schemas.android.com/apk/res/android"
    xmlns:tools="http://schemas.android.com/tools"
    android:id="@+id/LinearLayout1"
    android:layout_width="match_parent"
    android:layout_height="match_parent"
    android:orientation="horizontal">

    <LinearLayout
        android:layout_width="0dp"
        android:layout_height="fill_parent"
        android:background="#ADFF2F"
        android:layout_weight="1"/>


    <LinearLayout
        android:layout_width="0dp"
        android:layout_height="fill_parent"
        android:background="#DA70D6"
        android:layout_weight="2"/>

</LinearLayout>
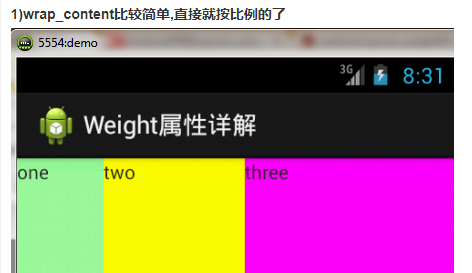
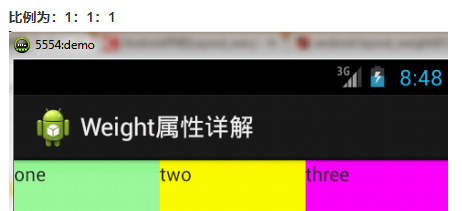
实现代码:

<LinearLayout xmlns:android="http://schemas.android.com/apk/res/android"
    xmlns:tools="http://schemas.android.com/tools"
    android:id="@+id/LinearLayout1"
    android:layout_width="match_parent"
    android:layout_height="match_parent"
    android:orientation="horizontal" >

    <TextView
        android:layout_weight="1"
        android:layout_width="wrap_content"
        android:layout_height="fill_parent"
        android:text="one"
        android:background="#98FB98"
     />
     <TextView
        android:layout_weight="2"
        android:layout_width="wrap_content"
        android:layout_height="fill_parent"
        android:text="two"
        android:background="#FFFF00"
     />
     <TextView
        android:layout_weight="3"
        android:layout_width="wrap_content"
        android:layout_height="fill_parent"
        android:text="three"
        android:background="#FF00FF"
     />

</LinearLayout>
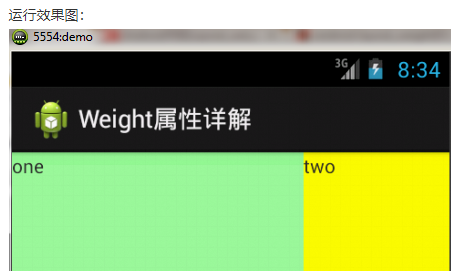
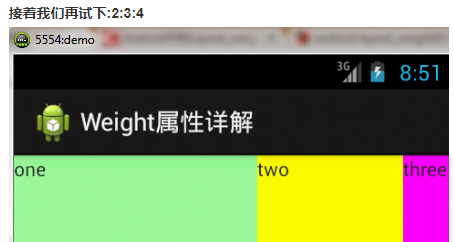
2)match_parent(fill_parent):这个则需要计算了

我们写这段简单的代码:

<LinearLayout xmlns:android="http://schemas.android.com/apk/res/android"
    xmlns:tools="http://schemas.android.com/tools"
    android:id="@+id/LinearLayout1"
    android:layout_width="match_parent"
    android:layout_height="match_parent" >

    <TextView
        android:layout_weight="1"
        android:layout_width="fill_parent"
        android:layout_height="fill_parent"
        android:text="one"
        android:background="#98FB98"
     />
     <TextView
        android:layout_weight="2"
        android:layout_width="fill_parent"
        android:layout_height="fill_parent"
        android:text="two"
        android:background="#FFFF00"
     />
     <TextView
        android:layout_weight="3"
        android:layout_width="fill_parent"
        android:layout_height="fill_parent"
        android:text="three"
        android:background="#FF00FF"
     />

</LinearLayout>
Java代码中设置weight属性:
setLayoutParams(new LayoutParams(LayoutParams.FILL_PARENT,
        LayoutParams.WRAP_CONTENT, 1));
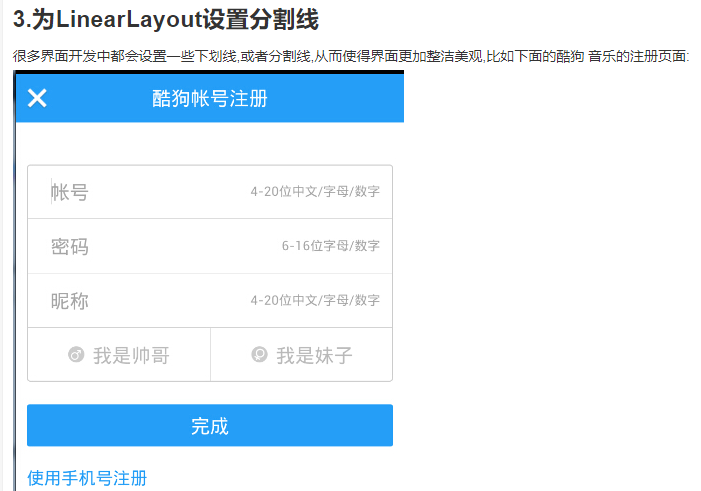
对于这种线,我们通常的做法有两种 ①直接在布局中添加一个view,这个view的作用仅仅是显示出一条线,代码也很简单:

<View
    android:layout_width="match_parent"
    android:layout_height="1px"
    android:background="#000000" />
这个是水平方向上的黑线,当然你也可以改成其他颜色,或者使用图片


②第二种则是使用LinearLayout的一个divider属性,直接为LinearLayout设置分割线 这里就需要你自己准备一张线的图片了 1)android:divider设置作为分割线的图片 2)android:showDividers设置分割线的位置,none(无),beginning(开始),end(结束),middle(每两个组件间) 3)dividerPadding设置分割线的Padding
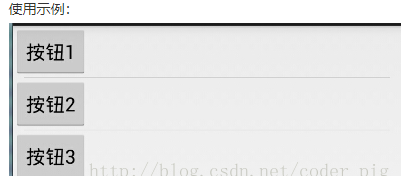
实现代码:

<LinearLayout xmlns:android="http://schemas.android.com/apk/res/android"
    xmlns:tools="http://schemas.android.com/tools"
    android:id="@+id/LinearLayout1"
    android:layout_width="match_parent"
    android:layout_height="match_parent"
    android:divider="@drawable/ktv_line_div"
    android:orientation="vertical"
    android:showDividers="middle"
    android:dividerPadding="10dp"
    tools:context="com.jay.example.linearlayoutdemo.MainActivity" >

    <Button
        android:layout_width="wrap_content"
        android:layout_height="wrap_content"
        android:text="按钮1" />

    <Button
        android:layout_width="wrap_content"
        android:layout_height="wrap_content"
        android:text="按钮2" />

    <Button
        android:layout_width="wrap_content"
        android:layout_height="wrap_content"
        android:text="按钮3" />

</LinearLayout>
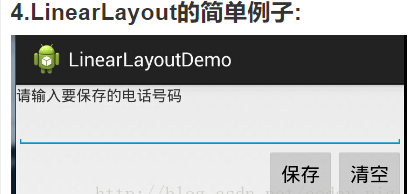
实现代码如下:

<LinearLayout xmlns:android="http://schemas.android.com/apk/res/android"
    xmlns:tools="http://schemas.android.com/tools"
    android:id="@+id/LinearLayout1"
    android:layout_width="fill_parent"
    android:layout_height="fill_parent"
    android:orientation="vertical"
    tools:context=".MainActivity" >

    <TextView
        android:layout_width="wrap_content"
        android:layout_height="wrap_content"
        android:text="请输入要保存的电话号码"/>
    <EditText
        android:layout_width="fill_parent"
        android:layout_height="wrap_content"/>
    <LinearLayout
        android:layout_width="fill_parent"
        android:layout_height="wrap_content"
        android:orientation="horizontal"
        android:gravity="right">
        <Button
            android:layout_width="wrap_content"
            android:layout_height="wrap_content"
            android:text="保存"/>
        <Button
            android:layout_width="wrap_content"
            android:layout_height="wrap_content"
            android:text="清空"/>
    </LinearLayout>
</LinearLayout>
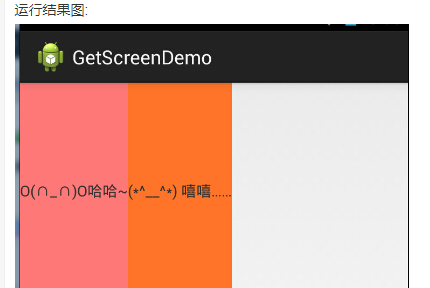
<LinearLayout xmlns:android="http://schemas.android.com/apk/res/android"
    xmlns:tools="http://schemas.android.com/tools"
    android:layout_width="match_parent"
    android:layout_height="match_parent"
    android:orientation="horizontal"
    tools:context="com.jay.example.getscreendemo.MainActivity" >

    <TextView
        android:layout_width="wrap_content"
        android:layout_height="200dp"
        android:layout_gravity="left"
        android:background="#FF7878"
        android:gravity="center"
        android:text="O(∩_∩)O哈哈~" />

    <TextView
        android:layout_width="wrap_content"
        android:layout_height="200dp"
        android:layout_gravity="right"
        android:background="#FF7428"
        android:gravity="center"
        android:text="(*^__^*) 嘻嘻……" />

</LinearLayout>
在外层LinearLayout加个gravity=left的属性,然后设置第二个 TextView的layout_gravity为right
<LinearLayout xmlns:android="http://schemas.android.com/apk/res/android"
    xmlns:tools="http://schemas.android.com/tools"
    android:layout_width="match_parent"
    android:layout_height="match_parent"
    android:orientation="horizontal"
    android:gravity="left"
    tools:context="com.jay.example.getscreendemo.MainActivity" >

    <TextView
        android:layout_width="wrap_content"
        android:layout_height="200dp"
        android:background="#FF7878"
        android:gravity="center"
        android:text="O(∩_∩)O哈哈~" />

    <TextView
        android:layout_width="wrap_content"
        android:layout_height="200dp"
        android:layout_gravity="right"
        android:background="#FF7428"
        android:gravity="center"
        android:text="(*^__^*) 嘻嘻……" />

</LinearLayout>
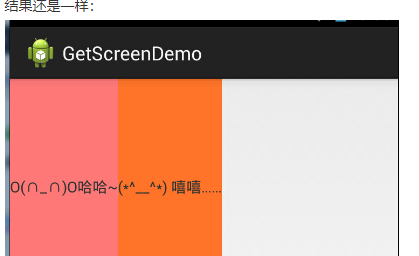
当 android:orientation="vertical" 时, 只有水平方向的设置才起作用,垂直方向的设置不起作用。 即:left,right,center_horizontal 是生效的。 当 android:orientation="horizontal" 时, 只有垂直方向的设置才起作用,水平方向的设置不起作用。 即:top,bottom,center_vertical 是生效的。
