linux 部署Nginx服务(编译安装方式,且步骤完整)
本次编译安装最大亮点: 文件路径 参照 "官方Nginx源yum安装"后各文件的配置路径
1 # 安装依赖包
[root@lb01 ~]# yum install openssl openssl-devel zlib zlib-devel -y
2 # 从官网下载Nginx源代码包
[root@lb01 ~]# wget https://nginx.org/download/nginx-1.20.2.tar.gz
3 # 解压
[root@lb01 ~]# tar -xf nginx-1.20.2.tar.gz
4 # 进入源代码目录
[root@lb01 ~]# cd nginx-1.20.2
5 # 设置编译参数
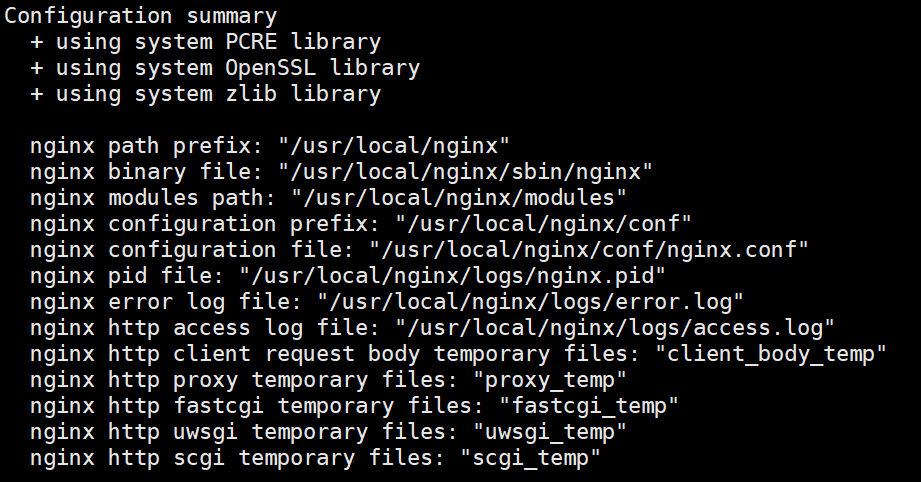
[root@lb01 nginx-1.20.2]# ./configure --with-http_gzip_static_module --with-stream --with-http_ssl_module

6 # 编译
[root@lb01 nginx-1.20.2]# make
7 # 安装
[root@lb01 nginx-1.20.2]# make install
---> 8~11 中关于各个文件存放位置是参照"用官方nginx源yum安装nginx后"各个文件的位置
8 - 关于配置文件的操作
8.1 把nginx的配置文件移动到/etc/nginx
8.11 创建目录
[root@lb01 ~]# mkdir /etc/nginx
8.12 移动
[root@lb01 ~]# mv /usr/local/nginx/conf/* /etc/nginx/
8.13 修改配置文件
vi /etc/nginx/nginx.conf
注意是vi,不是vim;因为vim方式下粘贴复制内容会把注释带上
修改内容
- 复制其他服务器/虚拟机上'用官方源安装nginx软件'的"/etc/nginx/nginx.conf "内容
user  www;
worker_processes  10;

error_log  /var/log/nginx/error.log notice;
pid        /var/run/nginx.pid;


events {
    worker_connections  1024;
}


http {
    include       /etc/nginx/mime.types;
    default_type  application/octet-stream;

    log_format  main  '$remote_addr - $remote_user [$time_local] "$request" '
                      '$status $body_bytes_sent "$http_referer" '
                      '"$http_user_agent" "$http_x_forwarded_for"';

    access_log  /var/log/nginx/access.log  main;

    sendfile        on;
    #tcp_nopush     on;

    keepalive_timeout  65;

    #gzip  on;

    include /etc/nginx/conf.d/*.conf;
}
8.2 创建软连接(原因见步骤14)
[root@lb01 ~]# ln -s /etc/nginx/nginx.conf /usr/local/nginx/conf/nginx.conf

8.3 创建外部配置文件的目录
此目录为/etc/nginx/nginx.conf加载外部配置文件的目录
[root@lb01 ~]# mkdir /etc/nginx/conf.d
8.4 创建配置文件(为测试本次安装是否成功)
[root@lb02 ~]# cd /etc/nginx/conf.d
[root@lb02 conf.d]# touch test_install.conf
[root@lb02 conf.d]# vim test_install.conf
server {
        listen 80;
        server_name _;
        location / {
                root /usr/share/nginx/html/;
                index index.html;
        }
}
[root@lb02 conf.d]# echo "bian yi an zhuang ok" > /usr/share/nginx/html/index.html
9 关于日志的操作
创建日志目录
[root@lb01 ~]# mkdir /var/log/nginx
10 创建nginx启动用户(在8.13的配置文件里用到)
用户来源: 8.13中"/etc/nginx/nginx.conf "中user 对应的用户
[root@lb01 ~]# groupadd www -g 666
[root@lb01 ~]# useradd www -u 666 -g 666 -M -r -s /sbin/nologin
11 关于可执行文件操作
移动nginx可执行文件到新位置(因为可执行文件一般放在/usr/sbin/路径下)
[root@lb01 ~]# mv /usr/local/nginx/sbin/nginx /usr/sbin/
12 新增nginx.service
[root@lb01 ~]# vim /usr/lib/systemd/system/nginx.service
[Unit]
Description=nginx - high performance web server
Documentation=http://nginx.org/en/docs/
After=network-online.target remote-fs.target nss-lookup.target
Wants=network-online.target


[Service]
Type=forking
PIDFile=/var/run/nginx.pid
ExecStart=/usr/sbin/nginx -c /etc/nginx/nginx.conf
ExecReload=/bin/sh -c "/bin/kill -s HUP $(/bin/cat /var/run/nginx.pid)"
ExecStop=/bin/sh -c "/bin/kill -s TERM $(/bin/cat /var/run/nginx.pid)"


[Install]
WantedBy=multi-user.target
13 重载服务的配置文件
systemctl daemon-reload
14 检查配置文件
nginx -t
出现以下结果表示成功
nginx: the configuration file /usr/local/nginx/conf/nginx.conf syntax is ok
nginx: configuration file /usr/local/nginx/conf/nginx.conf test is successful
补充
解决nginx -t 报错中找不见配置文件,所以才有步骤8.2

15 启动Nginx
[root@lb01 ~]# systemctl start nginx
16 查看Nginx版本号和配置项 及安装的所有模块
[root@lb01 ~]# nginx -V

17 浏览器访问测试
输入本机ip测试
页面出现"bian yi an zhuang ok"表示安装成功


