Flume(3)source组件之NetcatSource使用介绍
一、概述:
本节首先提供一个基于netcat的source+channel(memory)+sink(logger)的数据传输过程。然后剖析一下NetcatSource中的代码执行逻辑。
二、flume配置文件:
下面的配置文件netcat.conf中定义了source使用netcat,它会监听44444端口。
# Name the components on this agent
a1.sources = r1
a1.sinks = k1
a1.channels = c1

# Describe/configure the source
a1.sources.r1.type = netcat
a1.sources.r1.bind = locahost
a1.sources.r1.port = 44444

# Describe the sink
a1.sinks.k1.type = logger

# Use a channel which buffers events in memory
a1.channels.c1.type = memory
a1.channels.c1.capacity = 1000
a1.channels.c1.transactionCapacity = 100

# Bind the source and sink to the channel
a1.sources.r1.channels = c1
a1.sinks.k1.channel = c1
三、命令行启动:
切换到flume的安装目录下,执行下述代码:
bin/flume-ng agent --conf conf --conf-file study/netcat.conf --name a1 -Dflume.root.logger=INFO,console
四、利用telnet来直接访问且发送数据:
在命令行中键入以下代码:其中node5是flume所在的主机名。
telnet node5 44444
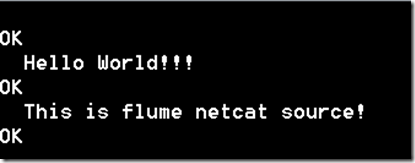
在telnet命令行输入信息:
在flume的启动界面就会输出接收到的数据:
由此,使用netcat作为source的功能即演示成功了。
除了利用telnet来发送数据以外,也可以自己实现一个socket编程来向node5主机的44444端口发送数据。
当然,我们发现了一个问题,明明在telnet中发送的数据是:This is flume netcat source!,接收到的数据却是This is flume ne。数据不完整。后面通过分析一下源码,看能不能找到原因。
出现上述的显示不完整的情况,是因为我们使用的是LoggerSink组件,它内部的实现逻辑导致了仅打印了16个字符。
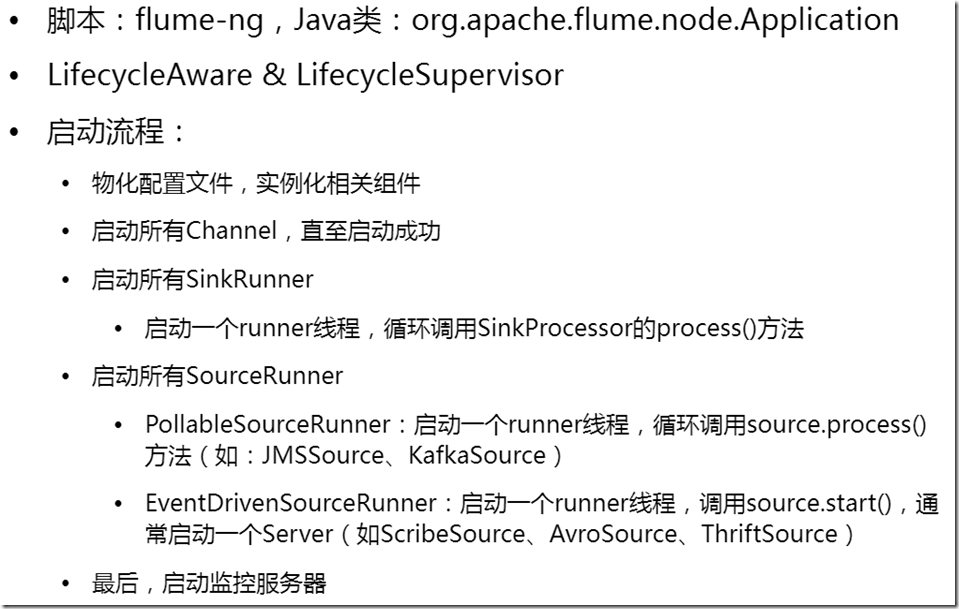
五、agent启动的基本步骤:
六、NetcatSource源码剖析:
该类的全路径为org.apache.flume.source.NetcatSource,继承了AbstractSource 并实现了Configurable接口。
由于NetcatSource一个监听服务,所以它是通过EventDrivenSourceRunner来启动一个线程,调用其start()方法的。
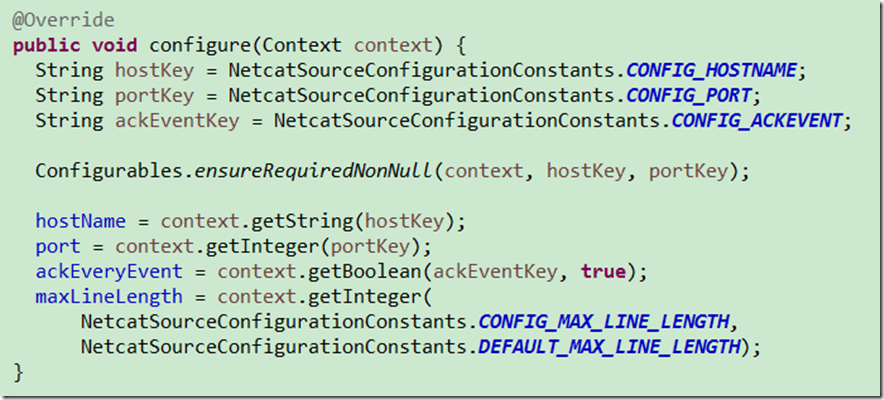
首先在正式启动source之前,会首先执行configure方法,初始化配置文件中提供的参数:bind\port\ack-every-event\max-line-length。
start()方法如下:
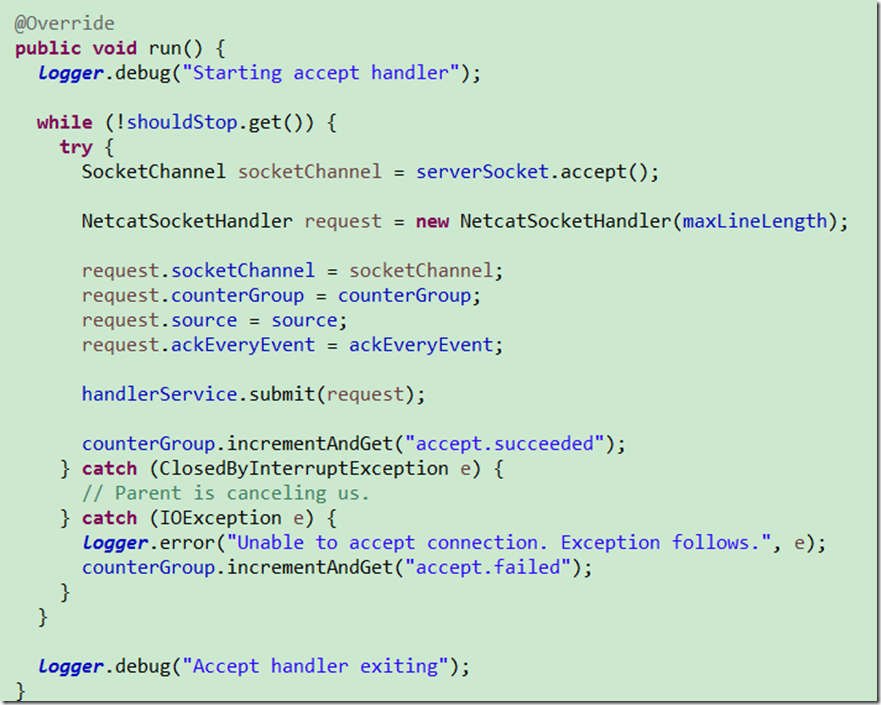
该方法内创建一个AcceptHandler内部类实例,实际的监听工作就是在该类的run方法中来实现的。


