Linux下Keepalived+LVS-DR模式配置高可用负载均衡集群
一、环境说明:
操作系统:Centos-6.5_x86_64
keepalived软件安装在node2和node3机器上。
实际安装之前,先关闭keepalived节点(node2,node3)上的防火墙。
[root@node2 ~]# service iptables stop
二、软件安装:
这里需要安装的软件是keepalived。node2和node3都需要安装。
[root@node2 ~]# yum install keepalived
安装完毕后,配置文件在/etc/keepalived/keepalived.conf下。
三、配置文件:
1、MASTER配置文件(node2):
! Configuration File for keepalived

bal_defs {
   notification_email {
     root@localhost
   }
   notification_email_from laoxiao@localhost
   smtp_server 127.0.0.1
   smtp_connect_timeout 30
   router_id LVS_DEVEL
}

vrrp_instance VI_1 {
    state MASTER
    interface eth0
    virtual_router_id 51
    priority 100
    advert_int 1
    authentication {
        auth_type PASS
        auth_pass 1111
    }
    virtual_ipaddress {
        192.168.103.100/24 dev eth0 label eth0:1
    }
}

virtual_server 192.168.103.100 80 {
    delay_loop 6
    lb_algo wrr
    lb_kind DR
    nat_mask 255.255.255.0
    persistence_timeout 50
    protocol TCP

    real_server 192.168.103.101 80 {
        weight 1
        HTTP_GET {
            url {
              path /
              status_code 200
            }
            connect_timeout 3
            nb_get_retry 3
            delay_before_retry 3
        }
    }
    real_server 192.168.103.105 80 {
        weight 1
        HTTP_GET {
            url {
              path /
              status_code 200
            }
            connect_timeout 3
            nb_get_retry 3
            delay_before_retry 3
        }
    }
}
2、BACKUP配置文件(node3):
! Configuration File for keepalived

bal_defs {
   notification_email {
     root@localhost
   }
   notification_email_from laoxiao@localhost
   smtp_server 127.0.0.1
   smtp_connect_timeout 30
   router_id LVS_DEVEL
}

vrrp_instance VI_1 {
    state BACKUP
    interface eth0
    virtual_router_id 51
    priority 50
    advert_int 1
    authentication {
        auth_type PASS
        auth_pass 1111
    }
    virtual_ipaddress {
        192.168.103.100/24 dev eth0 label eth0:1
    }
}

virtual_server 192.168.103.100 80 {
    delay_loop 6
    lb_algo wrr
    lb_kind DR
    nat_mask 255.255.255.0
    persistence_timeout 50
    protocol TCP

    real_server 192.168.103.101 80 {
        weight 1
        HTTP_GET {
            url {
              path /
              status_code 200
            }
            connect_timeout 3
            nb_get_retry 3
            delay_before_retry 3
        }
    }
    real_server 192.168.103.105 80 {
        weight 1
        HTTP_GET {
            url {
              path /
              status_code 200
            }
            connect_timeout 3
            nb_get_retry 3
            delay_before_retry 3
        }
    }
}
四、测试:
1、首先分别启动node2和node3上的keepalived服务:
[root@node2 ~]# service keepalived start
[root@node3 ~]# service keepalived start
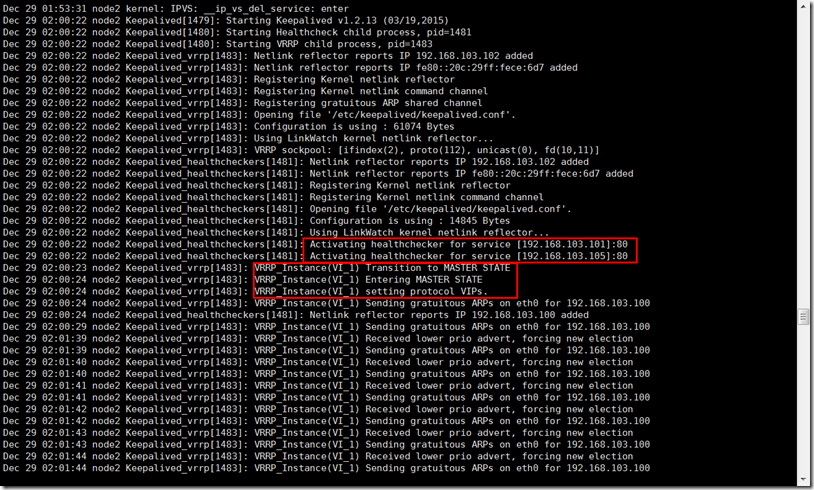
启动时产生的日志在/var/log/messages文件中,可以观察其中的日志。MASTER效果如下:BACKUP会略有不同。
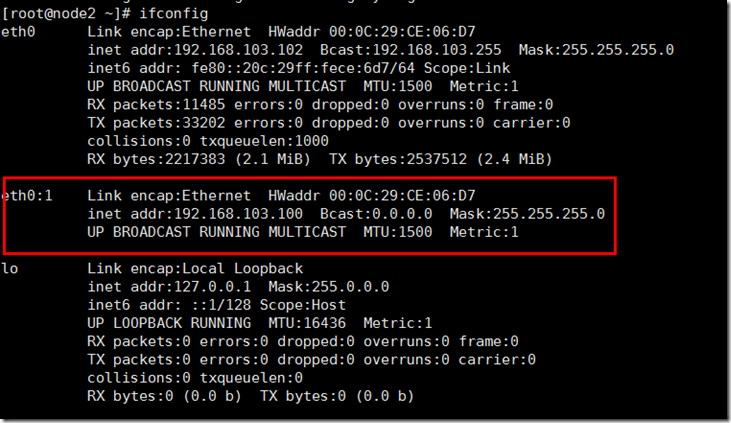
2、查看node2(MASTER)中的状态:
[root@node2 ~]# ifconfig
eth0      Link encap:Ethernet  HWaddr 00:0C:29:CE:06:D7
          inet addr:192.168.103.102  Bcast:192.168.103.255  Mask:255.255.255.0
          inet6 addr: fe80::20c:29ff:fece:6d7/64 Scope:Link
          UP BROADCAST RUNNING MULTICAST  MTU:1500  Metric:1
          RX packets:11485 errors:0 dropped:0 overruns:0 frame:0
          TX packets:33202 errors:0 dropped:0 overruns:0 carrier:0
          collisions:0 txqueuelen:1000
          RX bytes:2217383 (2.1 MiB)  TX bytes:2537512 (2.4 MiB)

eth0:1    Link encap:Ethernet  HWaddr 00:0C:29:CE:06:D7
          inet addr:192.168.103.100  Bcast:0.0.0.0  Mask:255.255.255.0
          UP BROADCAST RUNNING MULTICAST  MTU:1500  Metric:1

lo        Link encap:Local Loopback
          inet addr:127.0.0.1  Mask:255.0.0.0
          inet6 addr: ::1/128 Scope:Host
          UP LOOPBACK RUNNING  MTU:16436  Metric:1
          RX packets:0 errors:0 dropped:0 overruns:0 frame:0
          TX packets:0 errors:0 dropped:0 overruns:0 carrier:0
          collisions:0 txqueuelen:0
          RX bytes:0 (0.0 b)  TX bytes:0 (0.0 b)
[root@node2 ~]# ipvsadm -Ln
IP Virtual Server version 1.2.1 (size=4096)
Prot LocalAddress:Port Scheduler Flags
  -> RemoteAddress:Port           Forward Weight ActiveConn InActConn
TCP  192.168.103.100:80 wrr persistent 50
  -> 192.168.103.101:80           Route   1      0          0
  -> 192.168.103.105:80           Route   1      0          0
上述可以看到MASTER中的网卡是启用的。
3、查看BACKUP(node3)上的状态:
[root@node3 keepalived]# ifconfig
eth0      Link encap:Ethernet  HWaddr 00:0C:29:BE:D3:CA
          inet addr:192.168.103.103  Bcast:192.168.103.255  Mask:255.255.255.0
          inet6 addr: fe80::20c:29ff:febe:d3ca/64 Scope:Link
          UP BROADCAST RUNNING MULTICAST  MTU:1500  Metric:1
          RX packets:249981 errors:0 dropped:0 overruns:0 frame:0
          TX packets:72173 errors:0 dropped:0 overruns:0 carrier:0
          collisions:0 txqueuelen:1000
          RX bytes:284573915 (271.3 MiB)  TX bytes:5287459 (5.0 MiB)

lo        Link encap:Local Loopback
          inet addr:127.0.0.1  Mask:255.0.0.0
          inet6 addr: ::1/128 Scope:Host
          UP LOOPBACK RUNNING  MTU:16436  Metric:1
          RX packets:1898 errors:0 dropped:0 overruns:0 frame:0
          TX packets:1898 errors:0 dropped:0 overruns:0 carrier:0
          collisions:0 txqueuelen:0
          RX bytes:229406 (224.0 KiB)  TX bytes:229406 (224.0 KiB)
[root@node3 keepalived]# ipvsadm -Ln
IP Virtual Server version 1.2.1 (size=4096)
Prot LocalAddress:Port Scheduler Flags
  -> RemoteAddress:Port           Forward Weight ActiveConn InActConn
TCP  192.168.103.100:80 wrr persistent 50
  -> 192.168.103.101:80           Route   1      0          0
  -> 192.168.103.105:80           Route   1      0          0
如果node3没有关闭防火墙的话,也会启用eth0:1网卡,所以注意将防火墙关闭。


