


windows UI自动化测试入门篇
该教程是windows UI入门级,可以让一个初学者搭建起windows UI自动化测试平台的基本框架功能。所有资料都在百度链接
详细步骤如下:
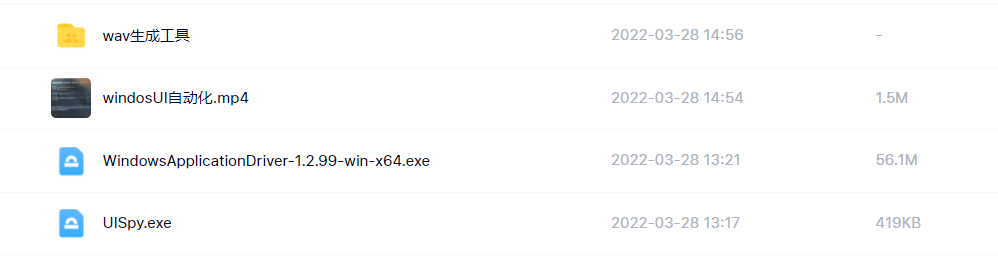
一、下载windwosUI测试驱动程序 WindowsApplicationDriver-1.2.99-win-x64 .exe和UISpy.exe windows UI元素获取工具
github下载链接:https://github.com/Microsoft/WinAppDriver/releases
(如果不好访问可以从百度云盘下载:链接: https://pan.baidu.com/s/1HjpuHMabLOjKlOVyXgsgKQ 提取码: yr9h 注意:百度网盘可能不最新版本)
windows UI元素获取工具只能从百度网盘获取(也可以自行去网上下载,这里不提供下载链接)
二、安装驱动
双击安装完成即可。安装完路径默认为C:\Program Files\Windows Application Driver\WinAppDriver.exe
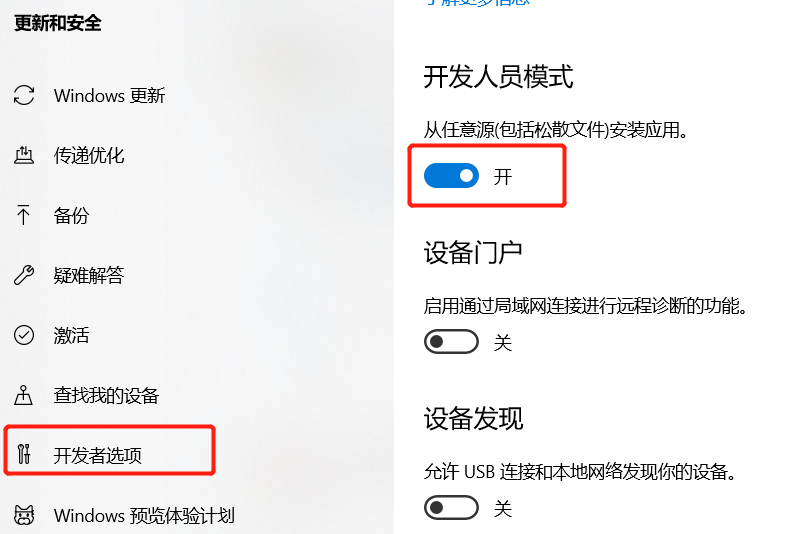
二、设置开发者模式
这里以windows10 设置开发者为例
1、点击设置选择更新和安全
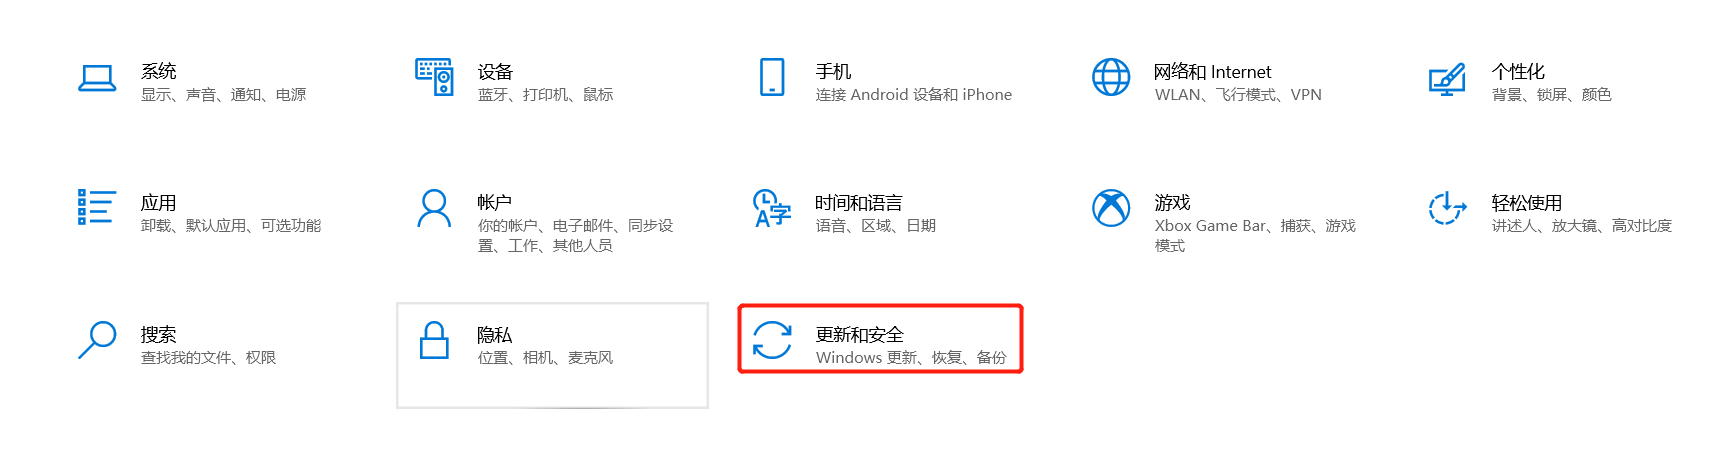
2、点击开发者,打开开发者设置
三、启动运行
如果是本机访问双击运行WinAppDriver.exe即可。如果是远程方式访问需要在程序后面添加IP地址和端口参数方式启动 例如:WinAppDriver.exe 主机ip地址 端口 (WinAppDriver.exe 192.168.1.88 4723 )

驱动安装和运行到此结束。下面使用python为例子来远程连接和测试。
四、连接测试
安装第三方插件appium :pip install Appium-Python-Client==1.1.0(注意:高版本可能有不兼容问题)
1、启动应用程序
from appium import webdriver
desired_caps = {}
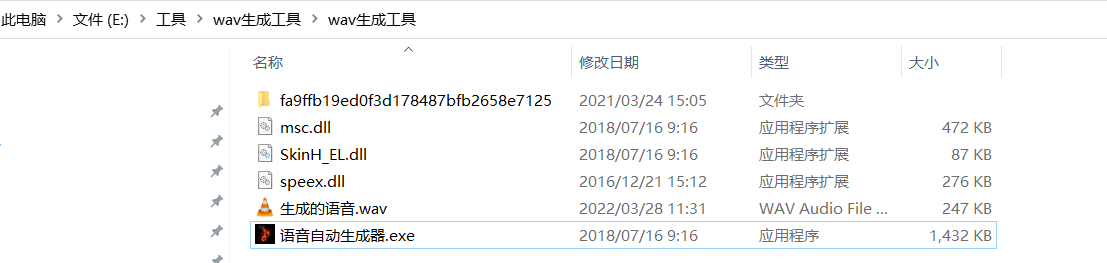
desired_caps["app"] = r"E:\工具\wav生成工具\wav生成工具\语音自动生成器.exe"
server_url = "http://127.0.0.1:4723" #我这里是本地访问
driver = webdriver.Remote(server_url, desired_caps)
2、测试输入一段文字
先运行被测程序->再运行UISpy
在UISpy中找到对应的程序名字点击如下图:
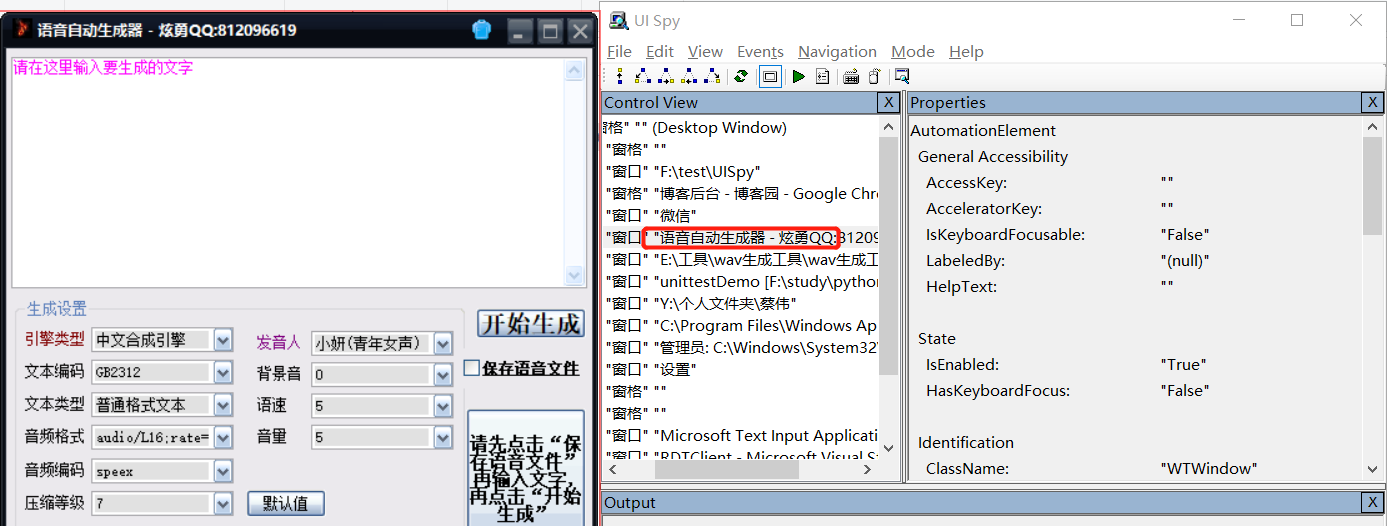
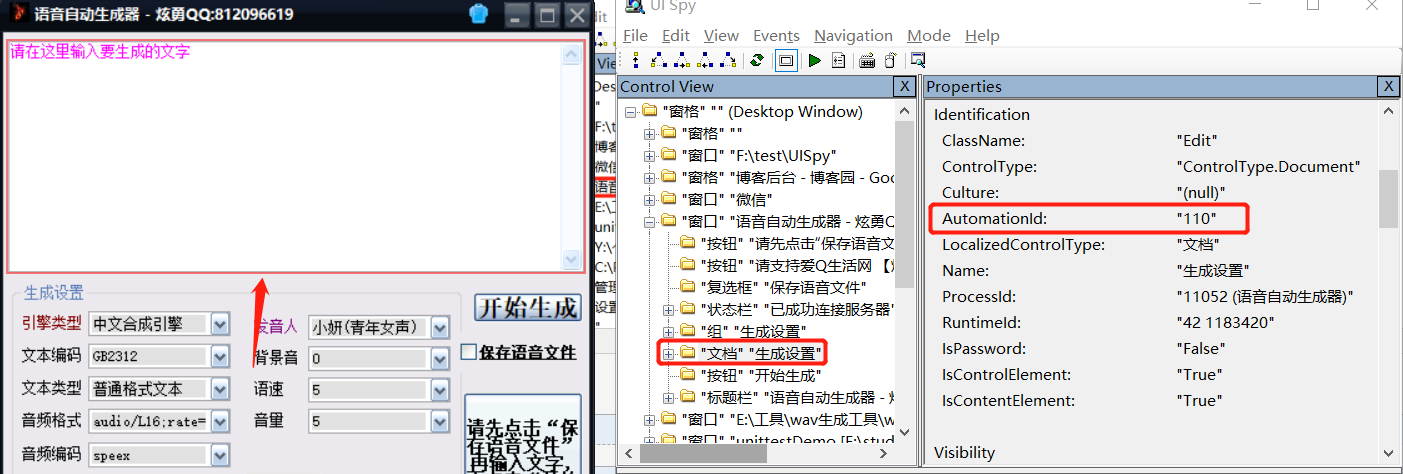
找到输入框->找到对应的id号
测试代码如下:
from appium import webdriver
import time

if __name__ == "__main__":
    desired_caps = {}
    desired_caps["app"] = r"E:\工具\wav生成工具\wav生成工具\语音自动生成器.exe"
    server_url = "http://127.0.0.1:4723"
    driver = webdriver.Remote(server_url, desired_caps)

    time.sleep(2)
    text_input = driver.find_element_by_accessibility_id("110")
    text_input.clear()
    text_input.send_keys("UI 自动化测试")

    time.sleep(1)
    save = driver.find_element_by_accessibility_id("350")
    save.click()

    time.sleep(1)
    start = driver.find_element_by_accessibility_id("100")
    start.click()
到此一个windwos UI自动化测试的基本环境搭建好了。


【推荐】国内首个AI IDE,深度理解中文开发场景,立即下载体验Trae
【推荐】编程新体验,更懂你的AI,立即体验豆包MarsCode编程助手
【推荐】抖音旗下AI助手豆包,你的智能百科全书,全免费不限次数
【推荐】轻量又高性能的 SSH 工具 IShell:AI 加持,快人一步
· TypeScript + Deepseek 打造卜卦网站:技术与玄学的结合
· 阿里巴巴 QwQ-32B真的超越了 DeepSeek R-1吗?
· 【译】Visual Studio 中新的强大生产力特性
· 10年+ .NET Coder 心语 ── 封装的思维:从隐藏、稳定开始理解其本质意义
· 【设计模式】告别冗长if-else语句:使用策略模式优化代码结构