在CentOS 7服务器中使用Jexus发布.net core webapi
环境:
服务器:CentOS 7 64位
.net core 2.1
Jexus独立版

按照官网安装独立版命令:curl https://jexus.org/release/x64/install.sh|sudo sh
[root@localhost ~]# curl https://jexus.org/release/x64/install.sh|sudo sh
  % Total    % Received % Xferd  Average Speed   Time    Time     Time  Current
                                 Dload  Upload   Total   Spent    Left  Speed
100   398  100   398    0     0    228      0  0:00:01  0:00:01 --:--:--   228
sh:行7: wget: 未找到命令
tar (child): jexus-6.1-x64.tar.gz:无法 open: 没有那个文件或目录
tar (child): Error is not recoverable: exiting now
tar: Child returned status 2
tar: Error is not recoverable: exiting now
cp: 无法获取"jexus" 的文件状态(stat): 没有那个文件或目录
sh: 第 10 行:cd: /usr/jexus: 没有那个文件或目录
chmod: 无法访问"/usr/jexus/jws": 没有那个文件或目录
sh:行12: /usr/jexus/jws: 没有那个文件或目录
sh: 第 16 行:cd: /usr/jexus: 没有那个文件或目录
OK, Jexus has been installed in /usr/jexus.
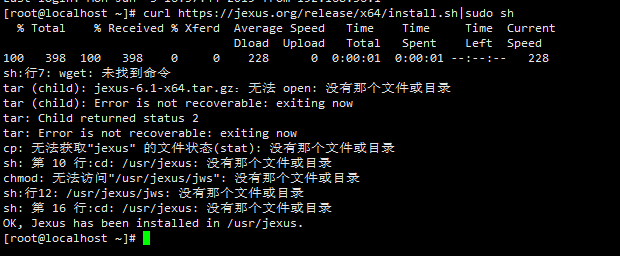
如提示wget: 未找到命令则需要先安装wget,用来下载Jexus。
CentOS安装wget:yum install wget
[root@localhost ~]# yum install wget
已加载插件:fastestmirror
Determining fastest mirrors
epel/x86_64/metalink                                                                    | 6.1 kB  00:00:00
 * base: mirrors.163.com
 * epel: mirror01.idc.hinet.net
 * extras: mirrors.aliyun.com
 * updates: mirrors.aliyun.com
base                                                                                    | 3.6 kB  00:00:00
epel                                                                                    | 5.3 kB  00:00:00
extras                                                                                  | 3.4 kB  00:00:00
packages-microsoft-com-prod                                                             | 2.9 kB  00:00:00
updates                                                                                 | 3.4 kB  00:00:00
epel/x86_64/primary_db         FAILED
http://fedora.cs.nctu.edu.tw/epel/7/x86_64/repodata/f36c8c0adcbde109e842436bc378f32c2cbcc6c06be1bff16765ab782fc1e6f0-primary.sqlite.bz2: [Errno 14] HTTP Error 404 - Not Found
正在尝试其它镜像。
To address this issue please refer to the below wiki article

https://wiki.centos.org/yum-errors

If above article doesn't help to resolve this issue please use https://bugs.centos.org/.

(1/5): extras/7/x86_64/primary_db                                                       | 200 kB  00:00:00
(2/5): epel/x86_64/updateinfo                                                           | 977 kB  00:00:00
(3/5): updates/7/x86_64/primary_db                                                      | 5.0 MB  00:00:01
(4/5): packages-microsoft-com-prod/primary_db                                           | 170 kB  00:00:01
(5/5): epel/x86_64/primary_db                                                           | 6.7 MB  00:00:03
正在解决依赖关系
--> 正在检查事务
---> 软件包 wget.x86_64.0.1.14-18.el7_6.1 将被 安装
--> 解决依赖关系完成

依赖关系解决

===============================================================================================================
 Package               架构                    版本                             源                        大小
===============================================================================================================
正在安装:
 wget                  x86_64                  1.14-18.el7_6.1                  updates                  547 k

事务概要
===============================================================================================================
安装  1 软件包

总下载量:547 k
安装大小:2.0 M
Is this ok [y/d/N]: y
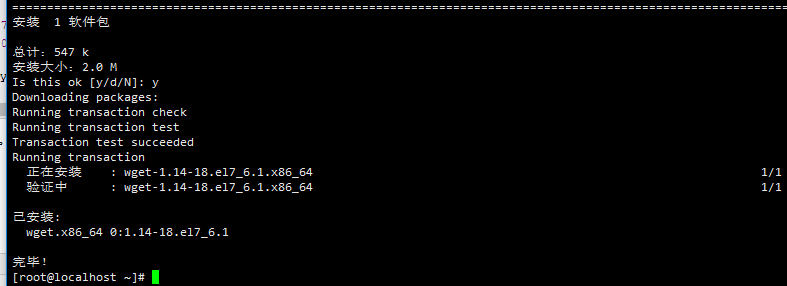
安装完后输入y
然后安装jexus.

安装成功会提示:
OK, Jexus has been installed in /usr/jexus.
可以看到Jexus的安装目录是/usr/jexus
查看Jexus本部命令:/usr/jexus/jws -V

Jexus网站配置目录为/usr/jexus/siteconf/
打开Xshell上面的Xfpt,可以进入该目录,下面有个default的文件,这个就是配置网站的文件,一个网站一个该配置文件。
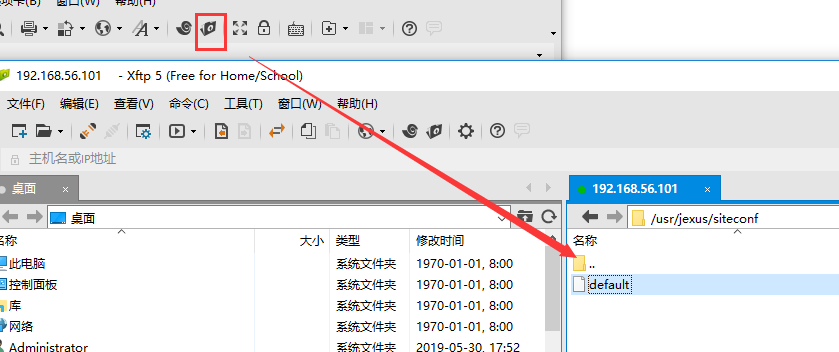
使用Xftp的记事本打开该文件
port=80 #网站端口
root=/ /var/www/default #网站目录
hosts=* #OR your.com,*.your.com #网站域名
因为我使用的服务器80端口已经使用了,把该default里的内容都注释掉,重新建一个文件web60的配置文件
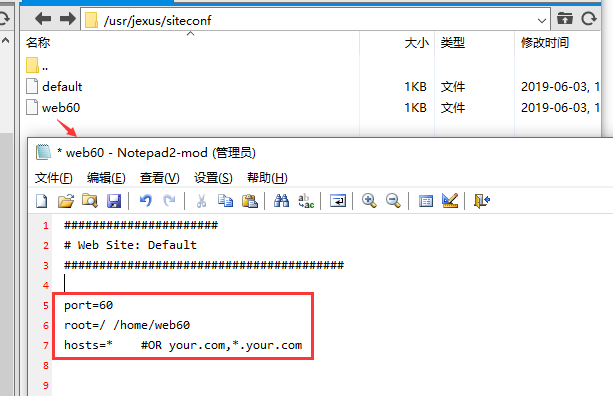
通过Xftp上传一个html页面到该路径
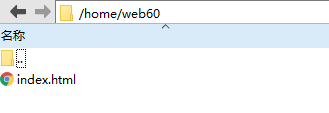
然后到Xshell中启动Jexus:

启动命令:sh /usr/jexus/jws start
重启命令:sh /usr/jexus/jws restart
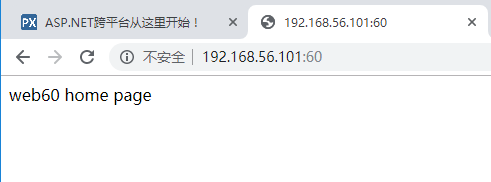
启动成功,在浏览器中输入改IP及端口,可以看到Jexus已经托管该网站。
CentOS下安装.net core 运行时可以参考微软的官方文档:https://dotnet.microsoft.com/learn/dotnet/hello-world-tutorial/install
1.注册.net core
sudo rpm -Uvh https://packages.microsoft.com/config/rhel/7/packages-microsoft-prod.rpm
2.更新Linux内核(生成环境慎用)
sudo yum update
3.安装.net SDK
sudo yum install -y dotnet-sdk-2.1
4.查看.net core版本(安装成功后)
dotnet --version
创建一个.net core的webapi,
设置Json样式
        // This method gets called by the runtime. Use this method to add services to the container.
        public void ConfigureServices(IServiceCollection services)
        {
            //services.AddMvc().SetCompatibilityVersion(CompatibilityVersion.Version_2_1);

            //全局配置Json序列化处理
            services.AddMvc()
                .SetCompatibilityVersion(CompatibilityVersion.Version_2_1)
                .AddJsonOptions(options =>
                    {
                        //忽略循环引用
                        options.SerializerSettings.ReferenceLoopHandling = ReferenceLoopHandling.Ignore;
                        //不使用驼峰样式的key
                        options.SerializerSettings.ContractResolver = new DefaultContractResolver();
                        //设置时间格式
                        options.SerializerSettings.DateFormatString = "yyyy-MM-dd HH:mm:ss";
                    }
                );
        }
调试环境需要注释启动配置文件launchSettings.json的$schema属性去掉默认的Json样式

设置.net core api访问的端口
        public static IWebHostBuilder CreateWebHostBuilder(string[] args) =>
            WebHost.CreateDefaultBuilder(args)
                .UseUrls("http://*:5002")
                .UseStartup<Startup>()
                /*.UseKestrel(options =>
                {
                    options.Limits.MaxConcurrentUpgradedConnections = 1000;
                })*/
                .ConfigureAppConfiguration((builderContext, configBuilder) =>
                {
                    var env = builderContext.HostingEnvironment;
                    configBuilder.SetBasePath(env.ContentRootPath)
                        .AddJsonFile("appsettings.json", optional: true, reloadOnChange: true)
                        .AddJsonFile($"appsettings.{env.EnvironmentName}.json", optional: true)
                        .AddEnvironmentVariables();
                    // Add to configuration the Cloudfoundry VCAP settings
                });
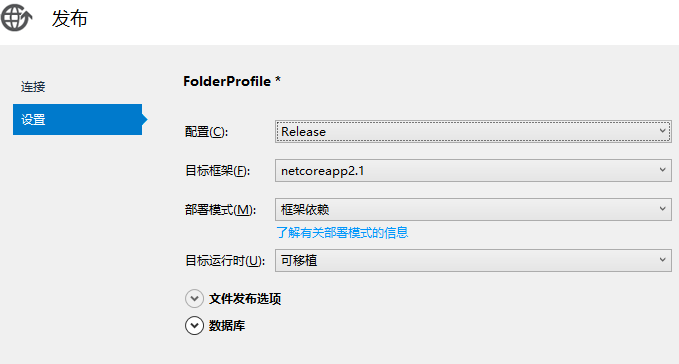
发布网站,部署模式选框架依赖,目标运行时选可移植。
将文件通过ftp上传到服务器
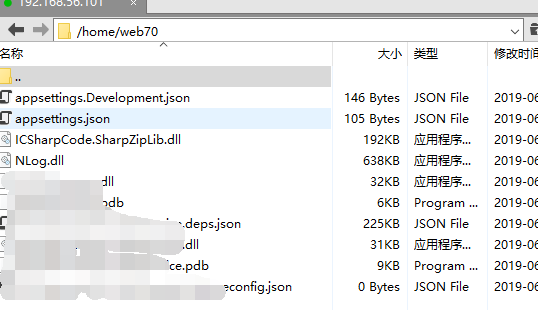
在xshell运行改网站:dotnet 程序集名称.dll,运行成功,直接在浏览器打开发现无法访问,这是服务器防火墙没开放该端口。

另起一个终端标签,使用curl访问该API,可以成功返回数据。
curl http://localhost:5002/api/values

Ctrl+C关闭.net core控制台 ,使用Jexus做外部端口监听和网站服务器。(类似Nginx方向代理+Linux进程守护)
创建一个Jexus网站配置
port=70                           # 外部访问的端口号,可以改成你想要的端口号,外部访问通过 ip/域名:端口号 即可访问
root=/ /home/web70/应用程序文件夹/  # 应用程序的工作根目录(全路径)
hosts=*                           #OR your.com,*.your.com # 如果为服务器设置了DNS解析,则可以填写解析到服务器的域名,如:www.myweb.com

AppHost={                         # .net core 网站配置
  cmd=dotnet 应用程序名称.dll;      # 命令,启动Asp.Net Core应用要执行的命令

  root=/var/www/应用程序文件夹/;    # Asp.Net Core应用程序所在的全路径

  port=5002;                      # Asp.Net Core应用程序所使用的端口号,如果在程序中使用了UsrUrls自定义端口则使用UsrUrls中填写的端口(不建议使用UsrUrls自定义端口),
                                  # 在没有使用UsrUrls自定义端口的情况下端口号设置为 0,Jexus会在运行时与Asp.Net Core进行"协商"具体使用的端口号,避免多个应用分配
                    # 端口的麻烦和冲突的风险。

}
重启Jexus,然后用浏览器访问该API地址


将Jexus设置为开机自动启动
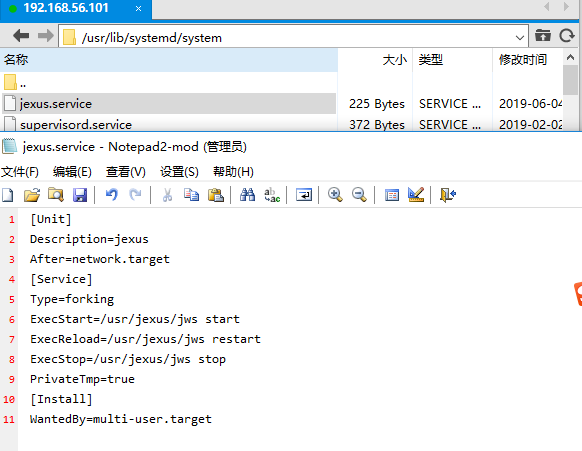
使用xftp打开路径/usr/lib/systemd/system ,在该路径下新建服务文件jexus.service
文件内容:
[Unit]
Description=jexus
After=network.target
[Service]
Type=forking
ExecStart=/usr/jexus/jws start
ExecReload=/usr/jexus/jws restart
ExecStop=/usr/jexus/jws stop
PrivateTmp=true
[Install]
WantedBy=multi-user.target

添加服务:systemctl enable jexus.service
启动Jexus服务:systemctl start jexus.service
查看Jexus服务状态:systemctl status jexus.service
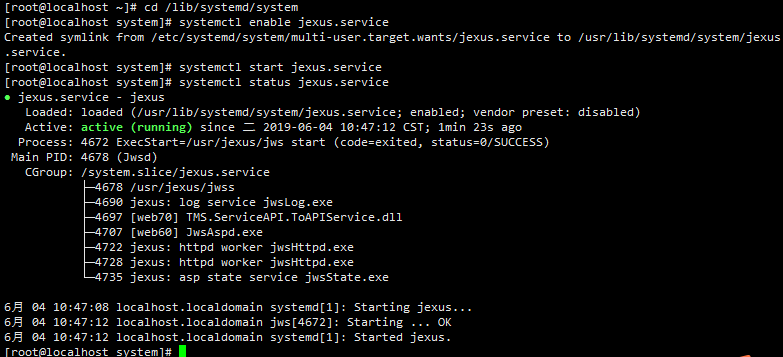
状态为active(running)表示已启动服务成功。
重启服务器后就会自动启动Jexus了。
jexus做负载均衡配置:
port=78

# Jexus 默认访问的工作目录
root=/ /web78/  # 应用程序的工作根目录(全路径),反向代理也需要指定

# 反向代理设置:
# 路径是"/"即根目录,也可以设置一个虚拟路径,如:reproxy=/api/ http://api.abc.com/
reproxy=/ 127.0.0.1:5000, 127.0.0.1:5002, 127.0.0.1:5003
参考资料:
https://www.cnblogs.com/nsky/p/10386460.html
https://www.cnblogs.com/alan-lin/p/9817331.html
https://dotnet.microsoft.com/learn/dotnet/hello-world-tutorial/install
Liunx下使用top命令查看CPU、内存等:


 浙公网安备 33010602011771号