Spring Cloud之Swagger集群搭建
在微服务中,Swagger是每个服务 比如会员服务,订单服务,支付服务 进行继承、
如何将整个微服务中的Swagger进行合成,同一台服务器上。
使用Zuul+Swagger实现管理整个微服务API文档
使用Nginx+Swagger以不同的项目区分跳转到不同的接口文档
Spring Boot支持对Swagger管理,只需要Zuul网关添加对应服务Swagger文档即可
服务配置
1、会员服务和订单服务都引入对swagger的maven支持
        <dependency>
            <groupId>io.springfox</groupId>
            <artifactId>springfox-swagger2</artifactId>
            <version>2.8.0</version>
        </dependency>
        <dependency>
            <groupId>io.springfox</groupId>
            <artifactId>springfox-swagger-ui</artifactId>
            <version>2.8.0</version>
        </dependency>
等于:(Spring Boot已经整合好了)
<dependency>
<groupId>com.spring4all</groupId>
<artifactId>swagger-spring-boot-starter</artifactId>
<version>1.7.0.RELEASE</version>
</dependency>
两者选择其一
然后启动类需要:
@EnableSwagger2Doc
接着,controller中需要:
类上注解
@Api("订单接口")
接口方法上
@ApiOperation("订单服务接口")
@PostMapping("/getOrder")
yml加入扫包范围:
swagger:
base-package: com.toov5.api
(每个服务都一样)
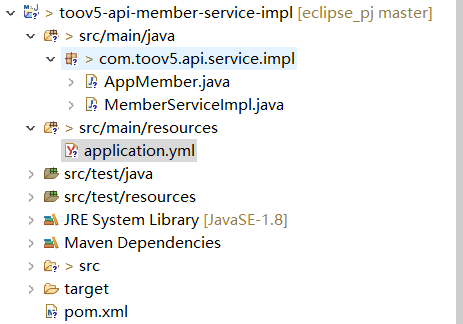
如Member:

package com.toov5.api.service.impl;

import org.springframework.beans.factory.annotation.Value;
import org.springframework.web.bind.annotation.GetMapping;
import org.springframework.web.bind.annotation.RequestMapping;
import org.springframework.web.bind.annotation.RequestParam;
import org.springframework.web.bind.annotation.RestController;

import com.toov5.api.entity.UserEntity;
import com.toov5.api.service.IMemberService;
import com.toov5.base.BaseApiService;
import com.toov5.base.ResponseBase;

import io.swagger.annotations.Api;
import io.swagger.annotations.ApiImplicitParam;
import io.swagger.annotations.ApiOperation;


@RestController
@Api("会员服务接口")
public class MemberServiceImpl extends BaseApiService implements IMemberService {
    @Value("${server.port}")
    private String serverPort;

     @RequestMapping("/getMember")
    public UserEntity getMember(@RequestParam("name") String name) {
        UserEntity userEntity = new UserEntity();
        userEntity.setName(name);
        userEntity.setAge(10);
        return userEntity;
    }

     @RequestMapping("/getUserInfo")
     public ResponseBase getUserInfo() {
        try {
            Thread.sleep(1500);
        } catch (Exception e) {

        }
        return setResultSuccess("getUserInfo调用成功....");
    }


     @RequestMapping("/")
     public String Index() {
        return "我是member"+serverPort;
    }

        @ApiOperation(value = "获取会员信息接口") // 具体描述
        @ApiImplicitParam(name = "userName", value = "用户信息参数", required = true, dataType = "String") // 传入的参数 ,描述 , 必须传递true                                                                                                    // , 类型String
        @GetMapping("/getMemberInfo")
        public String getMemberInfo(String userName) {
            System.out.println(userName);
            return "userName" + userName;
        }

}
启动:
package com.toov5.api.service.impl;

import org.springframework.boot.SpringApplication;
import org.springframework.boot.autoconfigure.SpringBootApplication;
import org.springframework.cloud.netflix.eureka.EnableEurekaClient;
import org.springframework.cloud.openfeign.EnableFeignClients;

import com.spring4all.swagger.EnableSwagger2Doc;

@SpringBootApplication (scanBasePackages={"com.toov5.*"})
@EnableEurekaClient
@EnableFeignClients
@EnableSwagger2Doc //开启swagger文档)
public class AppMember {
  public static void main(String[] args) {
    SpringApplication.run(AppMember.class, args);
}
}
yml
server:
  port: 8005

spring:
    application:
        name: app-toov5-member
ַ
eureka:
  client:
    service-url:
           defaultZone: http://localhost:8100/eureka


    register-with-eureka: true

    fetch-registry: true

swagger:
  base-package:  com.toov5.api.service.impl
网关gateway配置:
也需要引入相同的pom
<dependency>
<groupId>com.spring4all</groupId>
<artifactId>swagger-spring-boot-starter</artifactId>
<version>1.7.0.RELEASE</version>
</dependency>
然后启动类:
package com.toov5;

import java.util.ArrayList;
import java.util.List;

import org.springframework.boot.SpringApplication;
import org.springframework.boot.autoconfigure.SpringBootApplication;
import org.springframework.cloud.netflix.eureka.EnableEurekaClient;
import org.springframework.cloud.netflix.zuul.EnableZuulProxy;
import org.springframework.context.annotation.Primary;
import org.springframework.stereotype.Component;

import com.spring4all.swagger.EnableSwagger2Doc;

import springfox.documentation.swagger.web.SwaggerResource;
import springfox.documentation.swagger.web.SwaggerResourcesProvider;

@SpringBootApplication
@EnableEurekaClient
@EnableZuulProxy  //开启网关代理
@EnableSwagger2Doc  //开启swagger
public class AppGateway {
   public static void main(String[] args) {
   SpringApplication.run(AppGateway.class, args);
}

       // 添加文档来源
       @Component
       @Primary
       class DocumentationConfig implements SwaggerResourcesProvider {
           public List<SwaggerResource> get() {
               List resources = new ArrayList<Object>();
                 //app-itmayiedu-order
               resources.add(swaggerResource("app-toov5-member", "/api-member/v2/api-docs", "2.0")); // 第一个参数可以随便写 第二个参考yml对应
               resources.add(swaggerResource("app-toov5-order", "/api-order/v2/api-docs", "2.0"));
               return resources;
           }

           private SwaggerResource swaggerResource(String name, String location, String version) {
               SwaggerResource swaggerResource = new SwaggerResource();
               swaggerResource.setName(name);
               swaggerResource.setLocation(location);
               swaggerResource.setSwaggerVersion(version);
               return swaggerResource;
           }
       }

   }
yml配置:
###注册 中心
eureka:
  client:
    serviceUrl:
      defaultZone: http://localhost:8100/eureka/
server:  ##api网关端口号
  port: 81
###网关名称
spring:   ##网关服务名称
  application:
    name: service-zuul
  ###网关名称
  cloud:
    config:
    ####读取后缀
      profile: dev
      ####读取config-server注册地址
      discovery:
        service-id: confi

### 配置网关反向代理
zuul:
  routes:
    api-member:  ##随便写的
     ### 以 /api-member/访问转发到会员服务   通过别名找
      path: /api-member/**
      serviceId: app-toov5-member  ##别名  如果集群的话  默认整合了ribbon 实现轮训 负载均衡
    api-order:   ##随便写的
        ### 以 /api-order/访问转发到订单服务
      path: /api-order/**
      serviceId: app-toov5-order   ##别名

与yml的对应!
启动 eureka zuul member 然后访问


获取接口文档


