SpringBoot与web开发
简介
使用SpringBoot;
1)、创建SpringBoot应用,选中我们需要的模块; 比如web等等
2)、SpringBoot已经默认将这些场景配置好了,只需要在配置文件中指定少量配置就可以运行起来
3)、自己编写业务代码;
参考这里:
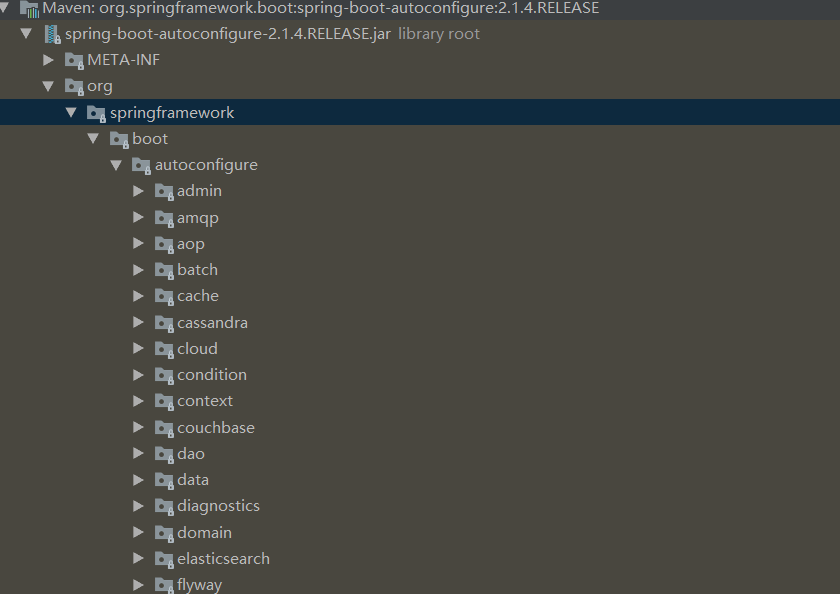
比如要连接数据库的:有数据库的配置
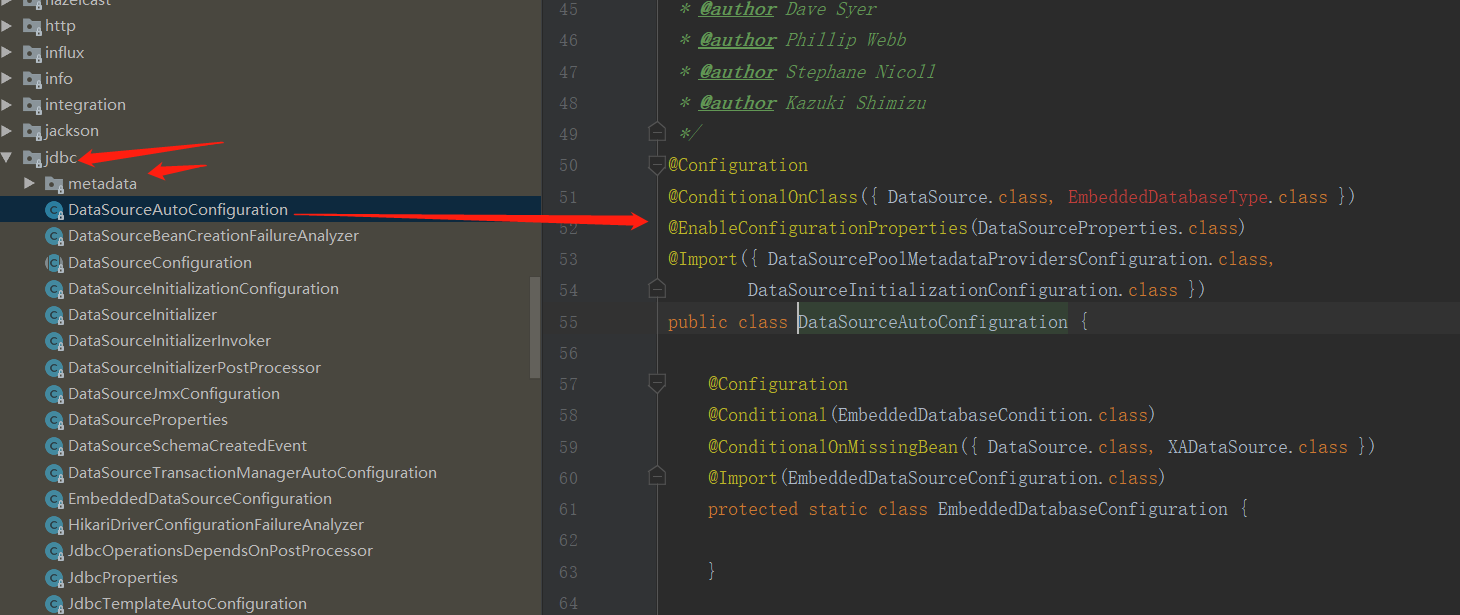
查看 @EnableConfigurationProperties中的 dataSourceProperties.class
@ConfigurationProperties(prefix = "spring.datasource")   //跟配置绑定
public class DataSourceProperties implements BeanClassLoaderAware, InitializingBean {
自动配置原理?
这个场景SpringBoot帮我们配置了什么?能不能修改?能修改哪些配置?能不能扩展?xxx
xxxxAutoConfiguration:帮我们给容器中自动配置组件;
xxxxProperties:配置类来封装配置文件的内容;
Web:
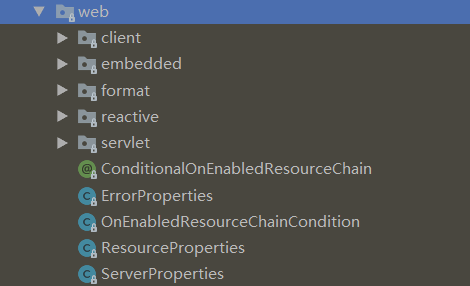
关于web 就是 restful的栗子了
restful web开发
Spring boot 最后打成个jar包,web开发时候,页面放哪里?
Spring boot对静态资源的映射规则
这个场景SpringBoot帮我们配置了什么?能不能修改?能修改哪些配置?能不能扩展?xxx
xxxxAutoConfiguration:帮我们给容器中自动配置组件;
xxxxProperties:配置类来封装配置文件的内容;
idea: ctrl+shift+n

这个类里面有个方法: 添加资源映射
public void addResourceHandlers(ResourceHandlerRegistry registry) {
            if (!this.resourceProperties.isAddMappings()) {
                logger.debug("Default resource handling disabled");
            } else {
                Duration cachePeriod = this.resourceProperties.getCache().getPeriod();
                CacheControl cacheControl = this.resourceProperties.getCache().getCachecontrol().toHttpCacheControl();
                if (!registry.hasMappingForPattern("/webjars/**")) {   //所有 /webjars/**
                    this.customizeResourceHandlerRegistration(registry.addResourceHandler(new String[]{"/webjars/**"}).addResourceLocations(new String[]{"classpath:/META-INF/resources/webjars/"}).setCachePeriod(this.getSeconds(cachePeriod)).setCacheControl(cacheControl));
                }

                String staticPathPattern = this.mvcProperties.getStaticPathPattern();
                if (!registry.hasMappingForPattern(staticPathPattern)) {
                    this.customizeResourceHandlerRegistration(registry.addResourceHandler(new String[]{staticPathPattern}).addResourceLocations(getResourceLocations(this.resourceProperties.getStaticLocations())).setCachePeriod(this.getSeconds(cachePeriod)).setCacheControl(cacheControl));
                }

            }
        }
所有 /webjars/** 都去 classpath:/META-INF/resources/webjars/ 这里找资源
webjars: 以jar包方式引入静态资源
参考:https://www.webjars.org/
<!‐‐引入jquery‐webjar‐‐>在访问的时候只需要写webjars下面资源的名称即可
<dependency>
<groupId>org.webjars</groupId>
<artifactId>jquery</artifactId>
<version>3.3.1</version>
</dependency>
引入后:
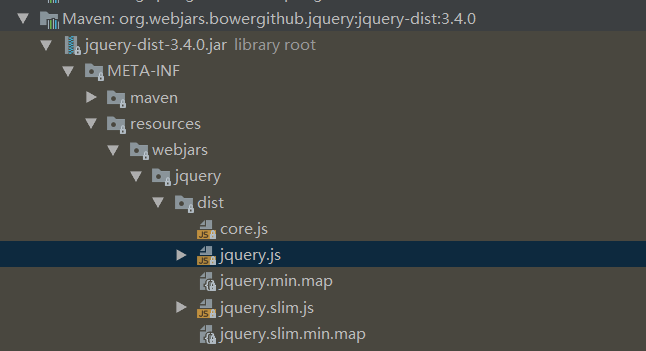
根据图生成地址
访问地址:http://localhost:8080/webjars/jquery/dist/jquery.js
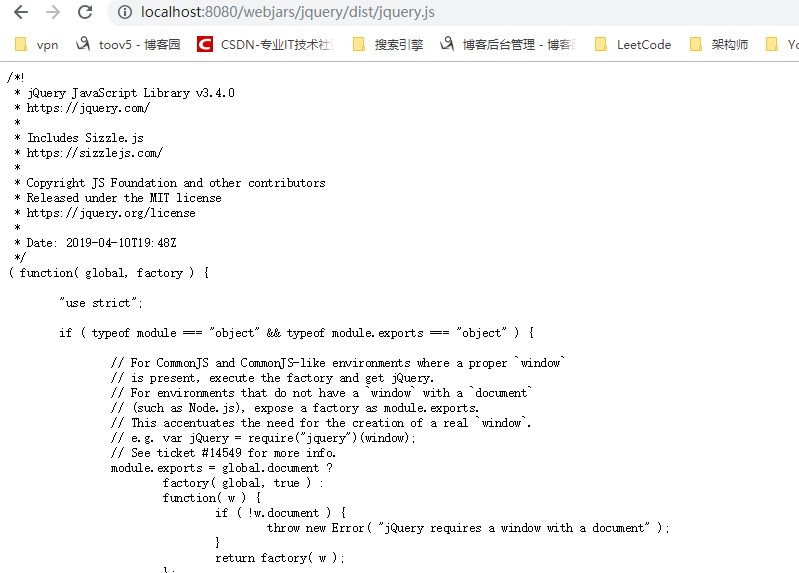
在访问时候 只需要写webjars下面的资源名称即可
资源映射:
@ConfigurationProperties(
    prefix = "spring.resources",
    ignoreUnknownFields = false
)
public class ResourceProperties {
    private static final String[] CLASSPATH_RESOURCE_LOCATIONS = new String[]{"classpath:/META-INF/resources/", "classpath:/resources/", "classpath:/static/", "classpath:/public/"};
可以设置和静态资源有关的参数, 缓存时间等
2)"/**" 访问当前项目的任何资源,都去(静态资源的文件夹)找映射
classpath 等价于 Java包同级的目录
"classpath:/META‐INF/resources/",
"classpath:/resources/",
"classpath:/static/",
"classpath:/public/"
"/":当前项目的根路径
classpath:
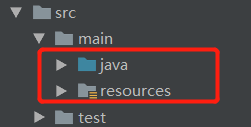
比如:localhost:8080/abc === 去静态资源文件夹里面找abc
3)、欢迎页; 静态资源文件夹下的所有index.html页面;被"/**"映射;
localhost:8080/ 找index页面
4)、所有的 **/favicon.ico 都是在静态资源文件下找;
其实都是可以配置的啊哈:
@ConfigurationProperties(
    prefix = "spring.resources",
    ignoreUnknownFields = false
)
public class ResourceProperties {
    private static final String[] CLASSPATH_RESOURCE_LOCATIONS = new String[]{"classpath:/META-INF/resources/", "classpath:/resources/", "classpath:/static/", "classpath:/public/"};
    private String[] staticLocations;
    private boolean addMappings;
    private final ResourceProperties.Chain chain;
    private final ResourceProperties.Cache cache;
可以修改静态文件夹位置!
Spring boot 不支持jsp ,Spring boot推荐使用模板引擎。
Velocty FreeaKer
模板:
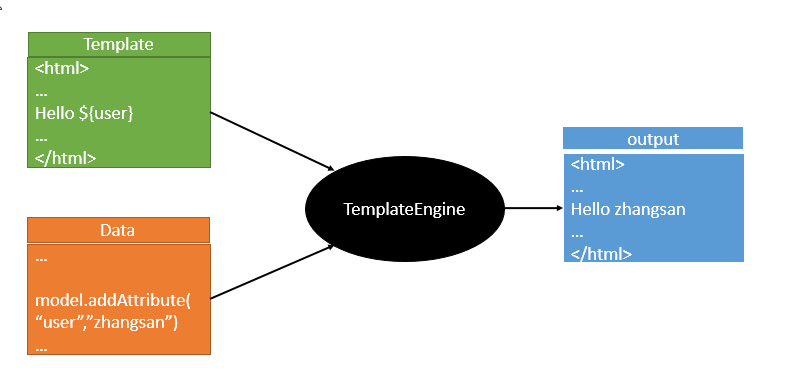
把数据和模板 交给模板引擎
Spring boot 推荐使用 Thymeleaf
引入thymeleaf ,开发
引入相应的starter
<dependency>
<groupId>org.springframework.boot</groupId>
<artifactId>spring‐boot‐starter‐thymeleaf</artifactId>
           2.1.6
</dependency>
切换thymeleaf版本
<properties>
<thymeleaf.version>3.0.9.RELEASE</thymeleaf.version>
<!‐‐ 布局功能的支持程序  thymeleaf3主程序  layout2以上版本 ‐‐>
<!‐‐ thymeleaf2   layout1‐‐>
<thymeleaf‐layout‐dialect.version>2.2.2</thymeleaf‐layout‐dialect.version>
  </properties>
Thymeleaf使用
@ConfigurationProperties(prefix = "spring.thymeleaf")
public class ThymeleafProperties {
private static final Charset DEFAULT_ENCODING = Charset.forName("UTF‐8");
private static final MimeType DEFAULT_CONTENT_TYPE = MimeType.valueOf("text/html");
public static final String DEFAULT_PREFIX = "classpath:/templates/";
public static final String DEFAULT_SUFFIX = ".html";
   //
只要我们把HTML页面放在classpath:/templates/,thymeleaf就能自动渲染;
使用:
1、导入thymeleaf的名称空间
<html lang="en" xmlns:th="http://www.thymeleaf.org">
2、使用thymeleaf语法;
<!DOCTYPE html>
<html lang="en" xmlns:th="http://www.thymeleaf.org">
<head>
    <meta charset="UTF‐8">
    <title>Title</title>
</head>
<body>
    <h1>成功!</h1>
    <!‐‐th:text 将div里面的文本内容设置为 ‐‐>
    <div th:text="${hello}">这是显示欢迎信息</div>
</body>
</html>
语法规则 自行学习吧 不详细介绍了
Spring Boot 与 Spring mvc 自动配置原理:
参考:https://docs.spring.io/spring-boot/docs/1.5.10.RELEASE/reference/htmlsingle/#boot-features-developing-web-applications
1. Spring MVC auto-configuration
Spring Boot 自动配置好了SpringMVC
以下是SpringBoot对SpringMVC的默认配置:(WebMvcAutoConfiguration):
Inclusion of ContentNegotiatingViewResolver and BeanNameViewResolver beans,自动配置了ViewResolver(视图解析器:根据方法的返回值得到视图对象(View),视图对象决定如何渲染(转发?重定向?))
到这个类里面去:
@Configuration
@ConditionalOnWebApplication(type = Type.SERVLET)
@ConditionalOnClass({ Servlet.class, DispatcherServlet.class, WebMvcConfigurer.class })
@ConditionalOnMissingBean(WebMvcConfigurationSupport.class)
@AutoConfigureOrder(Ordered.HIGHEST_PRECEDENCE + 10)
@AutoConfigureAfter({ DispatcherServletAutoConfiguration.class,
        TaskExecutionAutoConfiguration.class, ValidationAutoConfiguration.class })
public class WebMvcAutoConfiguration {

    public static final String DEFAULT_PREFIX = "";

    public static final String DEFAULT_SUFFIX = "";

    private static final String[] SERVLET_LOCATIONS = { "/" };

    @Bean
    @ConditionalOnMissingBean(HiddenHttpMethodFilter.class)
    @ConditionalOnProperty(prefix = "spring.mvc.hiddenmethod.filter", name = "enabled",
            matchIfMissing = true)
    public OrderedHiddenHttpMethodFilter hiddenHttpMethodFilter() {
        return new OrderedHiddenHttpMethodFilter();
    }

    @Bean
    @ConditionalOnMissingBean(FormContentFilter.class)
    @ConditionalOnProperty(prefix = "spring.mvc.formcontent.filter", name = "enabled",
            matchIfMissing = true)
    public OrderedFormContentFilter formContentFilter() {
        return new OrderedFormContentFilter();
    }
这个类里面有这个配置:视图解析器 (我们可以给容器中添加视图解析器)
        @Bean
        @ConditionalOnBean(ViewResolver.class)
        @ConditionalOnMissingBean(name = "viewResolver",
                value = ContentNegotiatingViewResolver.class)
        public ContentNegotiatingViewResolver viewResolver(BeanFactory beanFactory) {
            ContentNegotiatingViewResolver resolver = new ContentNegotiatingViewResolver();
            resolver.setContentNegotiationManager(
                    beanFactory.getBean(ContentNegotiationManager.class));
            // ContentNegotiatingViewResolver uses all the other view resolvers to locate
            // a view so it should have a high precedence
            resolver.setOrder(Ordered.HIGHEST_PRECEDENCE);
            return resolver;
        }
小结:
ContentNegotiatingViewResolver:组合所有的视图解析器的;
如何定制:我们可以自己给容器中添加一个视图解析器;自动的将其组合进来;
(验证方法 在doDispatch方法 打断点 进来的是自己定义的视图解析器组件)
Support for serving static resources, including support for WebJars (see below).静态资源文件夹路
径,webjars
Static index.html support. 静态首页访问
Custom Favicon support (see below). favicon.ico
自动注册了 of Converter , GenericConverter , Formatter beans.
Converter:转换器; public String hello(User user):类型转换使用Converter
Formatter 格式化器; 2017.12.17===Date;
关于Spring mvc的扩展问题,大家可以了解下。
<mvc:view‐controller path="/hello" view‐name="success"/>
    <mvc:interceptors>
        <mvc:interceptor>
            <mvc:mapping path="/hello"/>
            <bean></bean>
        </mvc:interceptor>
    </mvc:interceptors>
编写一个配置类(@Configuration),是WebMvcConfigurerAdapter类型;不能标注@EnableWebMvc;
既保留了所有的自动配置,也能用我们扩展的配置;
//使用WebMvcConfigurerAdapter可以来扩展SpringMVC的功能
@Configuration
public class MyMvcConfig extends WebMvcConfigurerAdapter {
    @Override
    public void addViewControllers(ViewControllerRegistry registry) {
       // super.addViewControllers(registry);
        //浏览器发送 /atguigu 请求来到 success
        registry.addViewController("/atguigu").setViewName("success");
    }
}
原理:
1)、WebMvcAutoConfiguration是SpringMVC的自动配置类
2)、在做其他自动配置时会导入;@Import(EnableWebMvcConfiguration.class)
@Configuration
public static class EnableWebMvcConfiguration extends DelegatingWebMvcConfiguration {
      private final WebMvcConfigurerComposite configurers = new WebMvcConfigurerComposite();
 //从容器中获取所有的WebMvcConfigurer
      @Autowired(required = false)
      public void setConfigurers(List<WebMvcConfigurer> configurers) {
          if (!CollectionUtils.isEmpty(configurers)) {
              this.configurers.addWebMvcConfigurers(configurers);
             //一个参考实现;将所有的WebMvcConfigurer相关配置都来一起调用;
             @Override
             // public void addViewControllers(ViewControllerRegistry registry) {
              //    for (WebMvcConfigurer delegate : this.delegates) {
               //       delegate.addViewControllers(registry);
               //   }
              }
          }
}
3)、容器中所有的WebMvcConfigurer都会一起起作用;
4)、我们的配置类也会被调用;
效果:SpringMVC的自动配置和我们的扩展配置都会起作用;
3、全面接管SpringMVC;
SpringBoot对SpringMVC的自动配置不需要了,所有都是我们自己配置;所有的SpringMVC的自动配置都失效了
我们需要在配置类中添加@EnableWebMvc即可;
//使用WebMvcConfigurerAdapter可以来扩展SpringMVC的功能
@EnableWebMvc
@Configuration
public class MyMvcConfig extends WebMvcConfigurerAdapter {
    @Override
    public void addViewControllers(ViewControllerRegistry registry) {
       // super.addViewControllers(registry);
        //浏览器发送 /atguigu 请求来到 success
        registry.addViewController("/atguigu").setViewName("success");
    }
}
原理:
为什么@EnableWebMvc自动配置就失效了;
@EnableWebMvc的核心
@Import(DelegatingWebMvcConfiguration.class)
public @interface EnableWebMvc {
@Configuration
public class DelegatingWebMvcConfiguration extends WebMvcConfigurationSupport {
@Configuration
@ConditionalOnWebApplication
@ConditionalOnClass({ Servlet.class, DispatcherServlet.class,
WebMvcConfigurerAdapter.class })
//容器中没有这个组件的时候,这个自动配置类才生效
@ConditionalOnMissingBean(WebMvcConfigurationSupport.class)
@AutoConfigureOrder(Ordered.HIGHEST_PRECEDENCE + 10)
@AutoConfigureAfter({ DispatcherServletAutoConfiguration.class,
ValidationAutoConfiguration.class })
public class WebMvcAutoConfiguration {
4)@EnableWebMvc将WebMvcConfigurationSupport组件导入进来;
5)、导入的WebMvcConfigurationSupport只是SpringMVC最基本的功能;
总结:
如何修改SpringBoot的默认配置
模式:
1)、SpringBoot在自动配置很多组件的时候,先看容器中有没有用户自己配置的(@Bean、@Component)如
果有就用用户配置的,如果没有,才自动配置;如果有些组件可以有多个(ViewResolver)将用户配置的和自己默
认的组合起来;
2)、在SpringBoot中会有非常多的xxxConfigurer帮助我们进行扩展配置
3)、在SpringBoot中会有很多的xxxCustomizer帮助我们进行定制配置


