Android开发:《Gradle Recipes for Android》阅读笔记(翻译)4.5——使用Android Libraries
问题:
你想要在app当中增加新的library模块
解决方案:
使用library插件,增加一个library模块作为依赖。
讨论:
不可以通过使用java库给app增加许多功能,通常是使用jar包。1.5节讲述了如何使用dependencies块。举例子,为了使用Googles的Gson库解析json,可以在module的配置文件里面增加依赖:
dependencies {
    compile 'com.google.code.gson:gson:2.6.2'
}
Android libraries超出了java library,因为它们不但包含android的API,还包括了需要的资源。当项目构建的时候,Gradle将Android libraries打包成aar(Android Archieve)文件,和jar文件类似,但是包含了Android的依赖。
从Gradle来看,Android libraries是root的一个子项目。这意味着它们就和Android应用一样,只是在一个子目录下面。module的名字因此被添加到settings.gradle文件里面:
include ':app', ':icndb'
在这样的情况下,Android library模块叫做icndb,代表着 Internet Chuck Norris Database,用来以json格式提供笑话。API页面如下:

作为一个Android library的示例,这个网站作为RESTful服务,返回的json数据会被解析,然后返回的笑话会被添加到WelcomeActivity的TextView。
在Android Studio里面可以通过“New Module”,选择“Android Library”新建一个library模块:

创建library名字后,你可以增加任何你想要的类型的activity。完成向导,创建了library目录,将它增加到根目录下面的settings.gradle文件里面。
每个library都有自己的Gradle配置文件。你可以指定最小和目标的SDK版本,自定义build types,flavors和按照需要修改依赖。最终要的区别是Gradle 配置使用了一个不同的插件:
apply plugin: 'com.android.library'

android {
    compileSdkVersion 23
    buildToolsVersion "23.0.3"
    packagingOptions {
        exclude 'META-INF/notice.txt'
        exclude 'META-INF/license.txt'
        exclude 'LICENSE.txt'
    }
    defaultConfig {
        minSdkVersion 16
        targetSdkVersion 23
        versionCode 1
        versionName "1.0"
    }
    buildTypes {
        release {
            minifyEnabled false
            proguardFiles getDefaultProguardFile('proguard-android.txt'),
        }
     }
}
dependencies {
    compile 'com.google.code.gson:gson:2.6.2'
    compile 'com.squareup.retrofit2:retrofit:2.0.1'
    compile 'com.squareup.retrofit2:converter-gson:2.0.1'
}
配置文件增加Retrofit2项目作为依赖想,使用Gsonlibrary转化JSON信息。
注意packagingOtions块的使用。这允许你排除在多个项目里面使用的同名文件。
如果你使用这些libraries,ICNDB库的使用就会变得很简单:
public class JokeFinder {
    private TextView jokeView;
    private Retrofit retrofit;
    private AsyncTask<String, Void, String> task;
    public interface ICNDB {
        @GET("/jokes/random")
        Call<IcndbJoke> getJoke(@Query("firstName") String firstName,
                                            @Query("lastName") String lastName,
                                            @Query("limitTo") String limitTo);
    }
    public JokeFinder() {
        retrofit = new Retrofit.Builder()
            .baseUrl("http://api.icndb.com")
            .addConverterFactory(GsonConverterFactory.create())
            .build();
    }

    public void getJoke(TextView textView, String first, String last) {
        this.textView = textView;
        new JokeTask().execute(first, last);
    }

    private class JokeTask extends AsyncTask<String, Void, String> {
        @Override
        protected String doInBackground(String... params) {
            ICNDB icndb = retrofit.create(ICNDB.class);
            Call<IcndbJoke> icndbJoke = icndb.getJoke(
                    params[0], params[1], "[nerdy]");
            String joke = "";
            try {
                joke = icndbJoke.execute().body().getJoke();
            } catch (IOException e) {
              e.printStackTrace();
            }
            return joke;
        }
        @Override
        protected void onPostExecute(String result) {
            jokeView.setText(result);
        }
    }
}
JokeFinder类使用提供的首字母和结尾字母访问ICNDB网络服务,使用异步任务,这样就可以使得操作在非UI线程运行。getJoke方法包含了一个TextView参数,这样JokeTask完成的使用进行更新。
IncdbJoke任务只是一个简单的POJO匹配JSON响应。响应的格式如下:

JSON很小,所以对于的IcndbJoke类也很简单,如下:
public class IcndbJoke {
    private String type;
    private Joke value;
    public String getJoke() { return value.getJoke();}

    public String getType() { return type; }
    public void setType(String type) { this.type = type; }

    public Joke getValue() { return value; }
    public void setValue(Joke value) { this.value = value;}

    private static class Joke {
        private int ID;
        private String joke;
        private String[] categories;

        public int getId() { return ID; }
        public void setId(int ID) { this.id = ID; }

        public String getJoke() { return joke; }
        public void setJoke(String joke) { this.joke = joke; }

        public String[] getCategories() { return categories; }
        public void setCategories(String[] categories) {
            this.categories = categories;
        }
    }
}
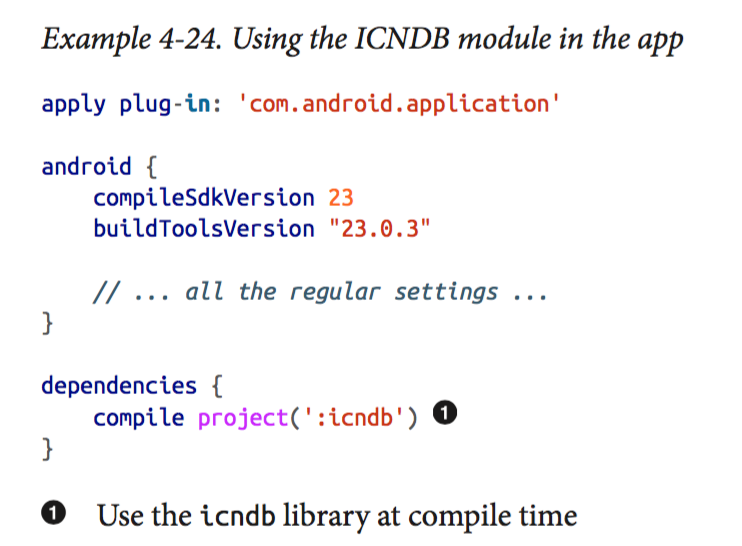
应用通过JokeFinder类使用library。在module的配置文件里面使用project依赖,如下:

使用project方法编译应用,将包含子目录的module作为参数。结果就是Gradle知道在构建app之前先构建ICNDB模块,这样使得在编译时可以使用类。
WelcomActivity在JokeFinder里面调用getJoke方法,提供一个TextView的引用和第一个和最后一个名字。如下:

运行结果如下:

构建进程在icndb/build/outputs/arr目录下生成了debug和release版本:

aar文件可以发布到仓库,供以后的app使用。
总结下:
1、Android library项目是需要Android依赖(Android APU的类或者资源)的java项目
2、Gradle为多项目使用子目录,每个子项目添加到根目录下的settings.gradle文件里面
3、在Android Studio里,使用“New Module”向导里面的“Android Library”创建Android Library项目
4、library项目使用com.android.library插件
5、app配置文件使用 project(":library")依赖来使用library。


