Spring MVC学习笔记——文件上传
1.实现文件上传首先需要导入Apache的包,commons-fileupload-1.2.2.jar和commons-io-2.1.jar
实现上传就在add.jsp文件中修改表单
enctype="multipart/form-data"
和
<tr>
  <td>附件:</td><td><input type="file" name="attach"/></td>
</tr>
完整的add.jsp文件
<%@ page language="java" contentType="text/html; charset=UTF-8"
    pageEncoding="UTF-8"%>
<%@ taglib prefix="sf" uri="http://www.springframework.org/tags/form" %>
<!DOCTYPE html PUBLIC "-//W3C//DTD HTML 4.01 Transitional//EN" "http://www.w3.org/TR/html4/loose.dtd">
<html>
<head>
<meta http-equiv="Content-Type" content="text/html; charset=UTF-8">
<title>Insert title here</title>
</head>
<body>
	<sf:form method="post" modelAttribute="user" enctype="multipart/form-data">
		<table width="700" align="center" border="1">
			<tr>
				<td>用户名:</td><td><sf:input path="username"/><sf:errors path="username"/></td>
			</tr>
			<tr>
				<td>用户密码:</td><td><sf:password path="password"/><sf:errors path="password"/></td>
			</tr>
			<tr>
				<td>用户昵称:</td><td><sf:input path="nickname"/></td>
			</tr>
			<tr>
				<td>用户邮箱:</td><td><sf:input path="email"/><sf:errors path="email"/></td>
			</tr>
			<tr>
				<td>附件:</td><td><input type="file" name="attach"/></td>
			</tr>
			<tr>
			<td colspan="2">
				<input type="submit" value="用户添加"/>
			</td>
			</tr>
		</table>
	</sf:form>

</body>
</html>
2.在user-servlet.xml中配置上传文件
    <!-- 配置上传文件CommonsMultipartResolver -->
    <bean id="multipartResolver" class="org.springframework.web.multipart.commons.CommonsMultipartResolver">
    	<property name="maxUploadSize" value="5000000"></property>
    </bean>
3.在控制器中修改add()方法
	//在具体添加用户的时候,是POST请求,就访问以下代码
	@RequestMapping(value="/add",method=RequestMethod.POST)
	public String add(@Validated User user,BindingResult br,MultipartFile attach,HttpServletRequest req) throws IOException{//一定要紧跟@Validated之后写验证结果类
		if(br.hasErrors()){
			//如果有错误,直接跳转到add视图
			return "user/add";
		}
		String realpath = req.getSession().getServletContext().getRealPath("/resources/upload"); 	//取得会话对象的路径
		System.out.println(realpath);
		File f = new File(realpath+"/"+attach.getOriginalFilename());
		FileUtils.copyInputStreamToFile(attach.getInputStream(), f);
		System.out.println(attach.getName()+","+attach.getOriginalFilename()+","+attach.getContentType());
		users.put(user.getUsername(),user);	//把key和user对象放进Map中
		return "redirect:/user/users";
	}
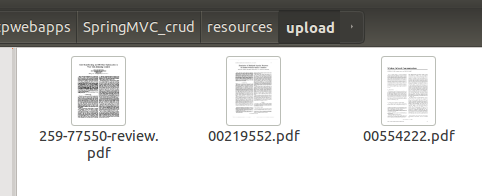
还需要在resources文件夹下面添加upload文件夹

在表单中添加文件上传后如下图

如果要上传多个文件的话,修改add.jsp中的表单,注意是attachs和控制器中的attachs对应
			<tr>
				<td>附件:</td><td><input type="file" name="attachs"/>
				<input type="file" name="attachs"/>
				<input type="file" name="attachs"/></td>
			</tr>
修改控制器中的add()方法,把MultipartFile改为数组,attachs对应,@RequestParam("attachs")必不可少
	//在具体添加用户的时候,是POST请求,就访问以下代码
	@RequestMapping(value="/add",method=RequestMethod.POST)
	public String add(@Validated User user,BindingResult br,@RequestParam("attachs")MultipartFile[] attachs,HttpServletRequest req) throws IOException{//一定要紧跟@Validated之后写验证结果类
		if(br.hasErrors()){
			//如果有错误,直接跳转到add视图
			return "user/add";
		}
		String realpath = req.getSession().getServletContext().getRealPath("/resources/upload"); 	//取得会话对象的路径
		System.out.println(realpath);
		for(MultipartFile attach:attachs){
			if(attach.isEmpty()){		//检查上传多个文件的时候,每个文件是否为空,否则会在copy的时候出错
				continue;
			}
			File f = new File(realpath+"/"+attach.getOriginalFilename());
			FileUtils.copyInputStreamToFile(attach.getInputStream(), f);
			System.out.println(attach.getName()+","+attach.getOriginalFilename()+","+attach.getContentType());
		}
		users.put(user.getUsername(),user);	//把key和user对象放进Map中
		return "redirect:/user/users";
	}


上面添加多个文件的时候,还检测了文件是否为空,为空的话就跳过
			if(attach.isEmpty()){
				continue;
			}
注意:在这个简单的上传文件的例子中,如果上传的文件和已经存在的文件同名的话,会进行覆盖
本文只发表于博客园和tonglin0325的博客,作者:tonglin0325,转载请注明原文链接:https://www.cnblogs.com/tonglin0325/p/6242094.html


