Helm基本操作
Helm是k8s的包管理工具,使用helm可以简化k8s应用部署
而使用了helm之后,helm会提供一个模板,将这些yaml文件作为一个整体进行管理,高效复用,同时方便版本管理
1.安装Helm和配置仓库
https://helm.sh/zh/docs/intro/install/
mac安装helm
brew install helm
ubuntu安装helm
curl https://baltocdn.com/helm/signing.asc | sudo apt-key add -
sudo apt-get install apt-transport-https --yes
echo "deb https://baltocdn.com/helm/stable/debian/ all main" | sudo tee /etc/apt/sources.list.d/helm-stable-debian.list
sudo apt-get update
sudo apt-get install helm
添加helm bitnami源
helm repo add bitnami https://charts.bitnami.com/bitnami
helm repo update
添加helm阿里云源
helm repo remove stable
helm repo add stable https://kubernetes.oss-cn-hangzhou.aliyuncs.com/charts
helm repo update
删除helm源
helm repo remove stable
2.查找chart
helm search repo nginx

NAME                            	CHART VERSION	APP VERSION	DESCRIPTION
bitnami/nginx                   	9.8.0        	1.21.6     	NGINX Open Source is a web server that can be a...
bitnami/nginx-ingress-controller	9.1.7        	1.1.1      	NGINX Ingress Controller is an Ingress controll...
bitnami/nginx-intel             	0.1.4        	0.4.7      	NGINX Open Source for Intel is a lightweight se...
stable/nginx-ingress            	0.9.5        	0.10.2     	An nginx Ingress controller that uses ConfigMap...
stable/nginx-lego               	0.3.1        	           	Chart for nginx-ingress-controller and kube-lego
bitnami/kong                    	5.0.2        	2.7.0      	Kong is a scalable, open source API layer (aka ...
stable/gcloud-endpoints         	0.1.0        	           	Develop, deploy, protect and monitor your APIs ...

helm search repo kubernetes-dashboard
NAME                            CHART VERSION   APP VERSION     DESCRIPTION
stable/kubernetes-dashboard     0.6.0           1.8.3           General-purpose web UI for Kubernetes clusters
3.部署release
其中mynginx是部署后的release名称,bitnami/nginx是chart的名称
helm install mynginx bitnami/nginx

NAME: mynginx
LAST DEPLOYED: Wed Jun  1 17:29:42 2022
NAMESPACE: default
STATUS: deployed
REVISION: 1
TEST SUITE: None
NOTES:
CHART NAME: nginx
CHART VERSION: 9.8.0
APP VERSION: 1.21.6

** Please be patient while the chart is being deployed **

NGINX can be accessed through the following DNS name from within your cluster:

    mynginx.default.svc.cluster.local (port 80)

To access NGINX from outside the cluster, follow the steps below:

1. Get the NGINX URL by running these commands:

  NOTE: It may take a few minutes for the LoadBalancer IP to be available.
        Watch the status with: 'kubectl get svc --namespace default -w mynginx'

    export SERVICE_PORT=$(kubectl get --namespace default -o jsonpath="{.spec.ports[0].port}" services mynginx)
    export SERVICE_IP=$(kubectl get svc --namespace default mynginx -o jsonpath='{.status.loadBalancer.ingress[0].ip}')
    echo "http://${SERVICE_IP}:${SERVICE_PORT}"
如果想卸载release
helm uninstall mynginx -n default

release "mynginx" uninstalled
4.查看部署的release
helm list

NAME   	NAMESPACE	REVISION	UPDATED                             	STATUS  	CHART      	APP VERSION
mynginx	default  	1       	2022-06-01 17:29:42.587416 +0800 CST	deployed	nginx-9.8.0	1.21.6
或者
helm ls -A
NAME                    NAMESPACE       REVISION        UPDATED                                 STATUS          CHART                           APP VERSION
kubernetes-dashboard    kube-system     1               2022-03-01 20:31:13.287929871 +0800 CST deployed        kubernetes-dashboard-0.6.0      1.8.3
查看部署release的状态
helm status mynginx

NAME: mynginx
LAST DEPLOYED: Wed Jun  1 23:28:47 2022
NAMESPACE: default
STATUS: deployed
REVISION: 1
TEST SUITE: None
NOTES:
CHART NAME: nginx
CHART VERSION: 9.8.0
APP VERSION: 1.21.6

** Please be patient while the chart is being deployed **

NGINX can be accessed through the following DNS name from within your cluster:

    mynginx.default.svc.cluster.local (port 80)

To access NGINX from outside the cluster, follow the steps below:

1. Get the NGINX URL by running these commands:

  NOTE: It may take a few minutes for the LoadBalancer IP to be available.
        Watch the status with: 'kubectl get svc --namespace default -w mynginx'

    export SERVICE_PORT=$(kubectl get --namespace default -o jsonpath="{.spec.ports[0].port}" services mynginx)
    export SERVICE_IP=$(kubectl get svc --namespace default mynginx -o jsonpath='{.status.loadBalancer.ingress[0].ip}')
    echo "http://${SERVICE_IP}:${SERVICE_PORT}"
可以看到pod已经启动
kubectl get pod -A
NAMESPACE     NAME                                     READY   STATUS    RESTARTS        AGE
default       mynginx-5998cdd48b-x59wz                 1/1     Running   0               3m29s
查看service
kubectl get svc --namespace default mynginx
NAME      TYPE           CLUSTER-IP     EXTERNAL-IP   PORT(S)        AGE
mynginx   LoadBalancer   10.99.159.33   localhost     80:31833/TCP   3m57s
可以通过访问localhost:80访问nginx的页面

5.更新values.yaml
首先下载chart并解压
helm fetch bitnami/nginx
tar -zxvf nginx-9.8.0.tgz
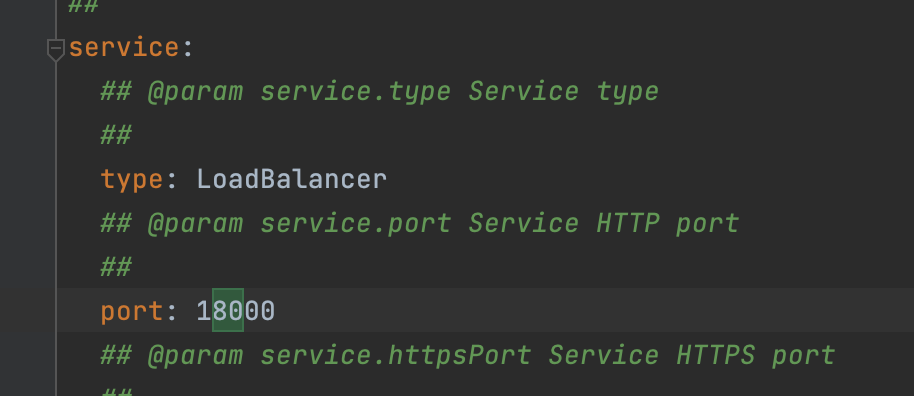
编辑values.yaml,修改nginx HTTP port 80成18000

如果修改了values文件,可以这样更新
helm upgrade mynginx -f ./values.yaml . --namespace default
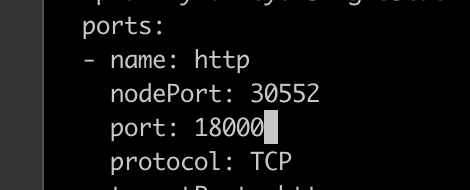
可以看到service端口已经被更新到18000
kubectl get svc -A
NAMESPACE     NAME         TYPE           CLUSTER-IP      EXTERNAL-IP   PORT(S)                  AGE
default       kubernetes   ClusterIP      10.96.0.1       <none>        443/TCP                  17d
default       mynginx      LoadBalancer   10.111.232.86   localhost     18000:32395/TCP          3m58s
或者也可以直接编辑service来修改端口
kubectl edit svc mynginx

6.如何创建chart
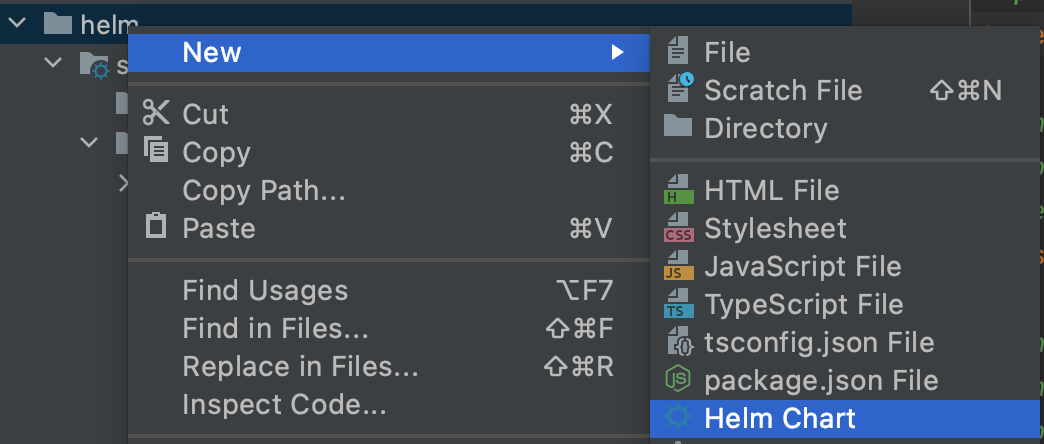
创建chart模板
helm create mychart
或者

创建deployment.yaml
kubectl create deployment mynginx --image=nginx --dry-run=client -o yaml > deployment.yaml

➜  /Users/lintong/coding/helm/mychart/templates $ ls
deployment.yaml
创建pod
kubectl create deployment mynginx --image=nginx
deployment.apps/mynginx created

kubectl get pods -A
NAMESPACE     NAME                                     READY   STATUS    RESTARTS        AGE
default       mynginx-654f8684f8-74dlg                 1/1     Running   0               26s
创建service.yaml
kubectl expose deployment mynginx --port=18000 --target-port=80 --type=NodePort --dry-run=client -o yaml > service.yaml

➜  /Users/lintong/coding/helm/mychart/templates $ ls
deployment.yaml service.yaml
之后就可以安装了mychart了
➜ /Users/lintong/coding/helm $ helm install mynginx mychart/
可以在values.yaml文件中定义变量,然后供deployment.yaml和service.yaml使用,比如
replicas: 1
image: nginx
tag: 1.16
label: nginx
port: 18000
然后修改deployment,service和ingress的模板,以 .Values.变量名称 的方式来使用values.yaml中的变量
deployment.yaml
apiVersion: apps/v1
kind: Deployment
metadata:
  creationTimestamp: null
  labels:
    app: {{ .Values.label }}
  name: {{ .Release.Name }}-deploy
spec:
  replicas: 1
  selector:
    matchLabels:
      app: {{ .Values.label }}
  strategy: {}
  template:
    metadata:
      creationTimestamp: null
      labels:
        app: {{ .Values.label }}
    spec:
      containers:
      - image: {{ .Values.image }}
        name: {{ .Values.label }}
        resources: {}
status: {}
service.yaml
apiVersion: v1
kind: Service
metadata:
  creationTimestamp: null
  labels:
    app: {{ .Values.label }}
  name: {{ .Release.Name }}-svc
spec:
  ports:
  - port: {{ .Values.port }}
    protocol: TCP
    targetPort: 80
  selector:
    app: {{ .Values.label }}
  type: NodePort
status:
  loadBalancer: {}
ingress.yaml
apiVersion: networking.k8s.io/v1
kind: Ingress
metadata:
  name: {{ .Release.Name }}-ingress
  annotations:
    kubernetes.io/ingress.class: nginx-internal
  labels:
    app: {{ .Values.label }}
spec:
  rules:
  - host: {{ .Values.label }}.k8s.xxx.com
    http:
      paths:
      - backend:
          service:
            name: {{ .Release.Name }}-svc
            port:
              number: {{ .Values.port }}
        path: /
        pathType: ImplementationSpecific
验证模板
helm install myweb mychart/ --dry-run

NAME: myweb
LAST DEPLOYED: Thu Jun  2 17:02:29 2022
NAMESPACE: default
STATUS: pending-install
REVISION: 1
TEST SUITE: None
HOOKS:
MANIFEST:
---
# Source: mychart/templates/service.yaml
apiVersion: v1
kind: Service
metadata:
  creationTimestamp: null
  labels:
    app: nginx
  name: myweb-svc
spec:
  ports:
  - port: 18000
    protocol: TCP
    targetPort: 80
  selector:
    app: nginx
  type: NodePort
status:
  loadBalancer: {}
---
# Source: mychart/templates/deployment.yaml
apiVersion: apps/v1
kind: Deployment
metadata:
  creationTimestamp: null
  labels:
    app: nginx
  name: myweb-deploy
spec:
  replicas: 1
  selector:
    matchLabels:
      app: nginx
  strategy: {}
  template:
    metadata:
      creationTimestamp: null
      labels:
        app: nginx
    spec:
      containers:
      - image: nginx
        name: nginx
        resources: {}
status: {}
install release
helm install myweb mychart/
接下来就可以使用下面命令查看域名,来访问服务
kubectl get ingress -n default
如果想要卸载release的话
helm install myweb -n default
其他helm变量用法可以参考:Helm教程
本文只发表于博客园和tonglin0325的博客,作者:tonglin0325,转载请注明原文链接:https://www.cnblogs.com/tonglin0325/p/5285420.html


