Ubuntu16.04安装protobuf
1.proto2
1.protobuf的github地址
https://github.com/protocolbuffers/protobuf
去releases下载需要的版本
https://github.com/protocolbuffers/protobuf/releases
选择2.5.0的版本
https://github.com/protocolbuffers/protobuf/releases/tag/v2.5.0
下载
wget https://github.com/protocolbuffers/protobuf/releases/download/v2.5.0/protobuf-2.5.0.tar.gz
编译安装
./autogen.sh
./configure
make
make check
sudo make install
安装完毕,查看版本
protoc --version
libprotoc 2.5.0
参考google的javatutorial
https://developers.google.com/protocol-buffers/docs/javatutorial
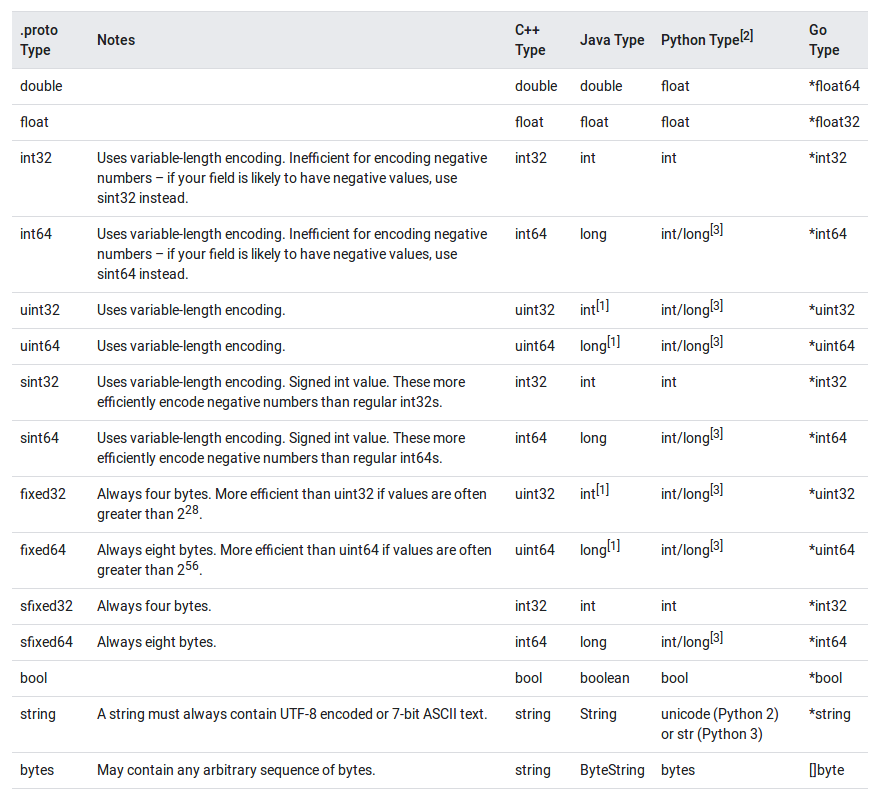
pb的数据类型如下
https://developers.google.com/protocol-buffers/docs/proto

下载文件addressbook.proto
https://github.com/protocolbuffers/protobuf/blob/v2.5.0/examples/addressbook.proto
编译成java代码
protoc -I=./ --java_out=./ ./addressbook.proto # protoc -I=$SRC_DIR --java_out=$DST_DIR $SRC_DIR/addressbook.proto
或者
protoc --java_out=. addressbook.proto
生成文件
tree -L 4
.
├── addressbook.proto
└── com
    └── example
        └── tutorial
            └── AddressBookProtos.java
2.proto3
如果想使用proto3的话,需要添加如下语法,否则编译器会使用proto2
syntax = "proto3";
参考
https://github.com/protocolbuffers/protobuf/blob/main/examples/addressbook.proto
以及
https://docs.confluent.io/platform/current/schema-registry/fundamentals/serdes-develop/serdes-protobuf.html
3.proto定义
message HelloRequest {
  string name = 1; // 转换为json的时候,"name": ""
  optional string name1 = 2; // 转换为json的时候,将没有key
  google.protobuf.StringValue name2 = 3; // 转换为json的时候,"name2": null
}
本文只发表于博客园和tonglin0325的博客,作者:tonglin0325,转载请注明原文链接:https://www.cnblogs.com/tonglin0325/p/13685527.html


