Maven整理笔记のMaven使用实践
我们通过实践来补充Maven构建的生命周期。
第一步:配置POM
接着上一篇Maven使用,我们先创建一个名为helloworld的文件夹,在helloworld目录下创建pom.xml文件,pom.xml文件配置如下:
<?xml version="1.0" encoding="UTF-8"?>
  <project xmlns="http://maven.apache.org/POM/4.0.0"
        xmlns:xsi="http://www.w3.org/2001/XMLSchema-instance"
        xsi:schemaLocation="http://maven.apache.org/POM/4.0.0
                                    http://maven.apache.org/maven-4_0_0.xsd">
                                    <modelVersion>4.0.0</modelVersion>
                                    <groupId>com.j1.hhl</groupId>
                                    <artifactId>helloworld</artifactId>
                                    <version>0.0.1-SNAPSHOT</version>
                                    <name>MAVEN HELLO WORLD PROJECT</name>
   </project>
第二步:编写Maven主代码
在helloworld目录下,创建src/main/java/com/j1/hhl/helloworld/目录,在该目录下,创建HelloWorld.java,并编写如下代码:
package com.j1.hhl.helloworld;
public class HelloWorld{
          public String sayHello(){
                    return "Hello Maven";
          }
          public static void main(String [] args){
                    System.out.println(new HelloWorld().sayHello());
          }
}
代码编写完毕后,使用Maven进行编译,在项目根目录下运行mvn clean compile会得到如图所示输出:

Clean告诉Maven清理输出目录target/,compile告诉Maven编译项目主代码,从输出中看到Maven首先执行了clean:clean任务,删除target/目录。默认情况下,Maven构建的所有输出都在target/目录中;接着执行resources:resources任务(未定义项目资源,暂且略过);最后执行compile:compile任务,将项目主代码编译至target/classer目录中,我们可以在target\classes\com\j1\hhl\helloworld中看到Helloworld编译文件。上面提到的clean:clean、clean:clean、compile:compile对应了一些Maven插件及插件目标。
第三步:编写Maven测试代码
在helloworld目录下,创建src/test/java/com/j1/hhl/helloworld/目录,在该目录下,创建HelloWorldTest.java。代码如下:
package com.j1.hhl.helloworld;
import static org.junit.Assert.assertEquals;
import org.junit.Test;
public class HelloWorldTest{
     @Test
     public void testSayHello(){
              HelloWorld helloWorld = new HelloWorld();
              String result = helloWorld.sayHello();
              assertEquals("Hello Maven",result);
     }
}
在代码中我们看到,在测试类中用到的是junit单元测试,所以在进行测试这一步骤前,我们需要引入junit第三方java 类库。在pom配置如下:


<?xml version="1.0"?>
<project xsi:schemaLocation="http://maven.apache.org/POM/4.0.0 http://maven.apache.org/xsd/maven-4.0.0.xsd"
  xmlns="http://maven.apache.org/POM/4.0.0" xmlns:xsi="http://www.w3.org/2001/XMLSchema-instance">
  <modelVersion>4.0.0</modelVersion>
  <groupId>com.j1.hhl</groupId>
  <artifactId>helloworld</artifactId>
  <version>0.0.1-SNAPSHOT</version>
  <name>Maven Hello World Project</name>
  <dependencies>
       <dependency>
            <groupId>junit</groupId>
            <artifactId>junit</artifactId>
            <version>4.7</version>
            <scope>test</scope>
       </dependency>
  </dependencies>
</project>
配置完成之后,在项目根目录下运行mvn clean test命令。结果如图所示:
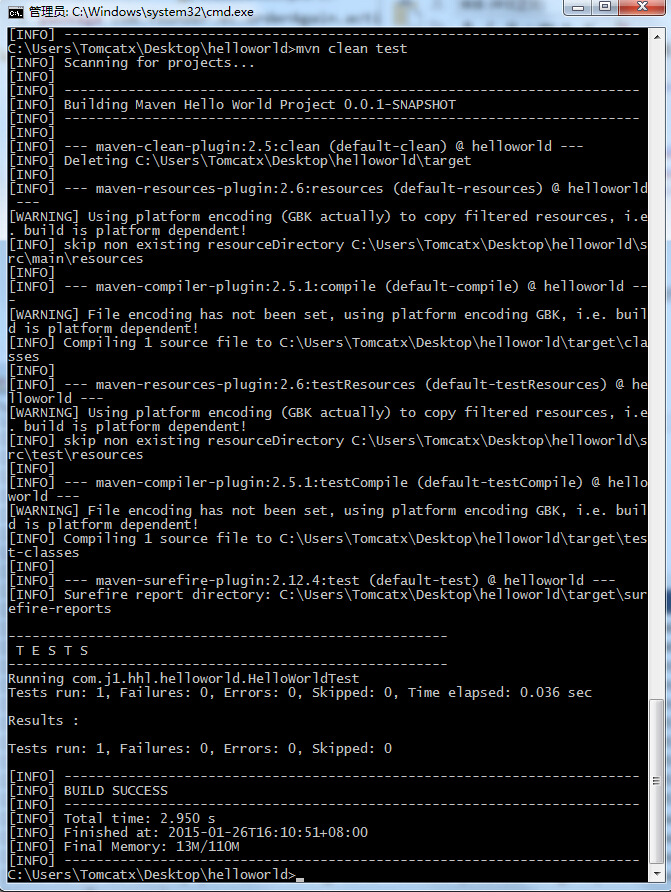
同样也经过clean:clean\resources:resources\compile:compile\test:test这几个步骤,测试代码在编译之后会在target\test-classes生成二进制文件,测试运行完成之后,会在surefire-reports下生成测试报告。
第四步:打包
编译测试完之后,就是打包,在项目根目录下运行mvn clean package命令,结果如图所示:
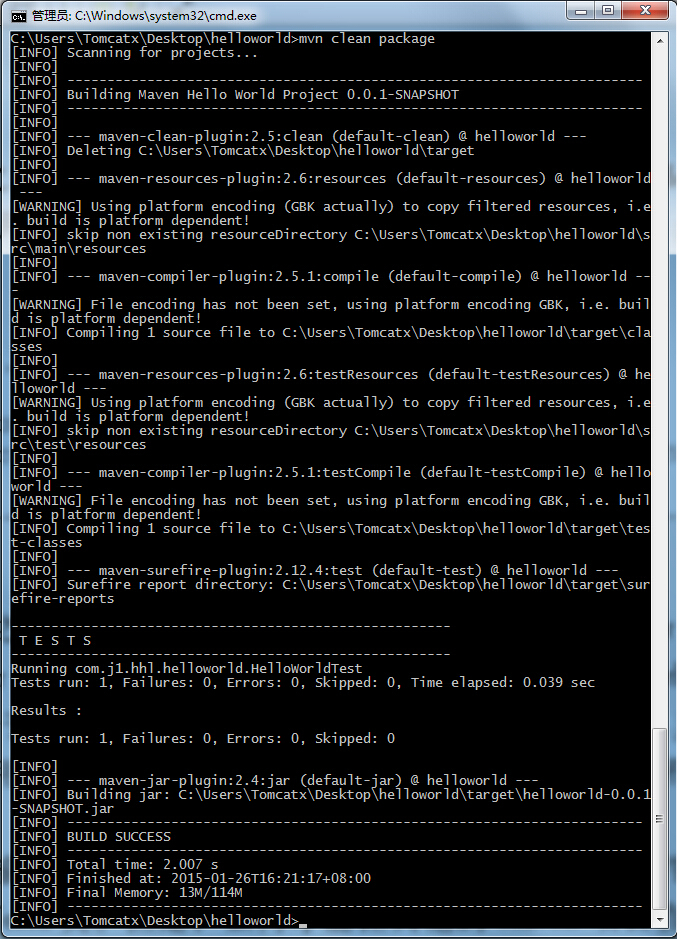
同样也经过clean:clean\resources:resources\compile:compile\test:test\jar:jar这几个步骤。
运行完之后,我们可以在target/输出目录中,看到一个依据pom.xml文件中配置artifactId-version规则的jar包:helloworld-0.0.1-SNAPSHOT.jar。同时在target中多出一个maven-archive文件夹,文件夹下放置的是pom属性文件。
第五步:Maven安装
至此我们的构建生命周期已经基本结束,如果有需要的话,我们可以复制这个jar文件到其他项目的Classpath中从而使用HelloWorld类。但是,如何才能让其他的Maven项目直接引用这个jar包呢?还需要一个安装步骤,即运行命令mvn clean install,结果如图所示:
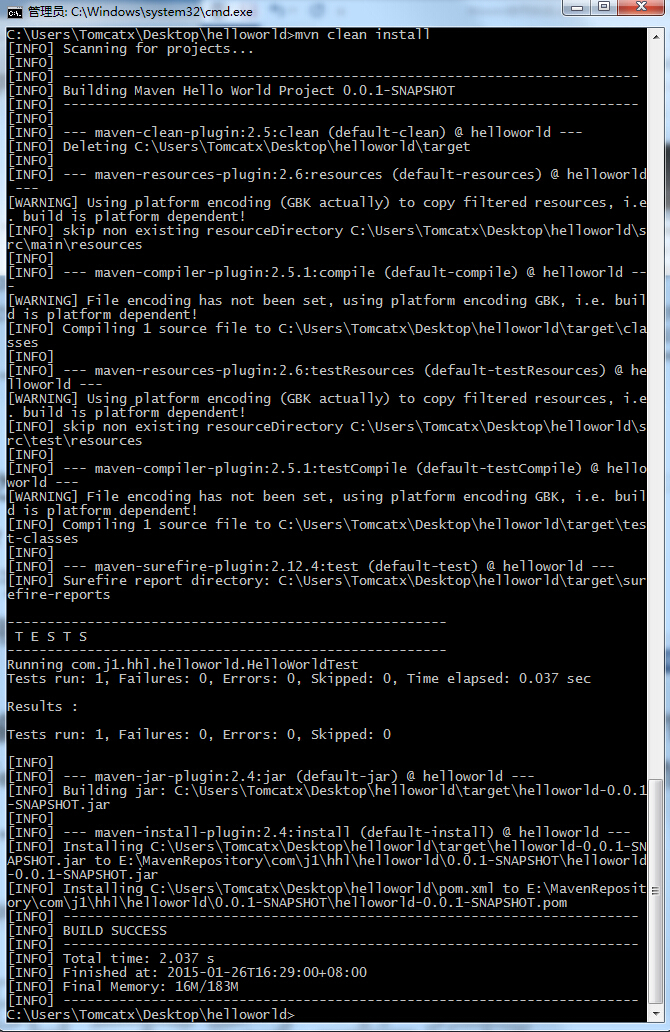
同样也经过clean:clean\resources:resources\compile:compile\test:test\jar:jar\install:install这几个步骤。
运行成功之后,我们可以在Maven本地仓库中找到helloworld-0.0.1-SNAPSHOT.jar和helloworld-0.0.1-SNAPSHOT.pom,我们可以复制pom文件的配置到自身Maven项目pom中,如此即可调用HelloWorld类。
当所有完成之后, 我们可以运行helloworld-0.0.1-SNAPSHOT.jar这个文件,具体操作是运行java –jar target\helloworld-0.0.1-SNAPSHOT.jar 结果如图所示:

包中没有主清单属性,为什么?
原因:我们可以利用反编译软件打开刚刚生成的jar包,继续打开包中的META-INF下的MANIFEST.MF文件,发现没有Main-Class: com.j1.hhl.helloworld.HelloWorld这一行。为什么没有这一行:那是因为HelloWorld存在main方法。在不删除main方法的前提下,解决办法如下:
在POM中修改配置如下:
<?xml version="1.0"?>
<project
    xsi:schemaLocation="http://maven.apache.org/POM/4.0.0 http://maven.apache.org/xsd/maven-4.0.0.xsd"
    xmlns="http://maven.apache.org/POM/4.0.0" xmlns:xsi="http://www.w3.org/2001/XMLSchema-instance">

    <modelVersion>4.0.0</modelVersion>
    <groupId>com.j1.hhl</groupId>
    <artifactId>helloworld</artifactId>
    <version>0.0.1-SNAPSHOT</version>
    <name>Maven Hello World Project</name>
    <dependencies>
        <dependency>
            <groupId>junit</groupId>
            <artifactId>junit</artifactId>
            <version>4.7</version>
            <scope>test</scope>
        </dependency>
    </dependencies>
    <build>
        <plugins>
            <plugin>
                <groupId>org.apache.maven.plugins</groupId>
                <artifactId>maven-shade-plugin</artifactId>
                <version>1.2.1</version>
                <executions>
                    <execution>
                        <phase>package</phase>
                        <goals>
                            <goal>
                                shade
                            </goal>
                        </goals>
                        <configuration>
                            <transformers>
                                <transformer implementation="org.apache.maven.plugins.shade.resource.ManifestResourceTransformer">
                                    <mainClass>
                                        com.j1.hhl.helloworld.HelloWorld
                                    </mainClass>
                                </transformer>
                            </transformers>
                        </configuration>
                    </execution>
                </executions>
            </plugin>
        </plugins>
    </build>
</project>
重新运行mvn clean install,此时我们会发现在输出目录target中会多出一个名为original-helloworld-0.0.1-SNAPSHOT.jar文件,从命名可以看出这是一个源文件,相对于helloworld-0.0.1-SNAPSHOT.jar的源文件,可运行的自然是helloworld-0.0.1-SNAPSHOT.jar,我们可以运行一下:


 浙公网安备 33010602011771号