Centos7安装Hive2.3
准备
1、hadoop已部署(若没有可以参考:Centos7安装Hadoop2.7),集群情况如下:
| hostname | IP地址 | 部署规划 |
| node1 | 172.20.0.4 | NameNode、DataNode |
| node2 | 172.20.0.5 | DataNode |
| node3 | 172.20.0.6 | DataNode |
2、官网下载安装包:apache-hive-2.3.6-bin.tar.gz(推荐去清华大学或中科大的开源镜像站)。
安装
hive只需要部署在主节点node1上,解压apache-hive-2.3.6-bin.tar.gz到/mydata;
然后将 /mydata/apache-hive-2.3.6-bin 重命名为 /mydata/hive-2.3.6。
配置环境变量:
export HIVE_HOME=/mydata/hive-2.3.6
export PATH=${HIVE_HOME}/bin:$PATH
hive是通过环境变量HADOOP_HOME寻找hadoop集群的。
$HIVE_HOME/conf/hive-default.xml.template 中包含了几乎所有hive的默认配置,修改时需要在同目录新建一个hive-site.xml,然后从default中将需要修改的配置项拷贝过来进行修改即可。
元数据
hive必须要一个关系型数据库来保存元数据(metastore),默认是使用自带的derby,但这个是单会话形式,性能非常有限,没有实用价值。
所以这里直接换成常用的mysql(若没有可以参考:Centos7安装使用Mysql),在mysql中增加数据库和用户:
MariaDB> create database hive_metastore;
MariaDB> create user 'hive'@'%' identified by 'hpwd';
MariaDB> grant all on hive_metastore.* to 'hive'@'%';
在 $HIVE_HOME/conf/hive-site.xml 中配置mysql连接:
<configuration>
  <property>
    <name>javax.jdo.option.ConnectionURL</name>
    <value>jdbc:mysql://node1:3306/hive_metastore</value>
  </property>
  <property>
    <name>javax.jdo.option.ConnectionDriverName</name>
    <value>com.mysql.jdbc.Driver</value>
  </property>
  <property>
    <name>javax.jdo.option.ConnectionUserName</name>
    <value>hive</value>
  </property>
  <property>
    <name>javax.jdo.option.ConnectionPassword</name>
    <value>hpwd</value>
  </property>
</configuration>
通过中科大的源下载连接myql的jar包(中科大源:http://mirrors.ustc.edu.cn/mysql-ftp/Downloads/Connector-J/mysql-connector-java-5.1.48.zip),解压后将其中的:
mysql-connector-java-5.1.48.jar 拷贝到 $HIVE_HOME/lib。
然后在命令行初始化元数据库(看到 schemaTool completed 表示成功,也可以通过mysql看到hive_metastore中出现许多表):
shell> schematool -dbType mysql -initSchema
存储
hive真正用来分析统计的数据是保存在hdfs上。
官方教程要求使用下面的命令创建对应目录并赋予权限,但由于这边的hadoop和hive都是用的root用户,所以可以省略:
shell> hdfs dfs -mkdir       /tmp
shell> hdfs dfs -mkdir       /user/hive/warehouse
shell> hdfs dfs -chmod g+w   /tmp
shell> hdfs dfs -chmod g+w   /user/hive/warehouse
这两个目录(强调:这是hdfs上的)可以在hive-site.xml中修改下面两项:
hive.exec.scratchdir
hive.metastore.warehouse.dir
不过,没啥特殊要求不建议修改,因为还有挺多其他数据会写到/tmp/hive或/user/hive,要改当然最好都改;于是还是选择都不改吧,默认的路径也没啥不好。
另外,有两个本地的目录配置可以考虑改掉:
<property>
  <name>hive.exec.local.scratchdir</name>
  <value>/mydata/tmp/hive</value>
</property>
<property>
  <name>hive.querylog.location</name>
  <value>/mydata/logs/hive</value>
</property>
hive shell
命令行直接运行hive即可进入hive shell:
shell> hive
hive> create database xyz;
hive> show databases;
hive> use xyz;
hive> create table x (id int, name string);
hive> show tables;
hive> insert into x values(1, 'hive');
hive> insert into x values(3, 'hbase');
hive> insert into x values(2, 'hadoop');
hive> select * from x;
这些命令都不需要解释,与mysql可以说一模一样,表xyz.x的数据存储在hdfs上的 /user/hive/warehouse/xyz.db/x :

命令虽一样,但肯定可以发现执行insert时明显是完成了一个mapreduce的job;
没错,这就是hive的作用所在,它可以将sql语句转换为mapreduce的job,一条sql就可以完成几十上百行mapreduce代码的工作。
hiveserver2
上面是通过hive的命令进行操作的,而实际中肯定是要通过程序连接,提供这个功能的是hiveserver2。
在hive-site.xml中添加下面的配置:
<property>
  <name>hive.server2.authentication</name>
  <value>NOSASL</value>
</property>
<property>
  <name>hive.server2.enable.doAs</name>
  <value>false</value>
</property>
<property>
  <name>hive.server2.logging.operation.log.location</name>
  <value>/mydata/logs/hive/hiveserver2</value>
</property>
配置项 |
说明 |
hive.server2.authentication |
设置为NOSASL表示不进行身份验证;实际中当然要用验证,常用的是LDAP和KERBEROS,那就需要另开篇总结了 |
hive.server2.enable.doAs |
关闭用户代理,这个代理需要hadoop那边也开启才行 |
hive.server2.logging.operation.log.location |
日志路径 |
命令行直接运行hiveserver2即可启动,但这样会阻塞在前端,所以要启动到后台(停止用:kill -9 [pid]):
shell> nohup hiveserver2 > /mydata/logs/hive/hiveserver2/std.out 2>&1 &
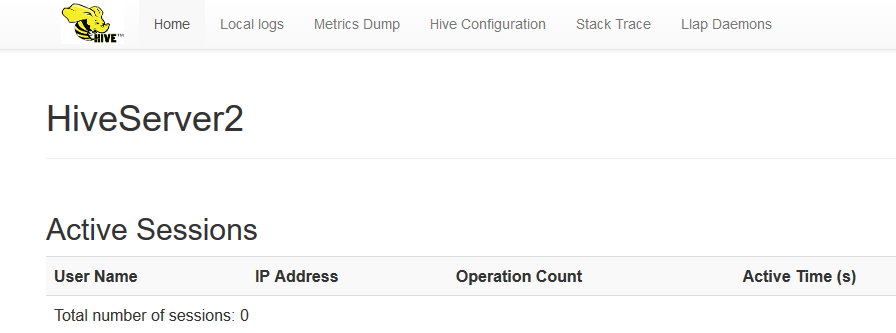
浏览器访问 http://node1:10002/ 可以看到一些hiveserver2服务的信息:

hive还自带了beeline工具作为客户端(通过jdbc)连接hiveserver2:
shell> beeline -u jdbc:hive2://node1:10000
beeline> show databaes;
下面是一段是根据官方示例进行了少许改动的Python代码:
shell> yum install gcc gcc-c++ make git python2-pip python-devel cyrus-sasl-devel -y  # 若缺少组件,无非是这里面的某个或某几个,根据报错信息判断,或直接全装
shell> pip install pyhs2  # Python操作hiveserver2的库
shell> vim t.py
    #!/bin/bash
    import pyhs2

    with pyhs2.connect(
        host='node1',
        port=10000,
        authMechanism="NOSASL",
        database='xyz') as conn:
        with conn.cursor() as cur:
            print cur.getDatabases()
            cur.execute("select * from x")
            print cur.getSchema()
            for i in cur.fetch():
                print i
shell> python t.py
    [['default', ''], ['xyz', '']]
    [{'comment': None, 'columnName': 'x.id', 'type': 'INT_TYPE'}, {'comment': None, 'columnName': 'x.name', 'type': 'STRING_TYPE'}]
    [1, 'hive']
    [2, 'hadoop']
    [3, 'hbase']
over

