nodejs学习(四)GET/POST请求
一.获取GET请求内容
由于GET请求直接被嵌入在路径中,URL是完整的请求路径,包括了?后面的部分,因此你可以手动解析后面的内容作为GET请求的参数。
node.js 中 url 模块中的 parse 函数提供了这个功能。
var http = require('http');
var url = require('url');
var util = require('util');

http.createServer(function(req, res){
    res.writeHead(200, {'Content-Type': 'text/plain; charset=utf-8'});
    res.end(util.inspect(url.parse(req.url, true)));
}).listen(3000);
在浏览器中访问 http://127.0.0.1:8888/index?a=b&c=d然后查看返回结果:
Url {
  protocol: null,
  slashes: null,
  auth: null,
  host: null,
  port: null,
  hostname: null,
  hash: null,
  search: '?a=b&c=d',
  query: [Object: null prototype] { a: 'b', c: 'd' },
  pathname: '/index',
  path: '/index?a=b&c=d',
  href: '/index?a=b&c=d'
}
二.获取 URL 的参数
我们可以使用 url.parse 方法来解析 URL 中的参数,代码如下:
//

var http = require('http');
var url = require('url');
var util = require('util');

http.createServer(function(req, res){
    res.writeHead(200, {'Content-Type': 'text/plain;;charset=utf-8'});


    // 解析 url 参数
    var params = url.parse(req.url, true).query;
    res.write("网站名:" + params.name);
    res.write("\n");
    res.write("网站 URL:" + params.url);
    res.end();

}).listen(8888);
在浏览器中访问 http://127.0.0.1:8888/index?name=tom&url=madou.com然后查看返回结果:
网站名:tom
网站 URL:madou.com
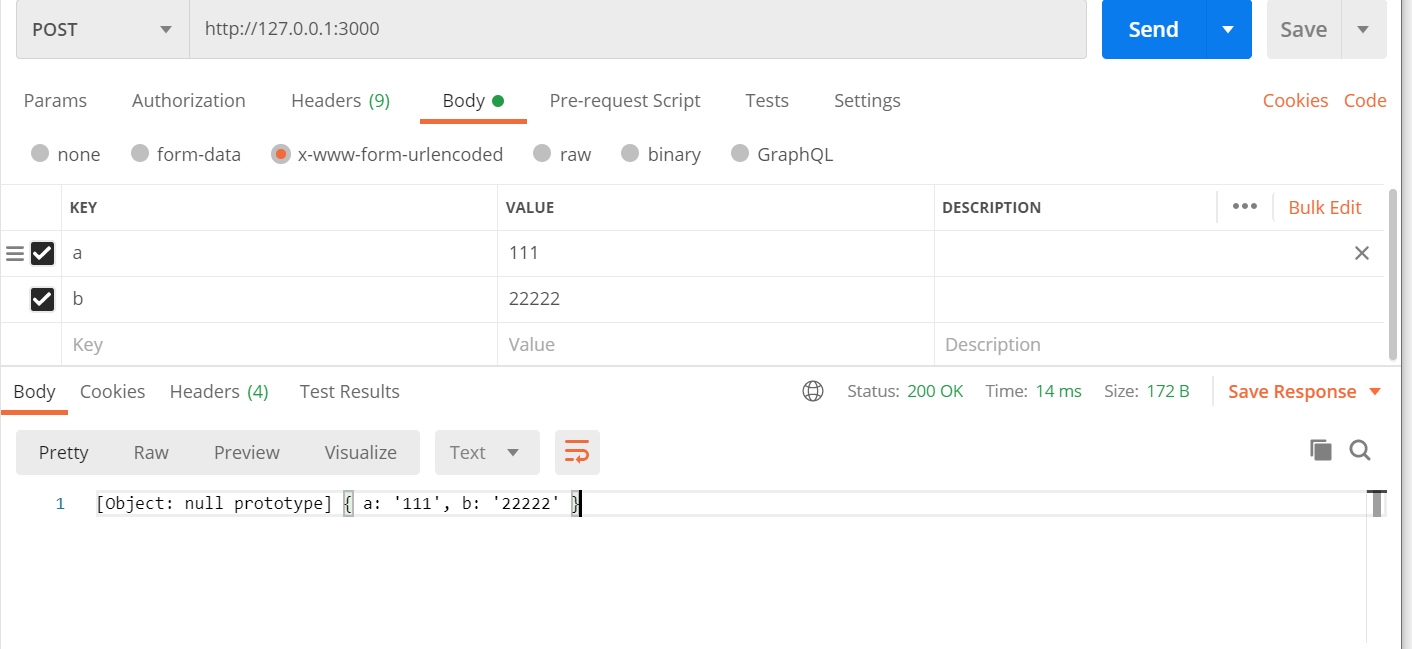
二.获取 POST 请求内容
POST 请求的内容全部的都在请求体中,http.ServerRequest 并没有一个属性内容为请求体,原因是等待请求体传输可能是一件耗时的工作。
比如上传文件,而很多时候我们可能并不需要理会请求体的内容,恶意的POST请求会大大消耗服务器的资源,所以 node.js 默认是不会解析请求体的,当你需要的时候,需要手动来做。
var http = require('http');
var querystring = require('querystring');
var util = require('util');

http.createServer(function(req, res){
    // 定义了一个post变量,用于暂存请求体的信息
    var post = '';

    // 通过req的data事件监听函数,每当接受到请求体的数据,就累加到post变量中
    req.on('data', function(chunk){
        post += chunk;
    });

    // 在end事件触发后,通过querystring.parse将post解析为真正的POST请求格式,然后向客户端返回。
    req.on('end', function(){
        post = querystring.parse(post);
        res.end(util.inspect(post));
    });
}).listen(3000);
三.解析url
var url = require("url");
var querystring = require("querystring");

string = "http://localhost:8888/start?foo=bar&hello=world";


//使用url模块
console.log("使用url模块。。。。")
console.log("query:" + " " + url.parse(string).query)
console.log("path:" + " " + url.parse(string).path)
console.log("pathname:" + " " + url.parse(string).pathname)


//使用querystring模块
console.log("使用querystring模块。。。。。。")
console.log(querystring.parse(string))


//使用全局变量URL
console.log("URL模块。。。。。。。。。。。。。。。。")
var myUrl = new URL(string);
console.log(myUrl)
console.log("myUrl_pathName:" + " " + myUrl.pathname)
console.log("foo:" + " " + myUrl.searchParams.get("foo"))
console.log("hello:" + " " + myUrl.searchParams.get("hello"))

 浙公网安备 33010602011771号