基于vue-cli搭建路飞
一.项目搭建
1. 首先进入到项目要保存的文件夹,然后执行命令如下命令初始化项目
vue init webpack lufei
2. 命令执行后,除了第一个填一下项目名称,其他的一路选no,这样建立的项目才是干净的,后边需要什么我们再临时安装就行
3.在第一步,第二部执行成功后,会在目录文件夹生成lufei目录,然后我们进入lufei这个目录,执行一下命令:
npm run dev
如果看到以下效果那就说明创建项目成功了.

可以打开浏览器,输入ip地址进行查看,会有一个欢迎页面
二.初始化项目
项目文件默认的是一个hello world页面,我们需要把这一部分全部清楚掉:
图中框选的部分,原有的和hello world 相关的全部别清除掉了(没来得及及时记录,自己看得懂就行)
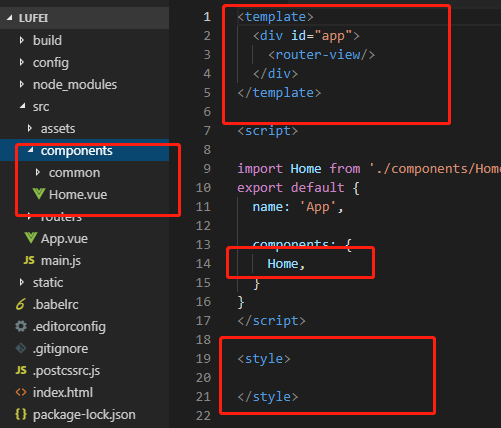
当你在访问那个网址,就应该看到的是一个空白页面
三.安装路由
1.下载路由组件
执行命令:
npm install vue-router --save

2.配置路由
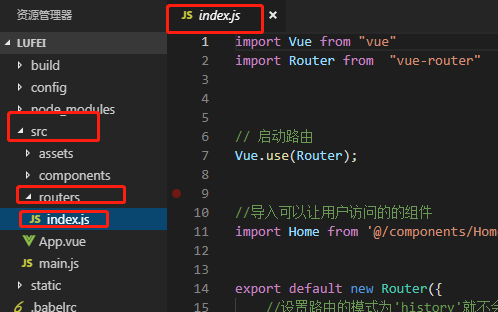
在src目录下创建routers路由目录,在routers目录下创建index.js路由文件
import Vue from "vue"
import Router from  "vue-router"


// 启动路由
Vue.use(Router);


//导入可以让用户访问的的组件
import Home from '@/components/Home'


export default new Router({
    //设置路由的模式为'history'就不会出现'#',但是,同时也不会帮我们补全'/'
    //z注意下面的routes不带'r'
    mode:"history",
    routes: [
        //路由列表
        {
            path:"/",
            name:"Home",
            component:Home,
        },


    ]
})
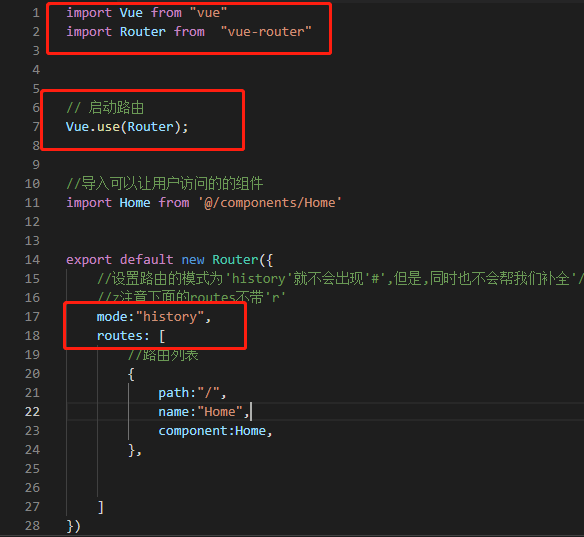
3.注册路由信息
打开main.js文件,把router对象注册到vue中.
// The Vue build version to load with the `import` command
// (runtime-only or standalone) has been set in webpack.base.conf with an alias.
import Vue from 'vue'
import App from './App'
import router from './routers/index';
//导入路由文件
import ElementUI from 'element-ui';
import 'element-ui/lib/theme-chalk/index.css';
//导入element插件以及css样式并启用


Vue.use(ElementUI)
Vue.config.productionTip = false

/* eslint-disable no-new */
new Vue({
  el: '#app',
  //注册路由组件
  router,
  components: { App },
  template: '<App/>'
})
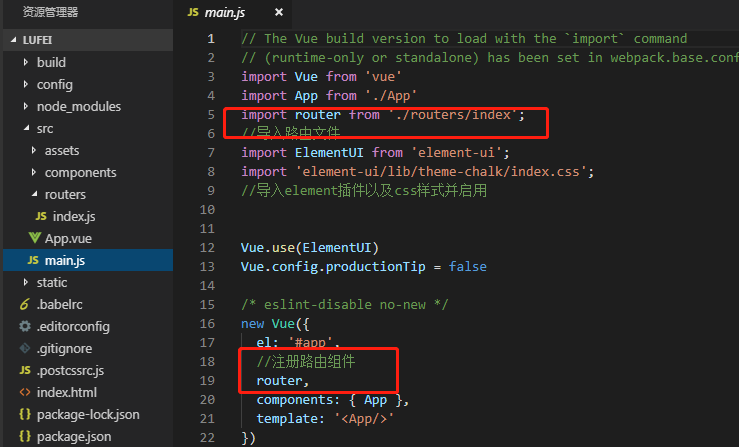
4.在视图中显示路由对应的内容
在App.vue组件中,添加显示路由对应的内容。
<template>
  <div id="app">
    <router-view/>
  </div>
</template>

<script>

import Home from './components/Home'
export default {
  name: 'App',

  components: {
    Home,
  }
}
</script>

<style>

</style>
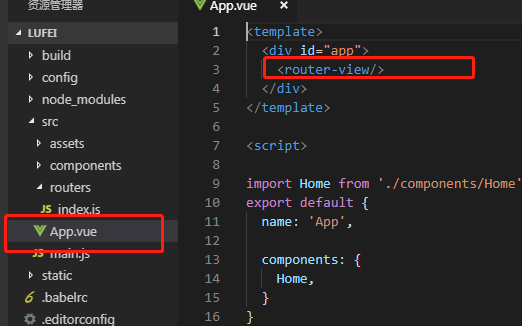
四.引入ElementUI组件
对于前端页面布局,我们可以使用一些开源的UI框架来配合开发,Vue开发前端项目中,
比较常用的就是ElementUI了。
npm install element-ui --save

2.配置element到项目中
在main.js中导入ElementUI,并调用。

// The Vue build version to load with the `import` command
// (runtime-only or standalone) has been set in webpack.base.conf with an alias.
import Vue from 'vue'
import App from './App'
import router from './routers/index';
//导入路由文件
import ElementUI from 'element-ui';
import 'element-ui/lib/theme-chalk/index.css';
//导入element插件以及css样式并启用


Vue.use(ElementUI)
Vue.config.productionTip = false

/* eslint-disable no-new */
new Vue({
  el: '#app',
  //注册路由组件
  router,
  components: { App },
  template: '<App/>'
})
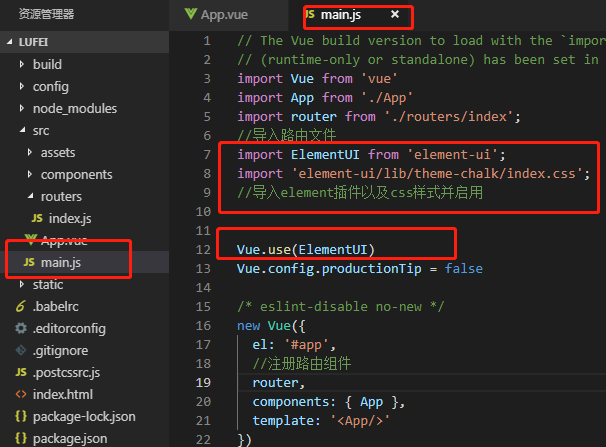
成功引入了ElementUI以后,接下来我们就可以开始进入前端页面开发,首先是首页。



【推荐】国内首个AI IDE,深度理解中文开发场景,立即下载体验Trae
【推荐】编程新体验,更懂你的AI,立即体验豆包MarsCode编程助手
【推荐】抖音旗下AI助手豆包,你的智能百科全书,全免费不限次数
【推荐】轻量又高性能的 SSH 工具 IShell:AI 加持,快人一步
· AI与.NET技术实操系列:基于图像分类模型对图像进行分类
· go语言实现终端里的倒计时
· 如何编写易于单元测试的代码
· 10年+ .NET Coder 心语,封装的思维:从隐藏、稳定开始理解其本质意义
· .NET Core 中如何实现缓存的预热?
· 分享一个免费、快速、无限量使用的满血 DeepSeek R1 模型,支持深度思考和联网搜索!
· 25岁的心里话
· 基于 Docker 搭建 FRP 内网穿透开源项目(很简单哒)
· ollama系列01:轻松3步本地部署deepseek,普通电脑可用
· 闲置电脑爆改个人服务器(超详细) #公网映射 #Vmware虚拟网络编辑器