“MVC+Nhibernate+Jquery-EasyUI” 信息发布系统 第三篇(登录窗口的实现以及如何保存登录者的信息)
一、前言:
1、再看这篇文章的时候,您是否已经完成前两篇介绍的文章里的功能了?(Tabs页的添加,Tabs页右键的关闭,主题的更换)


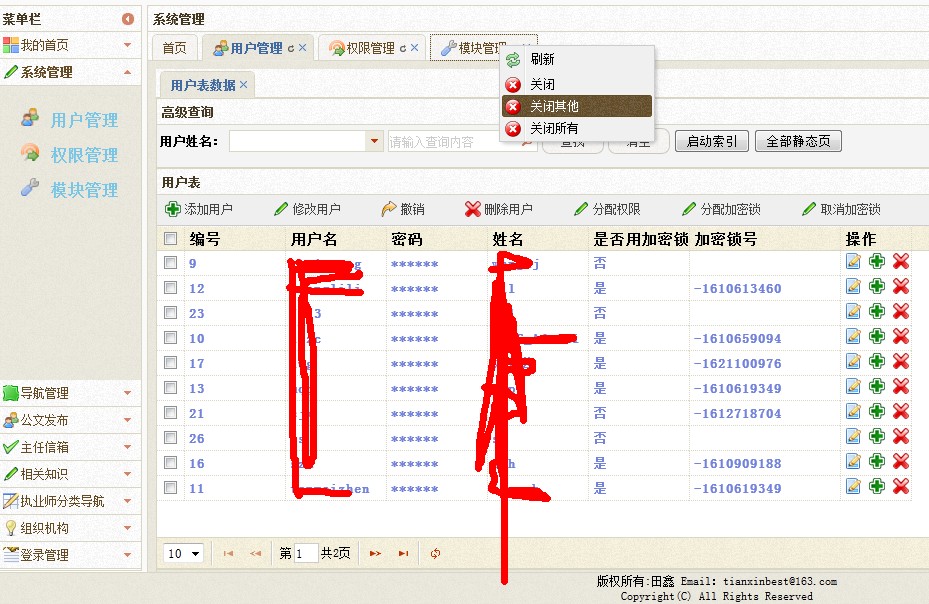
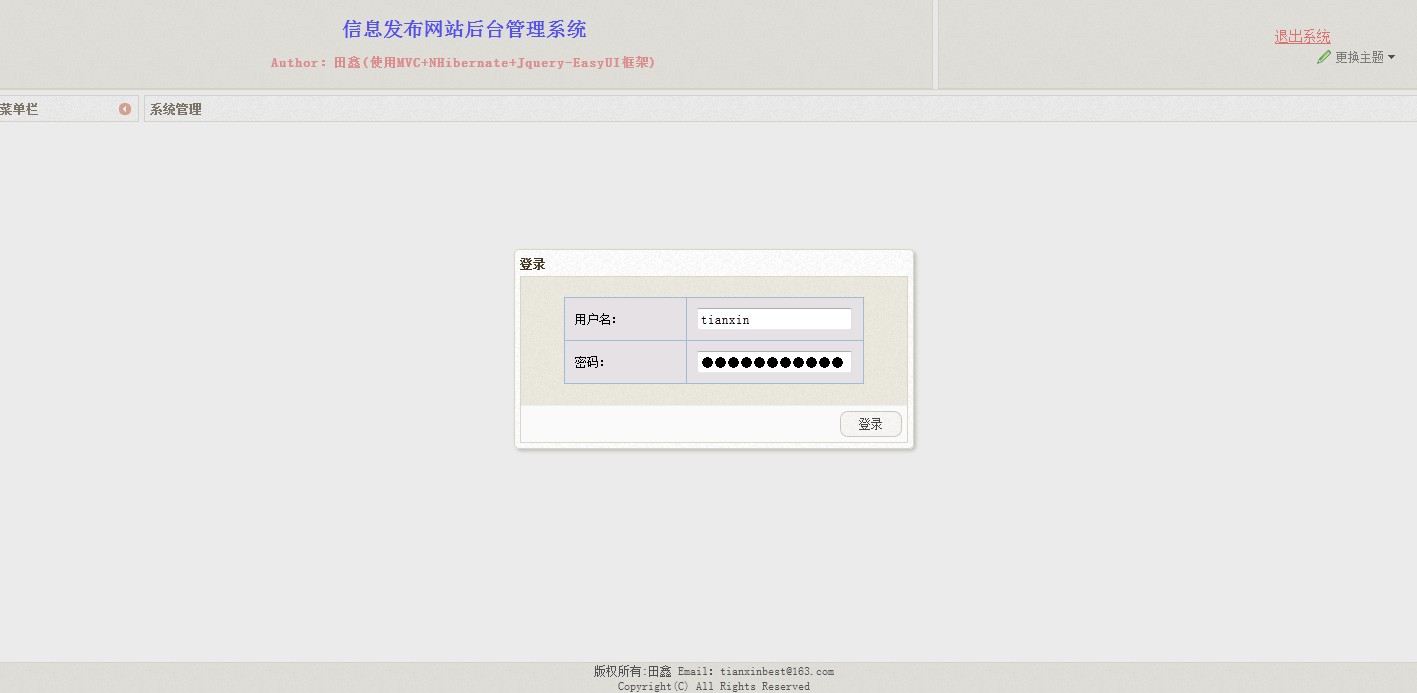
2、今天来说说登录窗口吧,看截图:是不是在进入的时候左边的菜单栏和中间的Tabs页没有内容(安全起见,必须得这样,只有登录成功后页面才能显示)。
而且还得是后面的内容是不能选择的,用过Jquery-EasyUI的朋友都知道,.dialog中有个Modal设置为True就行。

二、登录窗口功能如何实现?
1、还记的第二篇中说到MVC3中Shared文件夹下边的_houai.cshtml中有个@RenderBody,这个是布局页中必须得有一个,说白了就是一个“坑”,放内容页的地方。
2、所以在进入系统后台的时候,我把这个登录窗口就嵌套在这个布局页当中。文件位置如下:

3、在Index中记得引用布局页:Layout = "~/Areas/houtai/Views/Shared/_houtai.cshtml";
4、Jquery-EasyUI中的Dialog本身也是个DIV,怎么让他渲染成一个Dialog,有两种方式,我用的是写Jquery的方式。
(1)刚进入页面,先让输入用户名的地方进行设置焦点。
(2)AJAX的方式去验证用户名和密码。如果登录成功后,leftTreeLimits()方法判断此用户拥有什么样的权限!该显示哪些内容!这时Dialog窗口应该得关闭。
<script type="text/javascript">
    var dialogID;
    $(function () {
           $("#name1").focus();
            dialogID = $("#dlg").dialog({
            closable: false,
            modal: true,
            buttons: [
               {
                text: "登录",
                handler: function () {
                $.post(
                "/Account/LogIn",
                {
                  "UserName":$("#name1").val(),
                  "password":$("#pwdd").val(),
                },
               function(d)
                {
                if (d=="yes") {
                  //菜单项判断此用户所拥有的功能!
                  leftTreeLimits();
                  $("#dlg").dialog('close');
                  $.messager.show({msg:"登录成功!",title:"提示"});
                  $("#bodyColor").css("display", "");
                  $("#bodyColor1").css("display", "");
                }
                else  if (d=="no") {
                 $.messager.alert("提示","用户名和密码错误!");
                  return;
                 }
                }
               );
              }
            }]

        });

    });
</script>
(3)、body部分当然得有个表单,这个DIV用上面Jquery的方式渲染成一个Dialog,Controller部分,只返回一个View()就行。
@using (Html.BeginForm("", "",FormMethod.Post,new{id="Login"}))
{
  <div id="dlg"  title="登录" style="width: 400px; height: 200px; padding: 10px">
    <table id="list" style="background-color:#e5e1e5;">
     <tr><td>用户名:</td><td><input id="name1" name="name" type="text" class="easyui-validatebox" value="tianxin"  required="true" missingMessage="请输入用户名" /></td></tr>
     <tr><td>密码:</td><td><input id="pwdd" name="password" type="password" class="easyui-validatebox"  required="true" width="10px" missingMessage="请输入密码"/></td></tr>
    </table>
  </div>
}
(4)、通过第(2)个Jquery的代码很容易看出来进入的是哪个页面去判断的用户名和密码,/Account/Login。在这个Action里也得做这几个功能:
1、判断用户名和密码是否正确。
2、窗体的身份验证和登录成功后加入到Cookie中。
3、Model类使用的就是Account中的默认的LogOnModel。
4、FormsAuthenticationTicket第六个重载(user.ID),可以保存这个数据,在Global.asax.cs取到这个数据之后还有惊喜!!(稍后写出来)
        private static readonly string UserNameSessionKey = "Name";
        public ActionResult LogIn()
        {
            HttpCookie c = HttpContext.Request.Cookies[UserNameSessionKey];
            LogOnModel model = new LogOnModel { UserName = c != null ? c.Value : "" };
            return View(model);
        }
        [HttpPost]
        public ActionResult LogIn(LogOnModel model, string returnUrl)
        {
            if (model == null)
            {
                var m = TempData["User"] as LogOnModel;
                if (m != null)
                {
                    model = m;
                }
            }
            if (ModelState.IsValid == false) return View(model);
            var user = userBLL.GetByNameAndPassword(model.UserName.Trim(), model.Password.Trim());
            if (user==null)
            {
                return Content("no");
            }

            {
                HttpCookie c = new HttpCookie(UserNameSessionKey,model.UserName);
                HttpContext.Response.Cookies.Add(c);
            }
            //窗体票据的验证
            FormsAuthenticationTicket authTicket = new FormsAuthenticationTicket(
                1,
                user.UserName,
                DateTime.Now,
                DateTime.Now.AddMinutes(20),
                false,
                user.ID.ToString(),
                "/"
                );
                HttpCookie cookie = new HttpCookie(
                FormsAuthentication.FormsCookieName, FormsAuthentication.Encrypt(authTicket)
                );
                Response.Cookies.Add(cookie);
                if (!String.IsNullOrEmpty(returnUrl))
                {
                    if (returnUrl[0] != '/') returnUrl = "/" + returnUrl;
                    return Redirect(returnUrl);
                }
                if (user != null)
                {
                    return Content("yes");
                }
                else
                    return Redirect("~/houtai");

        }
5、在Global.asax.cs中如何取到前面的那个值??给 MvcApplication 增加构造函数,在其中增加 AuthorizeRequest 事件的处理函数。
        public MvcApplication()
        {
            AuthenticateRequest += new EventHandler(MvcApplication_AuthenticateRequest);
        }
        void MvcApplication_AuthenticateRequest(object sender, EventArgs e)
        {
             HttpCookie authCookie = Context.Request.Cookies[FormsAuthentication.FormsCookieName];
            if (authCookie != null)
            {
                FormsAuthenticationTicket authTicket = FormsAuthentication.Decrypt(authCookie.Value);
                int userID = int.Parse(authTicket.UserData);
                var userPrincipal = new Principal(userID, new GenericIdentity(authTicket.Name), new string[] { });
                Context.User = userPrincipal;
            }
        }
6、上面这段代码有没有看到Pricipal,表示一般用户,以后方便对Controller写个扩展方法,只要在任何的Controller中,使用类似这样:this.User(),就可以获得登陆后的用户,记得不要保存在Session中,将用户保存在 Session 中是一种非常不好的做法。下面就实现Principal.
        //实现GenericPrincipal,表示一般用户
        public class Principal : GenericPrincipal
        {
            public int ID { get; set; }
            public Principal(int id, IIdentity identity, string[] roles)
                : base(identity, roles)
            {
                this.ID = id;
            }
        }
7、上面说到扩展方法,来写一个吧,对Controller进行扩展。使用了NHibernate;NHibernate.Linq(Nhibernate中使用Linq查询的方式),扩展方法必须静态的,如果要用的话必须在Web.Config下添加命名空间,或者使用这种“懒”的方式,Using System.Web.MVC。这样的话在任何一个Controller中都可以使用var User=this.User();得到登录的用户的信息了。
        public static Users User(this Controller controller)
        {
            var principal = controller.User as MvcApplication.Principal;
            if (principal == null) return null;
            return GetCurrentSession().Linq<User>()
                .Where(u => u.ID == principal.ID)
                .FirstOrDefault();
        }
5、上面的登录功能的内容引申的知识点有点多了,个人认为还是详细点好,对于初学者来说看的更清晰一点。验证用户和获得用户就告一段落吧,接下说说,登录成功之后判断左边的菜单项,该显示哪些菜单,这个主要是判断他具有哪些权限?思路:(1)判断完权限之后,返回拥有权限的JSon数据的名称(2)然后和所有的权限(初始化时,所有的权限都在左边菜单栏)进行对比(3)返回的数据如果没有的话,就使用Jquery进行Remove或者Hide掉。剩下的不就是他所拥有的权限了吗。这是我的一种想法。如果还有其他的想法的话,请朋友们留言,也学习一下。
////TX:用户所拥有的权限菜单
function leftTreeLimits()
{
         $.post("/houtai/Privilige/PrivigeLimit",{},function(data){
         if (data!=null&&data!=undefined) {
            var node=$(".panel p a");
            $.each(data,function(a,b){
             for (var i = 0; i < node.length; i++) {
             if($(node[i]).text()==b)
             {
                $(node[i]).parent().remove();
             }
           }
           });
           var parentNo=$("#accordionId .panel");
           for (var j = 0; j < parentNo.length; j++) {
             if ($(parentNo[j]).children("#MenuID").children("p").length==0) {
                $(parentNo[j]).hide();
            }
           }
          }
       });
}
6、上面的JS很清晰,导向了/houtai/Privilige/PrivigeLimit,返回的是JSon数据,然后遍历他的Name,进行比较。删除没有权限的名称。
        //进入系统菜单权限分配
        public JsonResult PrivigeLimit()
        {
            var user = this.User();
            if (user == null)
            {
                return Json(null);
            }
            return Json(userLimitBll.GetLimits(user.ID));
        }
三、总结:登录功能已经完成,涉及到的知识点挺多的,也说了说思路,说的应该挺清晰的吧。如果对您有帮助,请继续关注这个系列吧,帮忙点击右下角“推荐”,让更多的朋友来共同学习,共同进步!!

