053、Vue3+TypeScript基础,页面通讯之v-model在组件中手写实现
01、main.js代码如下:
// 引入createApp用于创建Vue实例
import {createApp} from 'vue'
// 引入App.vue根组件
import App from './App.vue'

// 引入emitter用于全局事件总线
// import emitter from '@/utils/emitter'

const app = createApp(App);

// App.vue的根元素id为app
app.mount('#app')
02、App.vue代码如下:
<template>
  <div class="app">
    <h2 class="title">App.Vue</h2>
    <Father/>
  </div>
</template>

<script lang="ts" setup name="App">
import Father from "@/view/Father.vue";
</script>

<style scoped>
.app {
  background-color: #ddd;
  box-shadow: 0 0 10px;
  border-radius: 10px;
  padding: 20px;
}

.nav-button {
  display: inline-block; /* 让链接显示为块级元素,以便应用宽度和高度 */
  padding: 10px 20px; /* 内边距 */
  margin: 0 5px; /* 外边距,用于按钮之间的间隔 */
  text-decoration: none; /* 移除下划线 */
  color: white; /* 文本颜色 */
  background-color: #007bff; /* 背景颜色 */
  border-radius: 5px; /* 边框圆角 */
  transition: background-color 0.3s; /* 平滑过渡效果 */
}

.nav-button:hover {
  background-color: #0056b3; /* 鼠标悬停时的背景颜色 */
}

.nav-button.router-link-active {
  background-color: #28a745; /* 当前激活(路由匹配)时的背景颜色 */
}

.mai-content {
  /* 添加边框样式 */
  border: 2px solid #000; /* 边框宽度、样式和颜色 */
  border-radius: 5px; /* 可选:添加边框圆角 */
  padding: 20px; /* 可选:给内部内容添加一些内边距 */
  margin: 20px; /* 可选:给元素添加一些外边距,以便与其他元素隔开 */
}
</style>
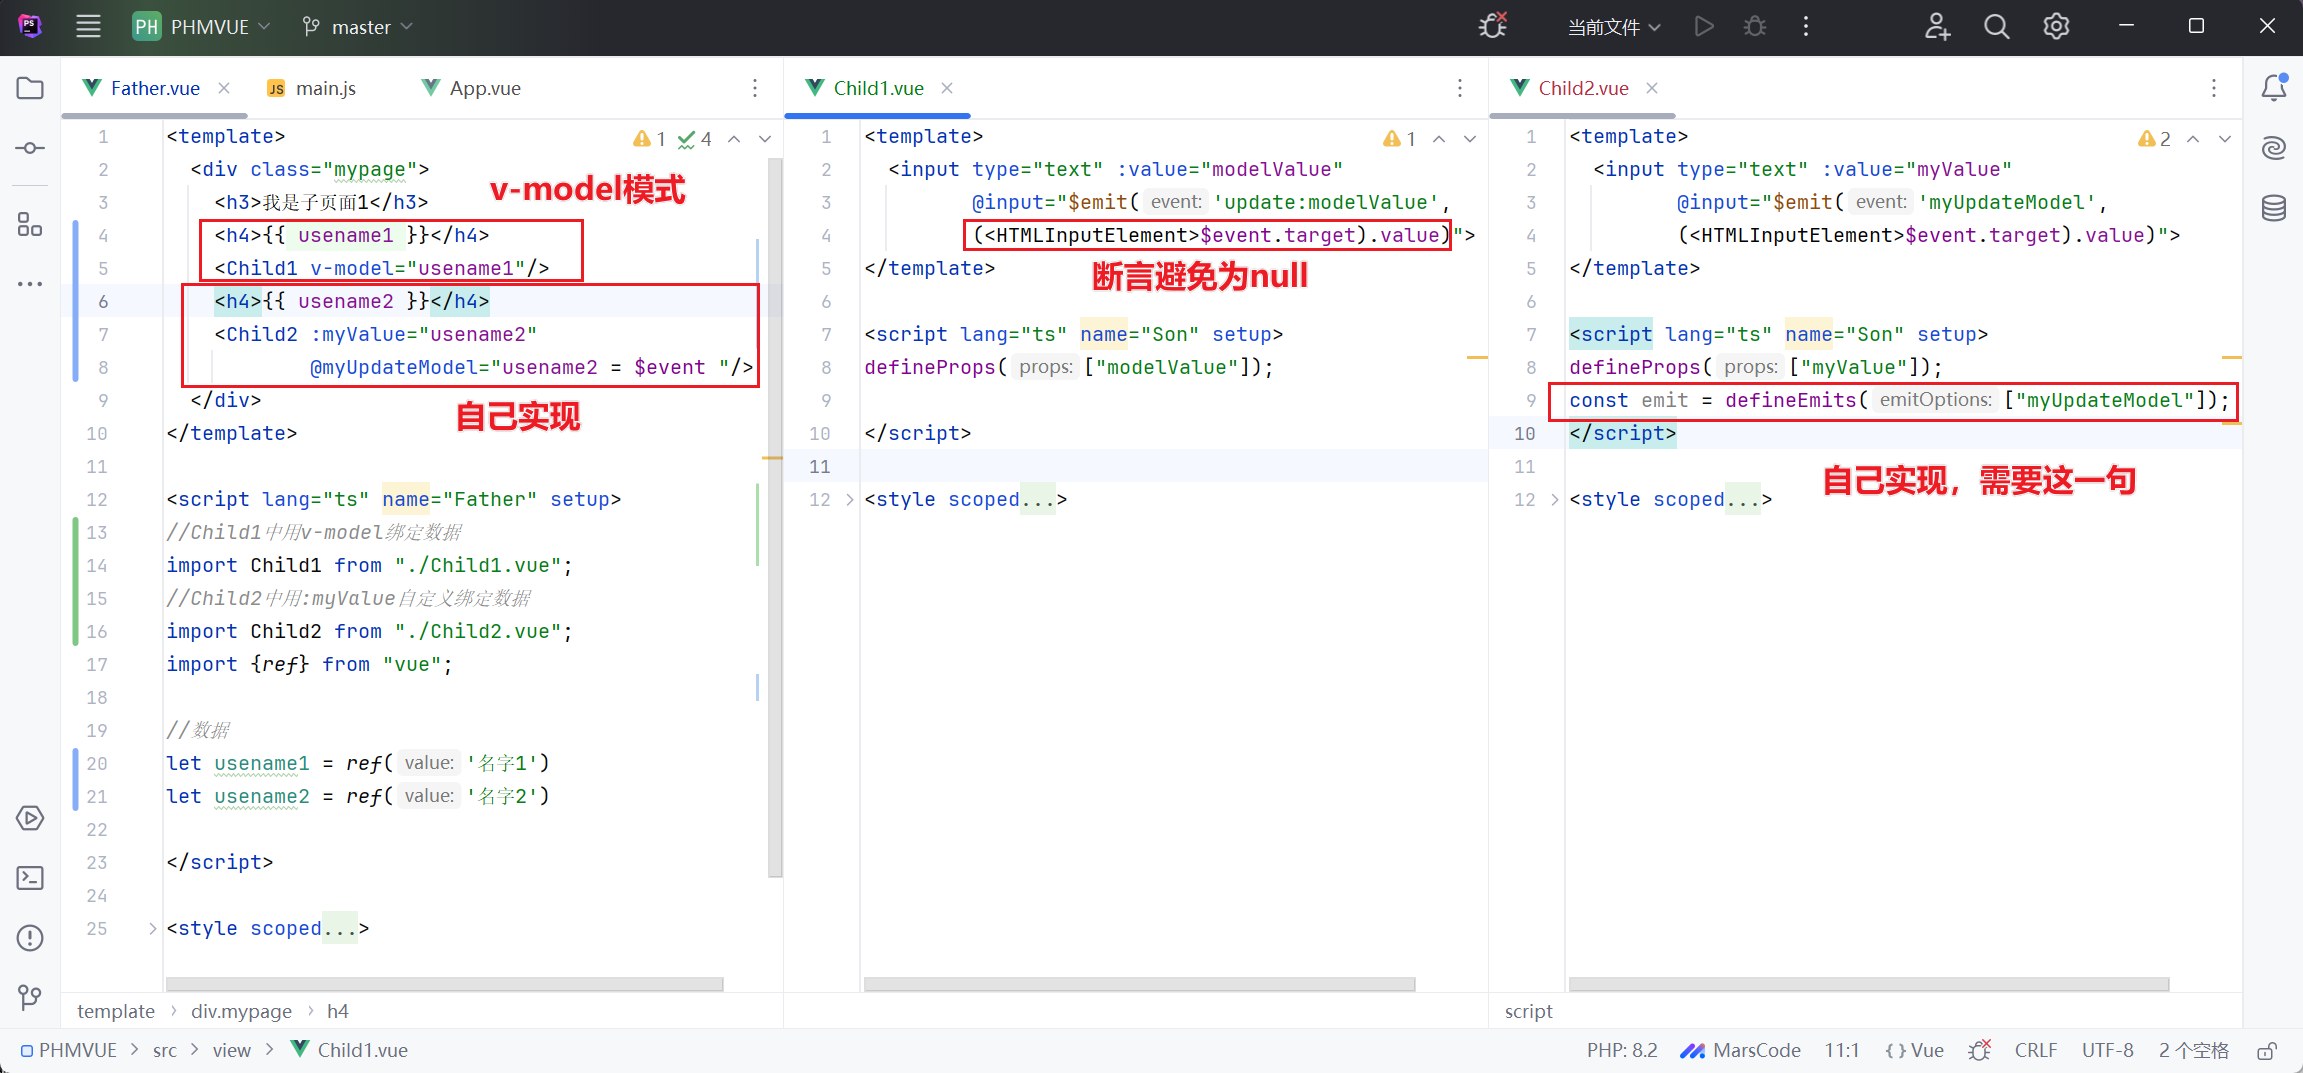
03、Father.vue代码如下:
<template>
  <div class="mypage">
    <h3>我是子页面1</h3>
    <h4>{{ usename1 }}</h4>
    <Child1 v-model="usename1"/>
    <h4>{{ usename2 }}</h4>
    <Child2 :myValue="usename2" @myUpdateModel="usename2 = $event "/>
  </div>
</template>

<script lang="ts" name="Father" setup>
//Child1中用v-model绑定数据
import Child1 from "./Child1.vue";
//Child2中用:myValue自定义绑定数据
import Child2 from "./Child2.vue";
import {ref} from "vue";

//数据
let usename1 = ref('名字1')
let usename2 = ref('名字2')

</script>

<style scoped>
.mypage {
  background-color: #ddd;
  box-shadow: 0 0 10px;
  border-radius: 10px;
  padding: 20px;

  button {
    margin: 0 5px;
  }
}
</style>
04、Child1.vue代码如下:
<template>
  <input type="text" :value="modelValue"
         @input="$emit('update:modelValue',
         (<HTMLInputElement>$event.target).value)">
</template>

<script lang="ts" name="Son" setup>
defineProps(["modelValue"]);

</script>

<style scoped>
input {
  border: 2px solid black;
  background-image: linear-gradient(45deg, red, yellow, green);
  height: 30px;
  font-size: 20px;
  color: white;
}
</style>
05、Child2.vue代码如下:
<template>
  <input type="text" :value="myValue"
         @input="$emit('myUpdateModel',
         (<HTMLInputElement>$event.target).value)">
</template>

<script lang="ts" name="Son" setup>
defineProps(["myValue"]);
const emit = defineEmits(["myUpdateModel"]);
</script>

<style scoped>
input {
  border: 2px solid black;
  background-image: linear-gradient(45deg, red, yellow, green);
  height: 30px;
  font-size: 20px;
  color: white;
}
</style>
06、界面如下:

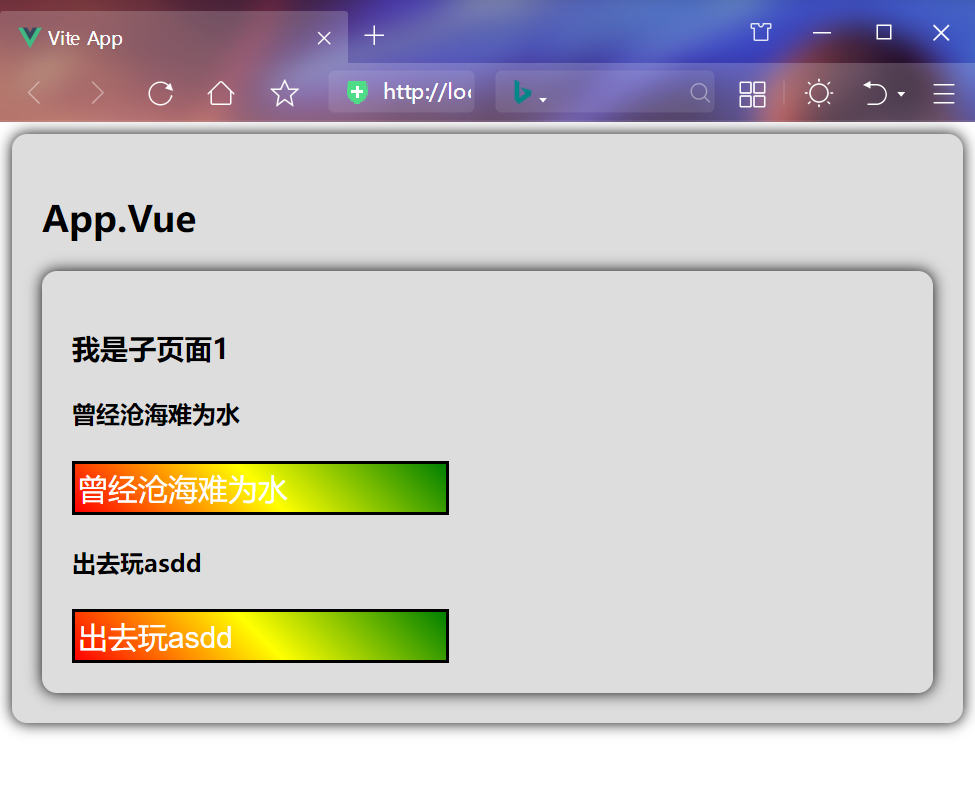
07、效果如下:


【推荐】国内首个AI IDE,深度理解中文开发场景,立即下载体验Trae
【推荐】编程新体验,更懂你的AI,立即体验豆包MarsCode编程助手
【推荐】抖音旗下AI助手豆包,你的智能百科全书,全免费不限次数
【推荐】轻量又高性能的 SSH 工具 IShell:AI 加持,快人一步
· 10年+ .NET Coder 心语 ── 封装的思维:从隐藏、稳定开始理解其本质意义
· 地球OL攻略 —— 某应届生求职总结
· 提示词工程——AI应用必不可少的技术
· Open-Sora 2.0 重磅开源!
· 周边上新:园子的第一款马克杯温暖上架
2020-08-24 111.附控CCO指令下发之后,工作未完成,拆装默认通过后,航材无法退料的处理办法