
项目实践之java调用python
背景:在进行javaweb项目开发时,通过登录设备,调用不同的测试用例(对设备下发命令,获取回显信息),判断业务是否达到预期效果。利用python的telnet模块进行实现较为方便,具体实践时也遇到一系列问题,主要包括:(1)java调用python的参数传递与实时回显问题; (2)python日志模块的重复打印问题
1 java调用python
关于java调用python的方法,常见的有2种。第一种:使用java的Process类调用python脚本,然后读取回显信息,此方法的缺点是对于python的回显信息反应较慢,无法满足实时回显需求。
第二种方法,利用Jython执行python方法,优点:能获取python方法的返回值,作为java调用python其他方法的入参,较好地控制代码流程,能更好的满足项目需求,同时,它能及时的获取python方法的返回值,因此,强力推荐该方法。
第一种方法代码如下:


 1  public static void main(String[] args)
 2     {
 3         // 1. 根据用户输入设备信息、选择用例修改脚本
 4         String shellPath = "D:\\dDevelopemnt\\javaDemo\\project1\\clockDetect\\src";
 5
 6         Runtime run = Runtime.getRuntime();
 7
 8         // 2. 执行cmd
 9         try
10         {
11             // run.exec("cmd /k shutdown -s -t 3600");
12             // cmd.exe /k
13
14             Process process = run.exec(" cmd /c D: && cd " + shellPath + " && python clkChecker.py fdas fda 432");
15
16             InputStream input = process.getInputStream();
17             BufferedReader reader = new BufferedReader(new InputStreamReader(input, Charset.forName("GBK")));
18             String szline;
19             System.out.println("\n********** DOS info begin **********");
20             while ((szline = reader.readLine()) != null)
21             {
22                 System.out.println(szline);
23             }
24             System.out.println("********** DOS info end **********\n");
25
26             // 第四步:输出Log,移动到指定路径
27
28             reader.close();
29             process.waitFor();
30             process.destroy();
31         }
32         catch (Exception e)
33         {
34             e.printStackTrace();
35         }
36     }
第二种方法代码如下:
java侧代码
 1 public void exeTestCases(
 2             ArrayList<String> lstCaseNames,
 3             String projectName,
 4
 5             String deviceAip,
 6             String deviceAport,
 7             String deviceAusername,
 8             String deviceApasswd,
 9
10             String deviceBip,
11             String deviceBport,
12             String deviceBusername,
13             String deviceBpasswd){
14
15         String shellPath = "D:\\dDevelopemnt\\javaDemo\\project1\\clockDetect\\src\\clkJython.py";
16
17         Properties props = new Properties();
18         props.put("python.console.encoding", "UTF-8"); // Used to prevent: console: Failed to install '': java.nio.charset.UnsupportedCharsetException: cp0.
19         props.put("python.security.respectJavaAccessibility", "false"); //don't respect java accessibility, so that we can access protected members on subclasses
20         props.put("python.import.site","false");
21         Properties preprops = System.getProperties();
22         PythonInterpreter.initialize(preprops, props, new String[0]);
23         PythonInterpreter interpreter = new PythonInterpreter();
24         interpreter.exec("import sys");
25         interpreter.exec("sys.path.append('D:\\dDevelopemnt\\javaDemo\\project1\\clockDetect\\src')");//自定义库函数路径
26         interpreter.execfile(shellPath);
27
28         // 前端设备信息封装
29         JSONObject jsondata = new JSONObject();
30         jsondata.put("\"projectName\"","\""+projectName+"\"");
31         jsondata.put("\"deviceAip\"","\""+deviceAip+"\"");
32         jsondata.put("\"deviceAusername\"","\""+deviceAusername+"\"");
33         jsondata.put("\"deviceApasswd\"","\""+deviceApasswd+"\"");
34         jsondata.put("\"deviceAport\"","\""+deviceAport+"\"");
35         jsondata.put("\"deviceBip\"","\""+deviceBip+"\"");
36         jsondata.put("\"deviceBusername\"","\""+deviceBusername+"\"");
37         jsondata.put("\"deviceBpasswd\"","\""+deviceBpasswd+"\"");
38         jsondata.put("\"deviceBport\"","\""+deviceBport+"\"");
39         jsondata.put("\"lstCaseNames\"","\""+lstCaseNames+"\"");
40
41         System.out.println(jsondata.toString());
42
43         // 调用Python方法传递参数、返回参数
44         // 第一个参数为期望获得的函数(变量)的名字,第二个参数为期望返回的对象类型
45         PyFunction pyFunction = interpreter.get("setConfig", PyFunction.class);  // 1.前端传递设备类表及参数信息
46
47         //调用函数,如果函数需要参数,在Java中必须先将参数转化为对应的“Python类型”
48         PyObject pyobjDictInfo = pyFunction.__call__(new PyString(jsondata.toString())); // 2.返回Python侧封装的设备信息
49
50         // 前端选取的测试用例
51         for(String item:lstCaseNames){
52             System.out.println("-----"+item+"------");
53             PyFunction fun1 = interpreter.get(item, PyFunction.class);         // 3.调用执行用例1
54             PyObject pyobjDictSync = fun1.__call__(pyobjDictInfo);                     // 4. 获取执行用例1的结果
55             System.out.println("****"+item+" now exe finished! "+ item  + new Date().toString() );
56
57             // 将消息推送至客户端,告知释放的设备ip
58             try {
59                 WebSocketServer.sendInfo(pyobjDictSync.toString());
60             } catch (IOException e) {
61                 e.printStackTrace();
62             }
63         }
64
65
66     }
上述29-39行是java侧封装成标准json格式数据
44-48行是java侧调用python方法,进行设备的登录,涉及项目进行参数的配置(设备用户名、密码、ip、项目名称等入参)
pyobjDictInfo是python侧封装的字典数据,包括设备列表以及Telnet对象等,该参数作为执行测试用例的入参,
51-63行是遍历测试用例
python侧代码
 1 '''
 2           通过Jython调用
 3 '''
 4 def setConfig(data):
 5     res= json.loads(data) # 根据字符串书写格式,将字符串自动转换成 字典类型
 6
 7     global projectName
 8     projectName =  eval(res['"projectName"'])
 9     logDir = "d:\\loggg\\" + projectName+"_log.txt"
10
11     # 创建一个logger
12     global root_logger
13     global fh
14     global ch
15
16     root_logger = logging.getLogger("clkLogger")
17     root_logger.setLevel(logging.DEBUG)
18
19     # 创建一个handler,用于写入日志文件
20     fh = logging.FileHandler(logDir)
21     fh.setLevel(logging.DEBUG)
22
23     # 再创建一个handler,用于输出到控制台
24     ch = logging.StreamHandler()
25     ch.setLevel(logging.DEBUG)
26
27     # 定义handler的输出格式
28     formatter = logging.Formatter('%(asctime)s - %(name)s - %(levelname)s - %(message)s')
29     fh.setFormatter(formatter)
30     ch.setFormatter(formatter)
31
32     # 给logger添加handler
33     root_logger.addHandler(fh)
34     root_logger.addHandler(ch)
35     logger = root_logger; # 修改全局日志变量
36
37     logger.info("======================================== project "+projectName+" begin ========================================")
38     logger.debug(res)
39
40     dictDevice = {}
41     dictDevice['key1'] = [eval(res['"deviceAip"']) , eval(res['"deviceAusername"']),eval( res['"deviceApasswd"']), eval(res['"deviceAport"'])]
42     dictDevice['key2'] = [eval(res['"deviceBip"']), eval(res['"deviceBusername"']), eval(res['"deviceBpasswd"']), eval(res['"deviceBport"']) ]
43
44     logger.info("==================== login device begin ====================")
45     myclass = MyClass();
46     dictInfo = myclass.tearUp(dictDevice)
47
48     return dictInfo
49
50
51 # 测试用例1
52 def checkClk(dictInfo):
53     logger.info("====================  1.1基本功能  begin ====================")
54     lstInfo = clearConfigInfo(dictInfo)
55     dict = detect_clk_sync(lstInfo[0],lstInfo[1],lstInfo[2],lstInfo[3])
56     logger.debug(dict)
57     logger.info("====================  1.1基本功能  end ====================")
58     return dict
59
60 # 测试用例2
61 def checkClkfreq(dictInfo):
62     logger.info("====================  1.2测试用例2  begin ====================")
63     lstInfo = clearConfigInfo(dictInfo)
64     dict = detect_clk_freq_deviation(lstInfo[0],lstInfo[1],lstInfo[2],lstInfo[3])
65     logger.debug(dict)
66     logger.info("====================  1.2测试用例2  end ====================")
67     return dict
其中,46行处调用函数如下,返回值包含telnet对象
 1     # 登录设备
 2     def tearUp(self,dictDevice):
 3         dictInfo = {}
 4
 5
 6          lstA =  dictDevice['key1']
 7          lstB =  dictDevice['key2']
 8          deviceA = [lstA[0],lstA[1],lstA[2],lstA[3]];
 9          deviceB = [lstB[0],lstB[1],lstB[2],lstB[3]];
10
11         try:
12             logger.info(deviceA)
13             logger.info(deviceB)
14
15             telnetA = telnetlib.Telnet(deviceA[0], port=23, timeout=50)
16             loginsys(telnetA,deviceA[1],deviceA[2])
17             # print deviceInfo(telnetA) # 获取设备信息
18
19             telnetB = telnetlib.Telnet(deviceB[0], port=23, timeout=50)
20             loginsys(telnetB,deviceB[1],deviceB[2])
21
22             dictInfo["telnetA"] = telnetA
23             dictInfo["telnetB"] = telnetB
24             dictInfo["deviceA"] = deviceA
25             dictInfo["deviceB"] = deviceB
26
27             logger.info("------ login success ------")
28
29         except(SystemExit, KeyboardInterrupt):
30             logger.info("------ ping error ------")
31
32         except Exception as e:
33             logger.error("failed to ping", exc_info=True)
34
35         return dictInfo
2 日志的重复打印问题
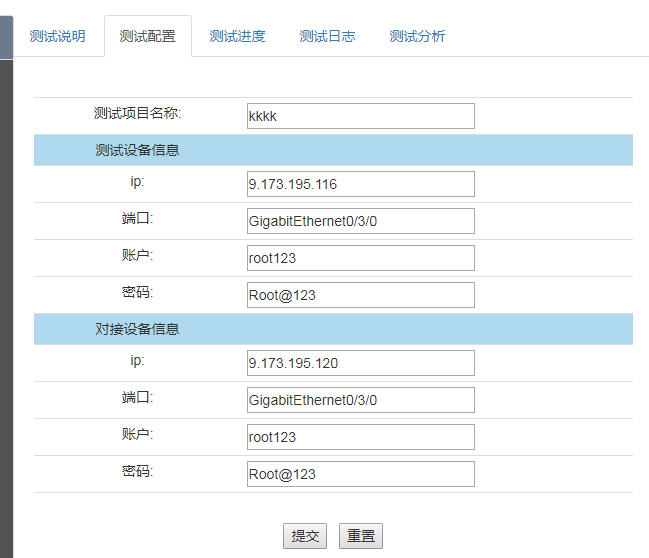
背景:在前端配置页面,输入项目项目,后端python解析后,以该项目名称作为log名称。
因此,在每次点击“提交”按钮都会执行python侧的setConfig函数,导致日志模块会不断添加handler,重复打印日志,
如下图:

这显然不利于日志处理,随着测试项目的不断增多,重复的次数也会不断增加。
因此,需要在每次执行完一个项目时,就删除日志的handler模块,具体实现函数为
1 '''
2    测试用例执行完毕,调用此方法
3 '''
4 def tear_down():
5     logger.debug("close the logging handlers")
6     root_logger.removeHandler(fh)
7     root_logger.removeHandler(ch)
8     logger.removeHandler(fh)
9     logger.removeHandler(ch)

