《Windows Azure Platform 系列文章目录》
本文介绍的是静态创建存储账户,即用户需要提前创建好存储账户
1.我们首先创建Azure AKS集群,步骤略。我们的AKS集群名称为:aks1-27-9
2.Azure AKS 通过NFS File Share挂载的时候,NFS 4.1只支持高级性能层的Azure存储账户。
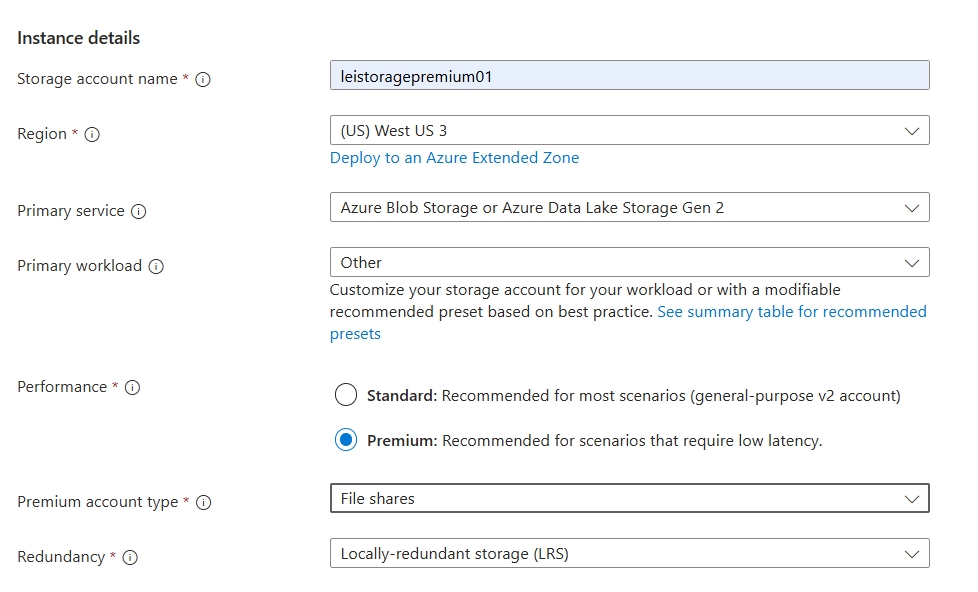
我们首先创建1个新的存储账户,如下图:
注意:Performance必须选择Premium
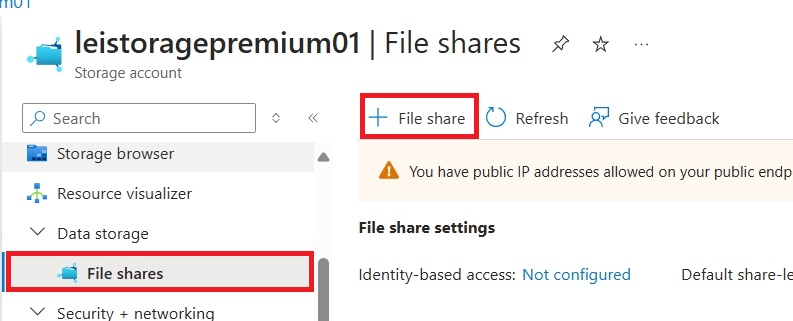
3.存储账户创建完毕后,点击File Share,创建1个File Share名称为nfs
请注意创建的协议为NFS,另外我这里创建的容量最小为100GB
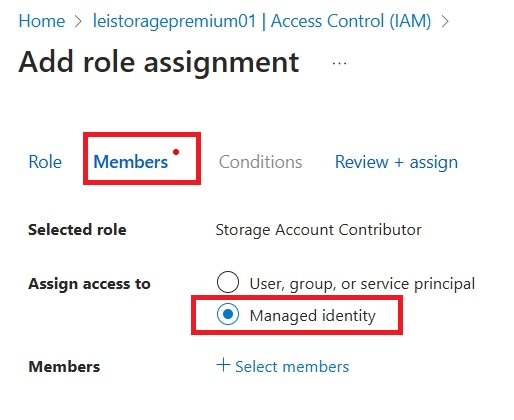
4.上面的存储账户创建完毕后,选择Access Control,点击Add Role Assignment

5.Role选择Storage Account Contributor,Members选择Managed Identity
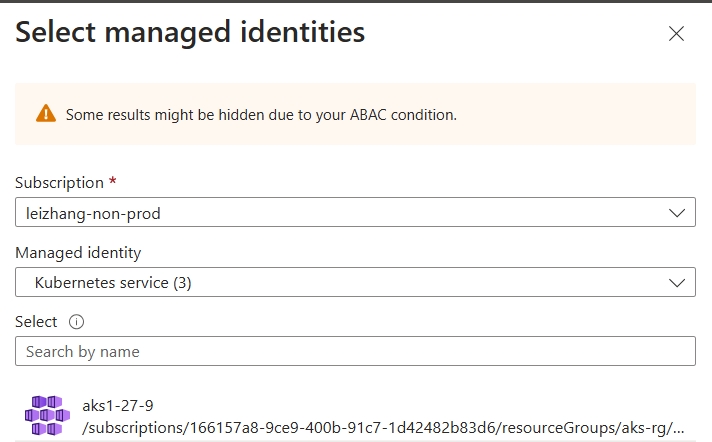
6.在Managed Identity里,选择Kubernetes Service,然后勾选我们之前创建的AKS服务实例
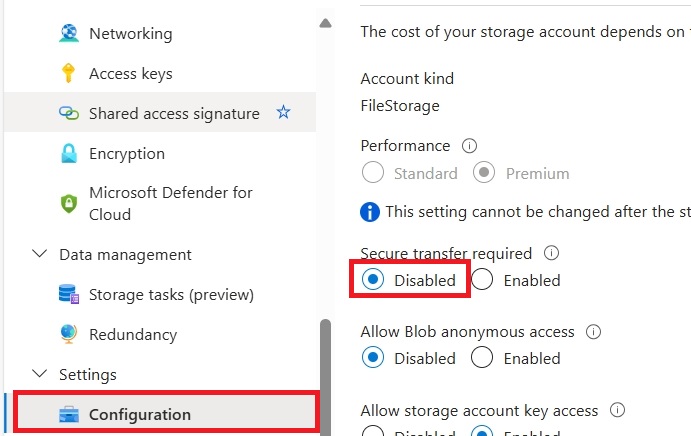
7.分配完Managed Identiy之后,把Azure Storage Account的安全传输关闭。我们点击Configuration,然后在Secure transfer required选择Disabled
8.在Azure Storage Account的Networking里,选择Enabled from select virtual network and IP Address,然后允许AKS所在的子网访问

9.在创建Azure存储账户的时候,获得他的访问秘钥
10.执行下面的命令,登录Azure
az login
az aks get-credentials -g 资源组名字 -n aks集群名字
12.执行下面的脚本,创建PV
apiVersion: v1
kind: PersistentVolume
metadata:
  annotations:
    pv.kubernetes.io/provisioned-by: file.csi.azure.com
  name: azurefile
spec:
  capacity:
    storage: 100Gi
  accessModes:
    - ReadWriteMany
  persistentVolumeReclaimPolicy: Retain
  storageClassName: azurefile-csi-premium
  csi:
    driver: file.csi.azure.com
    volumeHandle: "leistoragepremium01"  # make sure this volumeid is unique for every identical share in the cluster
    volumeAttributes:
      protocol: nfs
      storageAccount: leistoragepremium01
      resourceGroup: aks-rg  # optional, only set this when storage account is not in the same resource group as node
      shareName: nfs
  mountOptions:
  - nconnect=4
  - noresvport
  - actimeo=30
13.执行下面的脚本,创建PVC
apiVersion: v1
kind: PersistentVolumeClaim
metadata:
  name: azurefile
spec:
  accessModes:
    - ReadWriteMany
  storageClassName: azurefile-csi-premium
  volumeName: azurefile
  resources:
    requests:
      storage: 100Gi
14.执行下面的脚本,创建pod
kind: Pod
apiVersion: v1
metadata:
  name: mypod
spec:
  containers:
    - name: mypod
      image: mcr.microsoft.com/oss/nginx/nginx:1.15.5-alpine
      resources:
        requests:
          cpu: 100m
          memory: 128Mi
        limits:
          cpu: 250m
          memory: 256Mi
      volumeMounts:
        - mountPath: /mnt/azure
          name: azure
          readOnly: false
  volumes:
   - name: azure
     persistentVolumeClaim:
       claimName: azurefile
15.创建完毕后,pod应该会创建成功
1 2 3 | root@Leilaptop6:/mnt/d/work/github/k8s/1.27.9/2.premiumnfs-static# kubectl get podNAME READY STATUS RESTARTS AGEmypod 1/1 Running 0 5s |
16.然后我们进入到pod里面
kubectl exec -it pod/mypod -- /bin/sh
17.创建1个新的文件
root@Leilaptop6:/mnt/d/work/github/k8s/1.27.9/2.premiumnfs-static# kubectl exec -it pod/mypod -- /bin/sh
/ # cd /mnt/azure
/mnt/azure # ll
/bin/sh: ll: not found
/mnt/azure # ls
/mnt/azure # touch 1.txt
/mnt/azure # exit
18.把pod删除后,重建pod,然后再次exec进入pod,会发现上次创建的1.txt还会继续保留


【推荐】国内首个AI IDE,深度理解中文开发场景,立即下载体验Trae
【推荐】编程新体验,更懂你的AI,立即体验豆包MarsCode编程助手
【推荐】抖音旗下AI助手豆包,你的智能百科全书,全免费不限次数
【推荐】轻量又高性能的 SSH 工具 IShell:AI 加持,快人一步
· TypeScript + Deepseek 打造卜卦网站:技术与玄学的结合
· 阿里巴巴 QwQ-32B真的超越了 DeepSeek R-1吗?
· 【译】Visual Studio 中新的强大生产力特性
· 10年+ .NET Coder 心语 ── 封装的思维:从隐藏、稳定开始理解其本质意义
· 【设计模式】告别冗长if-else语句:使用策略模式优化代码结构