spring学习笔记
IoC
概念
控制反转,是一个理论,是一个指导思想。指导开发人员如何使用对象,管理对象的。
把对象的创建,属性赋值,对象的声明周期都交给代码之外的容器管理
IoC分为控制和反转
控制:对象创建,属性复制,对象声明周期管理
反转:把开发人员管理对象的权限转移给了代码之外的容器实现。由容器完成对象的管理
正转:开发人员使用new创建对象。开发人员掌握了对象的创建,属性赋值,对象从开始到销毁的全部过程。开发人员有对对象的全部控制
通过容器,可以使用容器中的对象(容器已经创建了对象,对象属性赋值了,对象也组装好了)
spring就是一个容器,可以管理对象,创建对象,给属性赋值
DI(依赖注入)
IoC的技术实现,程序只需要提供要使用的对象的名称就可以了,对象如何创建,
如何从容器中查找,获取都由容器内部自己实现
依赖名词:比如说ClassA类使用了ClassB的属性或者方法,叫做ClassA依赖ClassB
public class ClassB{
  public void createOrder(){}
}
public class ClassA{
  private ClassB = new ClassB();
  public void buy(){
      b.reateOrder();
  }
}
ClassA a = new ClassA();
a.buy();
Spring框架使用DI实现IoC
通过spring框架,只需要提供要使用的对象名词就可以了。从容器中获取名称对应的对象,
spring底层使用反射机制,通过反射创建对象
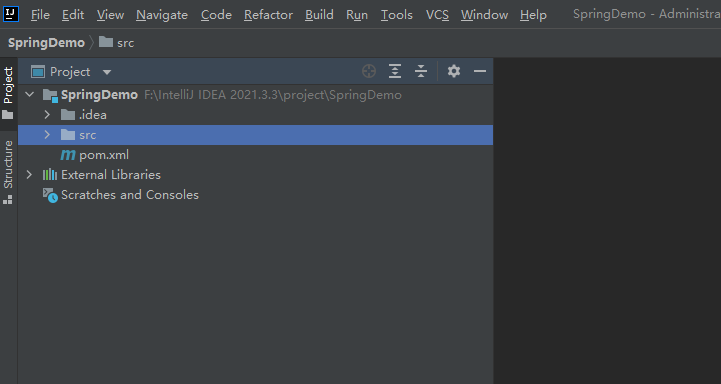
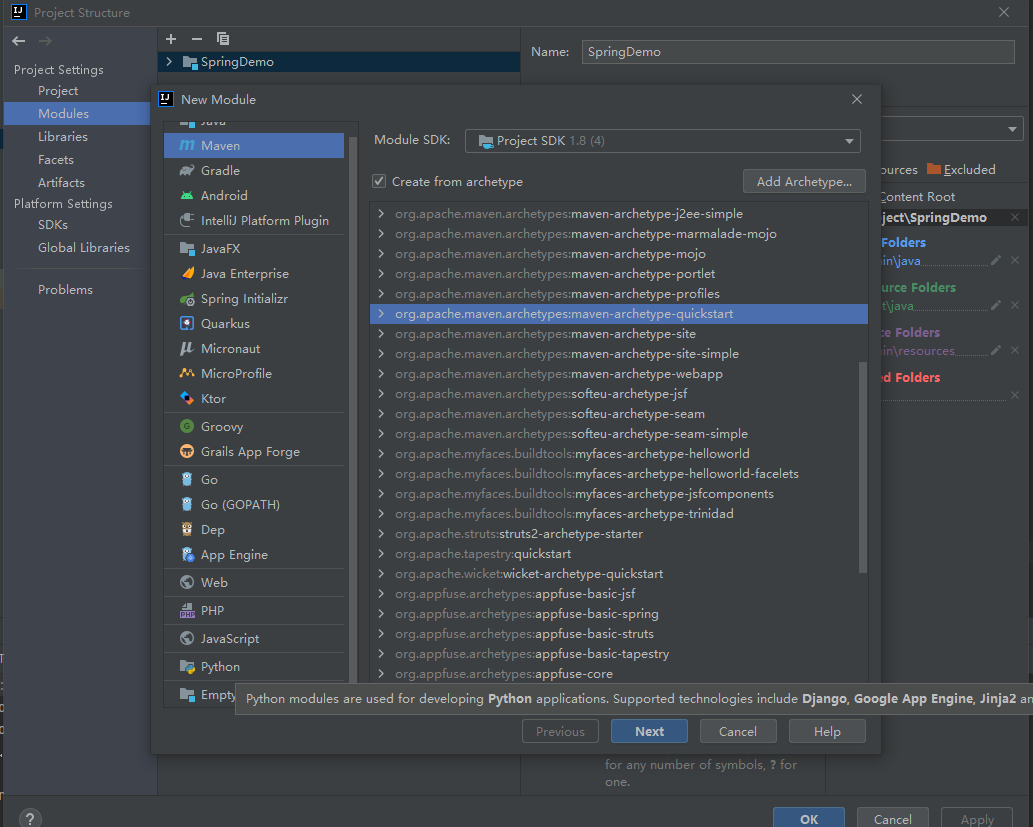
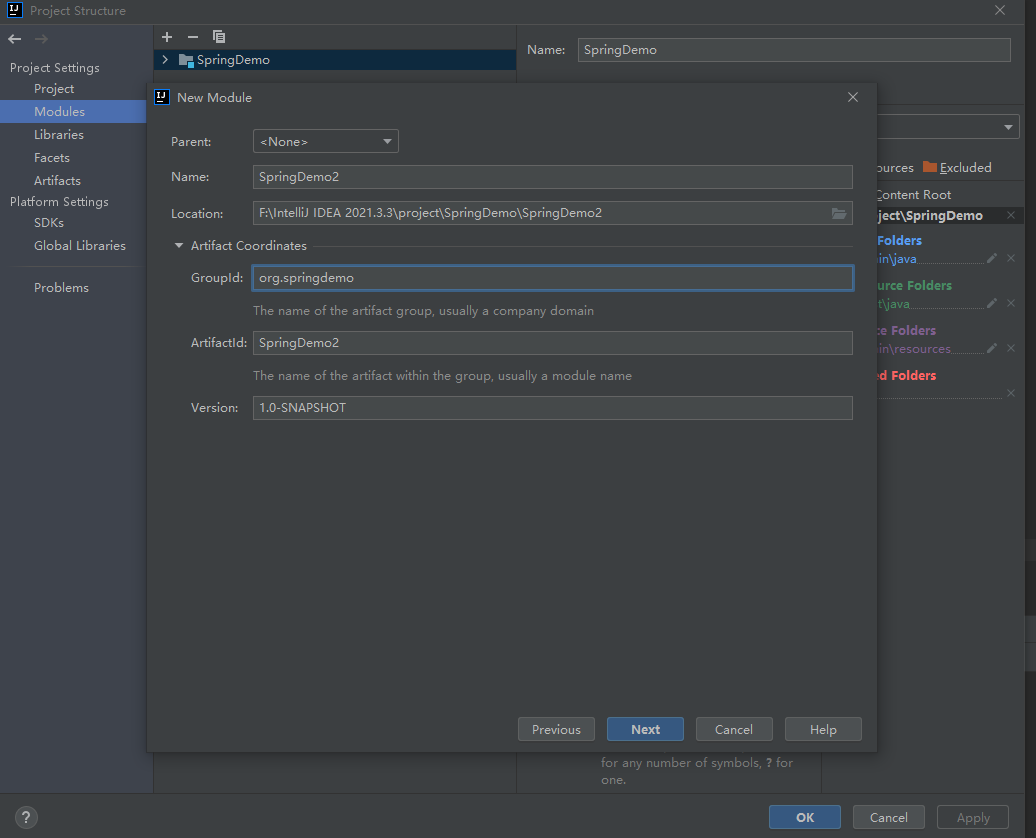
SpringDemo项目
新建maven项目
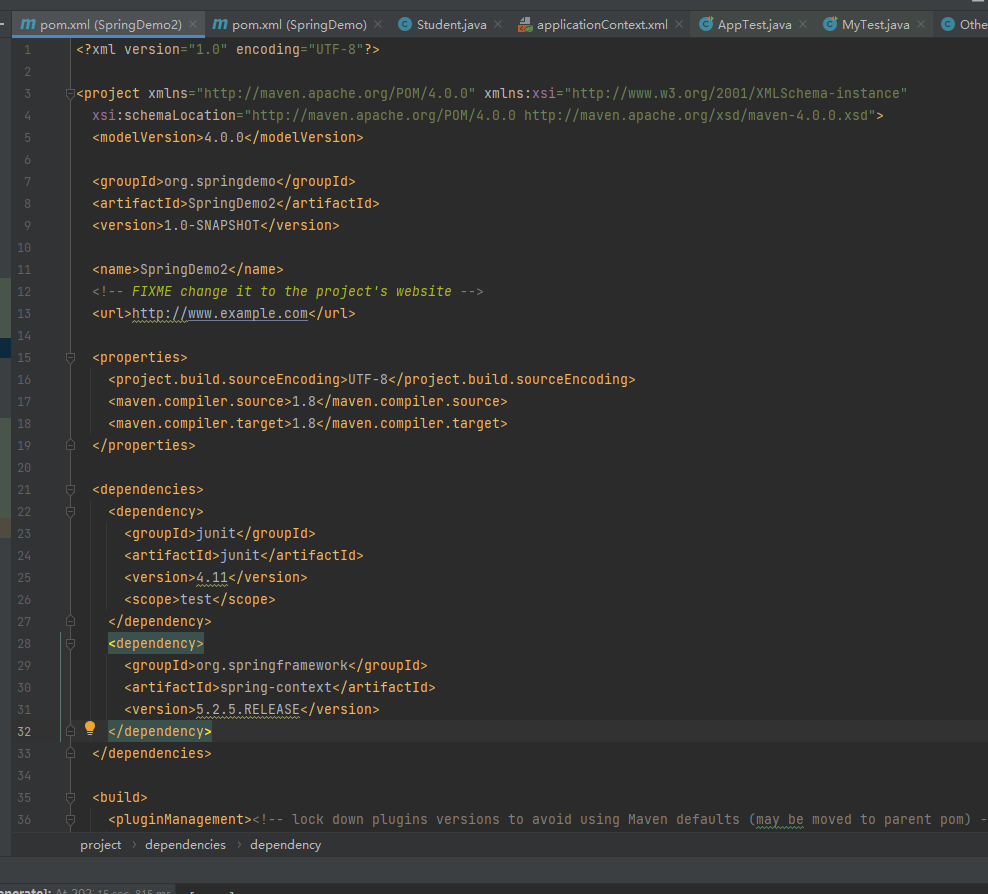
加入依赖
pom.xml
        <dependency>
            <groupId>org.springframework</groupId>
            <artifactId>spring-context</artifactId>
            <version>5.2.5.RELEASE</version>
        </dependency>
        <dependency>
            <groupId>junit</groupId>
            <artifactId>junit</artifactId>
            <version>4.11</version>
            <scope>test</scope>
        </dependency>
spring-context:spring依赖
junit:单元测试
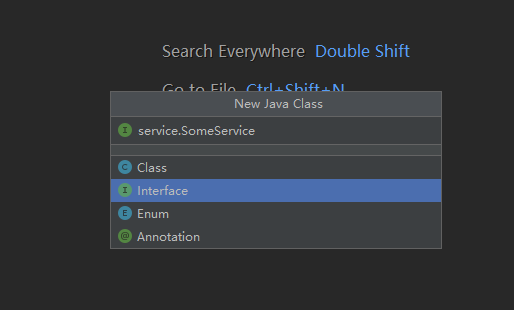
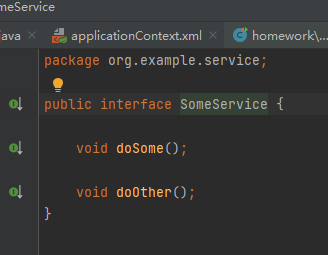
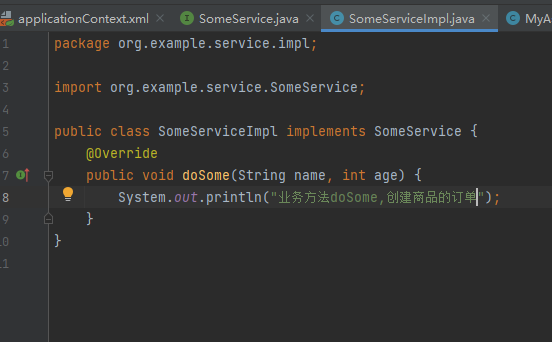
定义类:接口和实现类
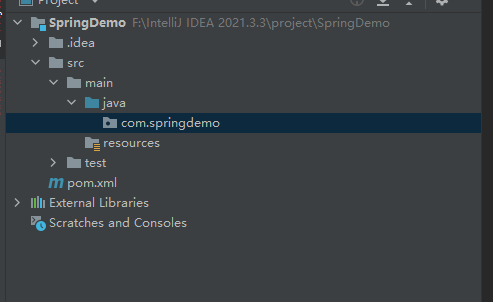
创建com.springdemo
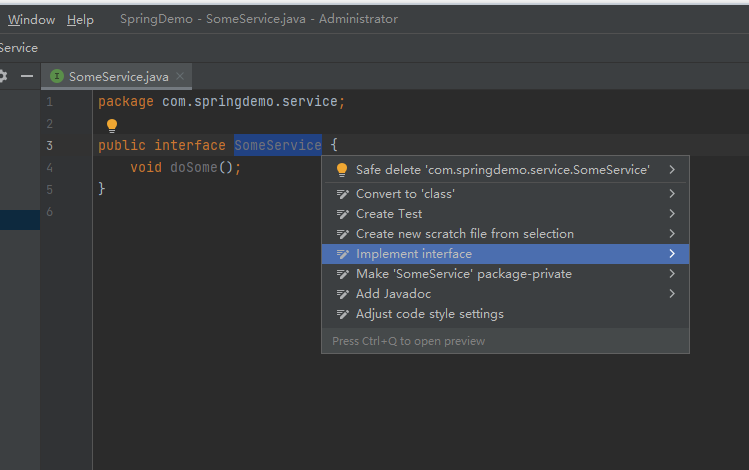
创建一个接口
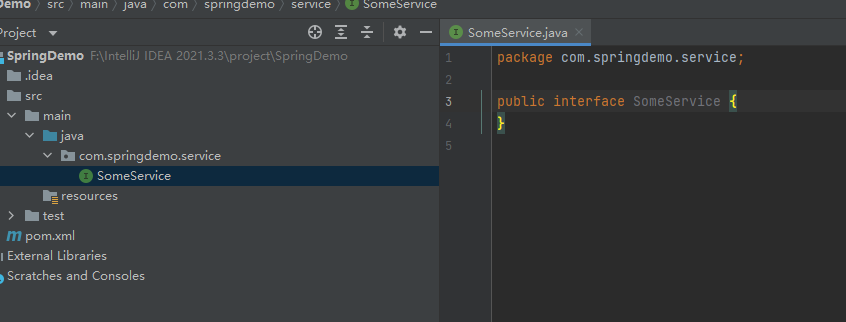
创建一个方法
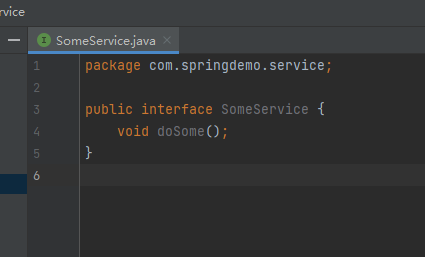
alt+enter
创建一个主类
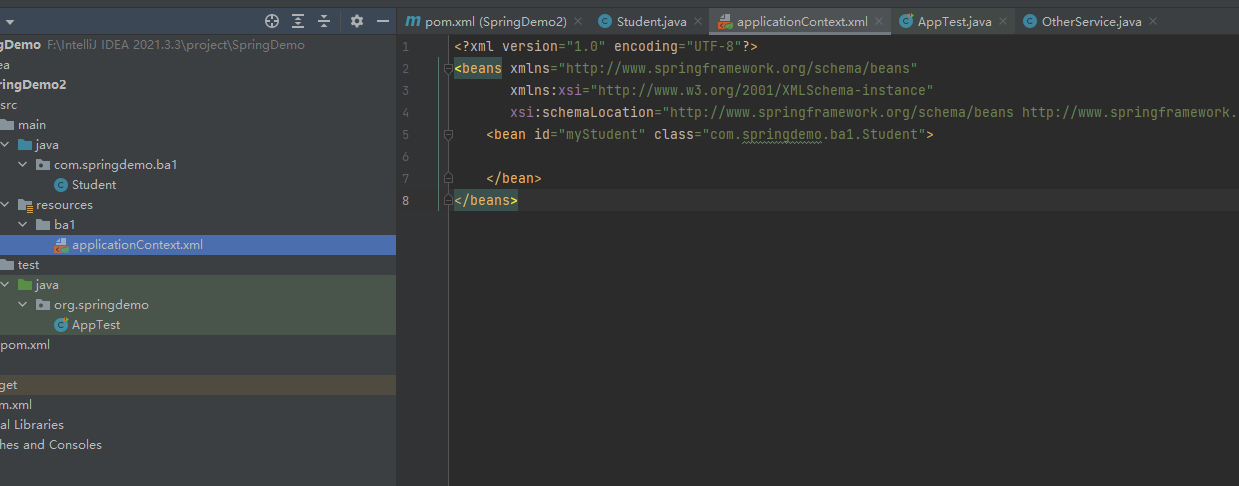
Spring的配置文件
在resources目录下创建一个spring的配置文件
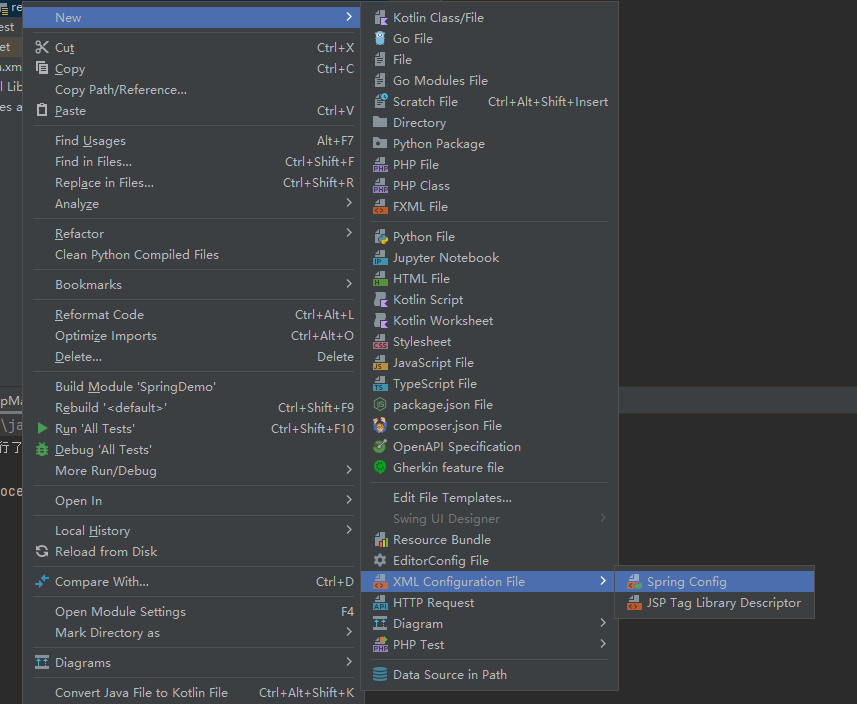
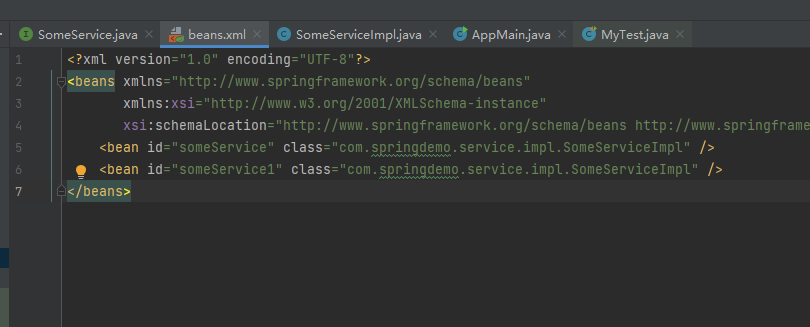
<?xml version="1.0" encoding="UTF-8"?>
<beans xmlns="http://www.springframework.org/schema/beans"
       xmlns:xsi="http://www.w3.org/2001/XMLSchema-instance"
       xsi:schemaLocation="http://www.springframework.org/schema/beans http://www.springframework.org/schema/beans/spring-beans.xsd">

</beans>
spring的标准配置文件:
1)根标签beans
2)beans后面的是约束文件说明
3)在beans里面是bean声明
4)什么是bean:bean就是java对象,spring容器管理的java对象,叫bean
把对象交给spring创建和管理
使用
id:自定义对象名称,唯一值(可以没有,spring提供默认的)
class:类的全限定名称,spring通过反射机制创建对象,不能是接口
spring根据id,class创建对象,把对象放入到spring的一个map对象,map.put(id,对象)
Spring容器创建对象
使用容器中的对象
创建一个表示spring容器的对象ApplicatonContext
从容器中,根据名称获取对象,使用getBean("对象名称")
demo
package com.springdemo.service;
import com.springdemo.service.impl.SomeServiceImpl;
import org.springframework.context.ApplicationContext;
import org.springframework.context.support.ClassPathXmlApplicationContext;
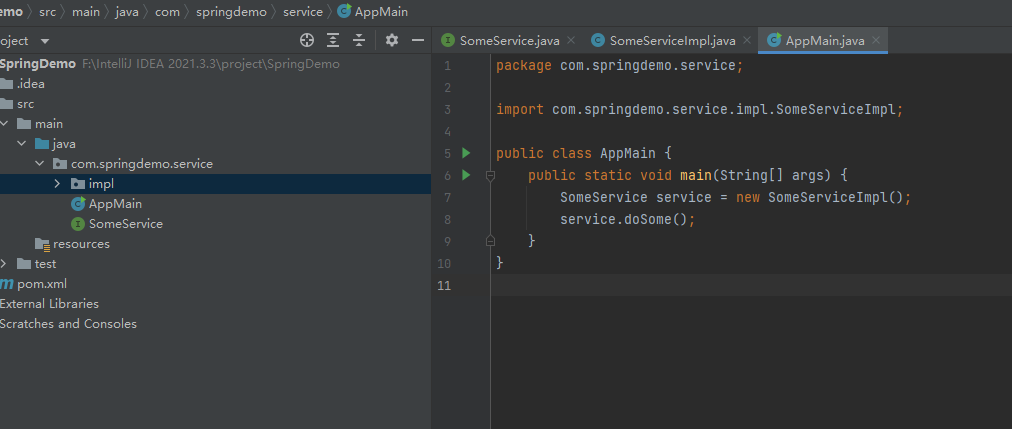
public class AppMain {
public static void main(String[] args) {
/*
SomeService service = new SomeServiceImpl();
service.doSome();
*/
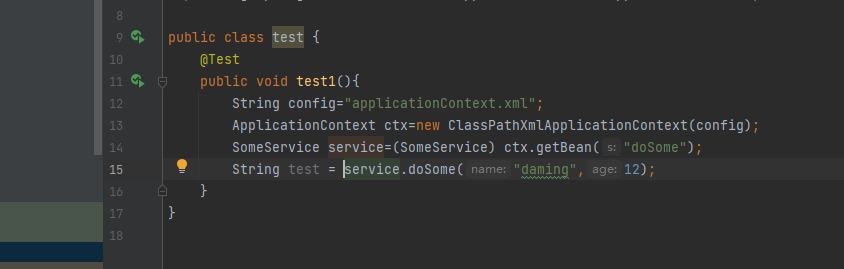
//1.指定spring配置文件:从类路径(classpath)之下开始的路径
String config="beans.xml";
//2.创建容器对象,ApplicationContext表示spring容器对象.通过ctx获取某个java对象
ApplicationContext ctx = new ClassPathXmlApplicationContext(config);
//3.从容器中获取指定名称的对象,使用getBean
SomeService service = (SomeService) ctx.getBean("someService");
//4.调用对象的方法,接口中的方法
service.doSome();
}
}
流程:
先通过ClassPathXmlApplicationContext读取配置文件,然后在配置文件中利用反射机制调用对象
把main下的整个java文件都复制到test目录下
将AppMain替换成MyTest
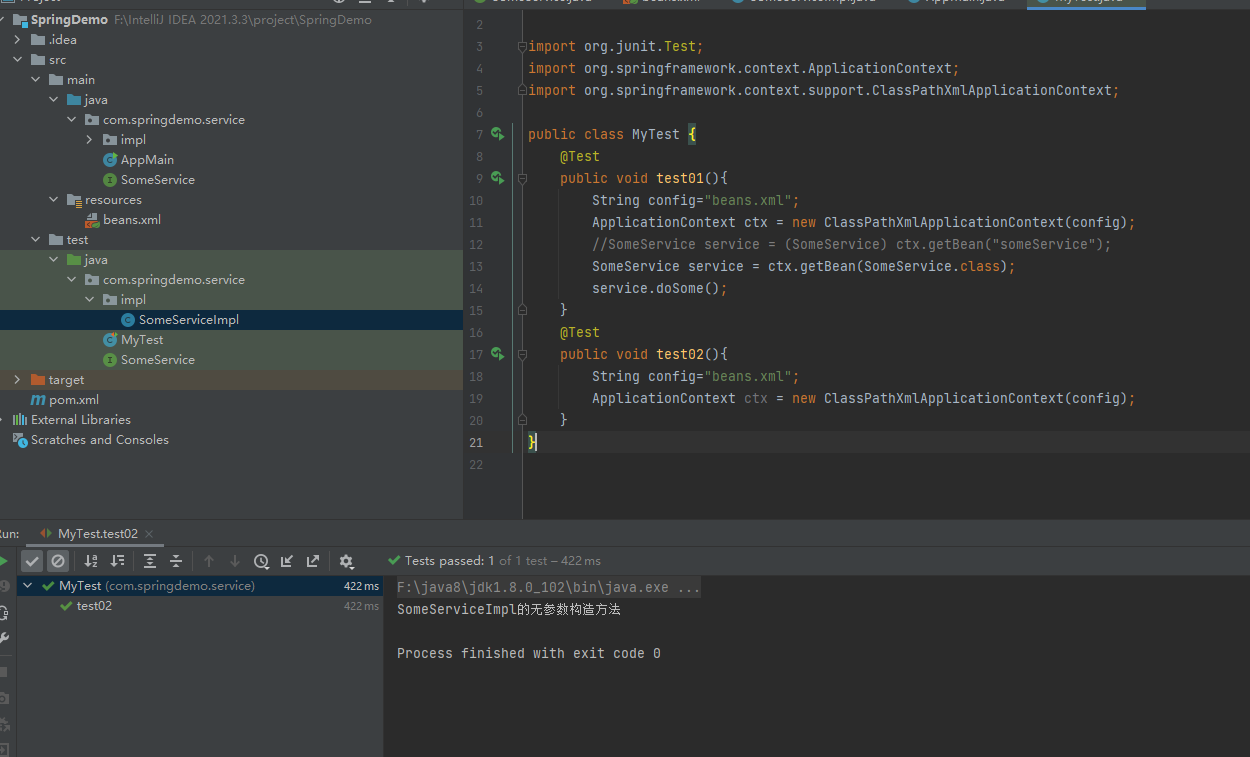
package com.springdemo.service;
import org.junit.Test;
import org.springframework.context.ApplicationContext;
import org.springframework.context.support.ClassPathXmlApplicationContext;
public class MyTest {
@Test
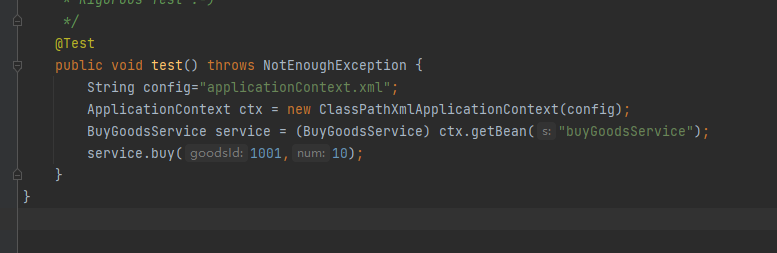
public void test01(){
String config="beans.xml";
ApplicationContext ctx = new ClassPathXmlApplicationContext(config);
//SomeService service = (SomeService) ctx.getBean("someService");
SomeService service = ctx.getBean(SomeService.class);
service.doSome();
}
}
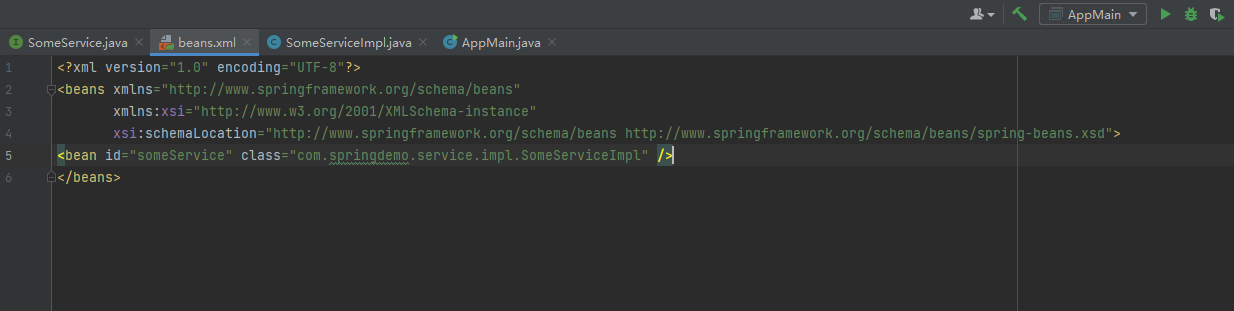
问题1:spring创建对象,调用是类的那个方法
添上一段代码
说明spring默认是无参构造方法
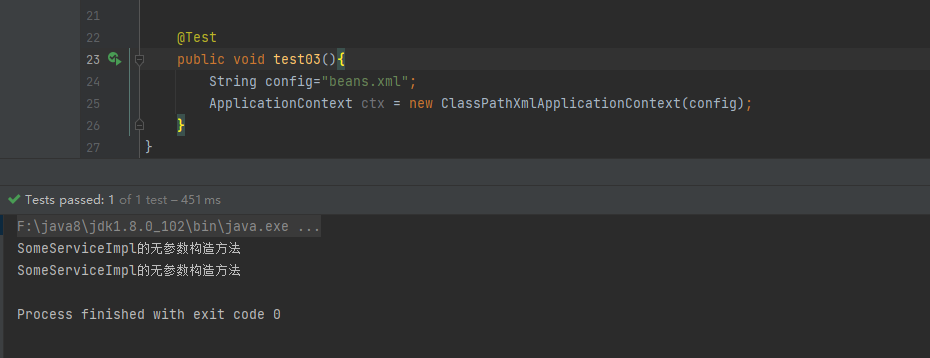
问题2:spring是在什么时候创建对象
创建spring容器对象的时候,会读取配置文件,创建文件中声明的java对象
问题3:spring容器创建对象,一次创建几个
在创建容器对象时,会把配置文件中的所有对象一次都创建出来,都放到容器的map中
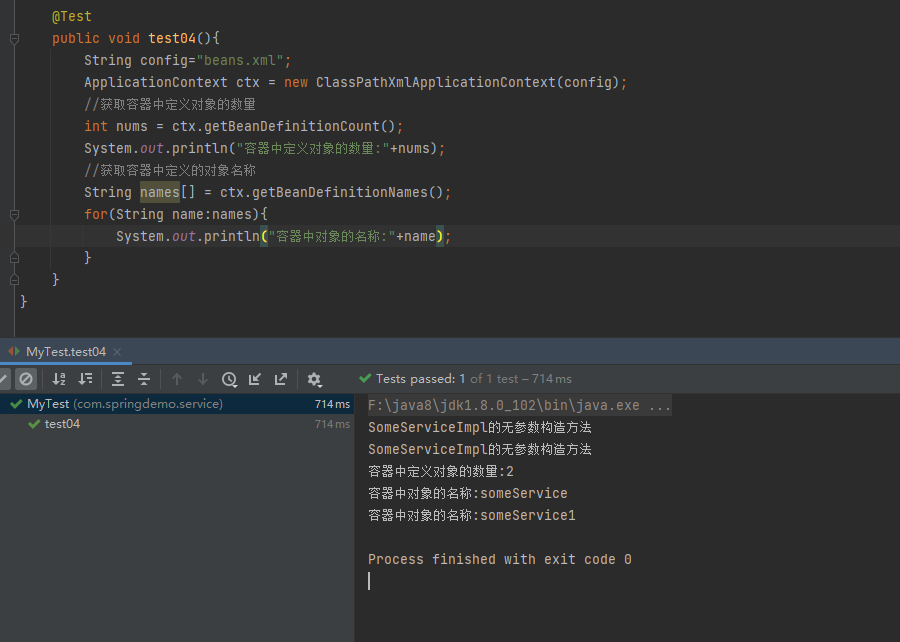
获取容器中对象的信息
    @Test
    public void test04(){
        String config="beans.xml";
        ApplicationContext ctx = new ClassPathXmlApplicationContext(config);
        //获取容器中定义对象的数量
        int nums = ctx.getBeanDefinitionCount();
        System.out.println("容器中定义对象的数量:"+nums);
        //获取容器中定义的对象名称
        String names[] = ctx.getBeanDefinitionNames();
        for(String name:names){
            System.out.println("容器中对象的名称:"+name);
        }
    }
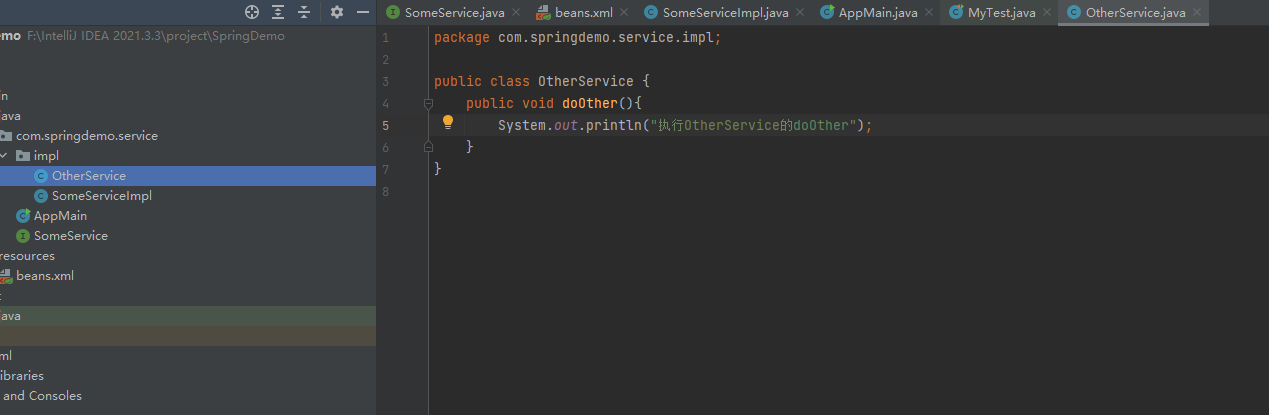
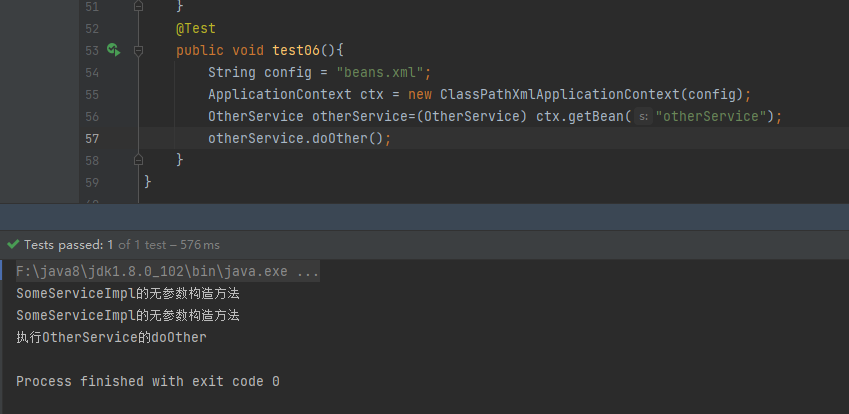
spring创建非定义类
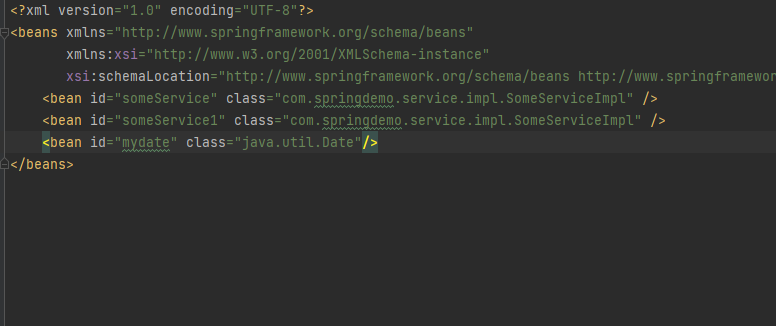
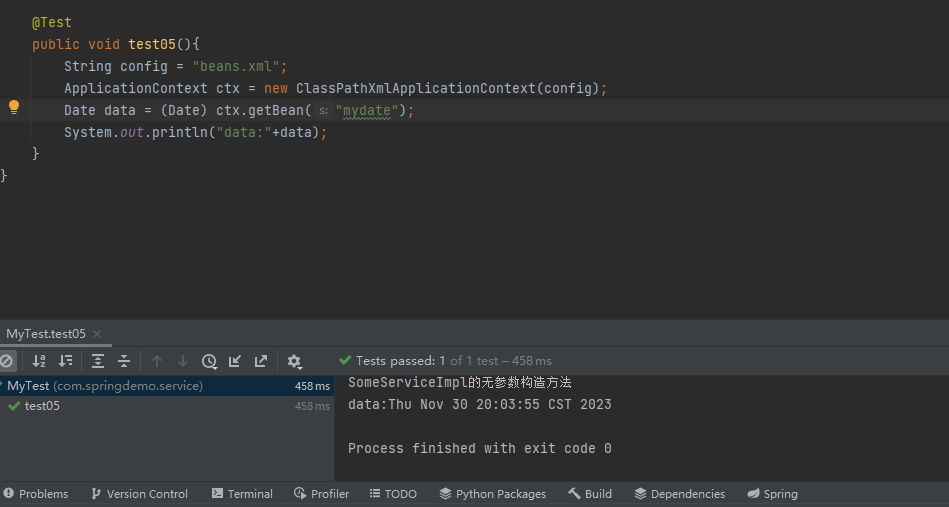
spring没有接口的类创建对象
DI:给属性赋值
spring调用类的无参数构造方法构造对象,创建对象,对象创建后给属性赋值
给属性赋值可以使用1)xml配置文件中的标签和属性 2)使用注解
DI分类: 1.set注入,也叫设值注入 2.构造注入
基于xml的DI
在xml配置文件中使用标签和属性,完成对象创建,属性赋值
set注入,也叫设值注入
概念:spring调用类中的set方法,在set方法中可以完成属性赋值,推荐使用
把1.7改为1.8,并补充依赖
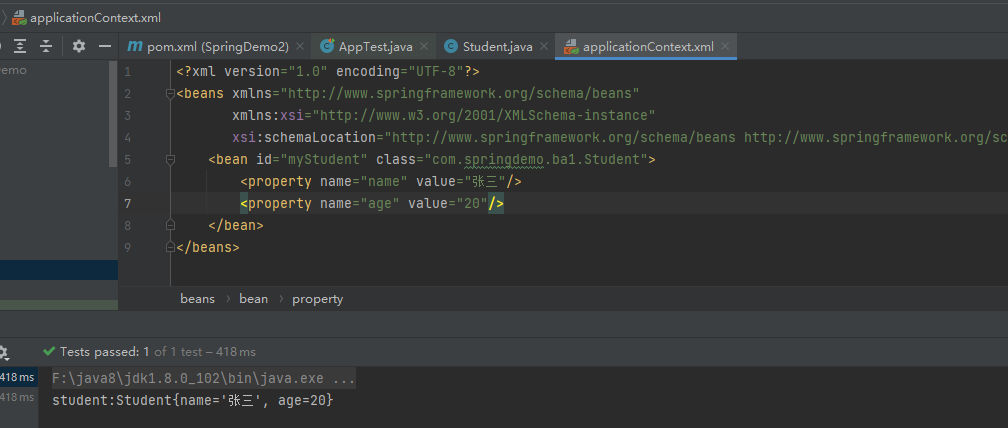
简单类型的set注入
格式
    <bean id="xxx" class="xxx">
        <property name="xxx" value="xxx"/>
        ...
    </bean>
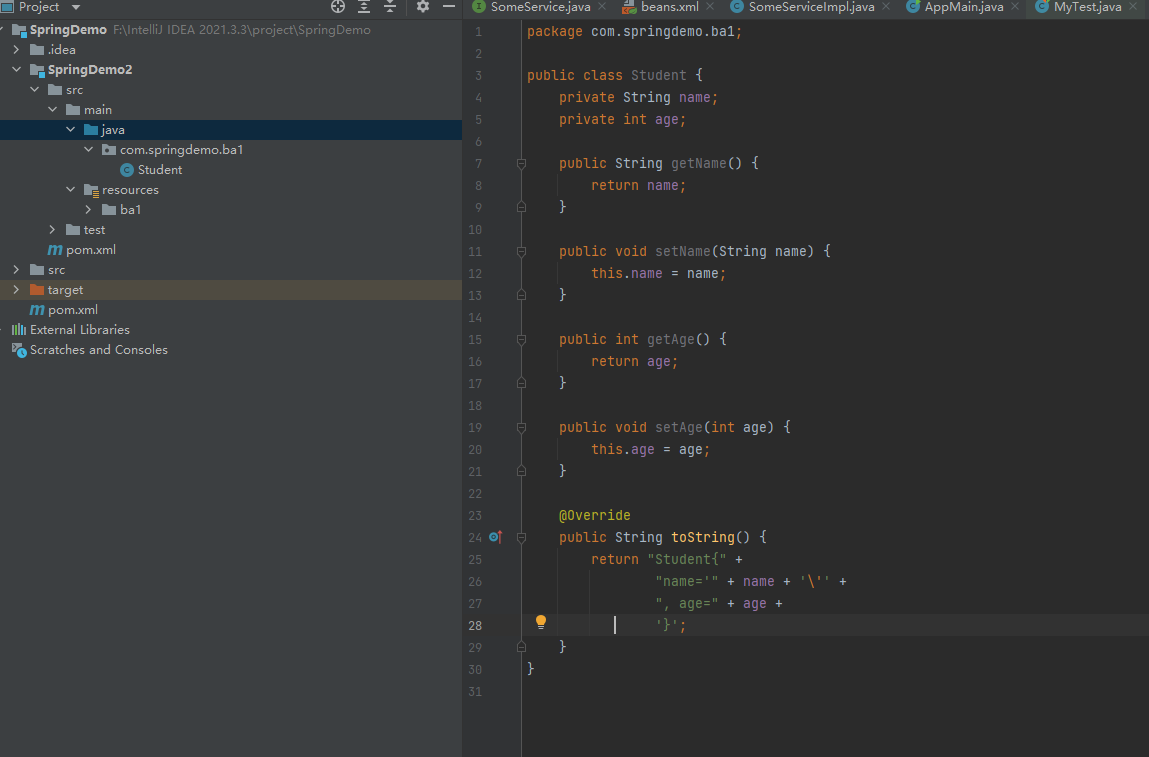
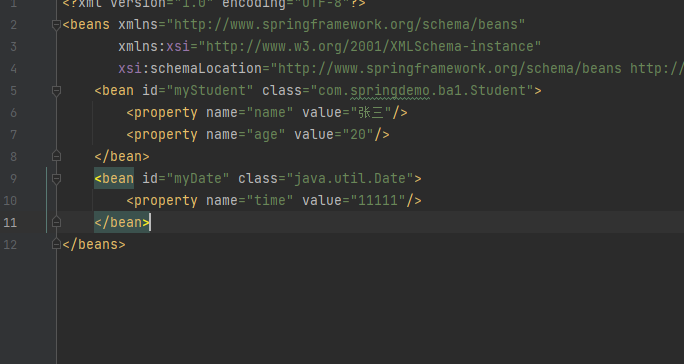
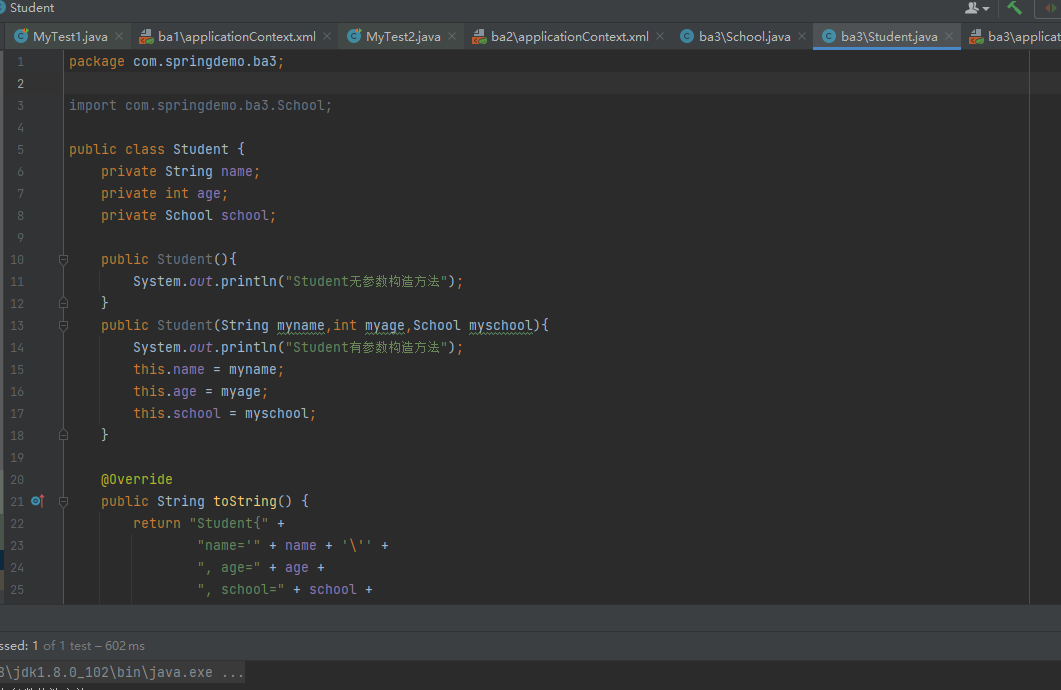
在增减一个ba1的package,写一个Student的类
alt+insert可以生成默认的setter和getter,toString方法
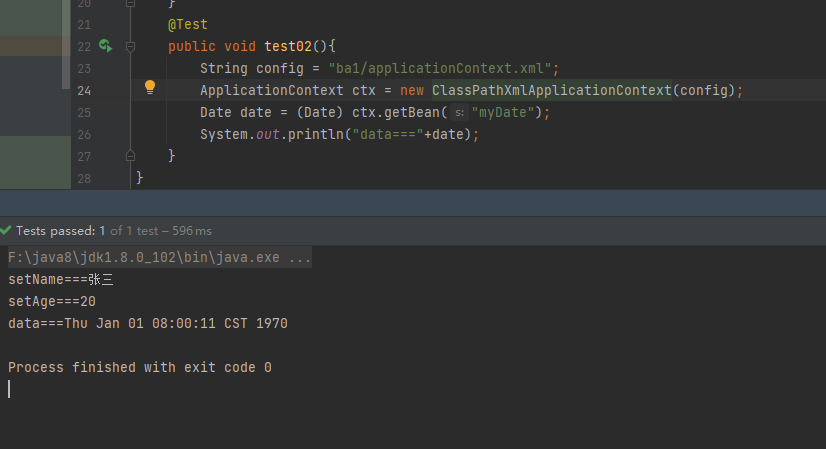
spring配置文件
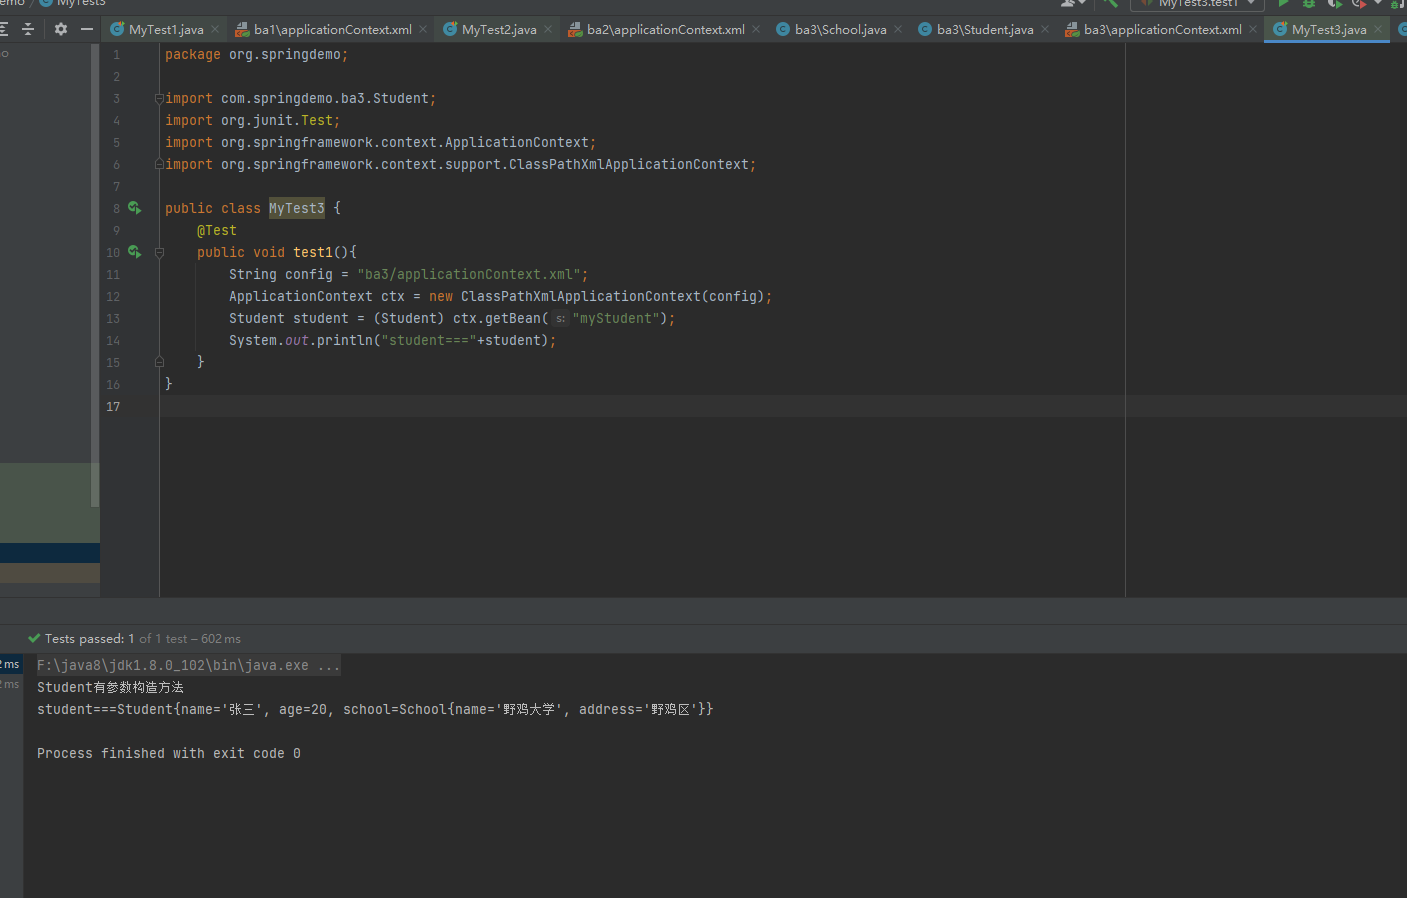
测试方法
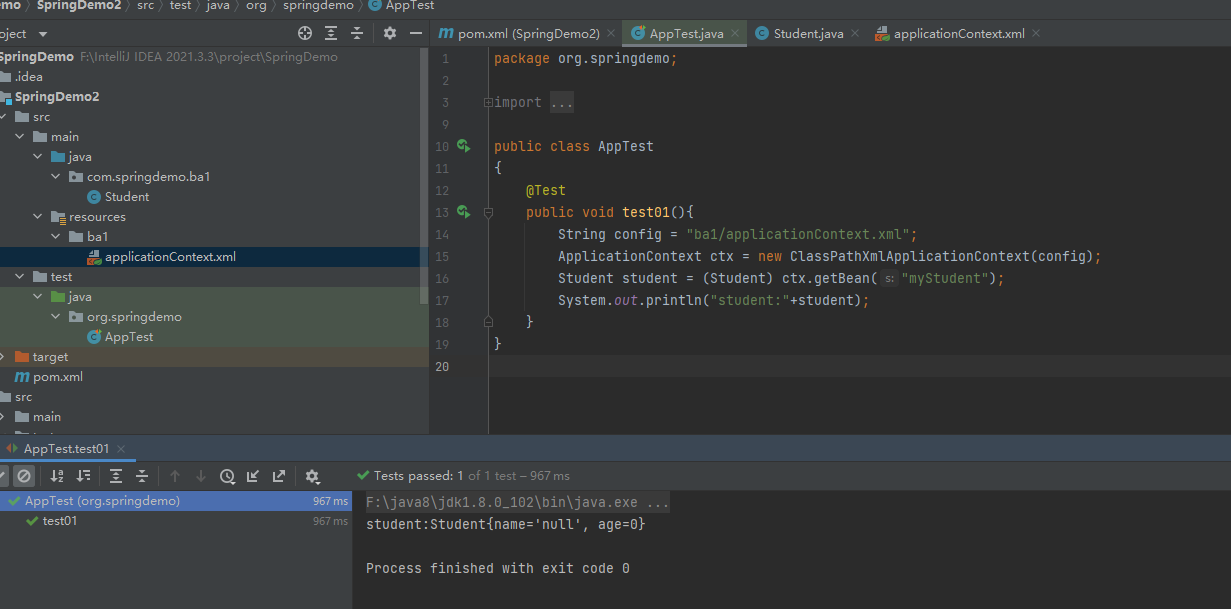
简单类型的set注入:
必须得有对应的set方法
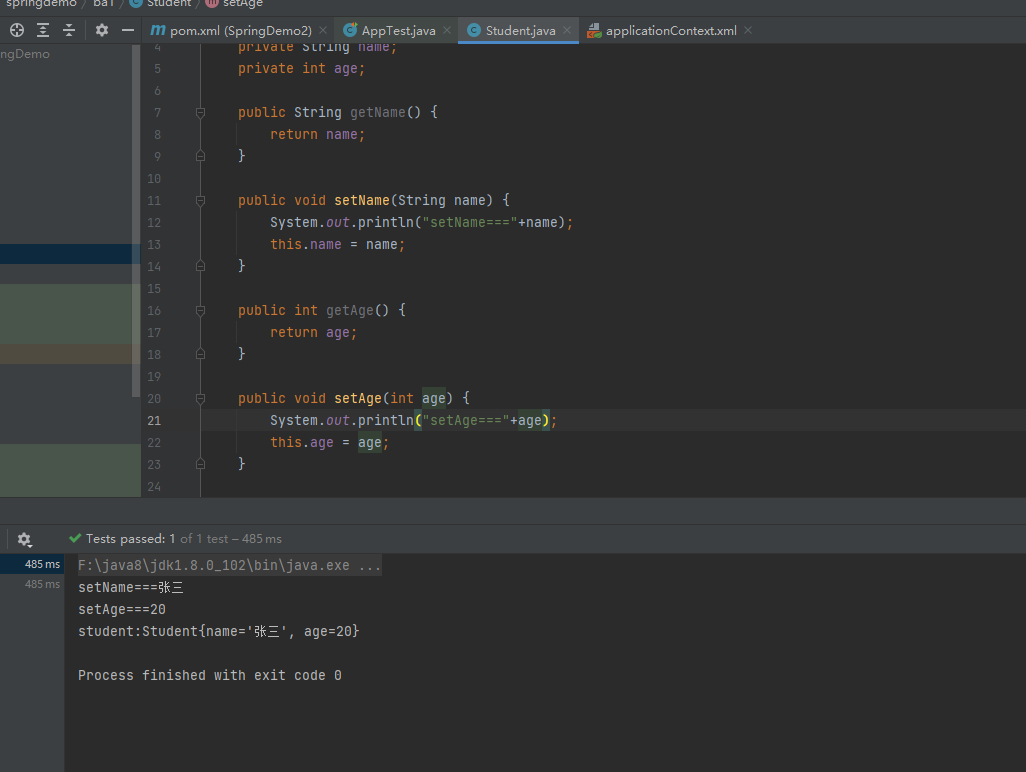
和属性名无关
只看是否有set方法,与是否有属性,属性名无关
同理也可以给非自定义方法定义
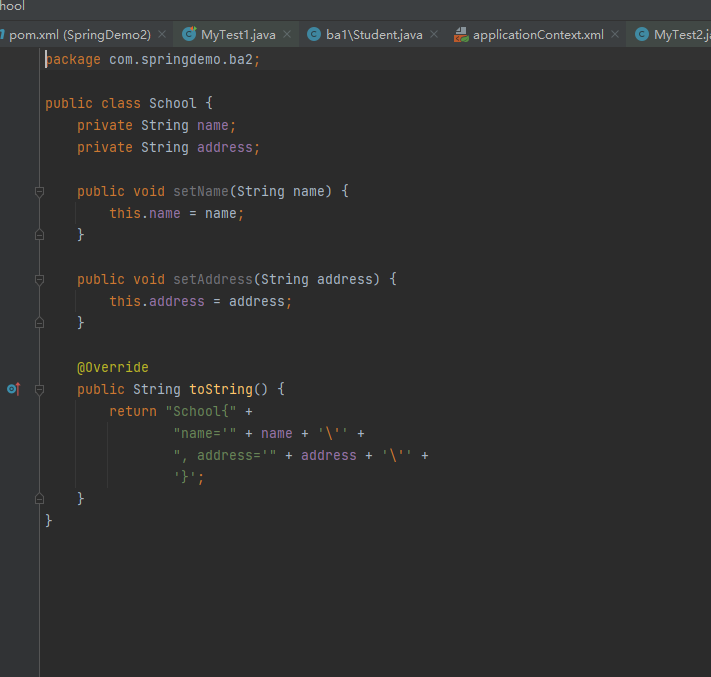
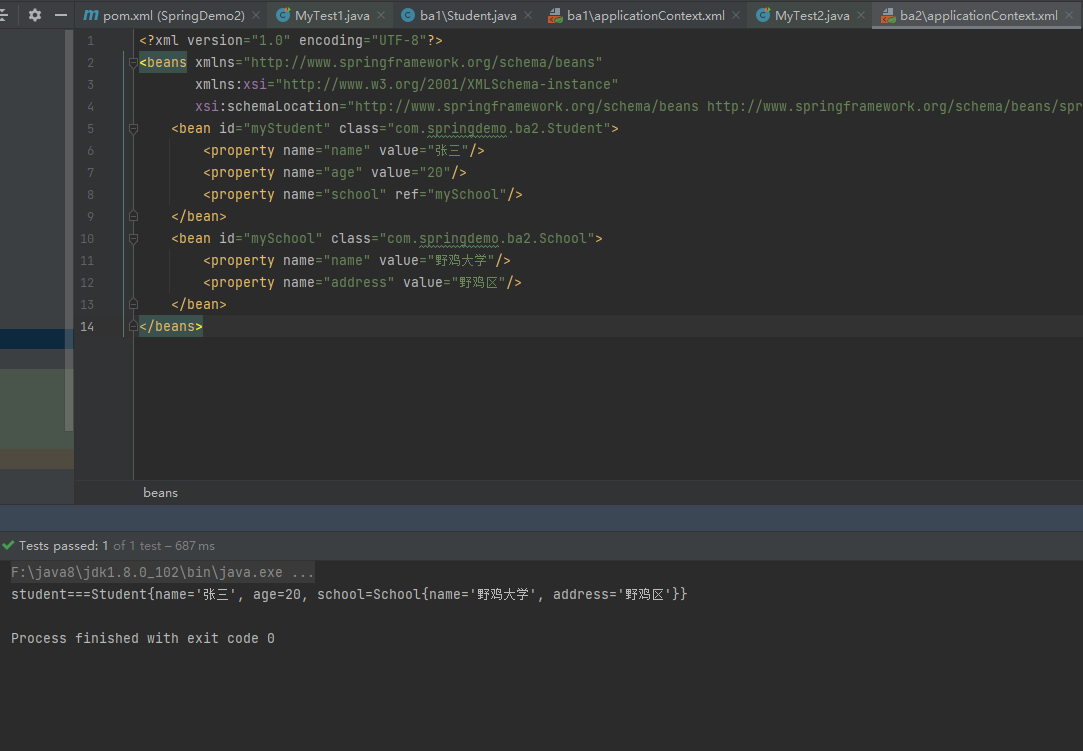
引用类型的set注入
格式
    <bean id="xxx" class="xxx">
        <property name="xxx" ref="xxx"/>
        ...
    </bean>

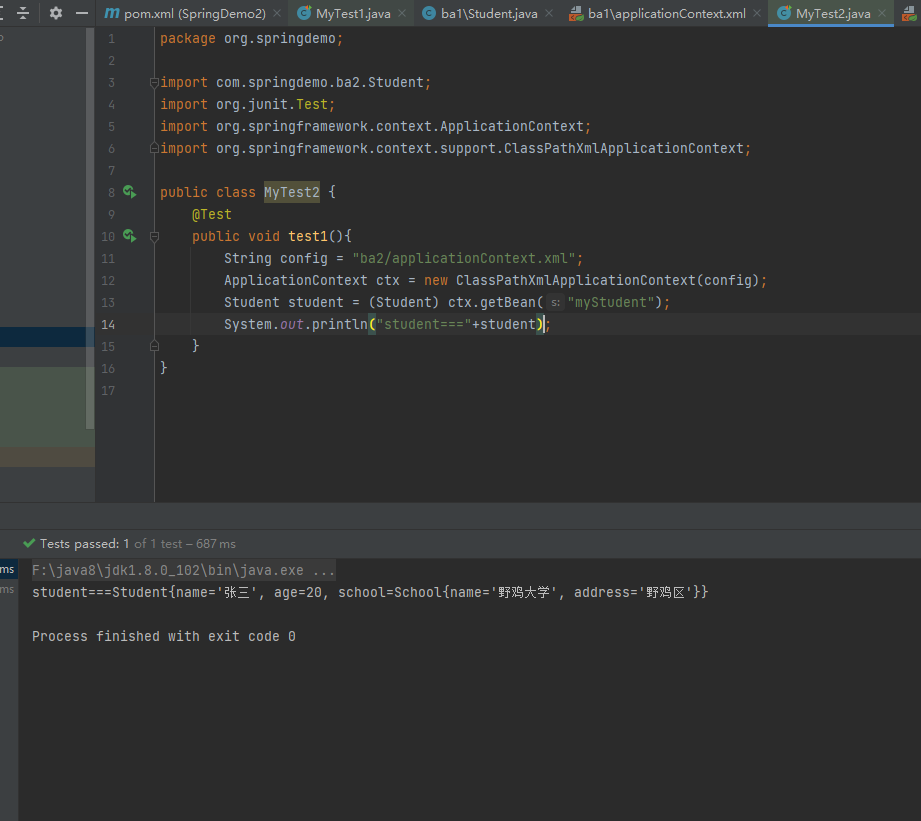
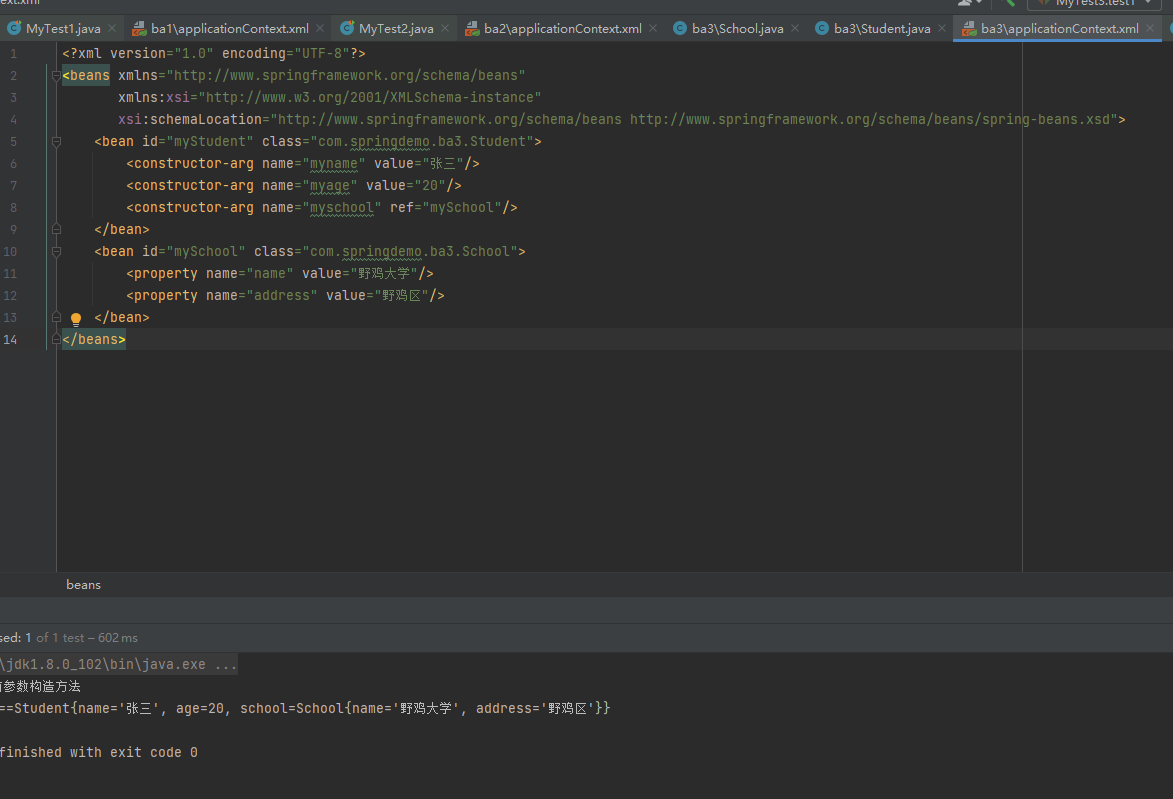
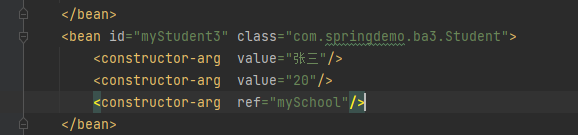
构造注入
name属性
    <bean id="xxx" class="xxx">
        <constructor-arg name="xxx" value="xxx"/>
        ...
    </bean>
index属性
    <bean id="xxx" class="xxx">
        <constructor-arg index="xxx" value="xxx"/>
        ...
    </bean>

省略index属性
引用类型的自动注入
概念:spring可以根据某些规则给引用类型自动完成赋值,只对引用类型有效,规则byName,byType
byName
java类中引入类型的属性名称和spring容器中bean的id名称一样,且数据类型一样的,这样的bean能够赋值给引用类型
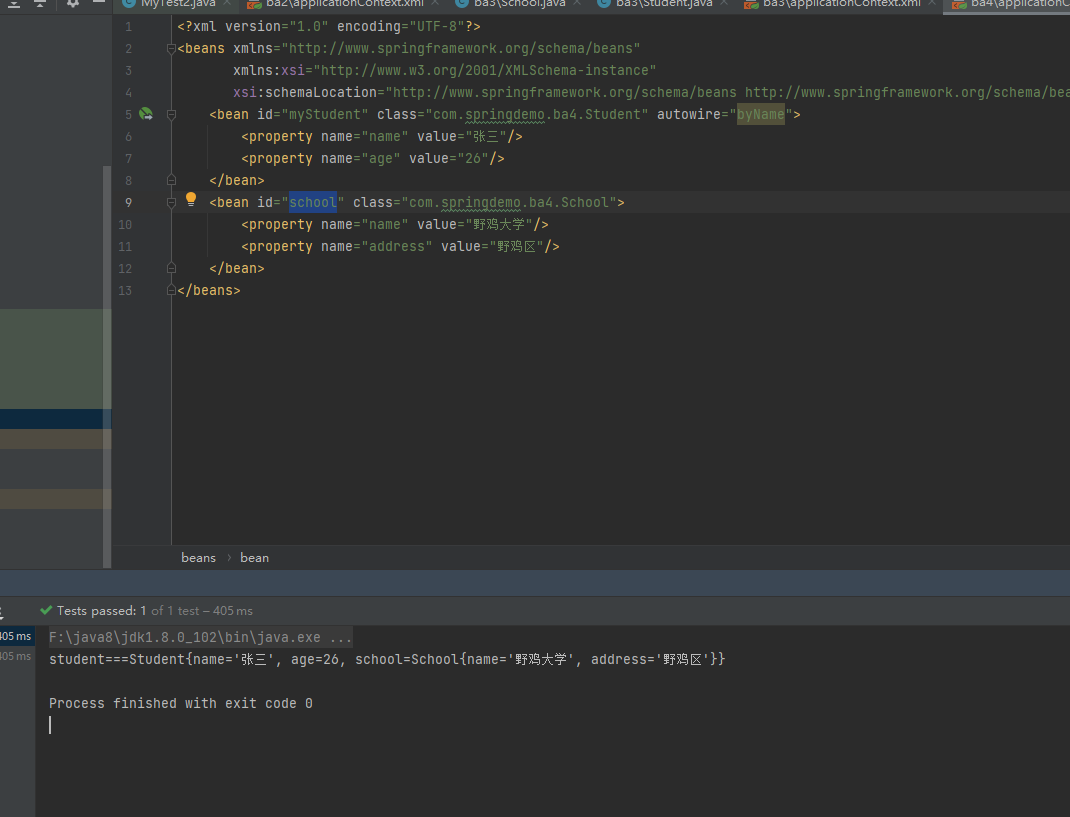
byType和byName的区别是byName的引用注入必须id值相同(下面的id必须为school,而byType不需要)
注意事项:
在xml配置文件中,符合条件的对象,只能有一个,否则会报错
byType第一种同源关系,java中引用类型的数据类型和bean的class值是一样的
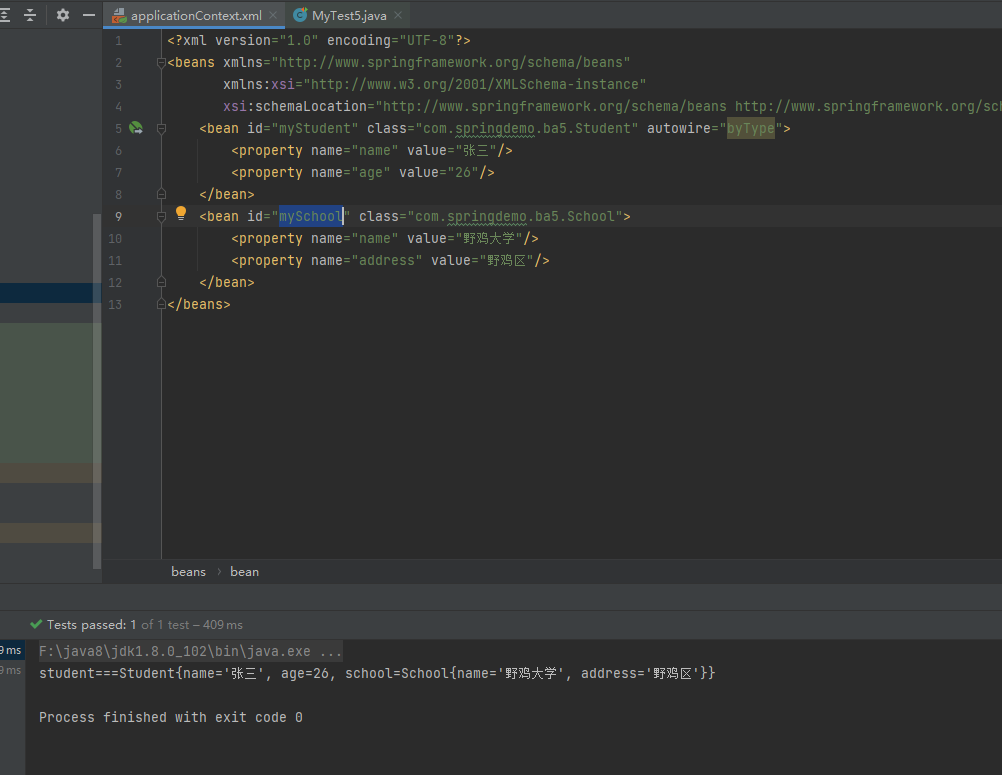
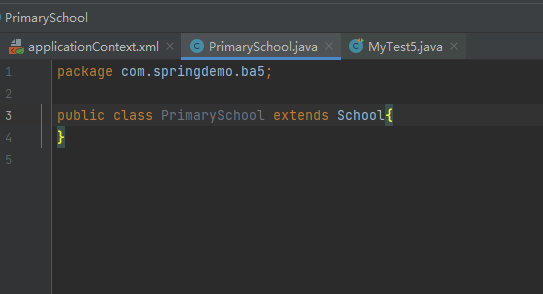
byType第二种同源关系,java中引用类型的数据类型和bean的class值是父子类关系

多个配置文件
classpath
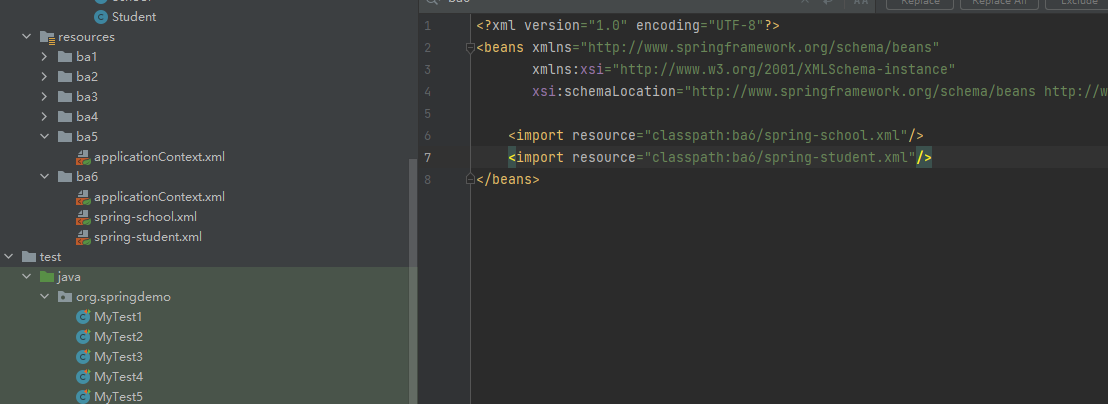
使用了通配符
注意总的xml不能被包含(applicationContext.xml)

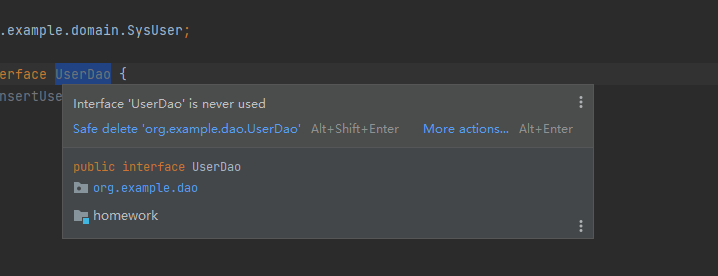
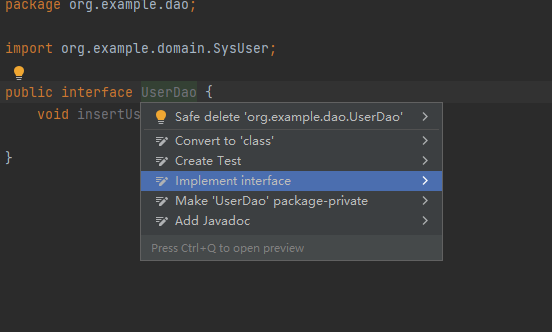
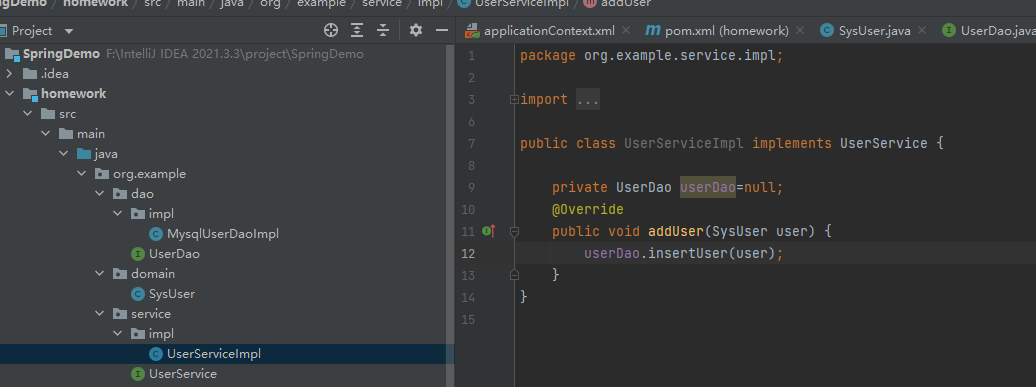
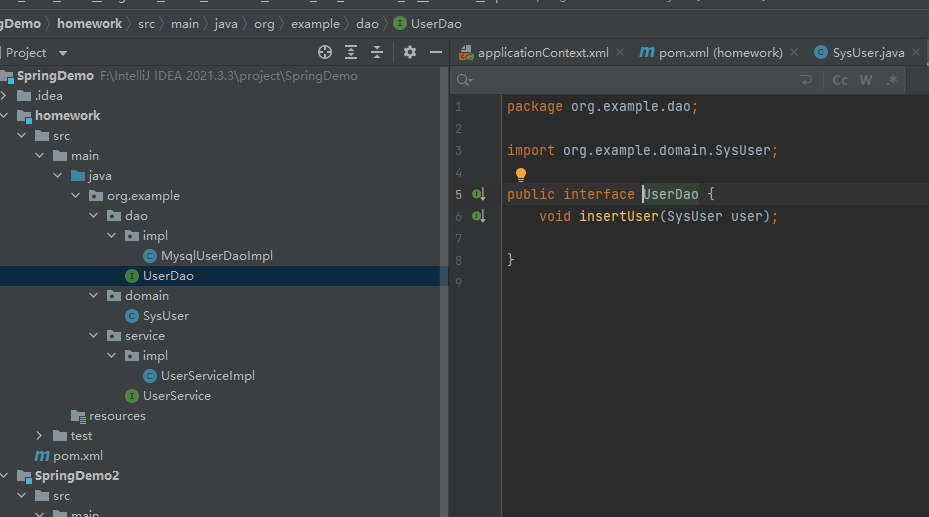
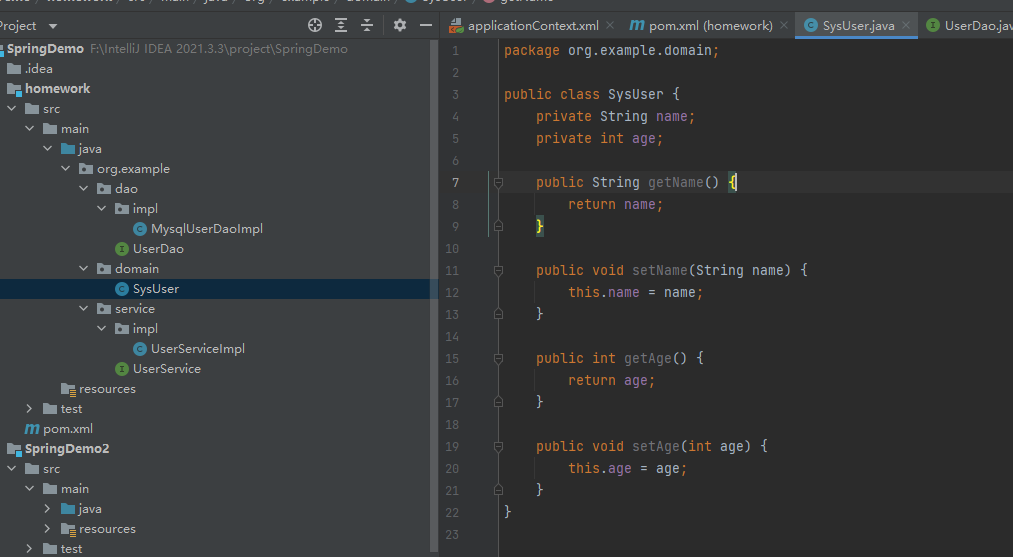
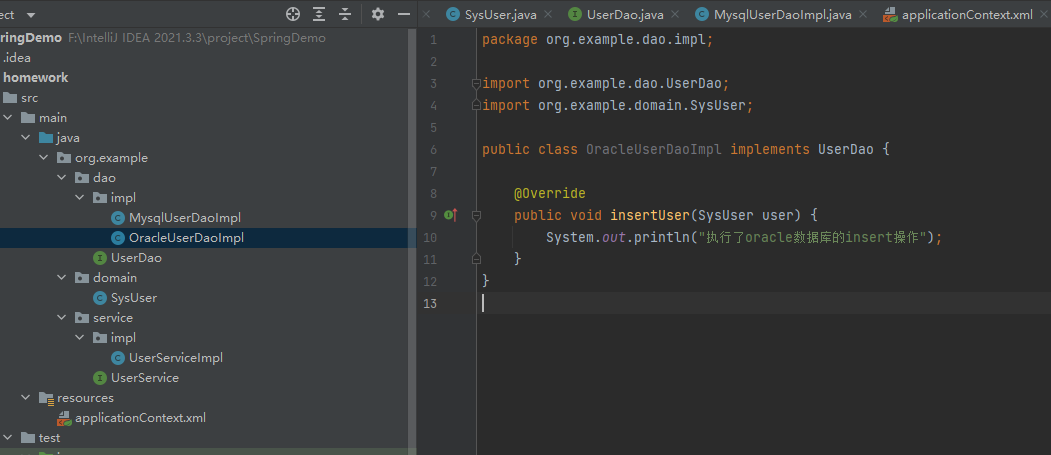
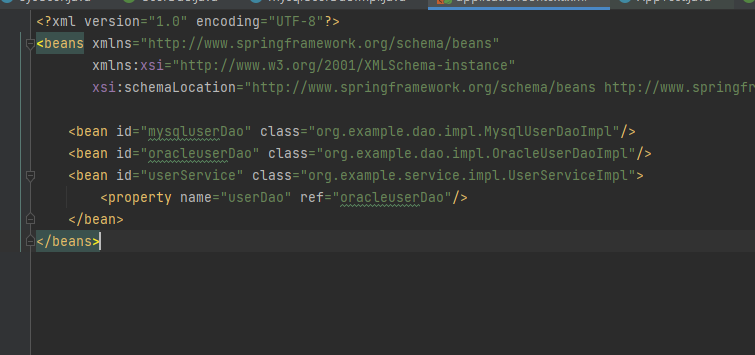
homework
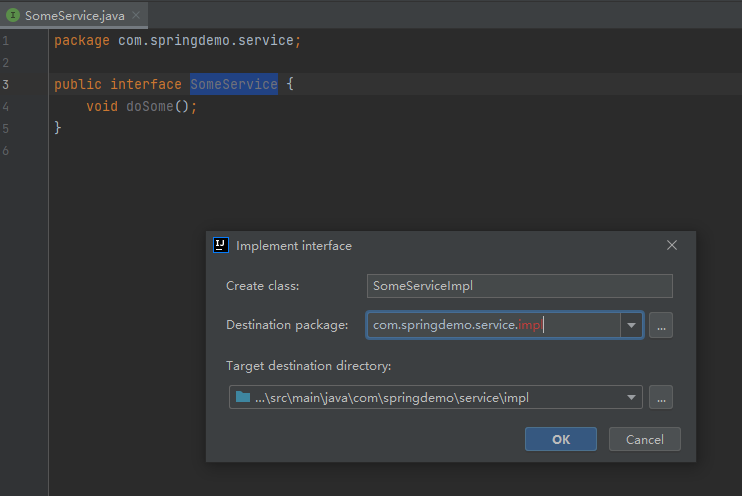
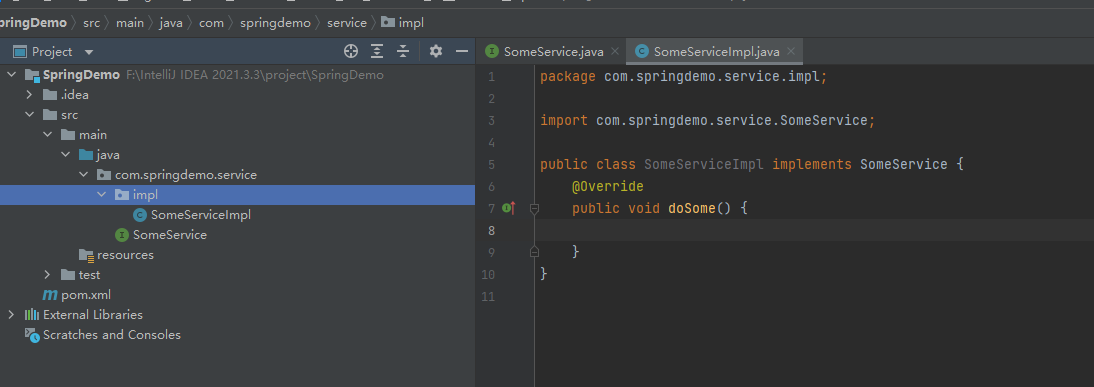
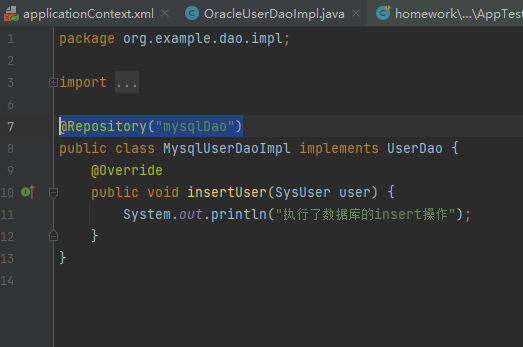
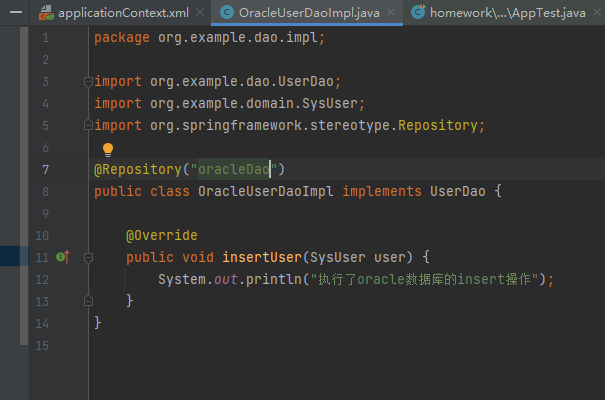
快速给接口创建实现类
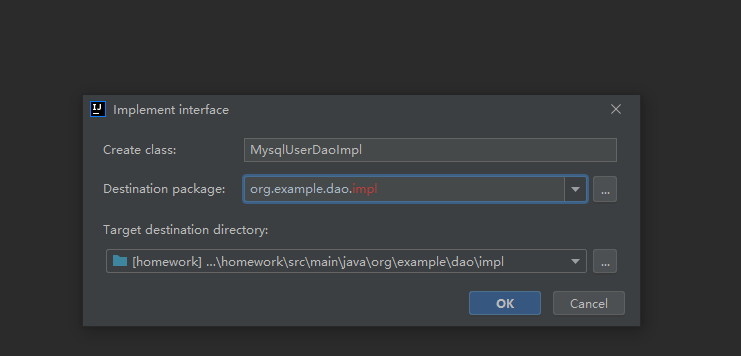


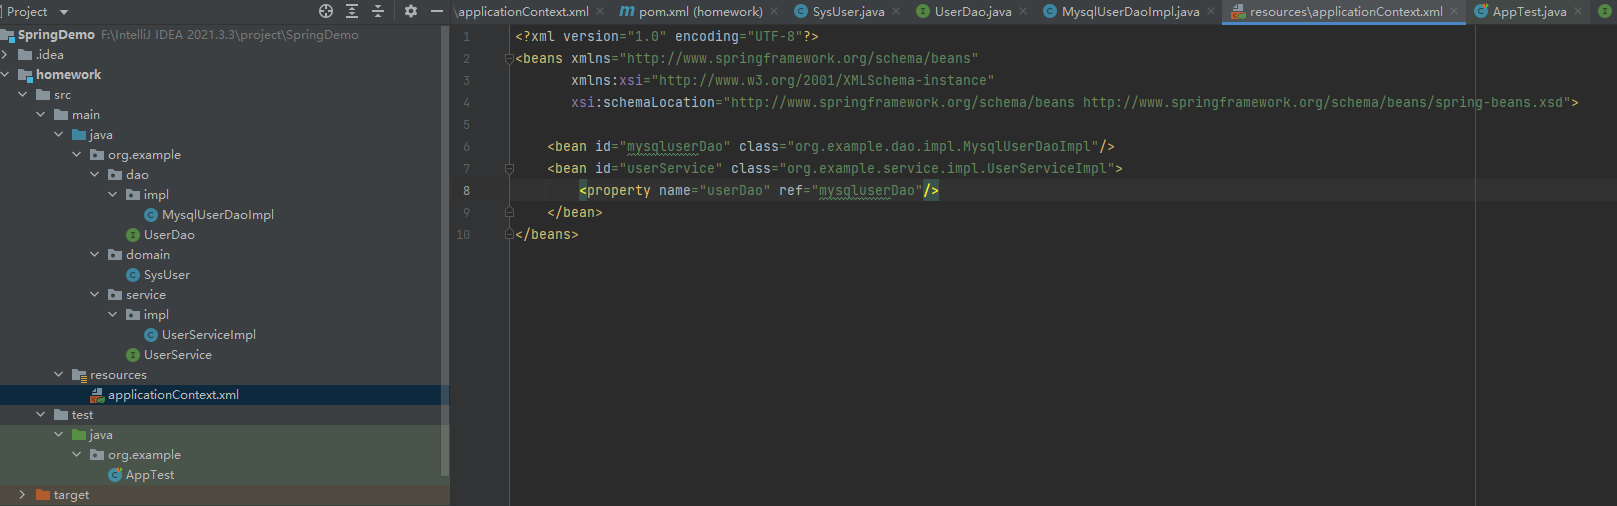
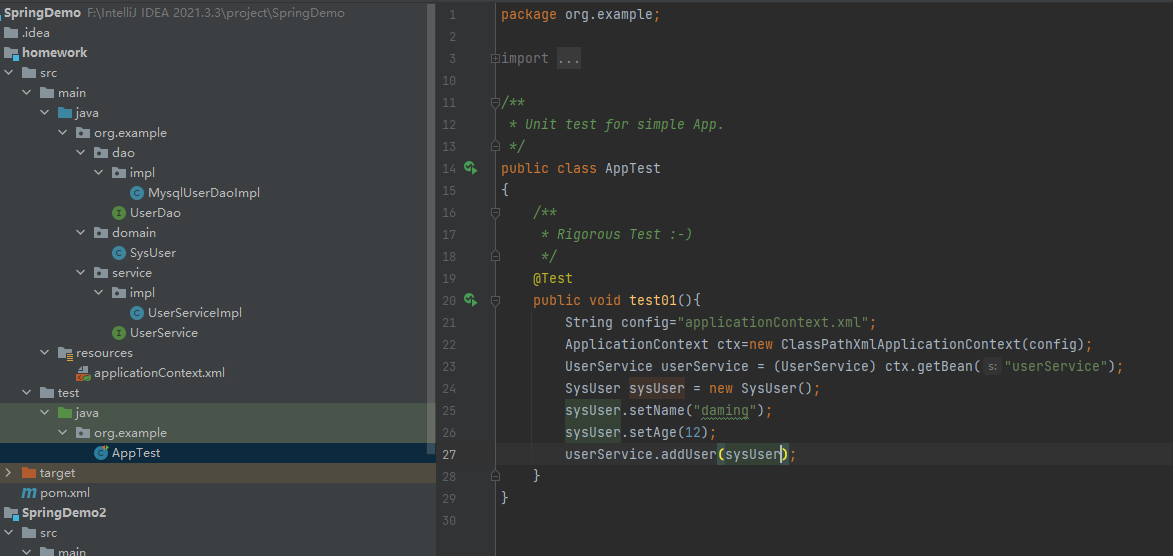
如果数据库换成oracle的话
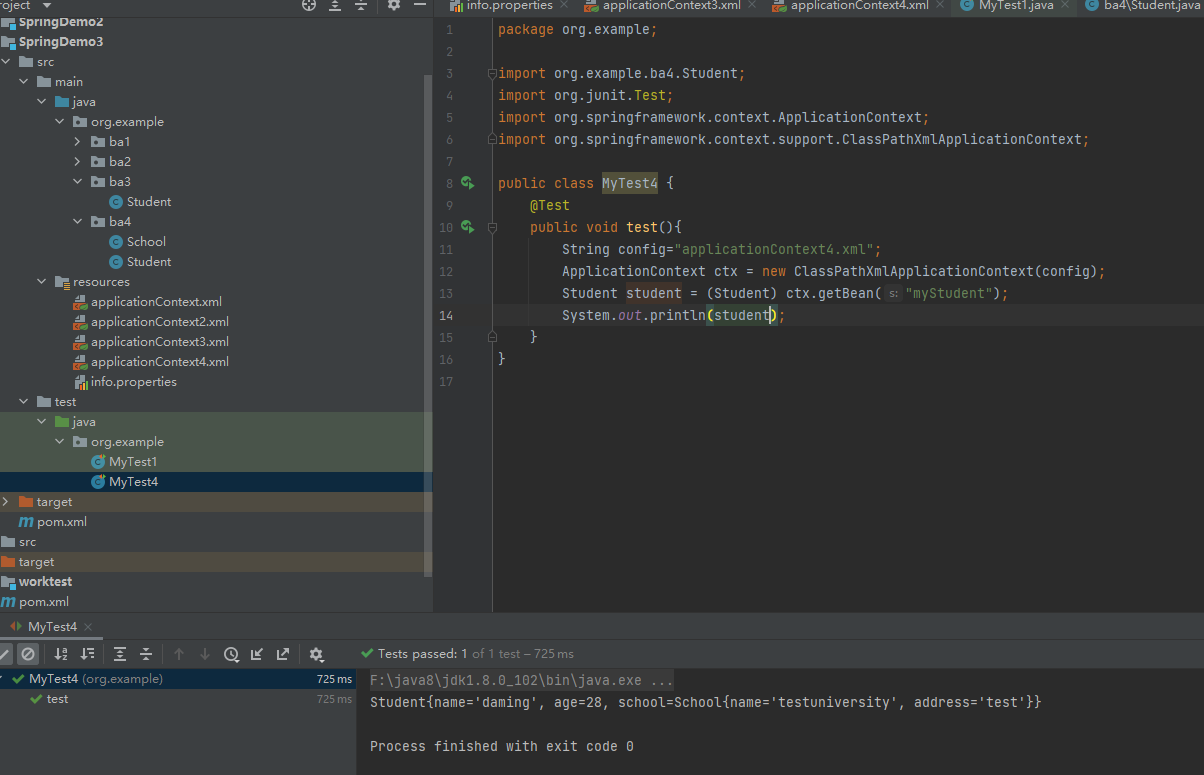
基于注解的DI
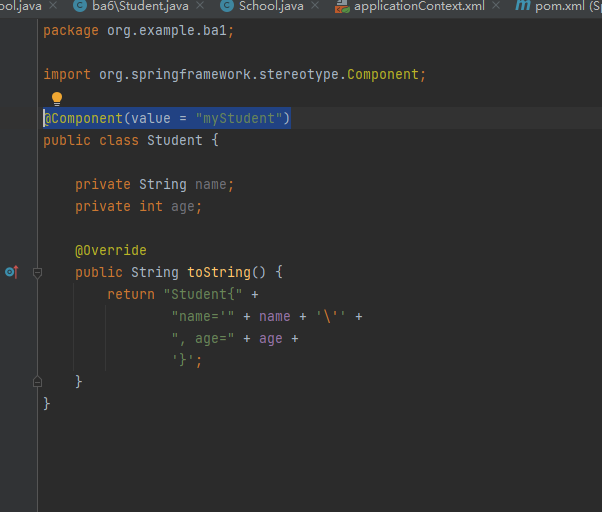
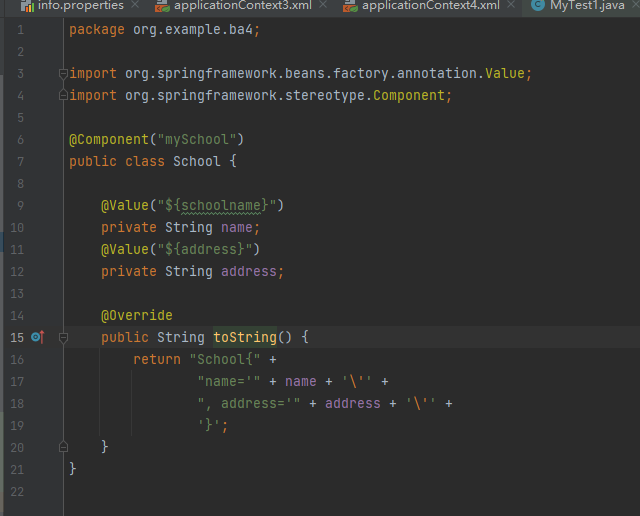
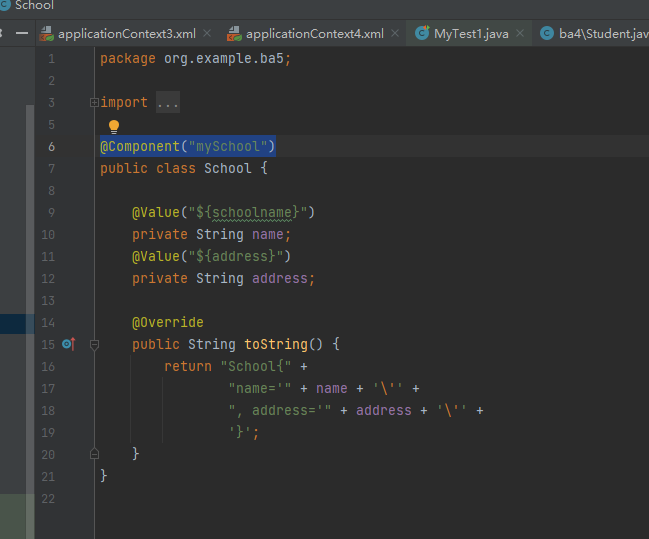
Spring-Component创建对象
@Component
表示创建对象,对象放到容器里,作用是
属性:value,表示对象名称,也就是bean的id属性值
位置:在类的上面,表示创建此类的对象
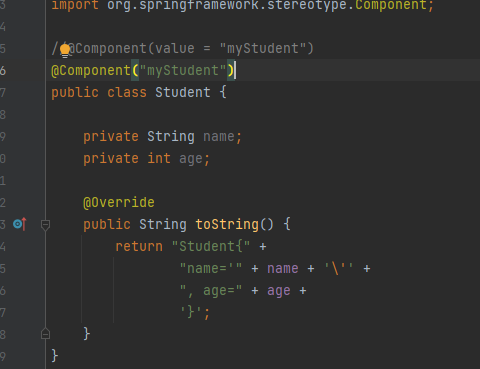
等同于
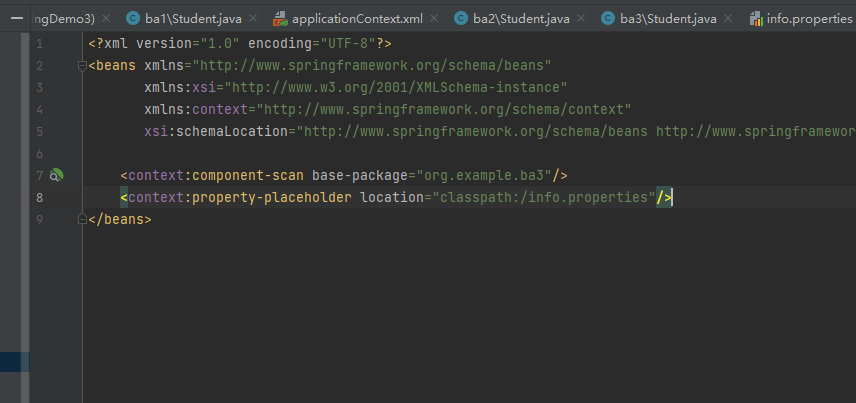
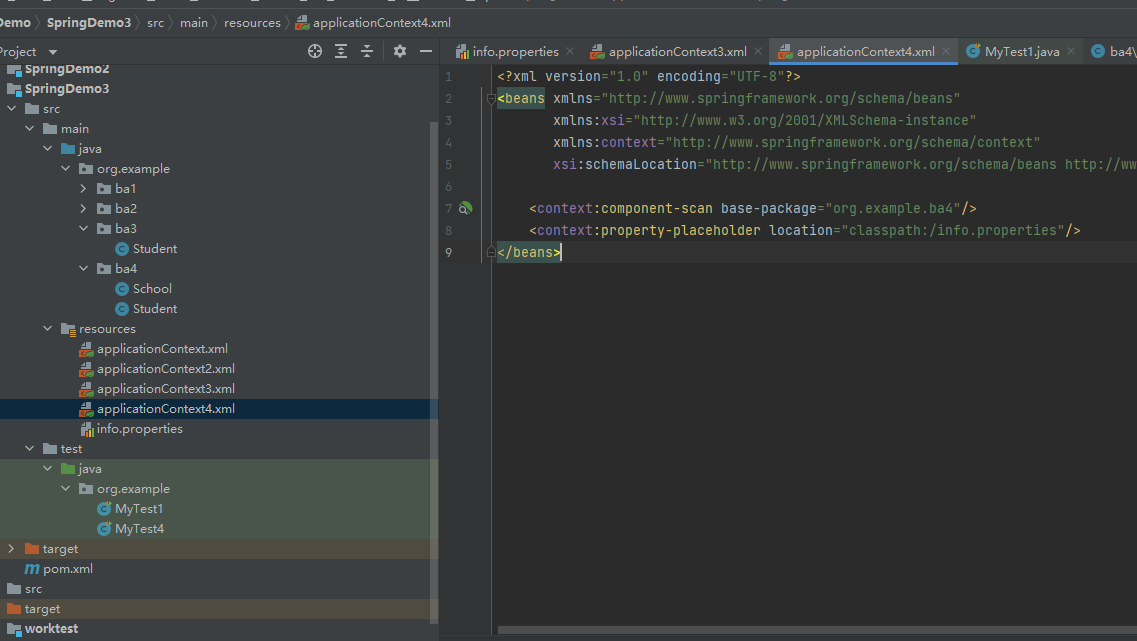
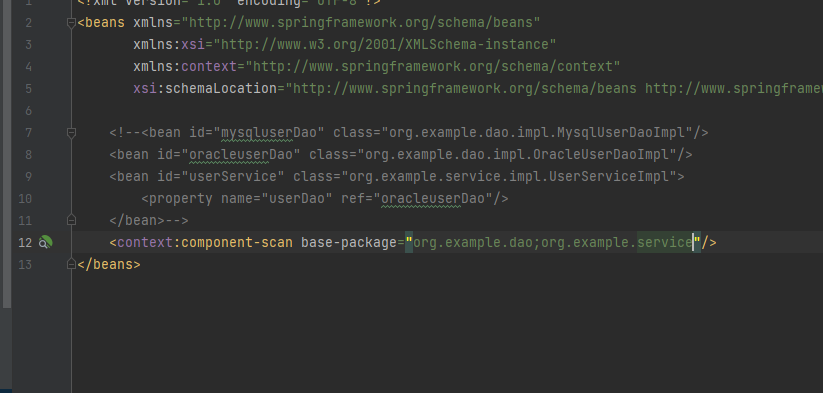
然后再resources的applicationContext.xml中
声明组件扫描器:使用注解必须加入这个语句
base-package 注解在项目中的包名
遇到注解后,安装注解表示的功能,创建对象,给属性赋值

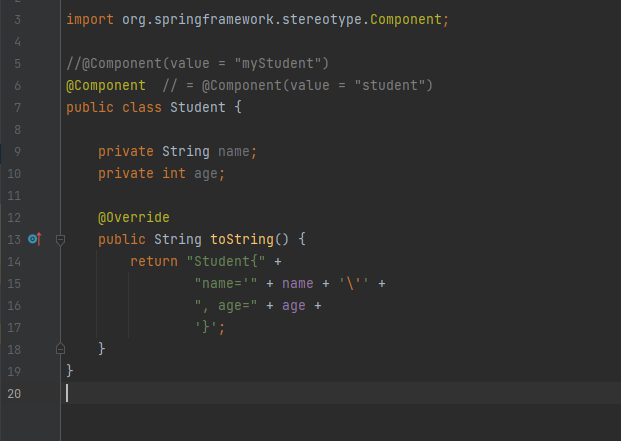
可以省略value
Component注解默认是类名首字母的小写
创建对象的四个注解
@Component
@Repository:放在dao接口的实现类上面,表示创建dao对象,持久层对象,能访问数据库
@Service:放在业务层接口的实现类上面,表示创建业务层对象,业务层对象有事务的功能
@Controller:放在控制器类的上面,表示创建控制器对象,属于表示层对象,控制器对象能接受请求,把请求的处理结果显示给用户
这三个注解有角色说明,表示对象是分层的
扫描多个包的三种方式
1.使用多次组件扫描器
<context:component-scan base-package="org.example.ba1"/>
<context:component-scan base-package="org.example.ba2"/>
2.使用分隔符(;或,)
<context:component-scan base-package="org.example.ba1;org.example.ba2"/>
3.指定父包
<context:component-scan base-package="org.example"/>
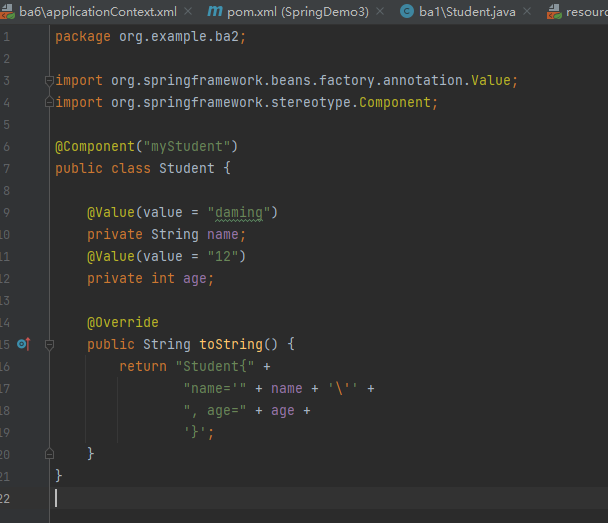
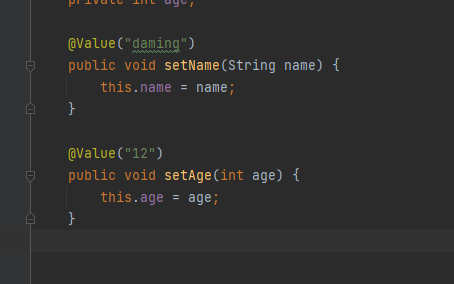
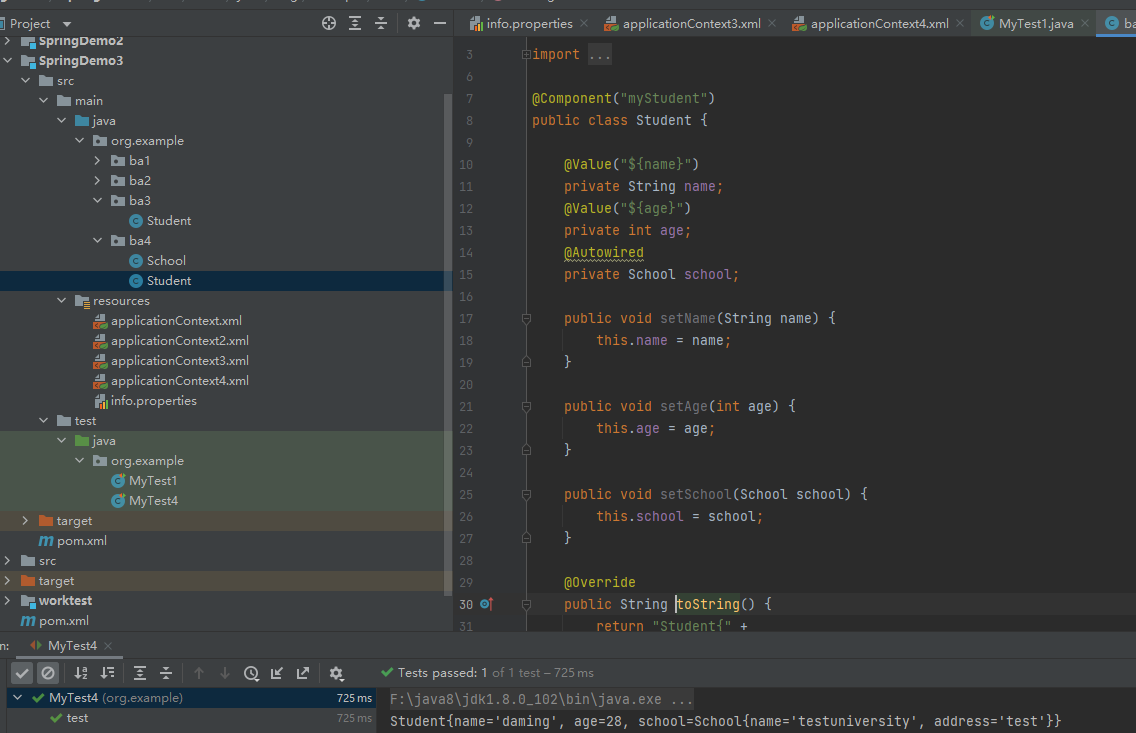
简单类型属性赋值@Value
在属性定义的上面,无需set方法,推荐使用
或者在set方法上面
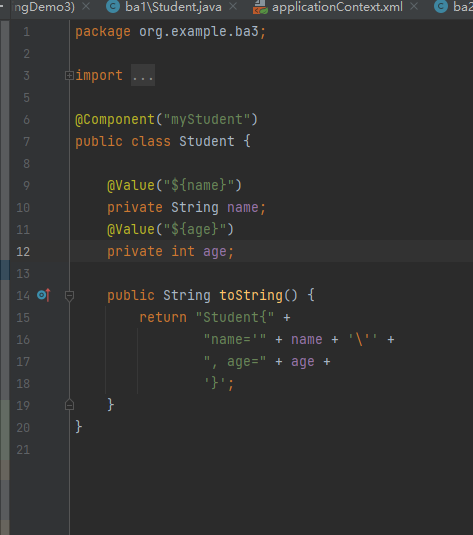
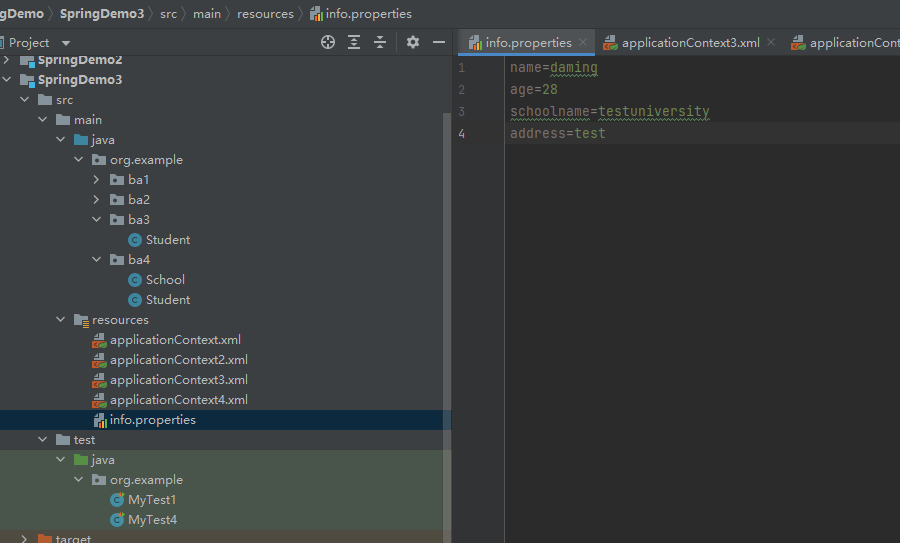
@Value使用外部属性配置文件
properties配置文件
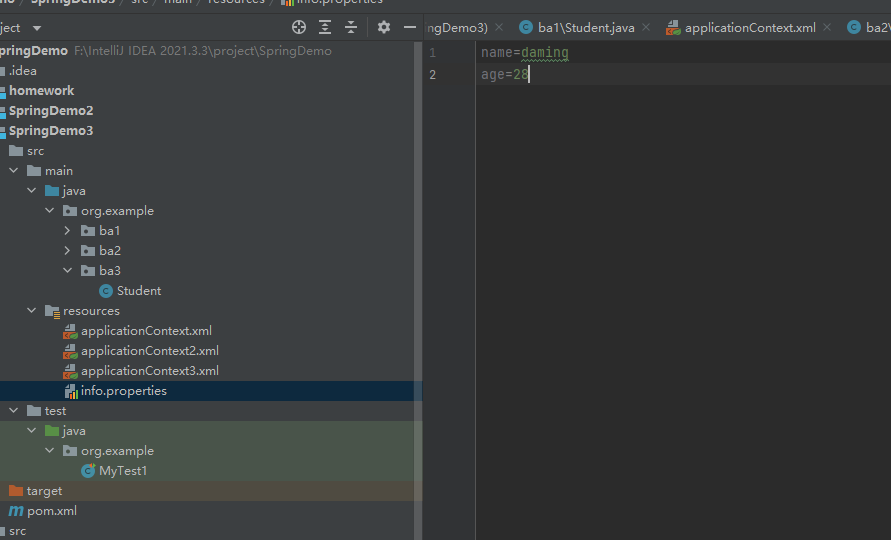
@Value("${key}")
xml中导入properties
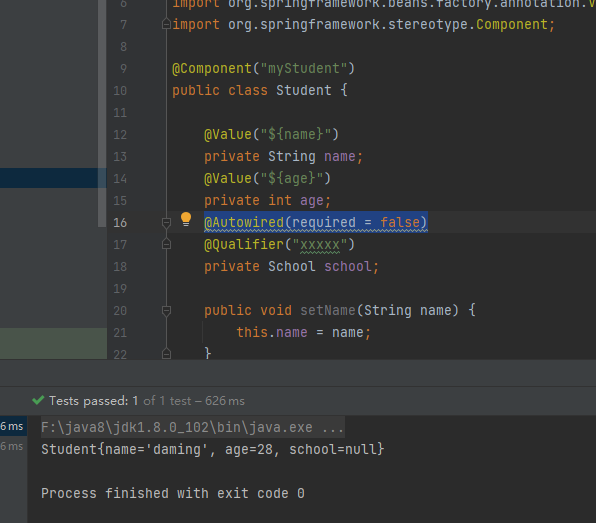
@Autowired自动注入byType
给引用类型赋值的,使用自动注入原理,支持byName,byType,默认byType
位置:
在属性定义的上方,无需set方法,推荐使用
或者在set方法上面
@Autowired自动注入byName
@Qualifer(value="bean的id"):从容器中找到指定名称的对象
value可以省略

@Autowired的required属性
默认为true,这样在启动的时候创建容器对象的时候,会检查引用类型是否赋值成功,如果赋值失败,就终止程序,并报错
如果设置为false,如果引用类型赋值失败的话不报错,而是将值设置为null(school=null)
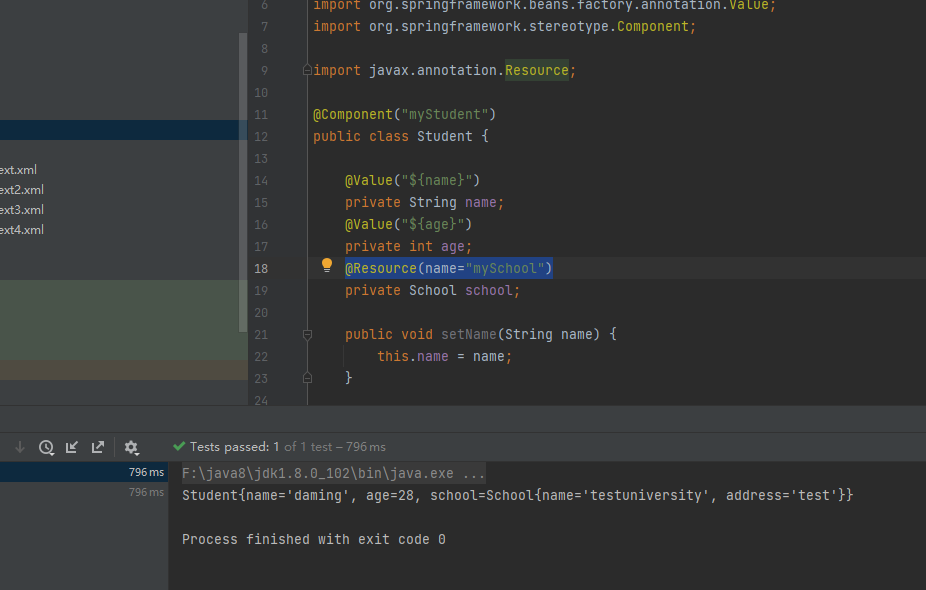
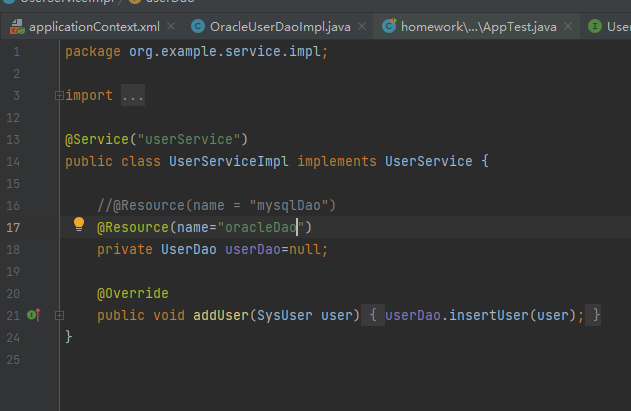
@Resource默认是byName
高于jdk1.8的话没有@Resource
需要依赖
        <dependency>
            <groupId>javax.annotation</groupId>
            <artifactId>javax.annotation-api</artifactId>
            <version>1.2</version>
        </dependency>
来自jdk中,spring框架支持使用
先使用byName,如果失败,再使用byType

@Resource只使用byName
homework
把基于xml的DI改成基于注解的DI
AOP面向切面编程
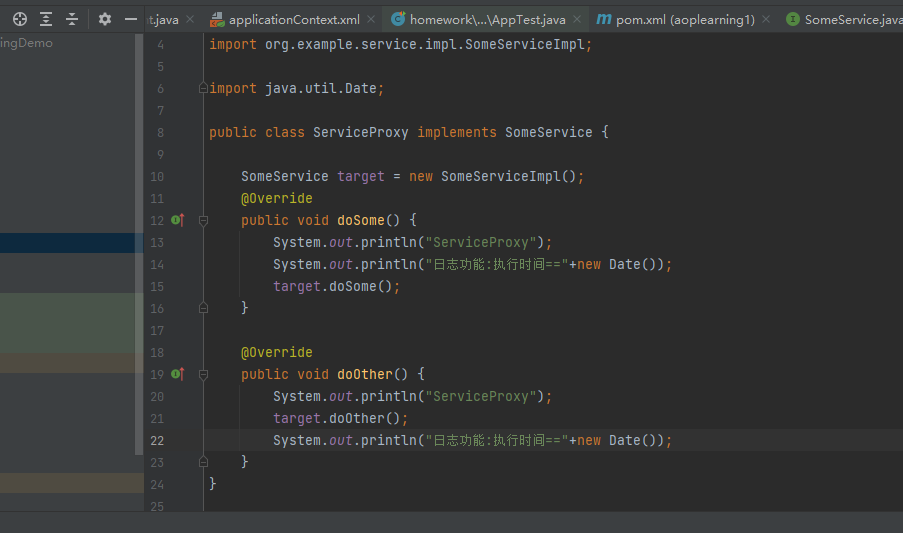
增加功能,导致的问题
1.源代码可能改动的比较多
2.重复代码比较多
3.代码难以维护
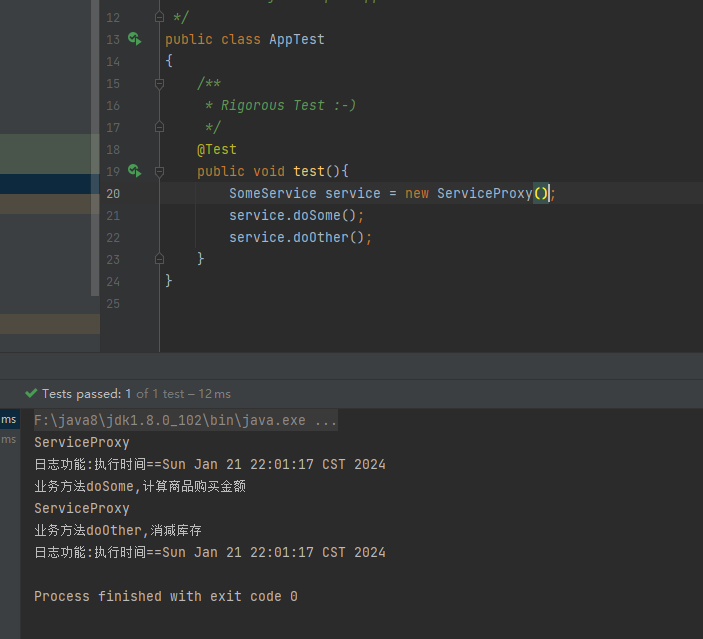
创建目标的代理
AOP概念
AOP(Aspect Orient Programming):面向切面编程
Aspect:表示切面,给业务方法增加的功能,叫做切面,切面一般都是非业务功能
而且切面功能一般都是可以复用的
例如 日志功能,事务功能,权限检查,参数检查,统计信息等等
Orient:面向,对着
Programming:编程
怎样理解?
1.设计项目时,找出切面的功能
2.安排界面的执行时间,执行的位置
AOP的作用
1.让切面功能复用
2.让开发人员专注业务逻辑,提高开发效率
3.实现业务功能和其他非业务功能解耦合
4.给存在的业务方法增加功能,不用修改原来的代码
AOP中的术语
1.Aspet:切面,给业务方法增加功能
2.JoinPoint:连接点,连接切面的业务方法,在这个业务方法执行时,会同时执行切面的功能
3.Pointcut:切入点,是一个或多个连接点的结合,表示这些方法执行时,都能增加切面的功能。表示切面执行的位置
4.target:目标对象,给那个对象增加切面的功能,这个对象就是目标对象
5.Advice:通知(增强),表示切面执行时间,在目标方法之前执行切面,还是目标方法之后执行切面
AOP中重要的三个要素:Aspect,Pointcut,Advice
在Advice时间,在Pointcut位置执行Aspect
是一个动态思想,是在程序运行期间创建代理,这个代理是存在内存中的
什么时候想用AOP
要给某些方法增加相同的功能,源代码不能改
源代码不能改,给业务方法添加非业务功能
AOP技术思想的实现
1.Spring:Spring框架实现AOP思想中的部分功能,但比较繁琐,笨重
2.Aspectj:独立的框架,专门是AOP,属于Eclipse
使用Aspectj框架实现AOP
Advice
Aspectj表示切面执行时间,用的通知(Advice),这个通知可以使用注解表示
五个注解,表示切面的五个执行时间,这些注解叫通知注解
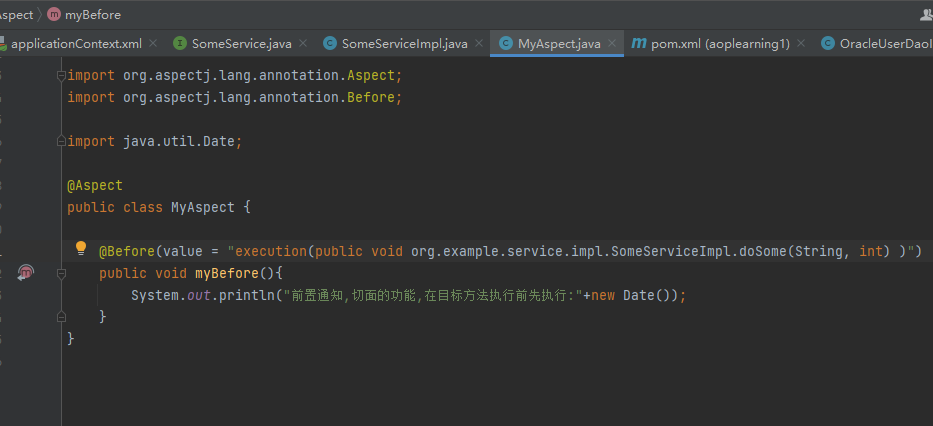
@Before:前置通知
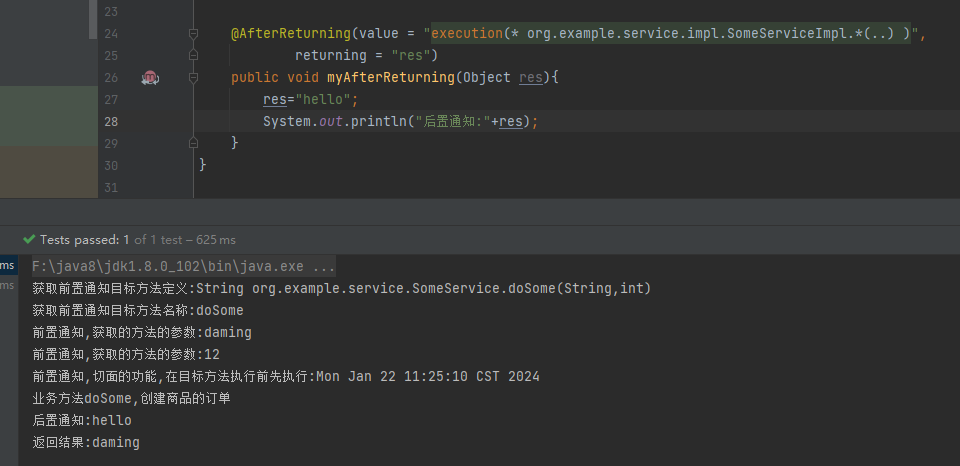
@AfterReturning:后置通知
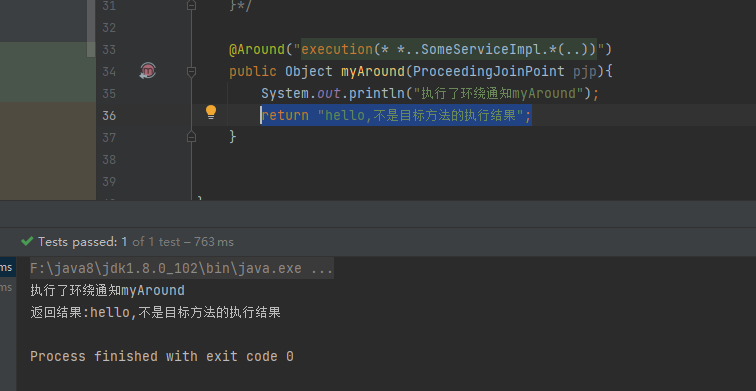
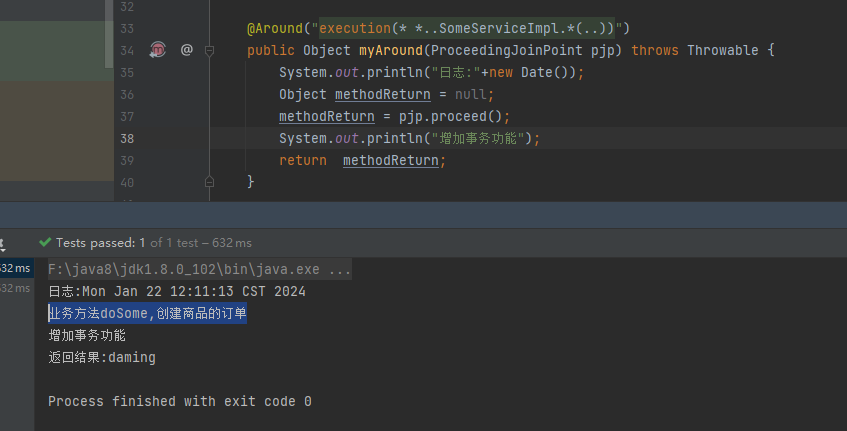
@Around:环绕通知
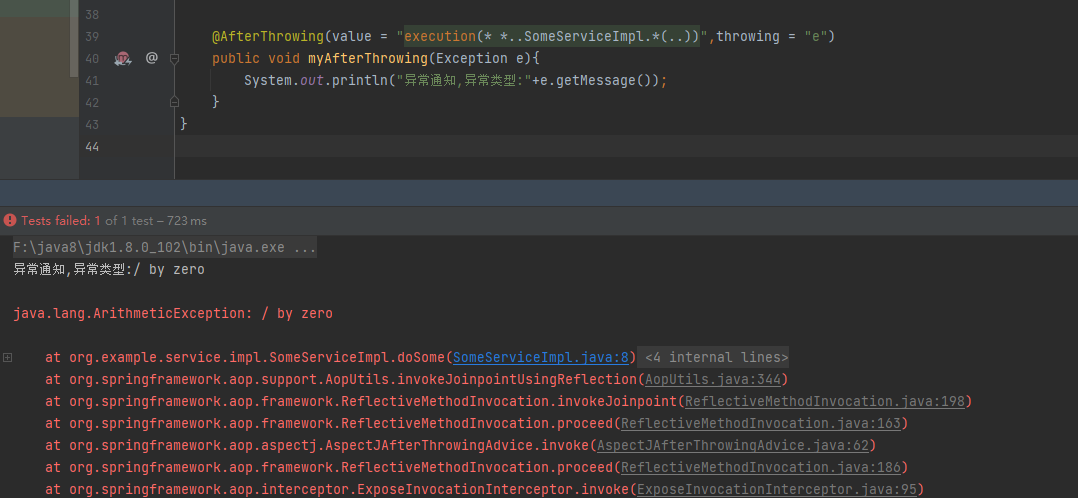
@AfterThrowing:异常通知
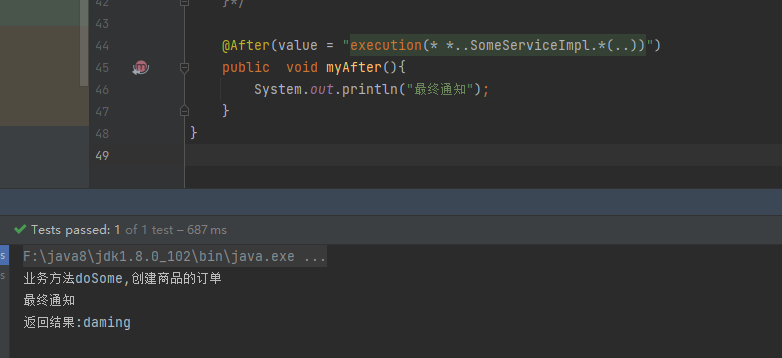
@After:最终通知
Pointcut位置
Pointcut表示切面的位置
@Before
添加依赖
        <dependency>
            <groupId>org.springframework</groupId>
            <artifactId>spring-aspects</artifactId>
            <version>5.2.5.RELEASE</version>
        </dependency>
@Aspect:切面类的注解
位置:放在某个类的上面
作用:表示当前类是切面类
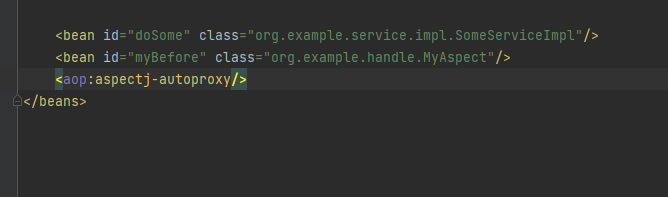
配置文件
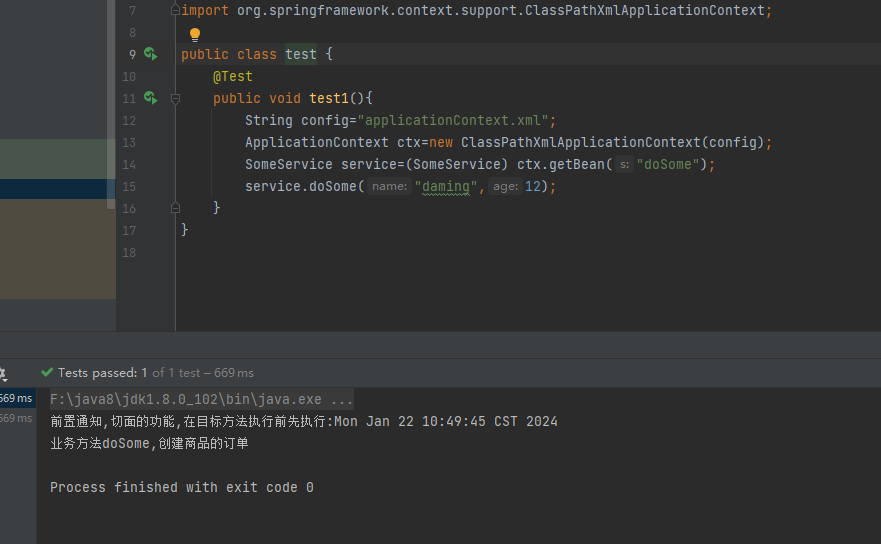
执行
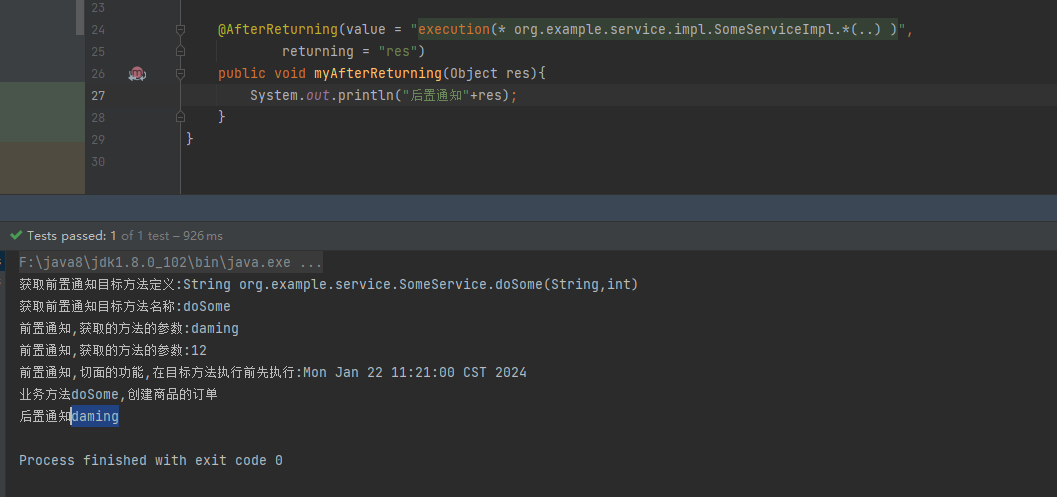
通知方法的参数JoinPoint
表示正在执行的业务方法,相当于反射中的Method
使用要求:必须是参数列表的第一个
作用:获取方法执行时的信息,例如方法名称,方法的参数集合

@AfterReturning
在目标方法之后执行
能够拿到返回值
如果在myAfterReturning修改目标返回值,不受影响目标方法最后调用的结果
JoinPoint只能为第一个参数
@Around
必须有返回值,必须有ProceedingJoinPoint
使用环绕通知:就是调用切面类中的通知方法
可以修改目标方法的结果
如果想要返回目标方法的结果
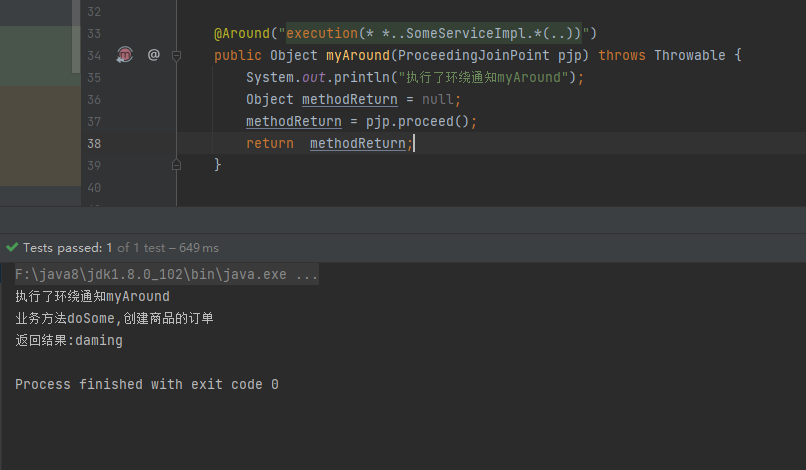
环绕
@AfterThrowing 异常通知
@After 最终通知
总是被执行
可以用来程序最后的收尾工作
Pointcut
定义和管理切入点,不是通知注解
别名的定义

homework
addNumber方法使用@Around校验传入的三个值不为null或<0
package com.example.handler;

import org.aspectj.lang.ProceedingJoinPoint;
import org.aspectj.lang.annotation.Around;
import org.aspectj.lang.annotation.Aspect;

@Aspect
public class CheckArgumentAspect {
    @Around("execution(* *..NumberServiceImpl.addNumber(..))")
    public Object CheckArgument(ProceedingJoinPoint pjp) throws Throwable {
        System.out.println("执行了环绕通知checkArgument");
        Object args[] = pjp.getArgs();
        boolean isAll = true;
        for(Object arg:args){
            if(arg==null){
                isAll=false;
                break;
            }else{
                int temp=(int)arg;
                if(temp<=0){
                    isAll=false;
                    break;
                }
            }
        }
        Object res=null;
        if(isAll){
            res=pjp.proceed();
        }else{
            res=-1;
        }
        return res;
    }
}
Spring集成MyBatis
依赖
        <dependency>
            <groupId>junit</groupId>
            <artifactId>junit</artifactId>
            <version>4.11</version>
            <scope>test</scope>
        </dependency>
        <dependency>
            <groupId>org.springframework</groupId>
            <artifactId>spring-context</artifactId>
            <version>5.2.5.RELEASE</version>
        </dependency>
        <dependency>
            <groupId>org.springframework</groupId>
            <artifactId>spring-tx</artifactId>
            <version>5.2.5.RELEASE</version>
        </dependency>
        <dependency>
            <groupId>org.springframework</groupId>
            <artifactId>spring-jdbc</artifactId>
            <version>5.2.5.RELEASE</version>
        </dependency>
        <dependency>
            <groupId>org.mybatis</groupId>
            <artifactId>mybatis</artifactId>
            <version>3.5.1</version>
        </dependency>
        <dependency>
            <groupId>org.mybatis</groupId>
            <artifactId>mybatis-spring</artifactId>
            <version>1.3.1</version>
        </dependency>
        <dependency>
            <groupId>mysql</groupId>
            <artifactId>mysql-connector-java</artifactId>
            <version>5.1.9</version>
        </dependency>
        <dependency>
            <groupId>com.alibaba</groupId>
            <artifactId>druid</artifactId>
            <version>1.1.12</version>
        </dependency>
build中添加
        <resources>
            <resource>
                <directory>src/main/java</directory>
                <includes>
                    <include>**/*.properties</include>
                    <include>**/*.xml</include>
                </includes>
                <filtering>false</filtering>
            </resource>
        </resources>
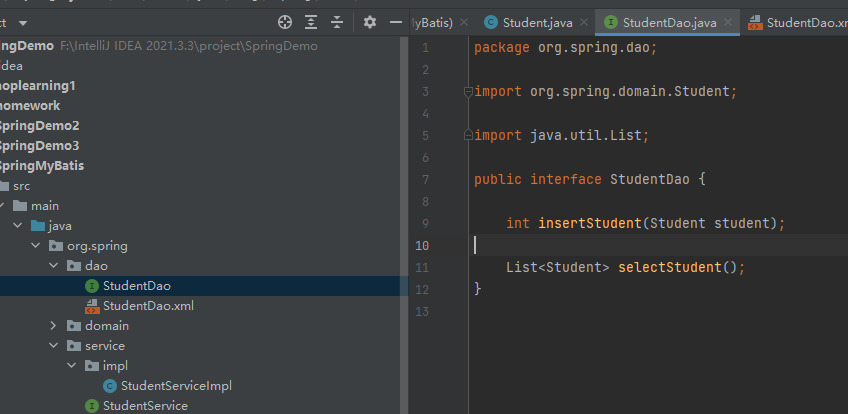
domain:
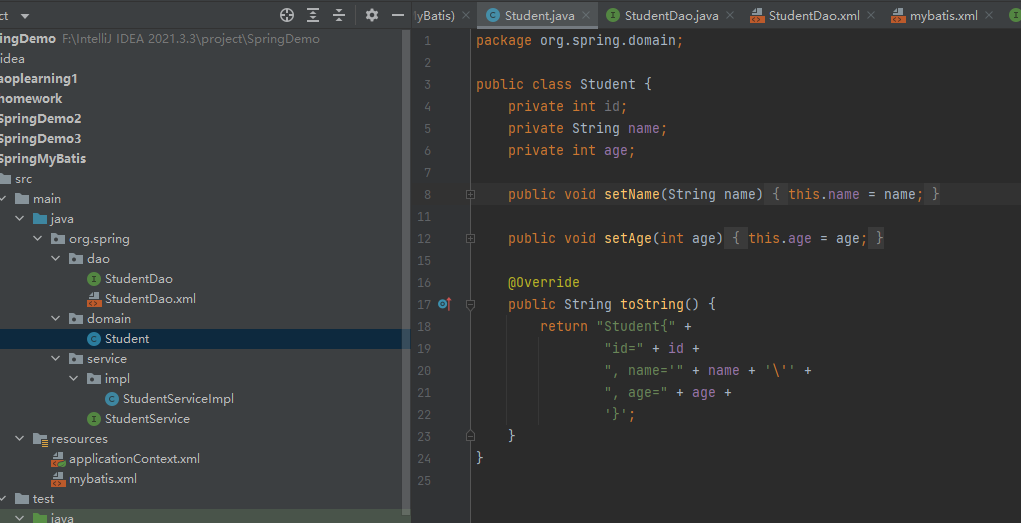
dao:
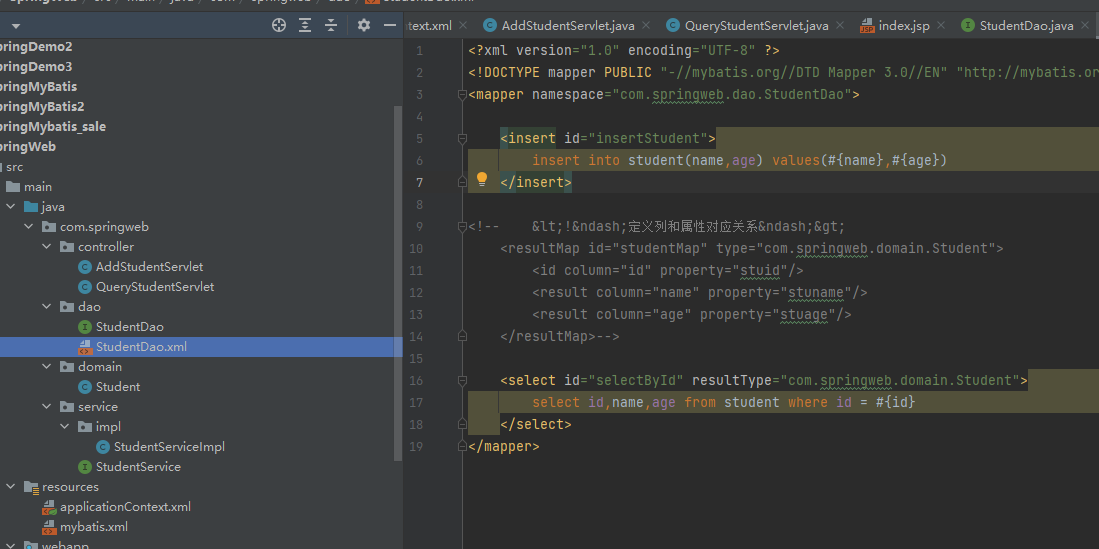
创建一个insert和一个select
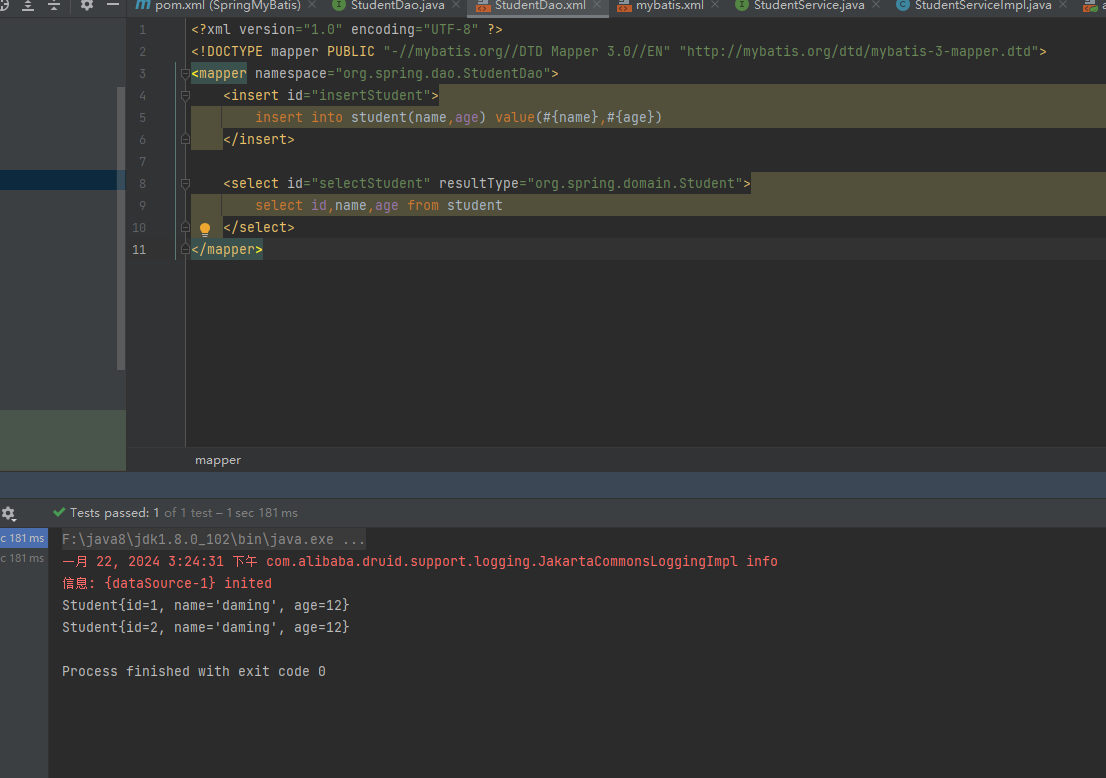
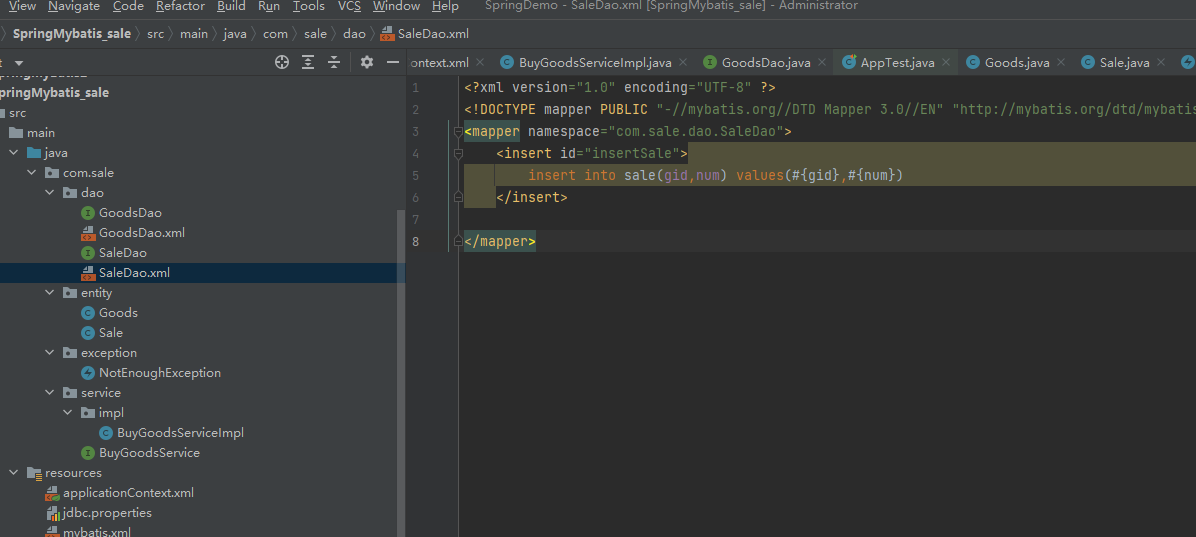
mybatis-mapper文件
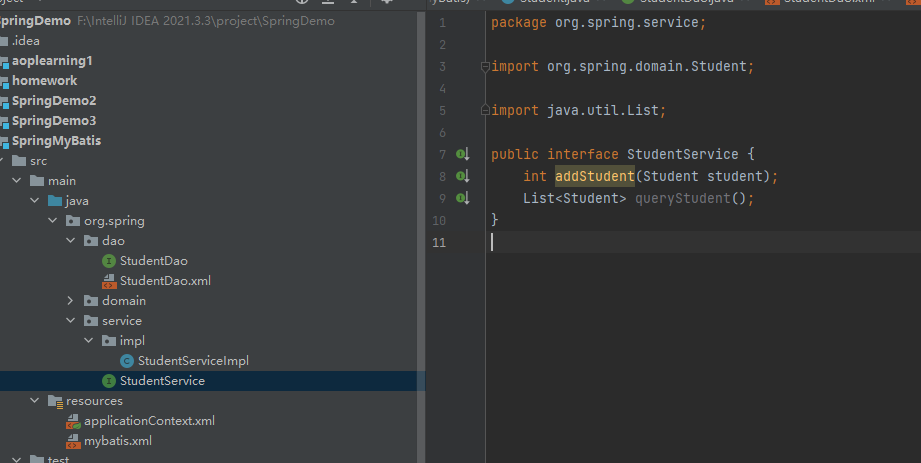
service:
application.xml:
<?xml version="1.0" encoding="UTF-8"?>
<beans xmlns="http://www.springframework.org/schema/beans"
xmlns:xsi="http://www.w3.org/2001/XMLSchema-instance"
xsi:schemaLocation="http://www.springframework.org/schema/beans http://www.springframework.org/schema/beans/spring-beans.xsd">
<!--声明数据源DataSource-->
<bean id="myDataSource" class="com.alibaba.druid.pool.DruidDataSource" init-method="init" destroy-method="close">
<property name="url" value="jdbc:mysql://localhost:3306/springdb"/>
<property name="username" value="root"/>
<property name="password" value="root"/>
</bean>
<!--声明SqlSessionFactoryBean,在这个类的内部,创建SqlSessionFactory-->
<bean id="factory" class="org.mybatis.spring.SqlSessionFactoryBean">
<!--指定数据源-->
<property name="dataSource" ref="myDataSource"/>
<!--指定mybatis主配置文件-->
<property name="configLocation" value="classpath:mybatis.xml"/>
</bean>
<!--
声明MapperScannerConfigurer
SqlSession.getMapper(StudentDao.class)
MapperScannerConfigurer作用:
循环basePackage所表示的包,把包中的每个接口都找到,调用SqlSession.getMapper
把每个dao接口都创建dao对象,dao代理放在容器中
-->
<bean class="org.mybatis.spring.mapper.MapperScannerConfigurer">
<!--指定SqlSessionFactory对象的名称-->
<property name="sqlSessionFactoryBeanName" value="factory"/>
<property name="basePackage" value="org.spring.dao"/>
</bean>
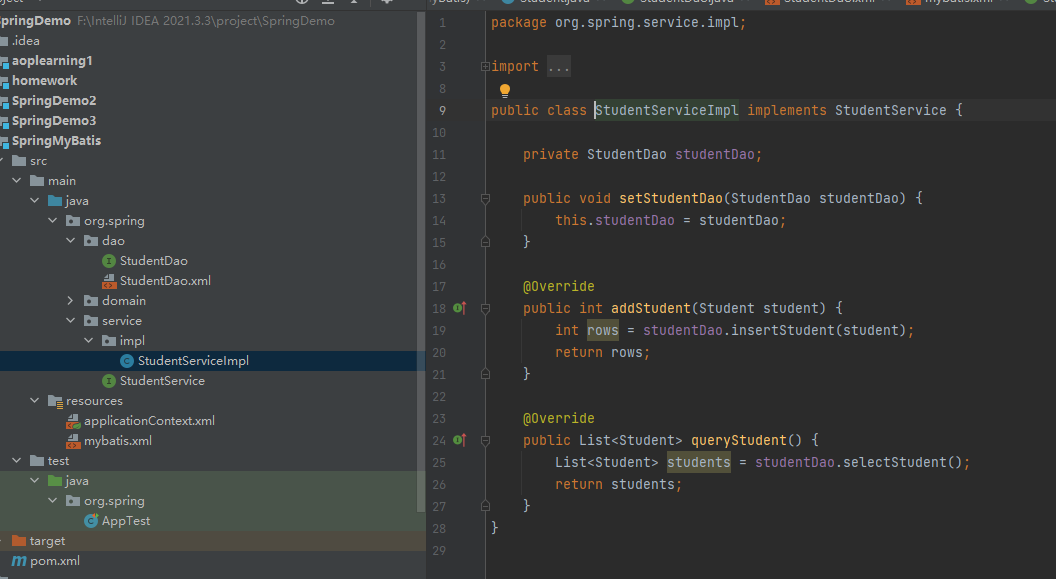
<!--声明service-->
<bean id="studentService" class="org.spring.service.impl.StudentServiceImpl">
<property name="studentDao" ref="studentDao"/>
</bean>
</beans>
mybatis-config文件
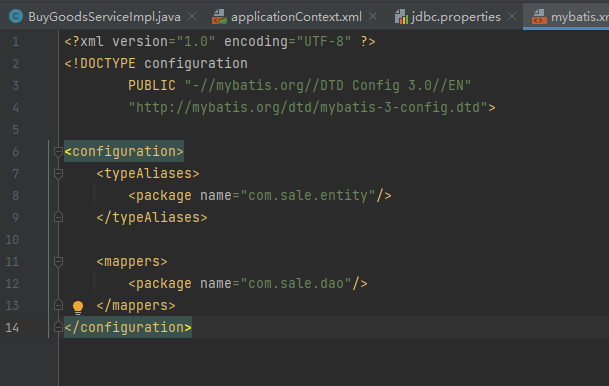
<?xml version="1.0" encoding="UTF-8" ?>
<!DOCTYPE configuration
        PUBLIC "-//mybatis.org//DTD Config 3.0//EN"
        "http://mybatis.org/dtd/mybatis-3-config.dtd">

<configuration>

    <typeAliases>
        <package name="org.spring.domain"/>
    </typeAliases>

    <mappers>
        <!--要求:
        1.mapper文件和dao接口在同一目录
        2.mapper文件和dao接口名称一致-->
        <package name="org.spring.dao"/>
        <!--<mapper resource="org/spring/dao/StudentDao.xml"/>-->
    </mappers>
</configuration>
如果出现org.apache.ibatis.binding.BindingException: Invalid bound statement (not found): 报错
可以重启一下idea就可以了
如果引用外部配置文件

Spring事务
@Transactional控制事务
属性
1.propagation:事务的传播行为,他使用的Propagation类的枚举值。例如Propagation.REQUIRED
2.isolation:表示隔离级别,使用lsolation类的枚举值,表示隔离级别。默认Isolation.DEFAULT
3.readOnly: boolean类型的值,表示数据库操作是不是只读的。默认是false
4.timeout:事务超时,默认是-1,整数值,单位是秒。例如timeout=20
5.rollbackFor:表示回滚的异常类列表,他的值是一个数组,每个值是异常类型的class。
6.rollbackForClassName:表示回滚的异常类列表,他的值是异常类名称,是String类型的值
7.noRollbackFor:不需要回滚的异常类列表。是class类型的。
8.noRollbackForClassName:不需要回滚的异常类列表,是String类型的值
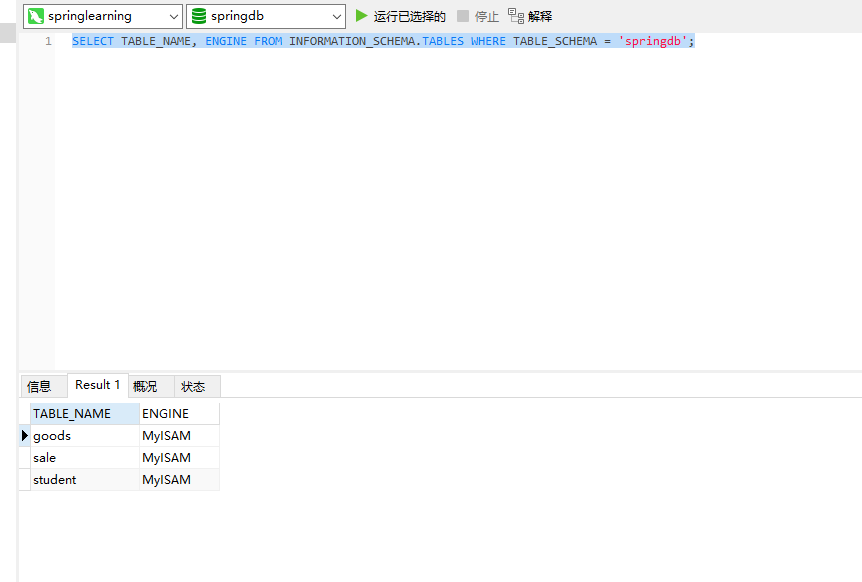
注意!!!
确保使用的是InnoDB引擎,而不是MyISAM引擎,因为MyISAM不支持事务
查看使用何种引擎
SELECT TABLE_NAME, ENGINE FROM INFORMATION_SCHEMA.TABLES WHERE TABLE_SCHEMA = 'springdb';
切换成InnoDB引擎
ALTER TABLE your_table_name ENGINE=InnoDB;
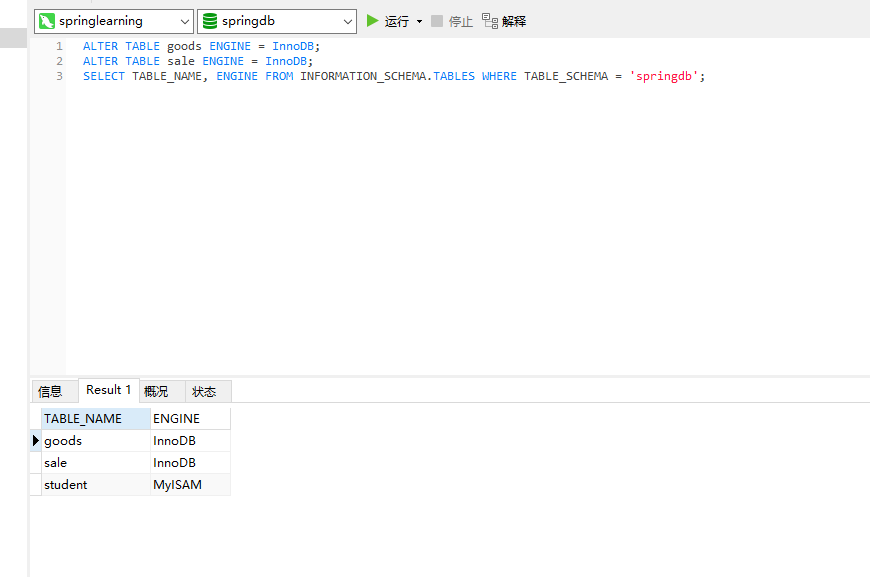
然后创建表sale(id,gid,num),表goods(id,name,num)
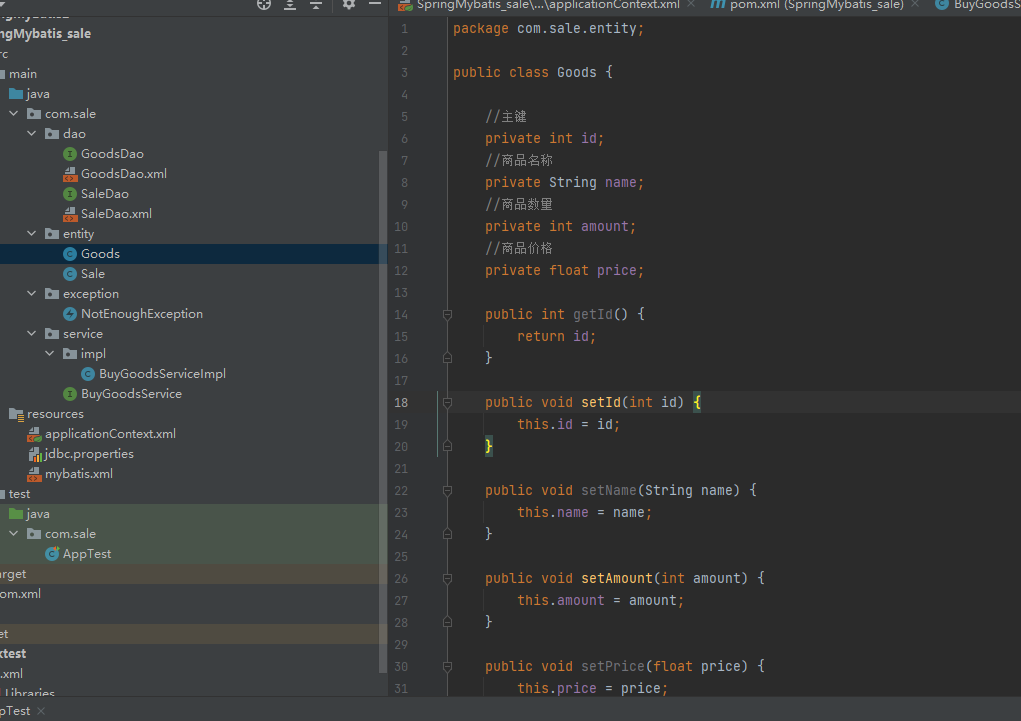
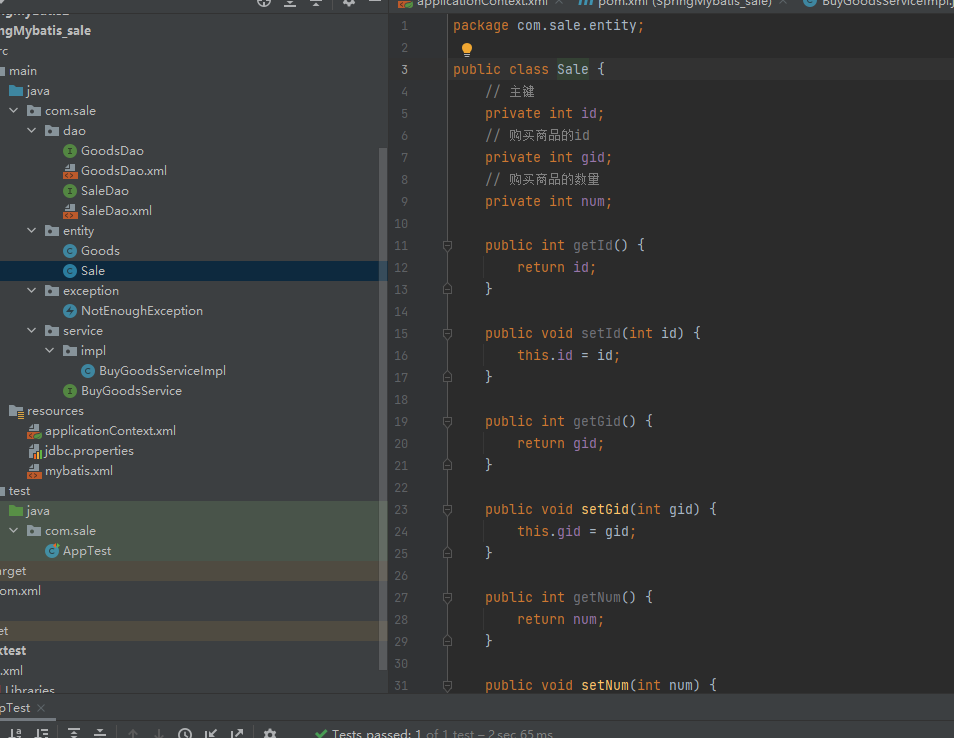
entity:
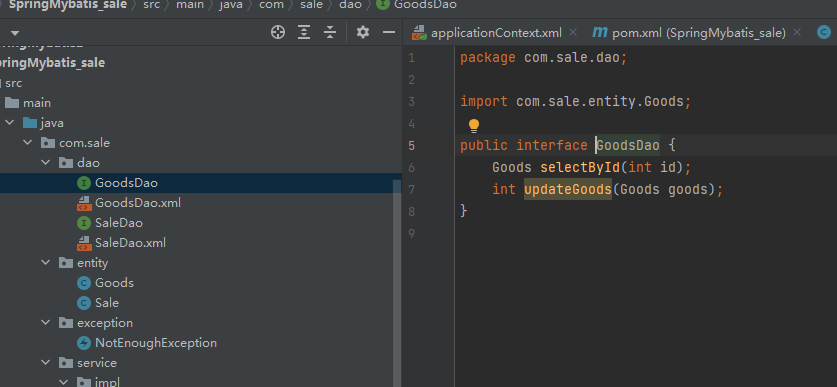
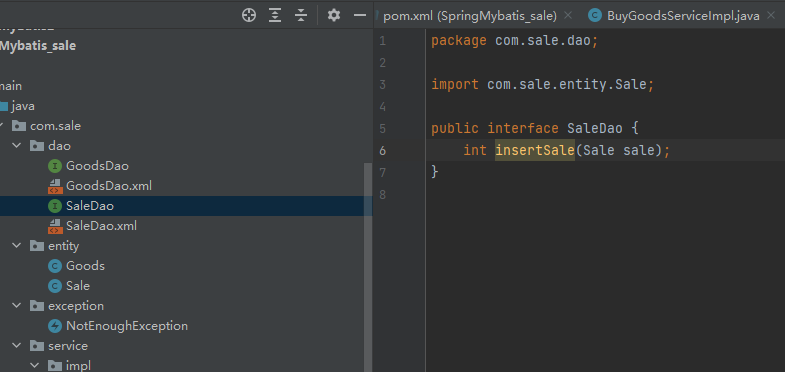
dao:

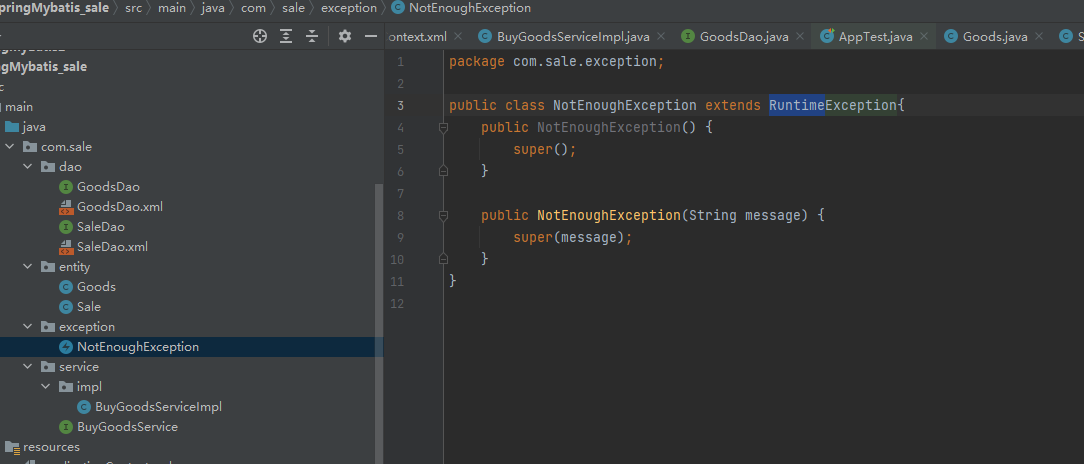
exception:
service:
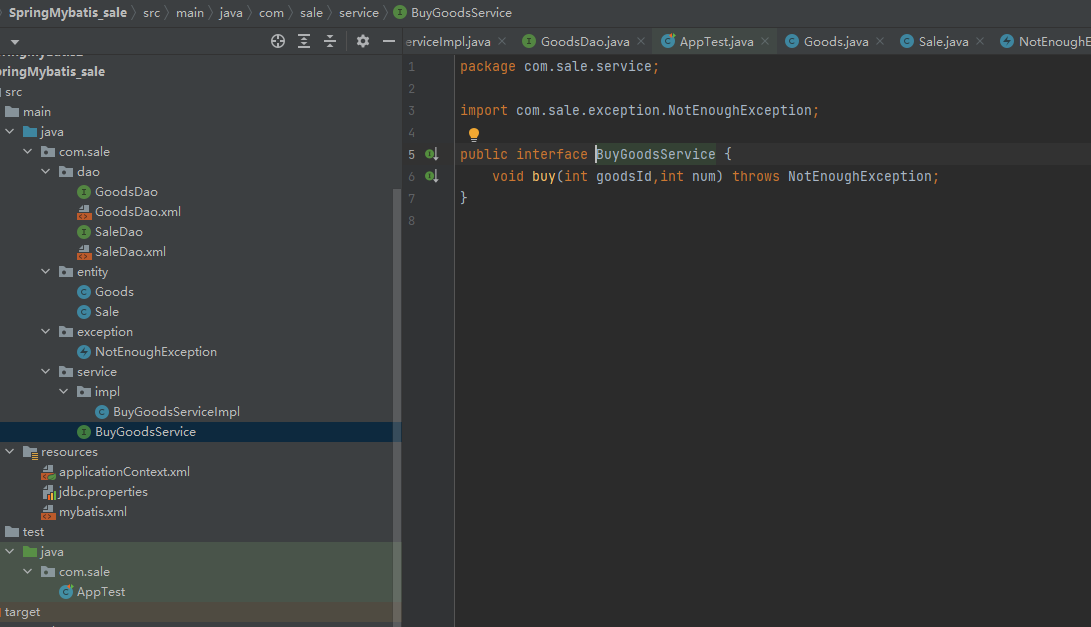
接口实现类
package com.sale.service.impl;

import com.sale.dao.GoodsDao;
import com.sale.dao.SaleDao;
import com.sale.entity.Goods;
import com.sale.entity.Sale;
import com.sale.exception.NotEnoughException;
import com.sale.service.BuyGoodsService;
import org.springframework.transaction.annotation.Isolation;
import org.springframework.transaction.annotation.Propagation;
import org.springframework.transaction.annotation.Transactional;

public class BuyGoodsServiceImpl implements BuyGoodsService {

    private SaleDao saleDao;
    private GoodsDao goodsDao;

    public void setSaleDao(SaleDao saleDao) {
        this.saleDao = saleDao;
    }

    public void setGoodsDao(GoodsDao goodsDao) {
        this.goodsDao = goodsDao;
    }

    @Transactional(propagation = Propagation.REQUIRED, isolation = Isolation.DEFAULT,
            readOnly = false,timeout = 20,
            rollbackFor = {NullPointerException.class,NotEnoughException.class})
    @Override
    public void buy(int goodsId, int num) throws NotEnoughException {
        System.out.println("====buy方法的开始====");

        //生成销售记录
        Sale sale=new Sale();
        sale.setGid(goodsId);
        sale.setNum(num);
        saleDao.insertSale(sale);

        //查询商品
        Goods goods=goodsDao.selectById(goodsId);
        if(goods==null){
            throw new NullPointerException(goodsId+"商品不存在");
        }else if(goods.getAmount()<num){
            throw new NotEnoughException(goodsId+"库存不足");
        }

        //更新库存
        Goods buyGoods = new Goods();
        buyGoods.setId(goodsId);
        buyGoods.setAmount(num);

        goodsDao.updateGoods(buyGoods);

        System.out.println("====buy方法的结束====");
    }
}
配置文件:
mybatis.xml
applicationContext.xml
<?xml version="1.0" encoding="UTF-8"?>
<beans xmlns="http://www.springframework.org/schema/beans"
xmlns:xsi="http://www.w3.org/2001/XMLSchema-instance"
xmlns:context="http://www.springframework.org/schema/context" xmlns:tx="http://www.springframework.org/schema/tx"
xmlns:aop="http://www.springframework.org/schema/aop"
xsi:schemaLocation="http://www.springframework.org/schema/beans http://www.springframework.org/schema/beans/spring-beans.xsd http://www.springframework.org/schema/context https://www.springframework.org/schema/context/spring-context.xsd http://www.springframework.org/schema/tx http://www.springframework.org/schema/tx/spring-tx.xsd http://www.springframework.org/schema/aop https://www.springframework.org/schema/aop/spring-aop.xsd">
<!--引入外部properties配置文件-->
<!--<context:property-placeholder location="classpath:jdbc.properties"/>-->
<!--基于注解的DI注入-->
<!--<context:component-scan base-package="com.sale.service"/>-->
<!--导入外部applicationContext配置文件-->
<!--<import resource="classpath:applicationContext.xml"/>-->
<!--声明数据源DataSource-->
<bean id="myDataSource" class="com.alibaba.druid.pool.DruidDataSource" init-method="init" destroy-method="close">
<property name="url" value="jdbc:mysql://localhost:3306/springdb"/>
<property name="username" value="root"/>
<property name="password" value="root"/>
</bean>
<!--声明SqlSessionFactoryBean,在这个类的内部,创建SqlSessionFactory-->
<bean id="factory" class="org.mybatis.spring.SqlSessionFactoryBean">
<!--指定数据源-->
<property name="dataSource" ref="myDataSource"/>
<!--指定mybatis主配置文件-->
<property name="configLocation" value="classpath:mybatis.xml"/>
</bean>
<bean class="org.mybatis.spring.mapper.MapperScannerConfigurer">
<!--指定SqlSessionFactory对象的名称-->
<property name="sqlSessionFactoryBeanName" value="factory"/>
<property name="basePackage" value="com.sale.dao"/>
</bean>
<!--基于xml的DI注入-->
<!--声明service-->
<bean id="buyGoodsService" class="com.sale.service.impl.BuyGoodsServiceImpl">
<property name="saleDao" ref="saleDao"/>
<property name="goodsDao" ref="goodsDao"/>
</bean>
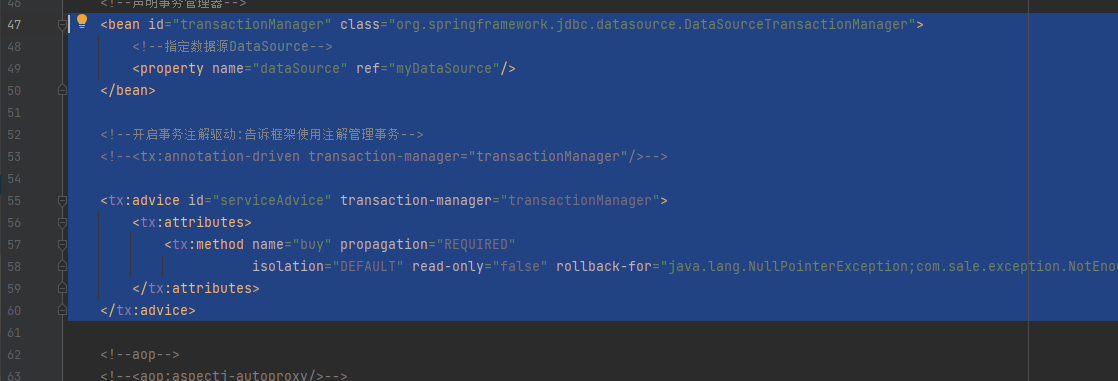
<!--声明事务的控制-->
<!--声明事务管理器-->
<bean id="transactionManager" class="org.springframework.jdbc.datasource.DataSourceTransactionManager">
<!--指定数据源DataSource-->
<property name="dataSource" ref="myDataSource"/>
</bean>
<!--开启事务注解驱动:告诉框架使用注解管理事务-->
<tx:annotation-driven transaction-manager="transactionManager"/>
<!--aop-->
<!--<aop:aspectj-autoproxy/>-->
</beans>
测试
rollbackFor解释:
如果方法抛出的异常不再数组中,会继续检查抛出的异常是不是RuntimeException,如果是,一定回滚
对buy方法使用事务,如果是buy*,则对buy开头的方法使用事务
使用Aspectj框架
加入依赖
        <dependency>
            <groupId>org.springframework</groupId>
            <artifactId>spring-aspects</artifactId>
            <version>5.2.5.RELEASE</version>
        </dependency>
Spring与Web
webapp
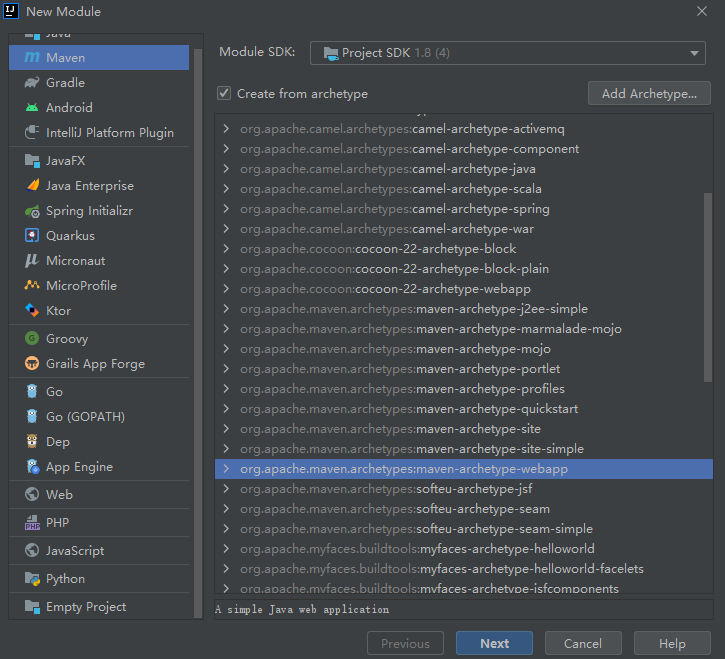
依赖
        <dependency>
            <groupId>junit</groupId>
            <artifactId>junit</artifactId>
            <version>4.11</version>
            <scope>test</scope>
        </dependency>
        <dependency>
            <groupId>org.springframework</groupId>
            <artifactId>spring-context</artifactId>
            <version>5.2.5.RELEASE</version>
        </dependency>
        <dependency>
            <groupId>org.springframework</groupId>
            <artifactId>spring-tx</artifactId>
            <version>5.2.5.RELEASE</version>
        </dependency>
        <dependency>
            <groupId>org.springframework</groupId>
            <artifactId>spring-jdbc</artifactId>
            <version>5.2.5.RELEASE</version>
        </dependency>
        <dependency>
            <groupId>org.springframework</groupId>
            <artifactId>spring-aspects</artifactId>
            <version>5.2.5.RELEASE</version>
        </dependency>
        <dependency>
            <groupId>org.springframework</groupId>
            <artifactId>spring-web</artifactId>
            <version>5.2.5.RELEASE</version>
        </dependency>
        <dependency>
            <groupId>org.mybatis</groupId>
            <artifactId>mybatis</artifactId>
            <version>3.5.1</version>
        </dependency>
        <dependency>
            <groupId>org.mybatis</groupId>
            <artifactId>mybatis-spring</artifactId>
            <version>1.3.1</version>
        </dependency>
        <dependency>
            <groupId>mysql</groupId>
            <artifactId>mysql-connector-java</artifactId>
            <version>5.1.9</version>
        </dependency>
        <dependency>
            <groupId>com.alibaba</groupId>
            <artifactId>druid</artifactId>
            <version>1.1.12</version>
        </dependency>
        <dependency>
            <groupId>javax.servlet</groupId>
            <artifactId>javax.servlet-api</artifactId>
            <version>3.1.0</version>
            <scope>provided</scope>
        </dependency>
        <dependency>
            <groupId>javax.servlet.jsp</groupId>
            <artifactId>jsp-api</artifactId>
            <version>2.1</version>
            <scope>provided</scope>
        </dependency>
...
<build>
        <resources>
            <resource>
                <directory>src/main/java</directory>
                <includes>
                    <include>**/*.properties</include>
                    <include>**/*.xml</include>
                </includes>
                <filtering>false</filtering>
            </resource>
        </resources>
...
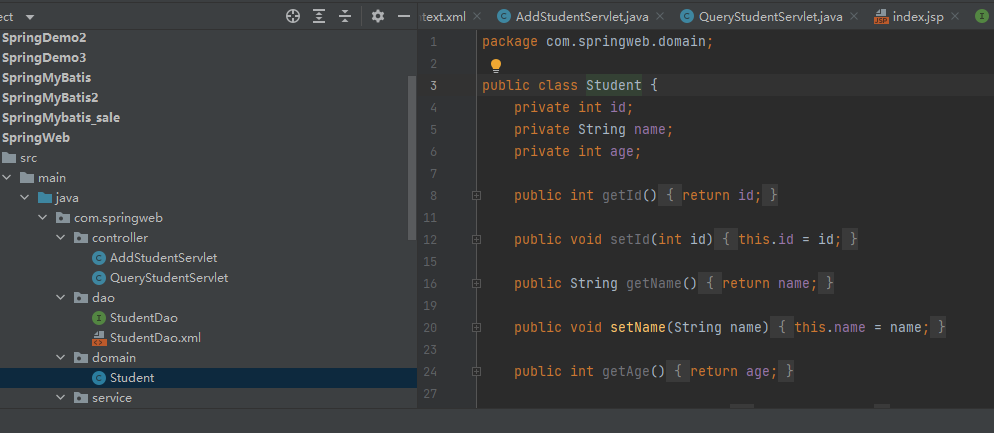
entity/domain:
dao:
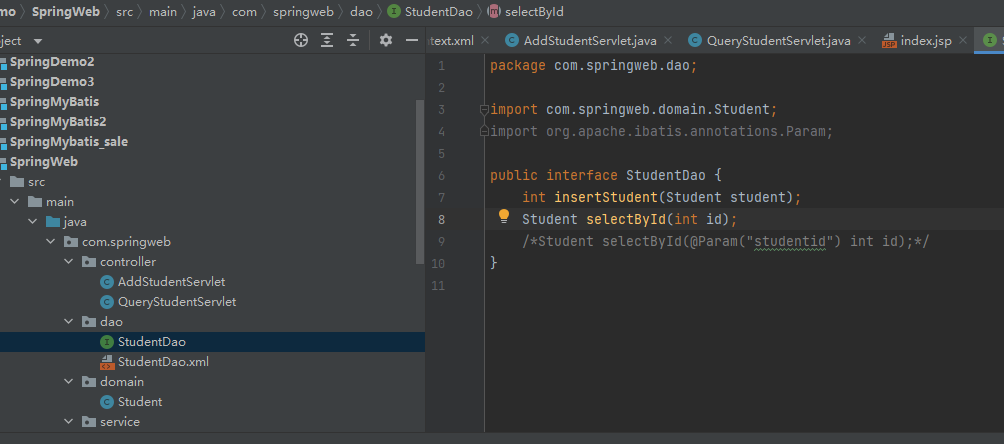
dao对应的mybatis-mapper:
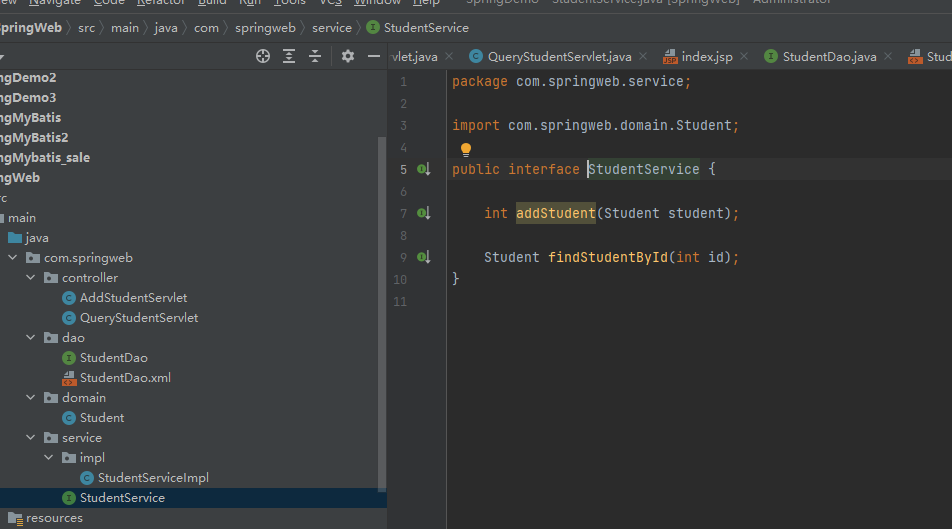
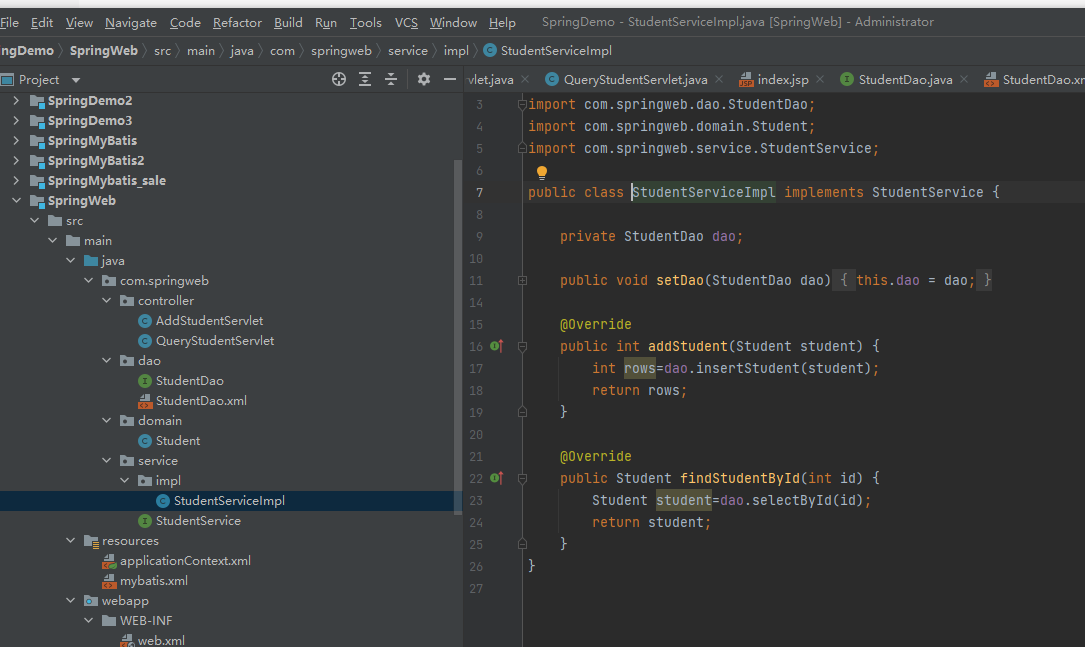
service:
mybatis-config:

applicationContext:
<?xml version="1.0" encoding="UTF-8"?>
<beans xmlns="http://www.springframework.org/schema/beans"
       xmlns:xsi="http://www.w3.org/2001/XMLSchema-instance"
       xmlns:context="http://www.springframework.org/schema/context" xmlns:tx="http://www.springframework.org/schema/tx"
       xmlns:aop="http://www.springframework.org/schema/aop"
       xsi:schemaLocation="http://www.springframework.org/schema/beans http://www.springframework.org/schema/beans/spring-beans.xsd http://www.springframework.org/schema/context https://www.springframework.org/schema/context/spring-context.xsd http://www.springframework.org/schema/tx http://www.springframework.org/schema/tx/spring-tx.xsd http://www.springframework.org/schema/aop https://www.springframework.org/schema/aop/spring-aop.xsd">

    <!--引入外部properties配置文件-->
    <!--<context:property-placeholder location="classpath:jdbc.properties"/>-->

    <!--基于注解的DI注入-->
    <!--<context:component-scan base-package="com.sale.service"/>-->

    <!--导入外部applicationContext配置文件-->
    <!--<import resource="classpath:applicationContext.xml"/>-->

    <!--声明数据源DataSource-->
    <bean id="myDataSource" class="com.alibaba.druid.pool.DruidDataSource" init-method="init" destroy-method="close">
        <property name="url" value="jdbc:mysql://localhost:3306/springdb"/>
        <property name="username" value="root"/>
        <property name="password" value="root"/>
    </bean>

    <!--声明SqlSessionFactoryBean,在这个类的内部,创建SqlSessionFactory-->
    <bean id="factory" class="org.mybatis.spring.SqlSessionFactoryBean">
        <!--指定数据源-->
        <property name="dataSource" ref="myDataSource"/>
        <!--指定mybatis主配置文件-->
        <property name="configLocation" value="classpath:mybatis.xml"/>
    </bean>

    <bean class="org.mybatis.spring.mapper.MapperScannerConfigurer">
        <!--指定SqlSessionFactory对象的名称-->
        <property name="sqlSessionFactoryBeanName" value="factory"/>
        <property name="basePackage" value="com.springweb.dao"/>
    </bean>

    <!--基于xml的DI注入-->
    <!--声明service-->
    <bean id="studentService" class="com.springweb.service.impl.StudentServiceImpl">
        <property name="dao" ref="studentDao"/>
    </bean>

</beans>
servlet:
添加学生(注册)
package com.springweb.controller;

import com.springweb.domain.Student;
import com.springweb.service.StudentService;
import org.springframework.context.ApplicationContext;
import org.springframework.context.support.ClassPathXmlApplicationContext;
import org.springframework.web.context.WebApplicationContext;
import org.springframework.web.context.support.WebApplicationContextUtils;

import javax.servlet.*;
import javax.servlet.http.*;
import javax.servlet.annotation.*;
import java.io.IOException;

/*@WebServlet(name = "Student", value = "/add")*/
public class AddStudentServlet extends HttpServlet {
    @Override
    protected void doGet(HttpServletRequest request, HttpServletResponse response) throws ServletException, IOException {
        super.doPost(request,response);
    }

    @Override
    protected void doPost(HttpServletRequest request, HttpServletResponse response) throws ServletException, IOException {
        String strName=request.getParameter("name");
        String strAge=request.getParameter("age");

/*        String config="applicationContext.xml";
        ApplicationContext ctx=new ClassPathXmlApplicationContext(config);*/

/*        WebApplicationContext ctx=null;
        String key=WebApplicationContext.ROOT_WEB_APPLICATION_CONTEXT_ATTRIBUTE;
        ServletContext sc=getServletContext();
        //ServletContext sc=request.getServletContext();
        Object attr=sc.getAttribute(key);
        if(attr!=null){
            ctx=(WebApplicationContext) attr;
        }*/
        /*监听器:将容器创建的对象放在全局作用域,这样避免每运行一次就创建一次对象*/
        WebApplicationContext ctx= WebApplicationContextUtils.getRequiredWebApplicationContext(getServletContext());

        System.out.println("在servlet中创建的容器对象===="+ctx);
        StudentService service = (StudentService) ctx.getBean("studentService");
        Student student = new Student();
        student.setName(strName);
        student.setAge(Integer.valueOf(strAge));
        service.addStudent(student);

        request.getRequestDispatcher("/show.jsp").forward(request,response);
    }
}
查询学生:
package com.springweb.controller;

import com.springweb.domain.Student;
import com.springweb.service.StudentService;
import org.springframework.context.ApplicationContext;
import org.springframework.context.support.ClassPathXmlApplicationContext;
import org.springframework.web.context.WebApplicationContext;
import org.springframework.web.context.support.WebApplicationContextUtils;

import javax.servlet.*;
import javax.servlet.http.*;
import javax.servlet.annotation.*;
import java.io.IOException;

/*@WebServlet(name = "jp", value = "/jp")*/
public class QueryStudentServlet extends HttpServlet {
    @Override
    protected void doGet(HttpServletRequest request, HttpServletResponse response) throws ServletException, IOException {
        super.doPost(request, response);
    }

    @Override
    protected void doPost(HttpServletRequest request, HttpServletResponse response) throws ServletException, IOException {
        String id = request.getParameter("id");

        WebApplicationContext ctx= WebApplicationContextUtils.getRequiredWebApplicationContext(getServletContext());

        System.out.println("在servlet中创建对象==="+ctx);

        StudentService service = (StudentService) ctx.getBean("studentService");
        Student student= service.findStudentById(Integer.valueOf(id));
        System.out.println("student对象===="+student);
        request.setAttribute("stu",student);
        request.getRequestDispatcher("/show.jsp").forward(request,response);
    }
}
配置web.xml
<!DOCTYPE web-app PUBLIC
 "-//Sun Microsystems, Inc.//DTD Web Application 2.3//EN"
 "http://java.sun.com/dtd/web-app_2_3.dtd" >

<web-app>
  <display-name>Archetype Created Web Application</display-name>
  <servlet>
    <servlet-name>AddStudentServlet</servlet-name>
    <servlet-class>com.springweb.controller.AddStudentServlet</servlet-class>
  </servlet>
  <servlet-mapping>
    <servlet-name>AddStudentServlet</servlet-name>
    <url-pattern>/add</url-pattern>
  </servlet-mapping>

  <servlet>
    <servlet-name>QueryStudentServlet</servlet-name>
    <servlet-class>com.springweb.controller.QueryStudentServlet</servlet-class>
  </servlet>
  <servlet-mapping>
    <servlet-name>QueryStudentServlet</servlet-name>
    <url-pattern>/query</url-pattern>
  </servlet-mapping>

  <context-param>
    <param-name>contextConfigLocation</param-name>
    <param-value>classpath:applicationContext.xml</param-value>
  </context-param>
  <listener>
    <listener-class>org.springframework.web.context.ContextLoaderListener</listener-class>
  </listener>
</web-app>
前端:
index.jsp写出注册和查询的表单
<%@ page contentType="text/html;charset=UTF-8" language="java" %>
<html>
<head>
    <title>添加学生</title>
</head>
<body>
<div align="center">
    <p>添加学生</p>
    <form action="add" method="post">
        姓名:<input type="text" name="name"><br/>
        年龄:<input type="text" name="age"><br/>
        <input type="submit" value="注册学生">
    </form>
    <br/>
    <br/>
    <p></p>
    <form action="query" method="post">
        学生id:<input type="text" name="id"/>
        <input type="submit" value="查询学生"/>
    </form>
</div>
</body>
</html>
接受页面:
<%@ page contentType="text/html;charset=UTF-8" language="java" %>
<html>
<head>
    <title>Title</title>
</head>
<body>
/show.jsp 注册成功
<br/>
查询结果: <%=request.getAttribute("stu")%>
</body>
</html>

 浙公网安备 33010602011771号