BBS项目个人站点文章筛选技术点
内容介绍
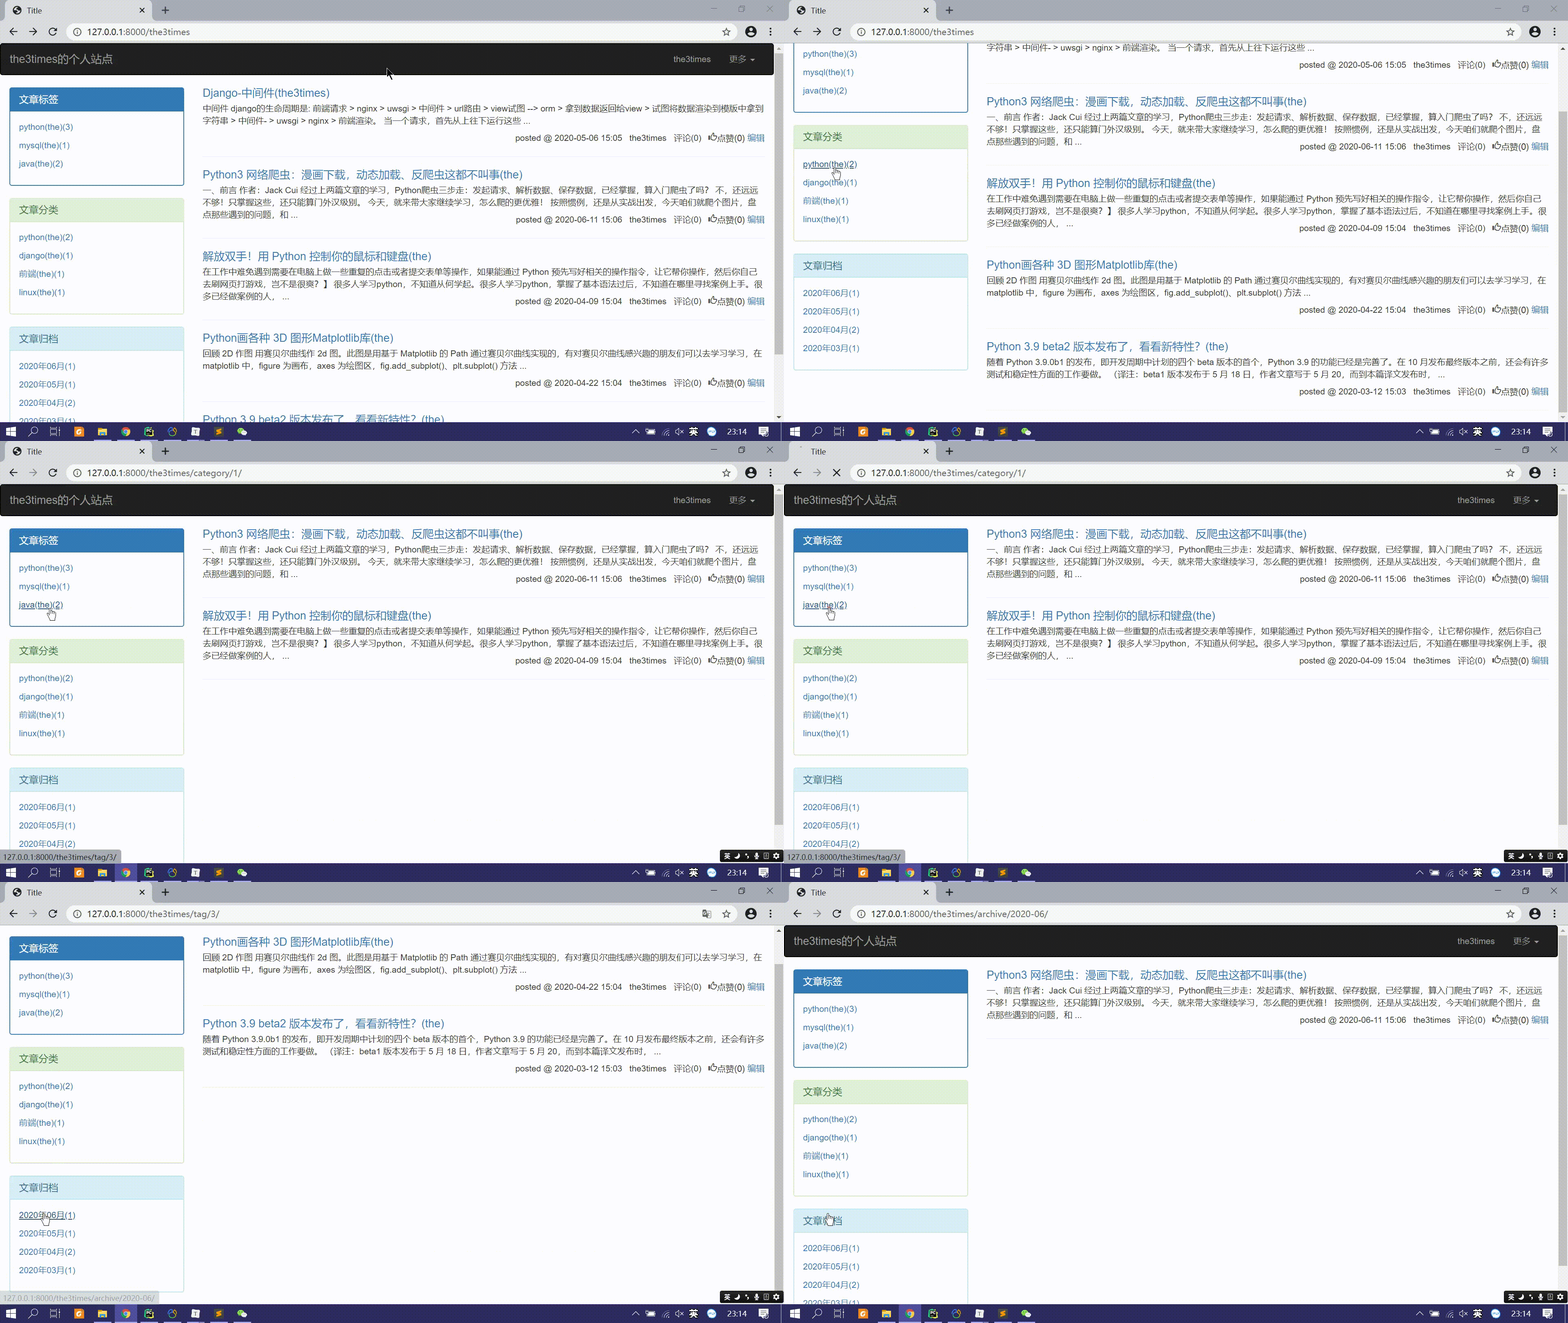
个人站点展示该站点用户的全部文章列表,并提供文章标签、分类、日期归档统计展示;
个人站点主题布局分左右两部分,左边侧边栏展示文章标签、分类、日期归档信息;右边主题栏罗列文章信息。
并且点击文章标签、分类、日期归档统计的链接后,显示该条件下的所有文章列表。

技术点
- 跨表分组查询(应该都不算技术点吧):文章标签分组、文章分类分组、日期归档分类(需要使用django提供的
TruncMonth方法)。
from django.db.models import Count
from django.db.models.functions import TruncMonth

# 标签、分类、归档ORM查询
tag_list = models.Tag.objects.filter(blog=blog).annotate(c=Count('article__pk')).values('pk', 'name', 'c')
category_list = models.Category.objects.filter(blog=blog).annotate(c=Count('article__pk')).values('pk', 'name', 'c')

# 日期归档查询使用django提供的TruncMonth自动按月截取,形成一个虚拟字段用于日期分组
archive_list = models.Article.objects.filter(blog=blog).\
annotate(month=TruncMonth('publish_time')).values('month').\
annotate(c=Count('pk')).order_by('-month').values('month', 'c')
-
点击文章标签分组、文章分类分组、日期归档分类时如何设计跳转和过滤相关文章信息。
- 个人站点首页的文章是该用户的全部文章,而标签分组这些都是附加一些其他过滤条件的文章。
- 可以设计一条新的url,处理该url的视图函数进一步过滤符合条件的文章。
- 进一步过滤时是在当前站点用户文章的基础上进一步附加附属限制条件过滤的。
- 因此,可以考虑处理新url的视图函数和个人站点的的url的公用一个视图函数。
- 不同的是个人站点的url需要要一个用户名就可以唯一标识;而新url不仅需要用户名还需要两个参数:标签|分类|归档中的一种情况,另一个参数唯一表示该情况下的具体值。
url(r'^(?P<username>\w+)$', views.blog, name='blog'), url(r'^(?P<username>\w+)/(?P<condition>tag|category|archive)/(?P<param>.*)/', views.blog, name='blog'), # 如: http://127.0.0.1:8000/the3times # 访问the3times的站点 http://127.0.0.1:8000/the3times/tag/1/ # 访问the3times的标签主键为1的文章列表 http://127.0.0.1:8000/the3times/category/1/ # 访问the3times的分类主键为1的文章列表 http://127.0.0.1:8000/the3times/archive/2020-06/ # 访问the3times2020年6月的文章列表- 这样后端视图函数需要分情况判断url请求是哪一个,进一步获取需要的文章列表
- 日期归档查询使用django提供的
TruncMonth自动按月截取,形成一个虚拟字段用于日期分组。此外django还提供了一些类似的截取方法,使用方式类似,举一反三地使用。
def blog(request, username, **kwargs):
    user_obj = models.UserInfo.objects.filter(username=username).first()
    if not user_obj:
        return render(request, 'error404.html')
    blog = user_obj.blog
    article_queryset = models.Article.objects.filter(blog=blog)
    # 按照标签、分类、归档条件查询文章的情况
    if kwargs:
        condition = kwargs.get('condition')
        param = kwargs.get('param')
        if condition == 'tag':
            article_queryset = article_queryset.filter(tags__pk=param).all()
        elif condition == 'category':
            article_queryset = article_queryset.filter(category__pk=param).all()
        else:
            year, month = param.split('-')
            article_queryset = article_queryset.filter(publish_time__year=year,
                                                      publish_time__month=month).all()
    # 标签、分类、归档ORM查询
    tag_list = models.Tag.objects.filter(blog=blog).annotate(c=Count('article__pk')).values('pk', 'name', 'c')
    category_list = models.Category.objects.filter(blog=blog).annotate(c=Count('article__pk')).values('pk', 'name', 'c')
    # 日期归档查询使用django提供的TruncMonth自动按月截取,形成一个虚拟字段用于日期分组
    archive_list = models.Article.objects.filter(blog=blog).\
    annotate(month=TruncMonth('publish_time')).values('month').\
        annotate(c=Count('pk')).order_by('-month').values('month', 'c')

    return render(request, 'blog.html', locals())
- 前端模版文件内仅需要在a标签上放置相关的链接即可
- 后端ORM查选获取值时使用的是
values_list(),此时前端通过模板语法取值就非常见名知意
- 后端ORM查选获取值时使用的是
<!-- 标签 -->
{% for tag in tag_list %}
   <p><a href="/{{ username }}/tag/{{ tag.pk }}/">{{ tag.name }}({{tag.c}})</a></p>
{% endfor %}

<!-- 分类 -->
{% for category in category_list %}
   <p><a href="/{{username}}/category/{{ category.pk }}">{{ category.name }}({{category.c}})</a></p>
{% endfor %}

<!-- 归档 -->
{% for archive in archive_list %}
   <p><a href="/{{ username }}/archive/{{ archive.month|date:'Y-m' }}/">{{ archive.month|date:'Y年m月' }}({{ archive.c }})</a></p>
{% endfor %}


