基于requests框架实现接口自动化测试项目实战
每天进步一点点,关注我们哦,每天分享测试技术文章
本文章出自【码同学软件测试】
码同学公众号:自动化软件测试,领取资料可加:magetest
码同学抖音号:小码哥聊软件测试
requests库是一个常用的用于http请求的模块,它使用python语言编写,在当下python系列的接口自动化中应用广泛,本文将带领大家深入学习这个库,Python环境的安装就不在这里赘述了,我们直接开干。
01requests的安装
windows下执行如下命令:
pip install requests -i http://pypi.douban.com/simple/--trust-host pypi.douban.com
mac终端下执行如下命令:
python3 -m pip install requests -i http://pypi.douban.com/simple/--trust-host pypi.douban.com
02常用方法

1、get请求实战:
# !/usr/bin python3
# encoding: utf-8 -*-
# @author: 沙陌 微信:Matongxue_2
# @Time:2021/3/25 9:54
# @Copyright:北京码同学网络科技有限公司
import requests
host='http://10.0.0.18:8080'
def get():
"""
get接口请求
:return:
"""
url =host+'/pinter/com/getSku' #接口地址
params={
'id':1
}
resp = requests.get(url,params=params)
status_code=resp.status_code #获取响应状态码
print('响应状态码:{}'.format(status_code))
text=resp.text #获取响应内容,结果类型是字符串
print('响应内容:{}'.format(text))
json=resp.json() #获取响应内容,结果是字典类型
print('响应内容:{}'.format(json))
resp_headers=resp.headers #获取响应headers
print('响应header:{}'.format(resp_headers))
if__name__=='__main__':
get()
结果如下:
D:\Python\Python36\python.exe D:/pycharmprojects/first/requetsstudy/pinter.py
响应状态码:200
响应内容:{"code":"0","message":"success","data":{"skuId":1,"skuName":"ptest-1","price":"645","stock":709,"brand":"testfan"}}
<class'dict'>
响应内容:{'code':'0','message':'success','data':{'skuId':1,'skuName':'ptest-1','price':'645','stock':709,'brand':'testfan'}}
响应header:{'Content-Type':'application/json;charset=UTF-8','Transfer-Encoding':'chunked','Date':'Fri,12Mar202122:13:49GMT','Keep-Alive':
'timeout=20','Connection':'keep-alive'}
Process finished with exit code 0
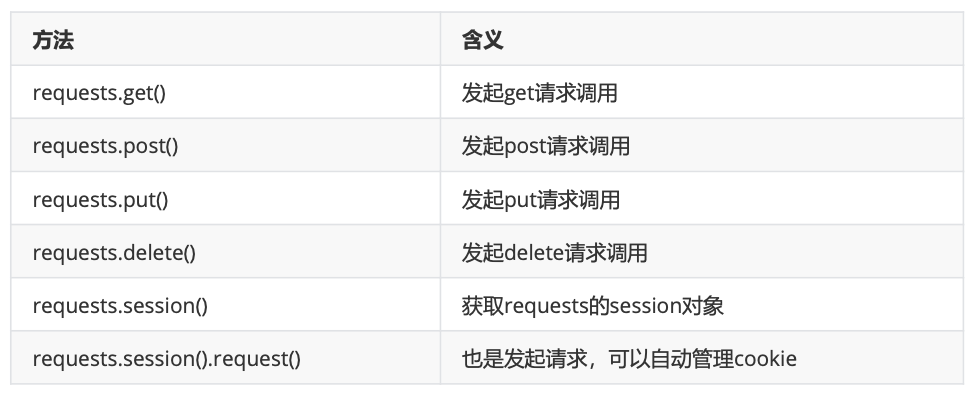
上述代码中请求发起后得到一个响应对象变量resp,那么resp对象的常用方法如下:

2、post请求实战
post请求的参数格式通常有多种,我们依次学习
第一种:表单形式的参数
import requests
host = 'http://10.0.0.18:8080'
def post():
"""
post表单
:return:
"""
url=host+'/pinter/com/login'
#表单参数
data={
'userName':'沙陌',
'password':'123456'
}
resp=requests.post(url=url,data=data)
status_code=resp.status_code#获取响应状态码
print('响应状态码:{}'.format(status_code))
text=resp.text#获取响应内容,结果类型是字符串
print('响应内容:{}'.format(text))
json=resp.json()#获取响应内容,结果是字典类型
print('响应内容:{}'.format(json))
resp_headers=resp.headers#获取响应headers
print('响应header:{}'.format(resp_headers))
第二种:json格式参数
import requests
host='http://10.0.0.18:8080'
def post_json():
"""
postjson
:return:
"""
url =host+'/pinter/com/register'
#header里定义参数类型
headers={
'Content-Type':'application/json'
}
#json参数
json={
"userName":"沙陌",
"password":"1234",
"gender":1,
"phoneNum":"110",
"email":"beihe@163.com",
"address":"Beijing"
}
resp=requests.post(url=url,json=json)
status_code=resp.status_code #获取响应状态码
print('响应状态码:{}'.format(status_code))
text=resp.text #获取响应内容,结果类型是字符串
print('响应内容:{}'.format(text))
json=resp.json() #获取响应内容,结果是字典类型
print('响应内容:{}'.format(json))
resp_headers=resp.headers #获取响应headers
print('响应header:{}'.format(resp_headers))
3、put接口实战
免费领取码同学软件测试课程笔记+超多学习资料+完整视频+面试题,可加微信:magetest
import requests
host='http://10.0.0.18:8080'
def put():
"""
put 清酒
:return:
"""
url = host+'/pinter/com/phone' #接口地址
#参数
json={
"brand":"Huawei",
"color":"yellow",
"memorySize":"64G",
"cpuCore":"8核",
"price":"8848",
"desc":"全新上市"
}
resp=requests.put(url=url,json=json)
status_code=resp.status_code #获取响应状态码
print('响应状态码:{}'.format(status_code))
text=resp.text #获取响应内容,结果类型是字符串
print('响应内容:{}'.format(text))
json=resp.json() #获取响应内容,结果是字典类型
print('响应内容:{}'.format(json))
resp_headers=resp.headers #获取响应headers
print('响应header:{}'.format(resp_headers))
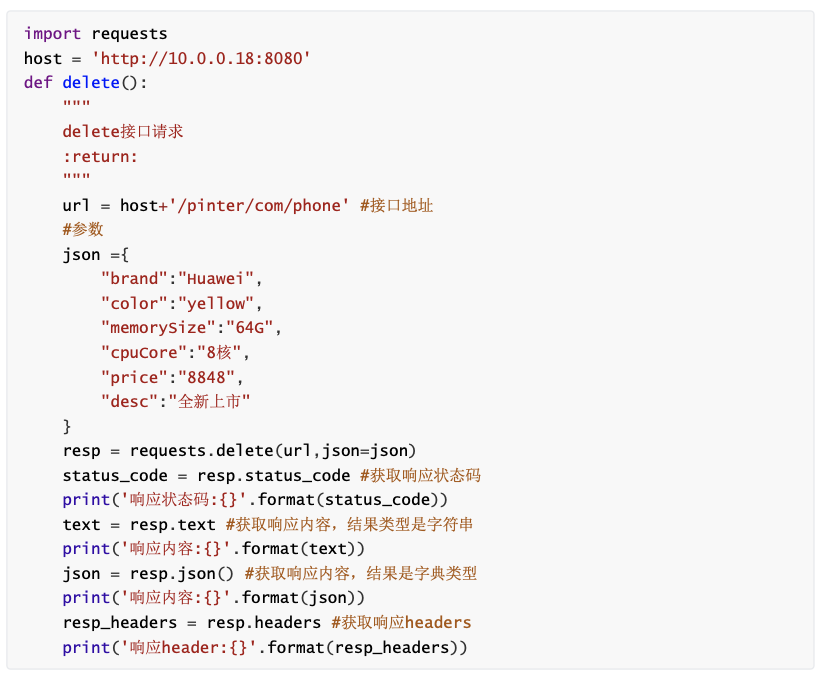
4、delete请求

5、request.session.request用法
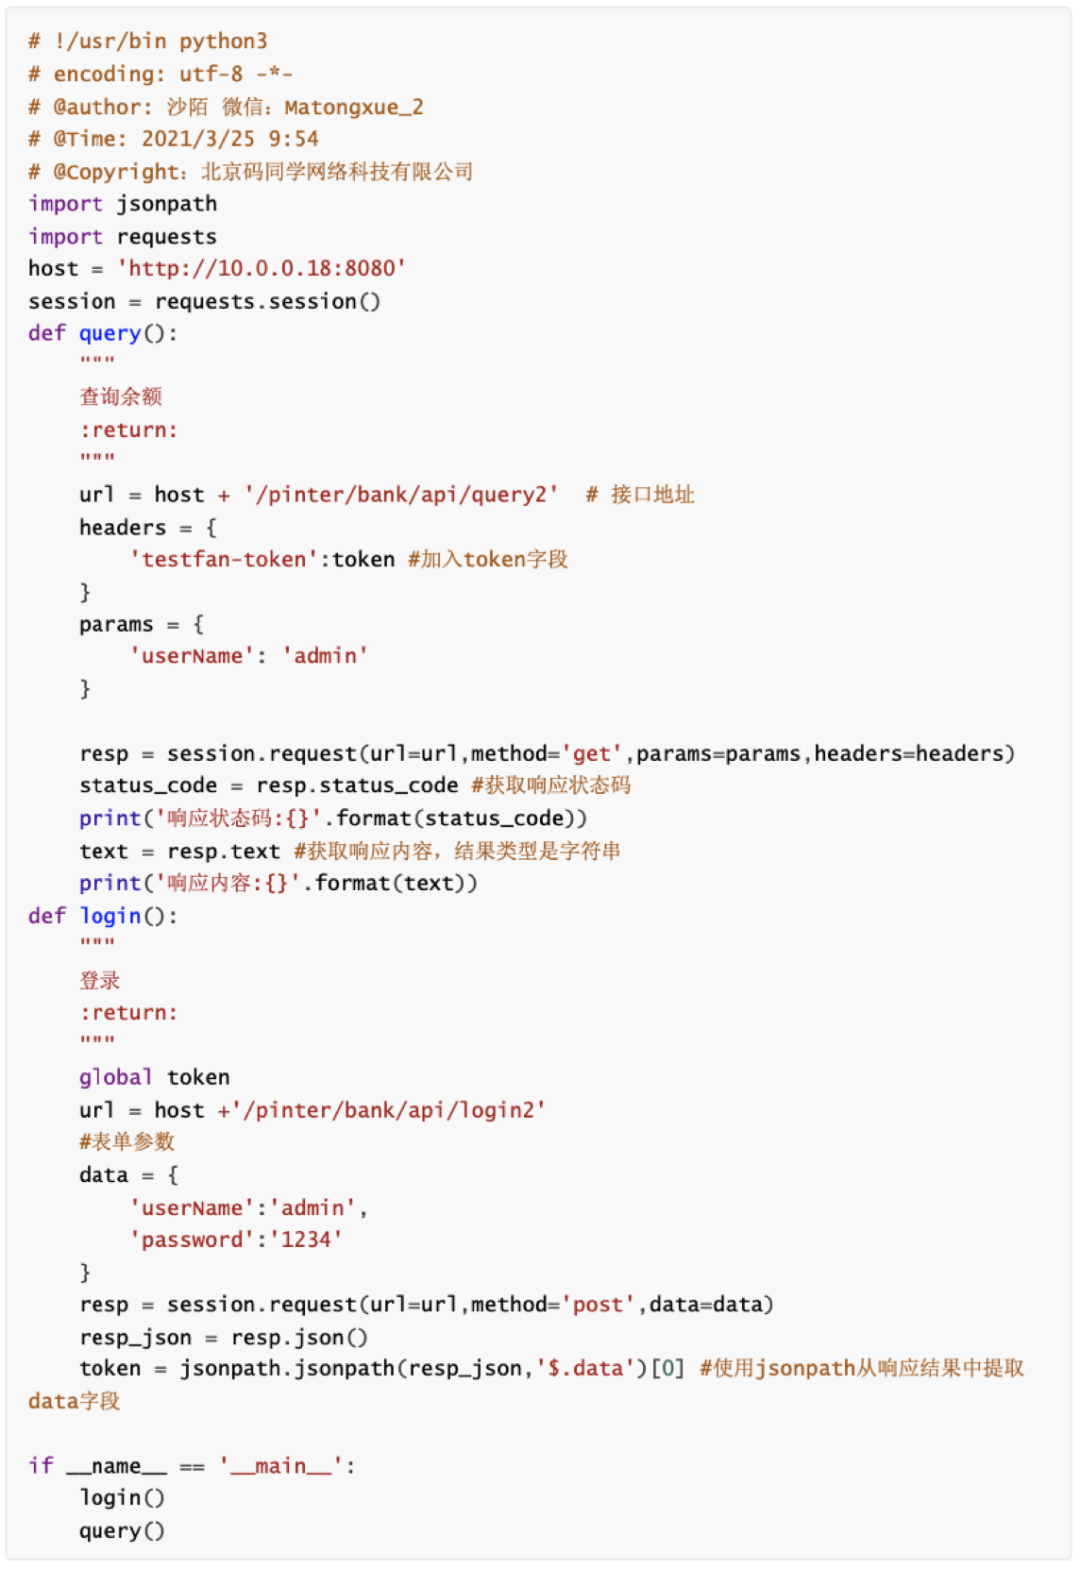
可以自动管理cookie,比如如下需要采用cookie认证的接口


结果如下:
D:\Python\Python36\python.exeD:/pycharmprojects/first/requetsstudy/pinter.py
响应状态码:200
响应内容:{"code":"0","message":"success","data":"$22,378,198"}
Process finished with exitcode 0
6、token关联的接口如何做呢?

对于需要token关联的接口来说,需要从登录接口的返回值中提取token信息,并传递给需要token的接口

结果如下:
D:\Python\Python36\python.exeD:/pycharmprojects/first/requetsstudy/pinter1.py
响应状态码:200
响应内容:{"code":"0","message":"success","data":"$74,780,457"}
Process finished with exit code 0
总结一下:
requests库的请求方法里参数众多,所以简单划分一下:
-
查询参数就用 params=params
-
表单参数就用 data=data
-
json参数就用 json=json
-
请求头信息header就用 headers=headers
免费领取码同学软件测试课程笔记+超多学习资料+学习完整视频 ☞ 可加:magetest/关注码同学公众号:自动化软件测试
本文著作权归作者所有,任何形式的转载都请联系作者获得授权并注明出处。


【推荐】国内首个AI IDE,深度理解中文开发场景,立即下载体验Trae
【推荐】编程新体验,更懂你的AI,立即体验豆包MarsCode编程助手
【推荐】抖音旗下AI助手豆包,你的智能百科全书,全免费不限次数
【推荐】轻量又高性能的 SSH 工具 IShell:AI 加持,快人一步
· 无需6万激活码!GitHub神秘组织3小时极速复刻Manus,手把手教你使用OpenManus搭建本
· C#/.NET/.NET Core优秀项目和框架2025年2月简报
· Manus爆火,是硬核还是营销?
· 终于写完轮子一部分:tcp代理 了,记录一下
· 【杭电多校比赛记录】2025“钉耙编程”中国大学生算法设计春季联赛(1)