google protocol buffer——protobuf的基本使用和模型分析
2020-08-16 13:22 tera 阅读(5614) 评论(0) 收藏 举报这一系列文章主要是对protocol buffer这种编码格式的使用方式、特点、使用技巧进行说明,并在原生protobuf的基础上进行扩展和优化,使得它能更好地为我们服务。
1.什么是protobuf
protocol buffer是由google推出一种数据编码格式,不依赖平台和语言,类似于xml和json。然而与xml和json最大的不同之处在于,protobuf并非是一种可以完全自解释的编码格式,这点在之后会有说明。
2.为什么要使用protobuf
和json或者xml相比,protocol buffer的解析速度更快,编码后的字节数更少。
其中解析速度的相关比较可以参看相关文章,这并不是本系列关心的重点,而字节数的减少将会是后续扩展和优化的重点。
另外,比json和xml更便利的是,开发者只需要编写一份.proto的描述文件,就可以通过google提供的编译器生成不同平台的模型代码,包括java、C#等等,而不需要手动进行模型编写。
本文后续的示例都是采用java进行展示。
3.如何使用protobuf
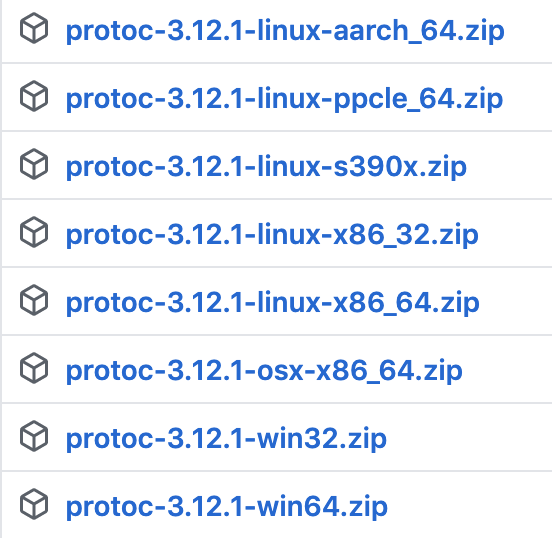
首先我们需要下载一个google提供的编译器,下载地址:
https://github.com/protocolbuffers/protobuf/releases/tag/v3.12.1
选择自己的系统下载相应的zip包

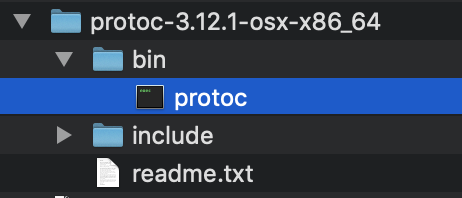
解压后就能看到看到一个protoc的执行文件,即是我们所需要的编译器。

接着我们需要定义一份BasicUsage.proto的描述文件,其结构和我们定义普通的类十分类似。
syntax = "proto3";

option java_package = "cn.tera.protobuf.model";
option java_outer_classname = "BasicUsage";

message Person {
  string name = 1;
  int32 id = 2;
  string email = 3;
}
第一行表示所使用的的语法版本,这里选择的是最新的proto3版本。
syntax = "proto3";
第三、四行表示最终生成的java的package名和外部class的类名(这里外部class的意思之后会有代码解释)
option java_package = "cn.tera.protobuf.model";
option java_outer_classname = "BasicUsage";
之后紧接着的就是我们所定义的模型,其中大部分都是我们所熟悉的内容。
这里需要特别注意,特别注意,特别注意的是,在字段的后面都跟着一个"= X",这里并不是指这个字段的值,而是表示这个字段的“序号”,和正确地编码与解码息息相关,在我看来是protocol buffer的灵魂,之后会有详细的说明
message Person {
  string name = 1;
  int32 id = 2;
  string email = 3;
}
有了编译器和.poto描述文件,我们就可以生成java模型文件了
编译指令
protoc -I=$SRC_DIR --java_out=$DST_DIR $SRC_DIR/BasicUsage.proto
-I :表示工作目录,如果不指定,则就是当前目录
--java_out:表示输出.java文件的目录
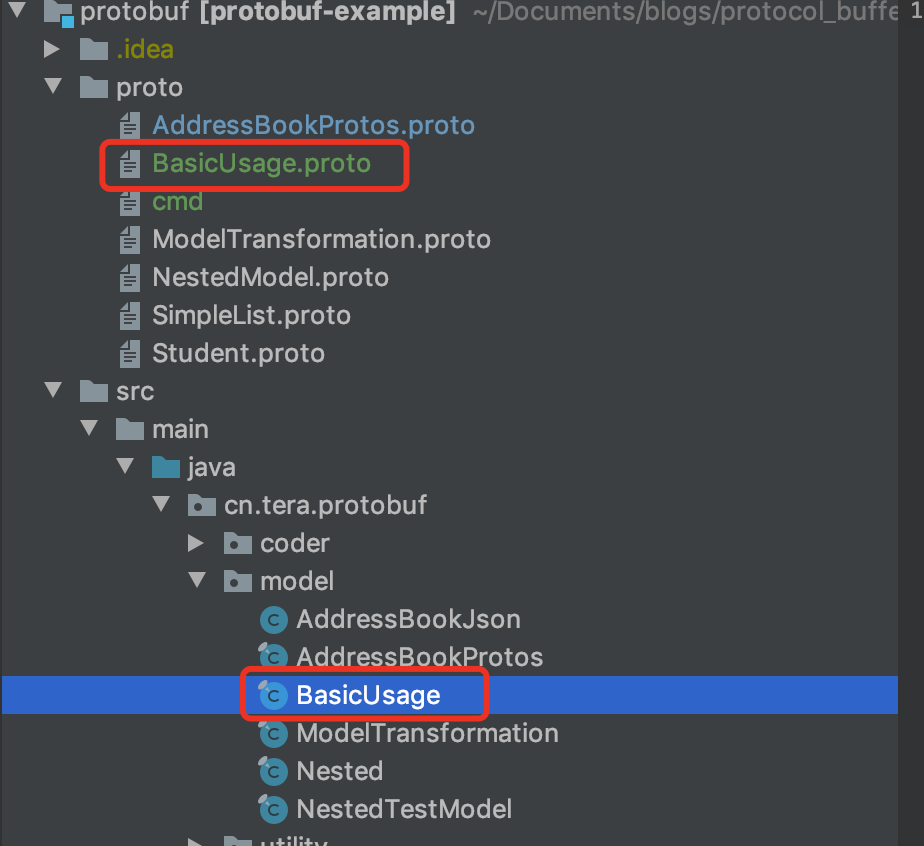
这里我比较习惯将.proto文件放到java项目中,并且将.java文件直接生成到相应的package文件夹中,即前文的java_package参数,这样在使用的时候就可以不用再手动复制文件了
protoc -I=/protocol_buffer/protobuf/proto --java_out=/protocol_buffer/protobuf/src/main/java/ /protocol_buffer/protobuf/proto/BasicUsage.proto
项目的目录结构如下图,其中BasicUsage的class文件就是生成出来的

以上都是准备工作,接着我们就要进入代码相关部分
引入maven依赖
<!--这部分是protobuf的基本库-->
<dependency>
    <groupId>com.google.protobuf</groupId>
    <artifactId>protobuf-java</artifactId>
    <version>3.9.1</version>
</dependency>
<!--这部分是protobuf和json相关的库,这里一并导入,后面会用到-->
<dependency>
    <groupId>com.google.protobuf</groupId>
    <artifactId>protobuf-java-util</artifactId>
    <version>3.9.1</version>
</dependency>
接着我们创建一个Test方法
/**
 * protobuf的基础使用
 */
@Test
void basicUse() {
    //创建一个Person对象
    BasicUsage.Person person = BasicUsage.Person.newBuilder()
            .setId(5)
            .setName("tera")
            .setEmail("tera@google.com")
            .build();
    System.out.println("Person's name is " + person.getName());

    //编码
    //此时我们就可以通过我们想要的方式传递该byte数组了
    byte[] bytes = person.toByteArray();

    //将编码重新转换回Person对象
    BasicUsage.Person clone = null;
    try {
        //解码
        clone = BasicUsage.Person.parseFrom(bytes);
        System.out.println("The clone's name is " + clone.getName());
    } catch (InvalidProtocolBufferException e) {
    }

    //引用是不同的
    System.out.println("==:" + (person == clone));
    //equals方法经过了重写,所以equals是相同的
    System.out.println("equals:" + person.equals(clone));

    //修改clone中的值
    clone = clone.toBuilder().setName("clone").build();
    System.out.println("The clone's new name is " + clone.getName());
}
在Test方法中,我们可以看到,访问Person类是需要通过BasicUsage.Person进行访问,这就是我们前面在定义.proto文件时指定的java_outer_classname参数
因为在一个.proto文件中,我们可以定义多个类,而多个.proto文件也可以定义相同的类名,因此用这个java_outer_classname进行区分,可以认为是.proto的package名
这里需要注意几个点:
protobuf的对象的实例化和赋值必须通过newBuilder()返回的Builder对象进行,实例化最终对象需要通过build()方法。
BasicUsage.Person person = BasicUsage.Person.newBuilder()
            .setId(5)
            .setName("tera")
            .setEmail("tera@google.com")
            .build();
对象实例化完成之后就只能调用get方法而无法set,如果需要set值,则必须将其转换回Builder对象才行。
clone = clone.toBuilder().setName("clone").build();
而对象的编码和解码,则分别通过toByteArray()方法和parseFrom()方法 。
byte[] bytes = person.toByteArray();
...
BasicUsage.Person.parseFrom(bytes);
以上就是protocol buffer的基本使用方式,其实除了赋值比较麻烦意外,其他操作都很方便(如果我们需要在普通的模型中实现.setXX().setYY()这种连续操作,还得另外加个注解呢),特别是对于需要深度clone的对象,protocol buffer也是一个很好的选择,可以避免很多clone引用的问题。
4.protocol buffer模型解析
当然,了解了基础使用,源码的研究自然也是不能少的,不过遵照着循序渐进的原则,我们先看下生成的模型文件中有些什么
查看Person的类,此时的你是不是吓了一跳,这么简单的一个类的代码竟然有这么多!为了不凑字数,我这里就不贴全了,有兴趣的同学自己去生成一个看看全貌,总计836行代码
下面主要看下几个主要部分
1).BasicUsage
主类名是BasicUsage,其余所有的类都作为了该主类的内部类,所以访问Person时,需要通过BasicUsage.Person访问
public final class BasicUsage {
      ...
}
2).PersonOrBuilder接口
PersonOrBuilder接口,定义了Person对象所有字段的get方法以及其对应的字节的get方法
public interface PersonOrBuilder extends
        // @@protoc_insertion_point(interface_extends:Person)
        com.google.protobuf.MessageOrBuilder {
    java.lang.String getName();
    com.google.protobuf.ByteString getNameBytes();

    int getId();

    java.lang.String getEmail();
    com.google.protobuf.ByteString getEmailBytes();
}
3).Person类
Person对象是实现了PersonOrBuilder接口的,因此Person只能get而不能set了
public static final class Person extends
            com.google.protobuf.GeneratedMessageV3 implements
            PersonOrBuilder {
    ...
}
Person类没有public的构造函数,只有3个private的构造函数,因此在外部代码中是不能直接创建Person对象的
3个构造函数分为接受Builder对象、构造空对象、接受CodeInputStream对象
其中Builder对象正是之前提到过的,用于通过Builder创建Person
而CodeInputStream则是指字节数组,则是用于从byte[]中解码出对象
这2个构造函数在后文中都可以看到使用场景
private Person(com.google.protobuf.GeneratedMessageV3.Builder<?> builder) {
    super(builder);
}

private Person() {
    name_ = "";
    email_ = "";
}
private Person(
        com.google.protobuf.CodedInputStream input,
        com.google.protobuf.ExtensionRegistryLite extensionRegistry)
        throws com.google.protobuf.InvalidProtocolBufferException {
    ...
}
查看Person的getName方法,可以看到在这里,name_是一个Object而不是String,在取值的时候需要做一个类型判断
这么实现的原因在于,因为对象是可以通过byte[]数组解码的,而byte[]数组的内容是不可控的、灵活可变的,为了尽量兼容这些情况,所以才会如此处理,这个问题后文会给出一些示例
@java.lang.Override
public java.lang.String getName() {
    java.lang.Object ref = name_;
    if (ref instanceof java.lang.String) {
        return (java.lang.String) ref;
    } else {
        com.google.protobuf.ByteString bs =
                (com.google.protobuf.ByteString) ref;
        java.lang.String s = bs.toStringUtf8();
        name_ = s;
        return s;
    }
}
查看equals和hashcode方法,可以看到根据对象字段的内容进行了相应的重写,因此在之前的基本使用示例中,equals方法会返回true
@java.lang.Override
public boolean equals(final java.lang.Object obj) {
    if (obj == this) {
        return true;
    }
    if (!(obj instanceof cn.tera.protobuf.model.BasicUsage.Person)) {
        return super.equals(obj);
    }
    cn.tera.protobuf.model.BasicUsage.Person other = (cn.tera.protobuf.model.BasicUsage.Person) obj;

    if (!getName()
            .equals(other.getName())) return false;
    if (getId()
            != other.getId()) return false;
    if (!getEmail()
            .equals(other.getEmail())) return false;
    if (!unknownFields.equals(other.unknownFields)) return false;
    return true;
}

@java.lang.Override
public int hashCode() {
    if (memoizedHashCode != 0) {
        return memoizedHashCode;
    }
    int hash = 41;
    hash = (19 * hash) + getDescriptor().hashCode();
    hash = (37 * hash) + NAME_FIELD_NUMBER;
    hash = (53 * hash) + getName().hashCode();
    hash = (37 * hash) + ID_FIELD_NUMBER;
    hash = (53 * hash) + getId();
    hash = (37 * hash) + EMAIL_FIELD_NUMBER;
    hash = (53 * hash) + getEmail().hashCode();
    hash = (29 * hash) + unknownFields.hashCode();
    memoizedHashCode = hash;
    return hash;
}
查看Person的toByteArray()方法,可以看到这个方法是在AbstractMessageLite的类中,这是所有Protobuf生成对象的父类中的方法
public byte[] toByteArray() {
    try {
        byte[] result = new byte[this.getSerializedSize()];
        CodedOutputStream output = CodedOutputStream.newInstance(result);
        this.writeTo(output);
        output.checkNoSpaceLeft();
        return result;
    } catch (IOException var3) {
        throw new RuntimeException(this.getSerializingExceptionMessage("byte array"), var3);
    }
}
此时查看Person类中的this.writeTo方法,可以看到正是在这个方法中写入了3个字段的数据,这些方法的细节我们需要放到之后的文章中详细分析,因为涉及到了protobuf的编码原理等内容
@java.lang.Override
public void writeTo(com.google.protobuf.CodedOutputStream output)
        throws java.io.IOException {
    if (!getNameBytes().isEmpty()) {
        com.google.protobuf.GeneratedMessageV3.writeString(output, 1, name_);
    }
    if (id_ != 0) {
        output.writeInt32(2, id_);
    }
    if (!getEmailBytes().isEmpty()) {
        com.google.protobuf.GeneratedMessageV3.writeString(output, 3, email_);
    }
    unknownFields.writeTo(output);
}
对于Person类,我们最后再看一下parseFrom方法,这个方法有很多的重载,然而本质都是一样的,通过PARSER去处理数据,这里我就不全贴出来了
public static cn.tera.protobuf.model.BasicUsage.Person parseFrom(byte[] data)
        throws com.google.protobuf.InvalidProtocolBufferException {
    return PARSER.parseFrom(data);
}
查看PARSER对象,这里正是会调用Person的接受Stream参数的构造函数,和前文对应
private static final com.google.protobuf.Parser<Person>
        PARSER = new com.google.protobuf.AbstractParser<Person>() {
    @java.lang.Override
    public Person parsePartialFrom(
            com.google.protobuf.CodedInputStream input,
            com.google.protobuf.ExtensionRegistryLite extensionRegistry)
            throws com.google.protobuf.InvalidProtocolBufferException {
        return new Person(input, extensionRegistry);
    }
};
4).Builder类
Builder类为Person的内部类,一样实现了PersonOrBuilder接口,不过额外定义了set的方法
public static final class Builder extends
        com.google.protobuf.GeneratedMessageV3.Builder<Builder> implements
        // @@protoc_insertion_point(builder_implements:Person)
        cn.tera.protobuf.model.BasicUsage.PersonOrBuilder {
    ...
}
这里的get方法的逻辑和Person类一样,不过特别注意的是,这里的name_和Person的getName方法中的name_不是同一个对象,而是分别属于Builder类和Person类的private字段
public java.lang.String getName() {
    java.lang.Object ref = name_;
    if (!(ref instanceof java.lang.String)) {
        com.google.protobuf.ByteString bs =
                (com.google.protobuf.ByteString) ref;
        java.lang.String s = bs.toStringUtf8();
        name_ = s;
        return s;
    } else {
        return (java.lang.String) ref;
    }
}
查看set方法,比较简单,就是一个直接的赋值操作
public Builder setName(
        java.lang.String value) {
    if (value == null) {
        throw new NullPointerException();
    }

    name_ = value;
    onChanged();
    return this;
}
最后,我们来看下Builder的build方法,这里调用了buildPartial方法
@java.lang.Override
public cn.tera.protobuf.model.BasicUsage.Person build() {
    cn.tera.protobuf.model.BasicUsage.Person result = buildPartial();
    if (!result.isInitialized()) {
        throw newUninitializedMessageException(result);
    }
    return result;
}
查看buildPartial方法,可以看到这里调用了Person获取builder参数的构造函数,和前文对应
构造完成后,将Builder中的各种字段赋值给Person中的相应字段,即完成了构造
@java.lang.Override
public cn.tera.protobuf.model.BasicUsage.Person buildPartial() {
    cn.tera.protobuf.model.BasicUsage.Person result = new cn.tera.protobuf.model.BasicUsage.Person(this);
    result.name_ = name_;
    result.id_ = id_;
    result.email_ = email_;
    onBuilt();
    return result;
}
总结一下:
1.protocol buffer需要定义.proto描述文件,然后通过google提供的编译器生成特定的模型文件,之后就可以作为正常的java对象使用了
2.不可以直接创建对象,需要通过Builder进行
3.只有Builder才可以进行set
4.可以通过对象的toByteArray()和parseFrom()方法进行编码和解码
5.模型文件很大(至少在java这里是如此),其中所有的代码都是定制的,这其实是它很大的缺点之一
这里留了几个伏笔,在maven引用中提到了json,在.proto描述文件中提到了=X的序号很重要,在getName()方法中提到了灵活性,这些内容会在下一篇文章中继续探究,本文主要是对protocol buffer进行初步了解


 浙公网安备 33010602011771号