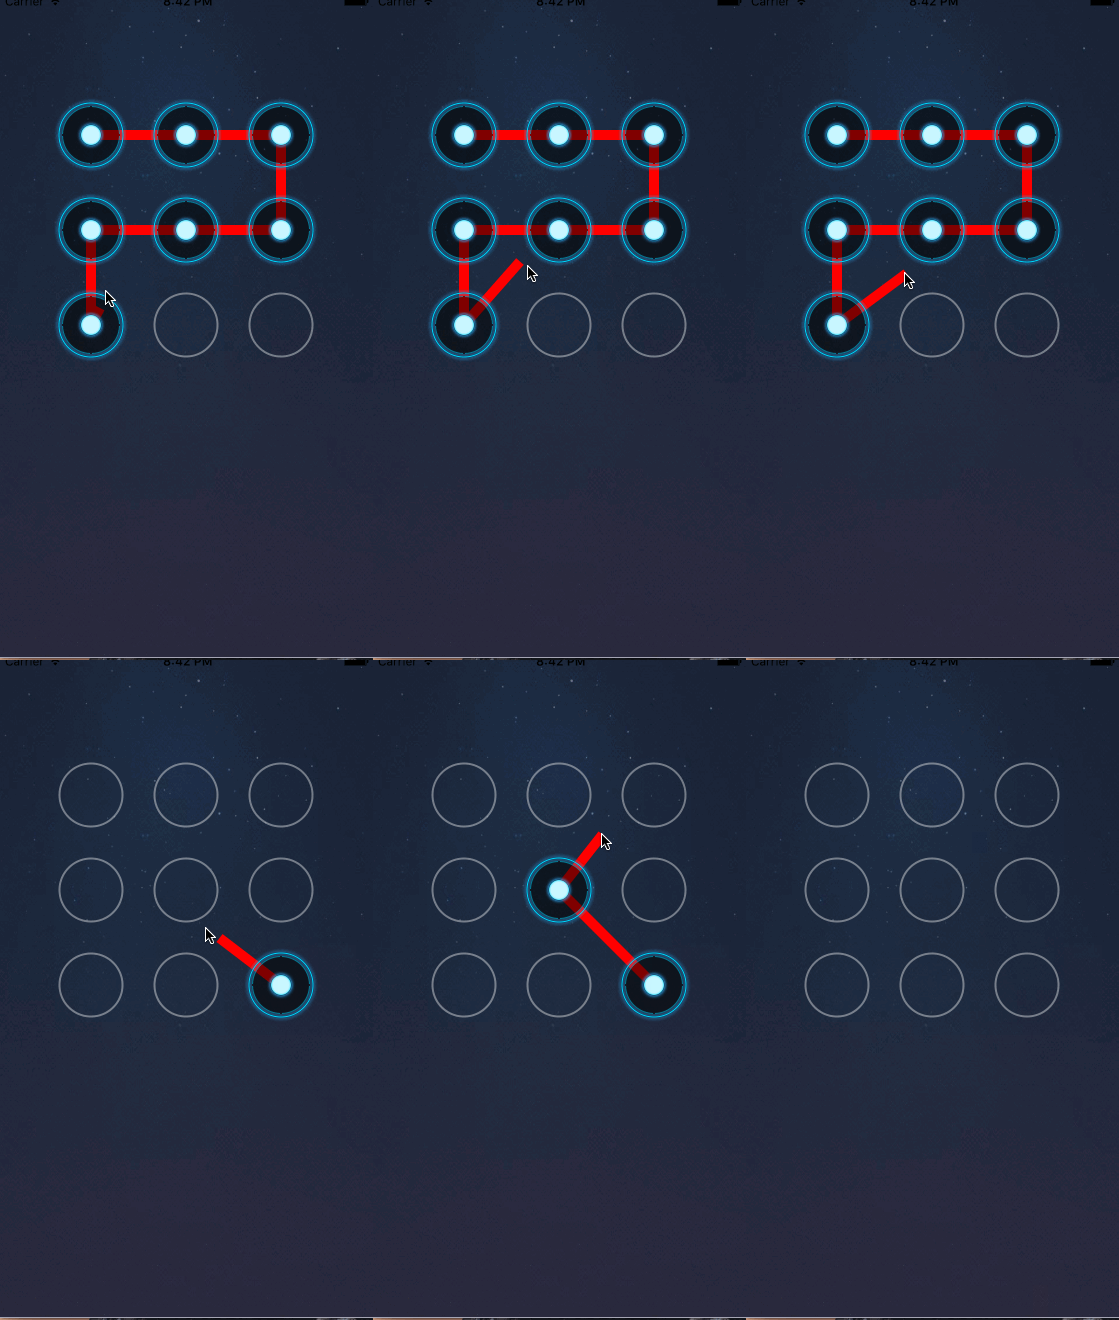
iOS仿安卓手势解锁
2017-09-03 14:22 海豚湾 阅读(693) 评论(0) 编辑 收藏 举报
界面是一个九宫格的布局.九宫格实现思路.
先确定有多少列 cloum = 3;
计算出每列之间的距离
计算为: CGFloat margin = (当前View的宽度 - 列数 * 按钮的宽度) / 总列数 + 1
每一列的X的值与它当前所在的行有关
当前所在的列为:curColum = i % cloum
每一行的Y的值与它当前所在的行有关.
当前所在的行为:curRow = i / cloum
每一个按钮的X值为, margin + 当前所在的列 * (按钮的宽度+ 每个按钮之间的间距)
每一个按钮的Y值为 当前所在的行 * (按钮的宽度 + 每个按钮之间的距离)
无论是Xib,还是代码,都做一次初始化
step1:界面搭建
-(void)awakeFromNib{
    初始化
    [self setUP];
}

-(instancetype)initWithFrame:(CGRect)frame{
    if (self = [super initWithFrame:frame]) {
         初始化
        [self setUP];
    }
    return self;
}

初始化
- (void)setUP{

    for (int i = 0; i < 9;  i++) {
        添加按钮
        UIButton *btn = [UIButton buttonWithType:UIButtonTypeCustom];
        设置图片
        [btn setImage:[UIImage imageNamed:@"gesture_node_normal"] forState:UIControlStateNormal];
        设置选中状态的下图片
        [btn setImage:[UIImage imageNamed:@"gesture_node_highlighted"] forState:UIControlStateSelected];
        添加按钮
        [self addSubview:btn];
    }
}

布局子控件
- (void)layoutSubviews{
    [super layoutSubviews];
    总列数
    int cloumn = 3;
    CGFloat btnWH = 74;
    每列之间的间距
    CGFloat margin = (self.bounds.size.width - cloumn * btnWH) / (cloumn + 1);
    当前所在的列
    int curClounm = 0;
    当前所在的行
    int curRow = 0;
    CGFloat x = 0;
    CGFloat y = 0;
    取出所有的控件
    for (int i = 0; i < self.subviews.count; i++) {
        计算当前所在的列
        curClounm = i % cloumn;
        计算当前所在的行.
        curRow = i / cloumn;
        计算Y
        x = margin + (margin + btnWH) * curClounm;
        计算Y.
        y = (margin +btnWH) * curRow;
        UIButton *btn = self.subviews[i];
        btn.frame = CGRectMake(x, y, btnWH, btnWH);
    }
}
step2:按钮选中
 1 /**
 2  *  获取当前手指所在的点
 3  *
 4  *  @param touches touches集合
 5  *
 6  *  @return 当前手指所在的点.
 7  */
 8 - (CGPoint)getCurrentPoint:(NSSet *)touches{
 9     UITouch *touch = [touches anyObject];
10     return [touch locationInView:self];
11 }
12
13 /**
14  *  判断一个点在不在按钮上.
15  *
16  *  @param point 当前点
17  *
18  *  @return 如果在按钮上, 返回当前按钮, 如果不在返回nil.
19  */
20 - (UIButton *)btnRectContainsPoint:(CGPoint)point{
21      遍历所有的子控件
22     for (UIButton *btn in self.subviews) {
23          判断手指当前点在不在按钮上.
24         if (CGRectContainsPoint(btn.frame, point)) {
25             在按钮上.返回当前按钮
26             return btn;
27         }
28     }
29     return nil;
30
31 }
32
33 手指点击时让按钮成选中状态
34 -(void)touchesBegan:(NSSet *)touches withEvent:(UIEvent *)event{
35
36     判断当前手指在不在按钮上,如果在按钮上, 让按钮成为选中状态.
37     1.获取当前手指所在的点
38     CGPoint curP = [self getCurrentPoint:touches];
39     2.判断当前手指所在的点在不在按钮上.
40     UIButton *btn  = [self btnRectContainsPoint:curP];
41     if (btn) {
42         btn.selected = YES;
43     }
44 }
45
46 手指移动时,按钮选中,连线到当前选中的按钮
47 -(void)touchesMoved:(NSSet *)touches withEvent:(UIEvent *)event{
48
49     判断当前手指在不在按钮上,如果在按钮上, 让按钮成为选中状态.
50     1.获取当前手指所在的点
51     CGPoint curP = [self getCurrentPoint:touches];
52     2.判断当前手指所在的点在不在按钮上.
53     UIButton *btn  = [self btnRectContainsPoint:curP];
54     if (btn) {
55         btn.selected = YES;
56     }
57 }
step3:连线
 1 @interface ClockView()
 2
 3 /**
 4  *  选中的按钮数组.
 5  *  每次选中一个按钮时,都把按钮添加到数组当中.移动添加到按钮当中时做一次重绘.
 6  *  重绘过程中取出所有保存的按钮, 判断是不是第一个按钮, 如果是第一个按钮,那就让它成为路径的起点.
 7  *  如果不是第一个按钮,那就添加一根线到按钮的中心点.
 8  */
 9 @property(nonatomic,strong)NSMutableArray *selectBtn;
10
11 @end
12
13 懒加载数组.
14 -(NSMutableArray *)selectBtn{
15     if (_selectBtn == nil) {
16         _selectBtn = [NSMutableArray array];
17     }
18     return _selectBtn;
19 }
20
21 手指点击时让按钮成选中状态
22 -(void)touchesBegan:(NSSet *)touches withEvent:(UIEvent *)event{
23
24     判断当前手指在不在按钮上,如果在按钮上, 让按钮成为选中状态.
25     1.获取当前手指所在的点
26     CGPoint curP = [self getCurrentPoint:touches];
27
28     2.判断当前手指所在的点在不在按钮上.
29    UIButton *btn  = [self btnRectContainsPoint:curP];
30    if (btn && btn.selected == NO) {如果按钮已经是选中状态,就不让它再添加到数组当中
31         让按钮成为选中状态
32         btn.selected = YES;
33         把选中按钮添加到数组当中
34         [self.selectBtn addObject:btn];
35     }
36 }
37
38 手指移动时,按钮选中,连线到当前选中的按钮
39 -(void)touchesMoved:(NSSet *)touches withEvent:(UIEvent *)event{
40     判断当前手指在不在按钮上,如果在按钮上, 让按钮成为选中状态.
41     1.获取当前手指所在的点
42     CGPoint curP = [self getCurrentPoint:touches];
43     2.判断当前手指所在的点在不在按钮上.
44     UIButton *btn  = [self btnRectContainsPoint:curP];
45     if (btn && btn.selected == NO) {//如果按钮已经是选中状态,就不让它再添加到数组当中
46         让按钮成为选中状态
47         btn.selected = YES;
48         把选中按钮添加到数组当中
49         [self.selectBtn addObject:btn];
50         每次添加完毕后做一次重绘.
51         [self setNeedsDisplay];
52     }
53 }
54
55 - (void)drawRect:(CGRect)rect {
56     创建路径.
57     UIBezierPath *path = [UIBezierPath bezierPath];
58     取出所有保存的选中按钮连线.
59     for(int i = 0; i < self.selectBtn.count;i++){
60         UIButton *btn = self.selectBtn[i];
61         判断当前按钮是不是第一个,如果是第一个,把它的中心设置为路径的起点.
62         if(i == 0){
63             设置起点.
64             [path moveToPoint:btn.center];
65         }else{
66             添加一根线到当前按钮的圆心.
67             [path addLineToPoint:btn.center];
68         }
69     }
70
71     设置颜色
72     [[UIColor redColor] set];
73     设置线宽
74     [path setLineWidth:10];
75     设置线的连接样式
76     [path setLineJoinStyle:kCGLineJoinRound];
77     绘制路径.
78     [path stroke];
79 }
step4:业务逻辑
 1 @interface ClockView()
 2
 3 /**
 4  *  选中的按钮数组.
 5  */
 6 @property(nonatomic,strong)NSMutableArray *selectBtn;
 7
 8 /**
 9  *  当前手指移动的点
10   * 记录当前手指的点,数组当中所有的点都绘制完毕后, 再添加一根线到当前手指所在的点.
11  */
12 @property(nonatomic,assign)CGPoint curP;
13
14 @end
15
16 手指松开时,按钮取消选中状态,清空所有的连线.
17 -(void)touchesEnded:(NSSet *)touches withEvent:(UIEvent *)event{
18
19     1.取消所有选中的按钮,查看选中按钮的顺序
20     NSMutableString *str = [NSMutableString string];
21     for (UIButton *btn in self.selectBtn) {
22         [str appendFormat:@"%ld",btn.tag];
23         btn.selected = NO;
24     }
25     2.清空所有的连线.
26     [self.selectBtn removeAllObjects];
27     3.重绘
28     [self setNeedsDisplay];
29     NSLog(@"选中按钮顺序为:%@",str);
30 }
31
32 - (void)drawRect:(CGRect)rect {
33     如果数组当中没有元素,就不让它进行绘图.直接返回.
34     if(self.selectBtn.count <= 0) return;
35     创建路径.
36     UIBezierPath *path = [UIBezierPath bezierPath];
37     取出所有保存的选中按钮连线.
38     for(int i = 0; i < self.selectBtn.count;i++){
39         UIButton *btn = self.selectBtn[i];
40        判断当前按钮是不是第一个,如果是第一个,把它的中心设置为路径的起点.
41         if(i == 0){
42            设置起点.
43             [path moveToPoint:btn.center];
44         }else{
45            添加一根线到当前按钮的圆心.
46             [path addLineToPoint:btn.center];
47         }
48     }
49      连完先中的按钮后, 在选中按钮之后,添加一根线到当前手指所在的点.
50     [path addLineToPoint:self.curP];
51      设置颜色
52     [[UIColor redColor] set];
53        设置线宽
54     [path setLineWidth:10];
55      设置线的连接样式
56     [path setLineJoinStyle:kCGLineJoinRound];
57      绘制路径.
58     [path stroke];
59 }
github下载地址:https://github.com/CrazyZhangSanFeng/shoushijiesuo

