

乘风破浪,遇见最美Windows 11之现代Windows桌面应用开发 - Visual Studio扩展开发
工欲善其事,必先利其器
通过使用和生成扩展,打造适合你和你的团队的完美工具。

什么是Visual Studio扩展
https://visualstudio.microsoft.com/zh-hans/vs/features/extend/
Visual Studio扩展(Visual Studio Extend)是可以允许你在Visual Studio中进行自定义并增强在其中的体验的附加项,通过添加新功能或集成现有工具实现。扩展复杂程度不一,但是其主要用途在于提高工作效率并满足工作流需求。
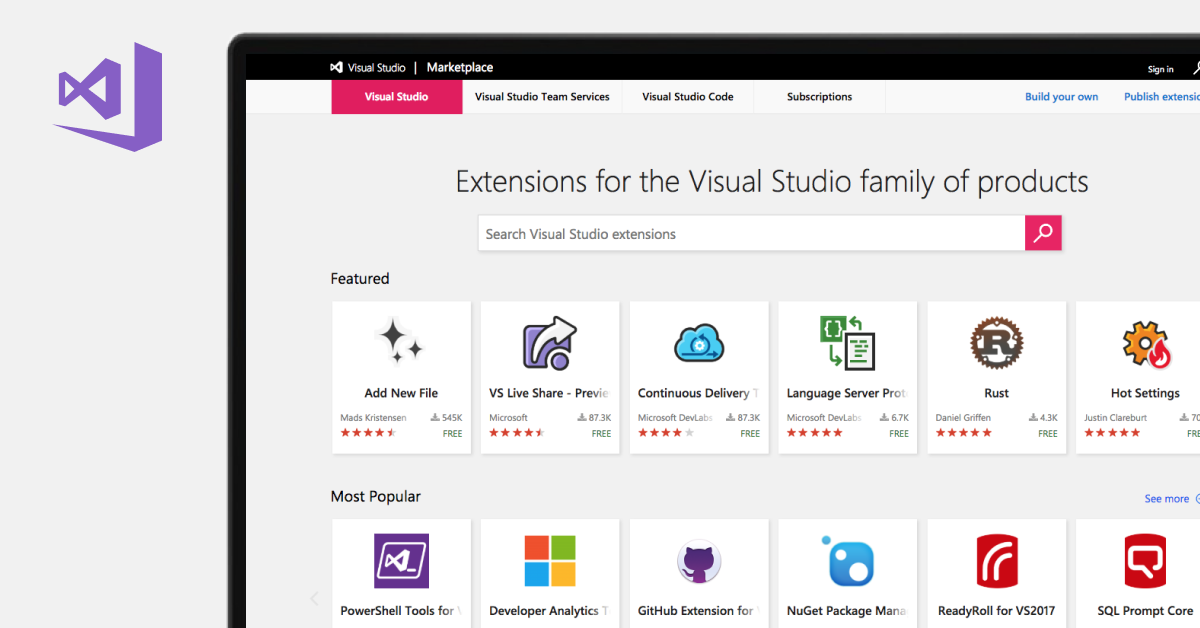
Visual Studio扩展商店
Visual Studio扩展商店(Visual Studio Marketplace)提供的数千万个扩展,可以帮助你查找所需工具,增强你的Visual Studio,还可以通过它发布你的扩展。
创建Visual Studio扩展
https://docs.microsoft.com/visualstudio/extensibility/starting-to-develop-visual-studio-extensions
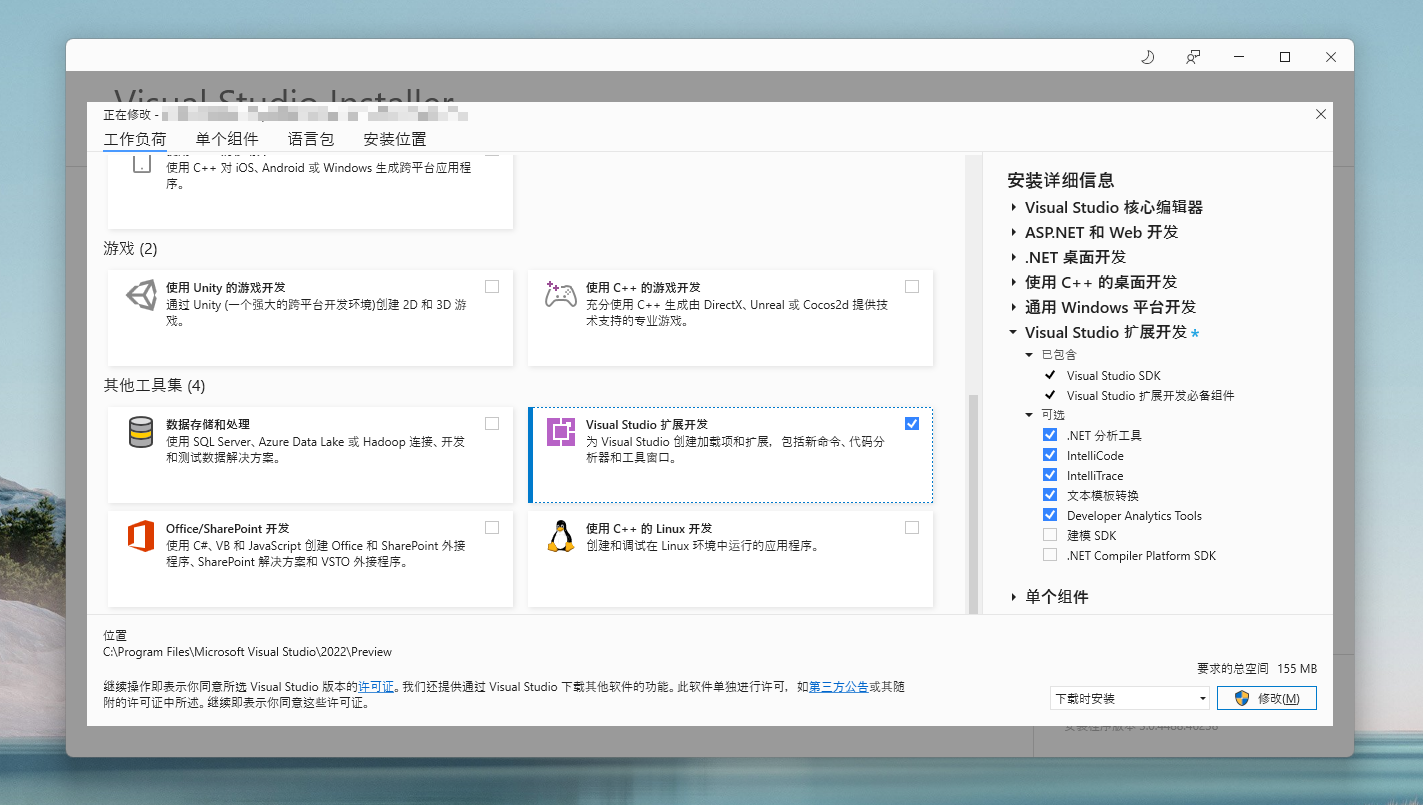
安装Visual Studio SDK
Visual Studio软件开发工具包(Visual Studio SDK)是安装Visual Studio时一个可选项,我们可以通过Visual Studio Installer安装器,修改或首次安装VS对应版本时,选中并勾选其他工具集分类中的Visual Studio 扩展开发工作负荷来安装它。
或者,如果你本地有扩展的项目,双击打开的时候,也会提示你安装此依赖项。

思考Visual Studio能完成的事情
如果你正好有如下所列方向的需求,那么创建Visual Studio扩展可能是比较好的选项之一:
- 支持未包含在Visual Studio中的语言、语法着色、IntelliSense以及编译器和调试支持
- 利用附加模板、代码重构、新对话框或工具窗口扩展核心IDE体验的生产力工具
- 适用于各种方案(如数据设计或云支持)的域特定设计器
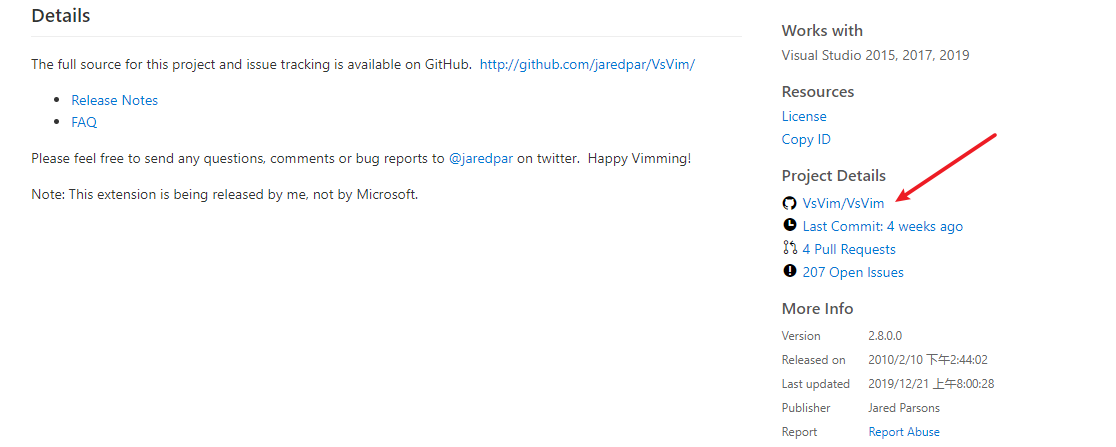
值得留意的是,许多扩展是开放源代码的,并且Visual Studio扩展商店(Visual Studio Marketplace)包含指向其GitHub存储库的链接。
利用Visual Studio扩展能完成的功能
理论上,你可以只扩展VisualStudio的任何部分:菜单、工具栏、命令、窗口、解决方案、项目、编辑器等。
实际上,我们发现大多数人要扩展的功能是命令、菜单和工具栏、Windows、IntelliSense和项目。下面是相关资料链接:
- 扩展菜单和命令:将您自己的项添加到VisualStudio菜单和工具栏中。您可以使用它们来启动新Visual Studio功能或您自己的外部帮助程序应用程序。还可以提供菜单项的自定义快捷方式。
- 扩展和自定义工具Windows:扩展现有工具窗口或创建自己的工具窗口。例如,您可以将新属性添加到属性,也可以创建新的工具窗口来添加其他功能。
- 编辑器和语言服务扩展:将你自己的自定义添加到为VisualStudio语言提供的IntelliSense,或创建对新编程语言的支持。你可以创建新的语句完成、建议和新的QuickInfo工具提示。对于轻型电灯泡,可以添加重构建议和代码修补程序,以支持新的编程语言。
- 扩展项目
- 扩展用户设置和选项
- 扩展属性和属性窗口
- 扩展Visual Studio的其他部分
- Visual Studio独立Shell
编写自己的第一个扩展
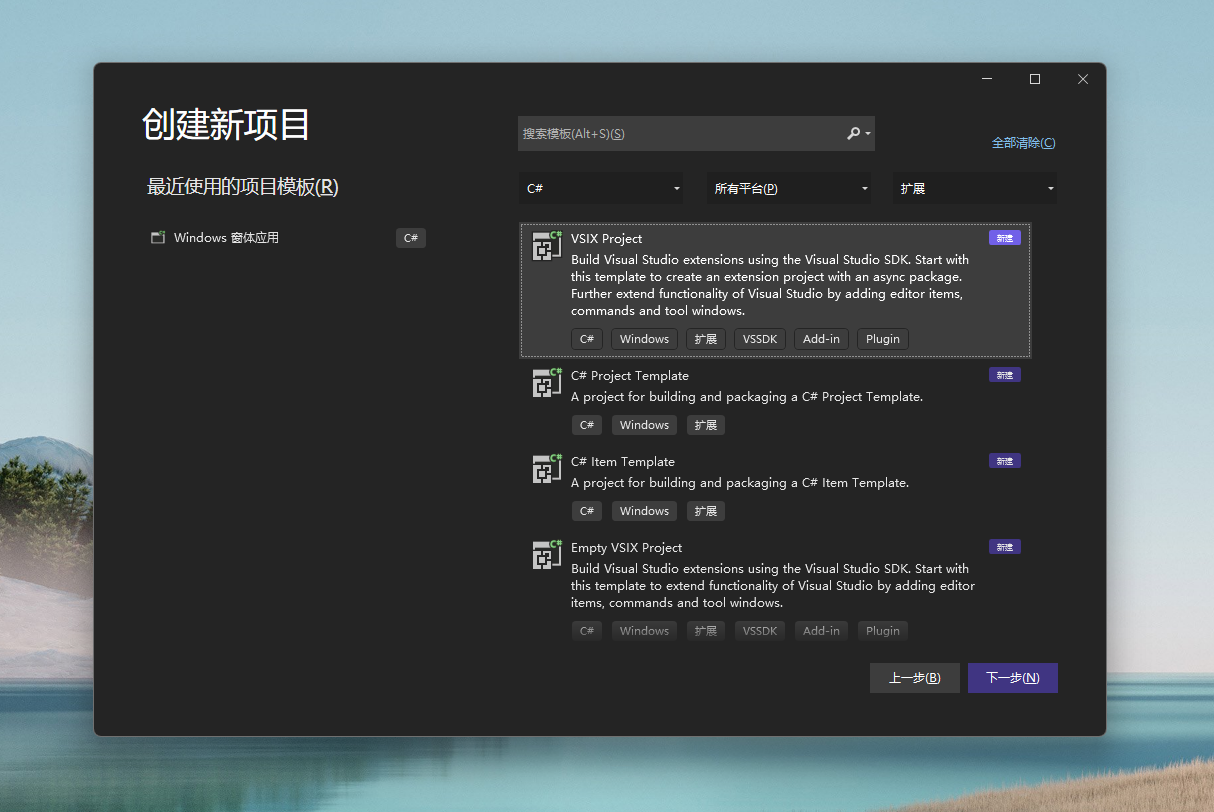
a. 打开Visual Studio创建项目
这里筛选C#语言、所有平台、扩展项目类型,比如这里找到VSIX Project这种项目模板类型,然后点击"下一步"按钮。
b. 输入项目名称,创建项目
这里我们就采用demoForVsixExtend作为项目名称和解决方案的名称吧,然后点击"创建"按钮。

c. 创建成功并打开解决方案
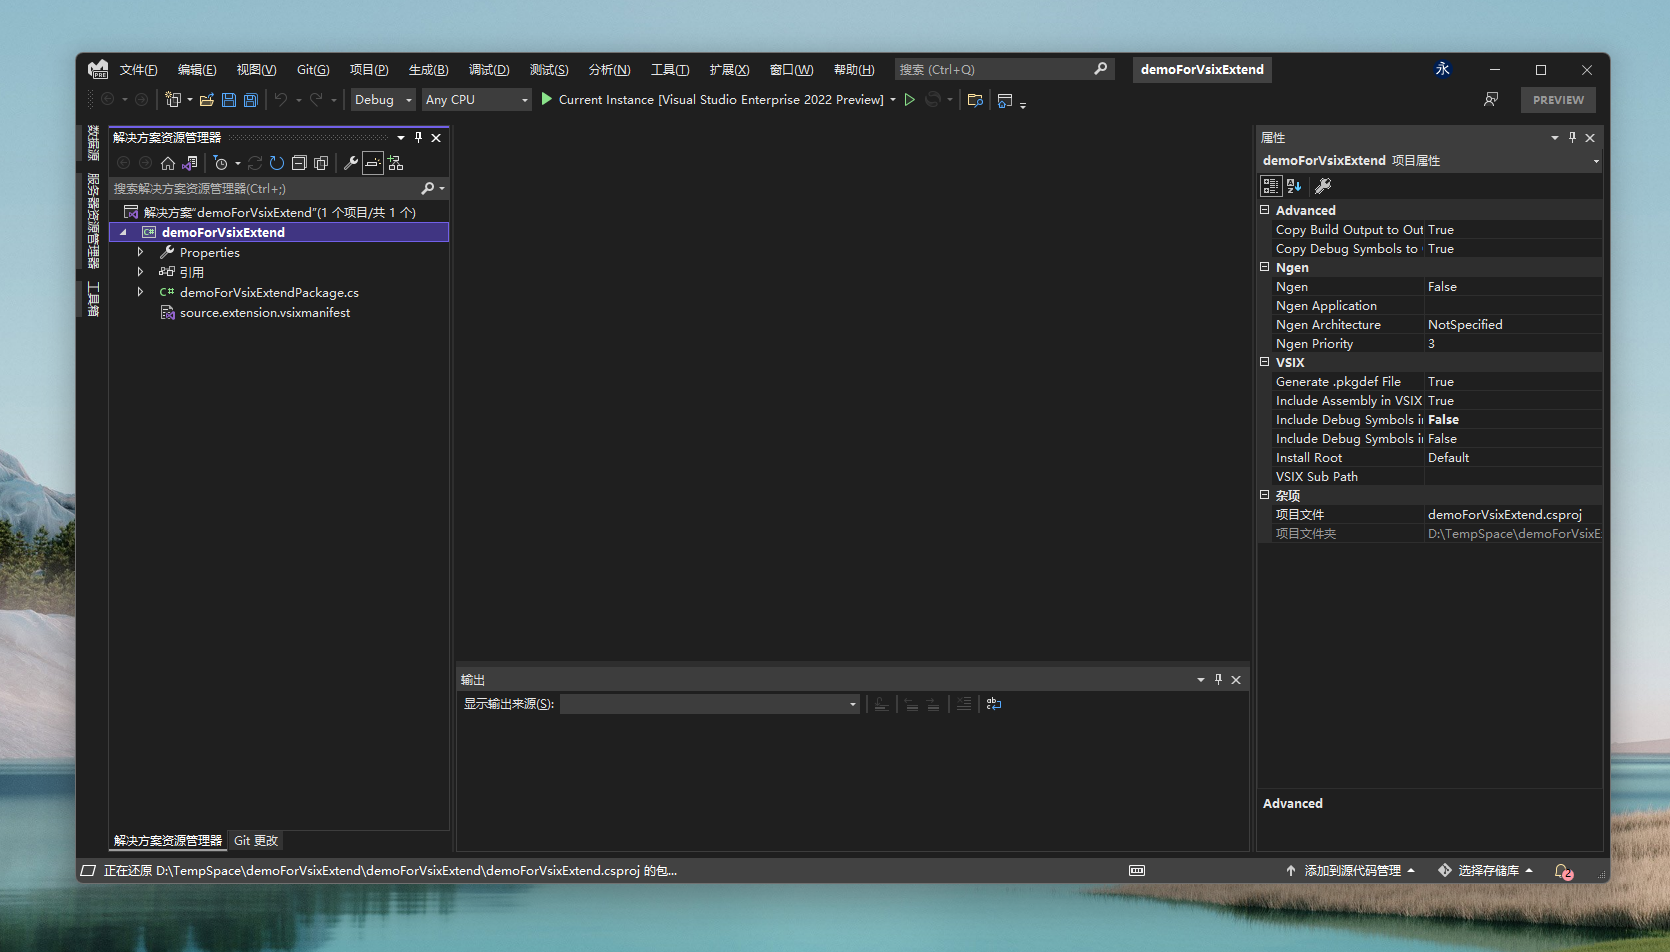
d. 查看并编辑扩展元数据
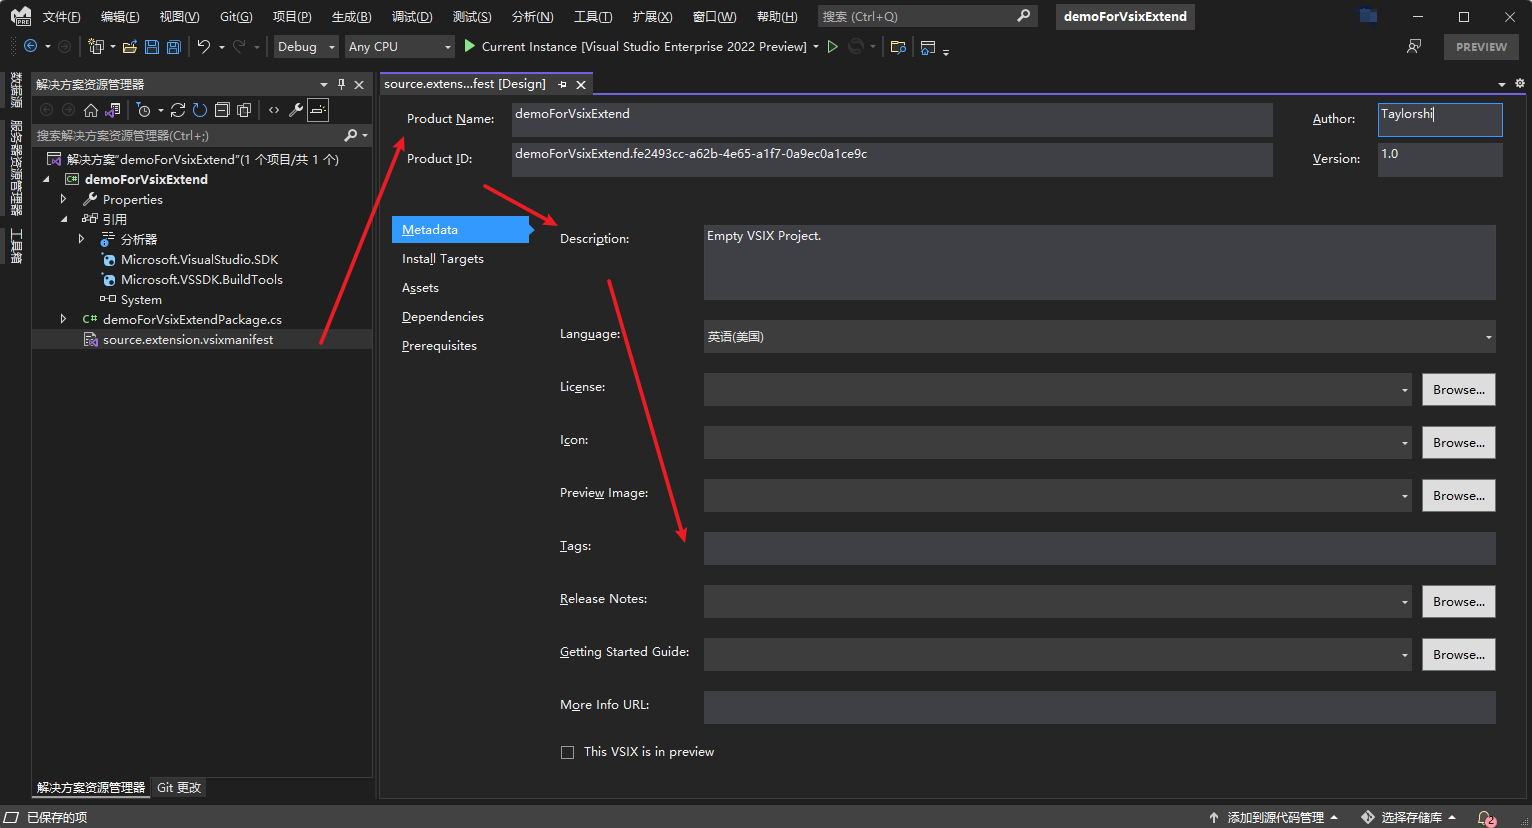
在demoForVsixExtend项目中找到.vsixmanifest文件,双击可以进入配置界面,这里面编辑扩展的描述、语言、协议、图标、预览图、标签、更新内容、开始指引、扩展链接、是否为预览拓展。
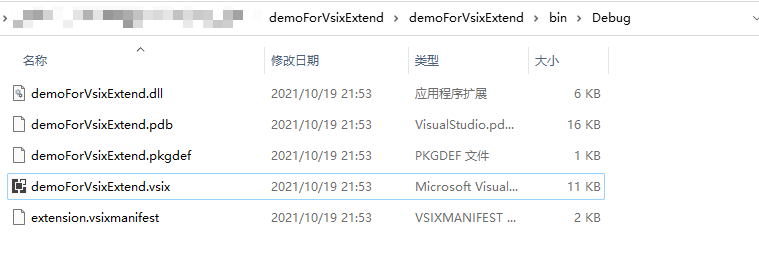
e. 编译并生成,查看输出文件
从demoForVsixExtend项目的包引用来看,我们可以清晰看到是依赖Microsoft.VisualStudio.SDK和Microsoft.VSSDK.BuildTools两个包。
全部编译之后,我们看看Bin生成目录,可以看到,它会生成一个DLL,和一个.vsix的包。
向工具栏添加自定义命令
a. 创建扩展的自定义命令类文件
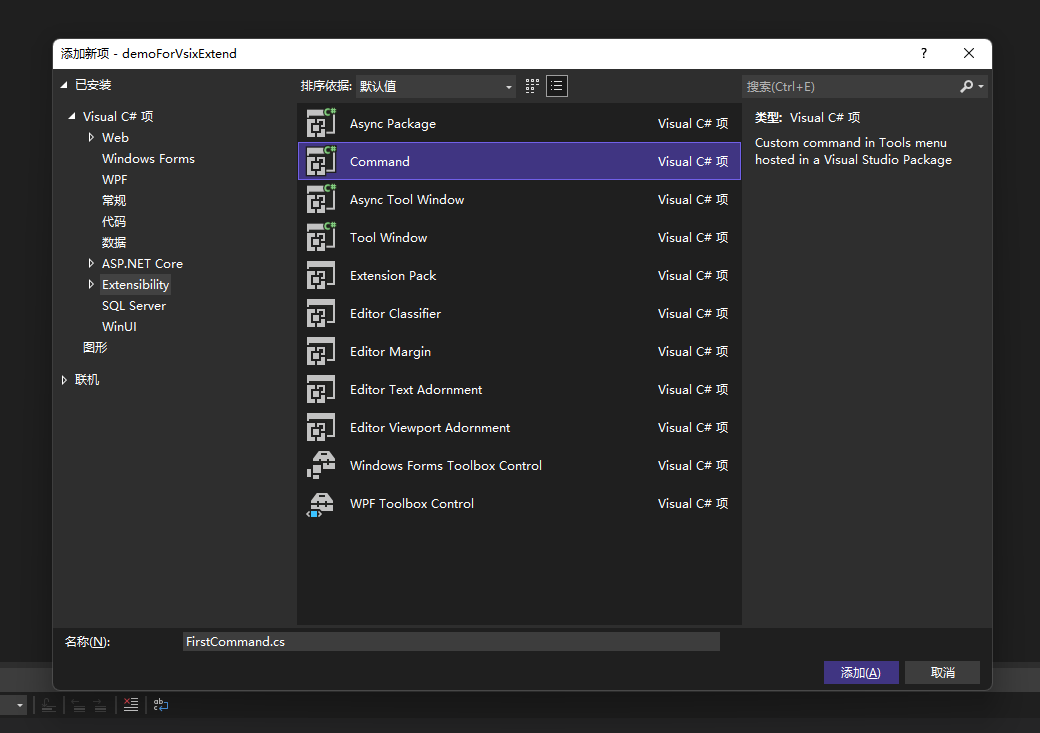
在demoForVsixExtend项目上右键,"添加"-"新建项"

在已安装的Visual C#项中找到Extendsibility分组,选择Command项,我们取个名字叫FirstCommand,然后点击"添加"按钮。
添加成功之后,我们会发现它会自动创建一个FirstCommand.cs分类,并且在Resources文件夹中,创建配套的FirstCommand.png资源文件。
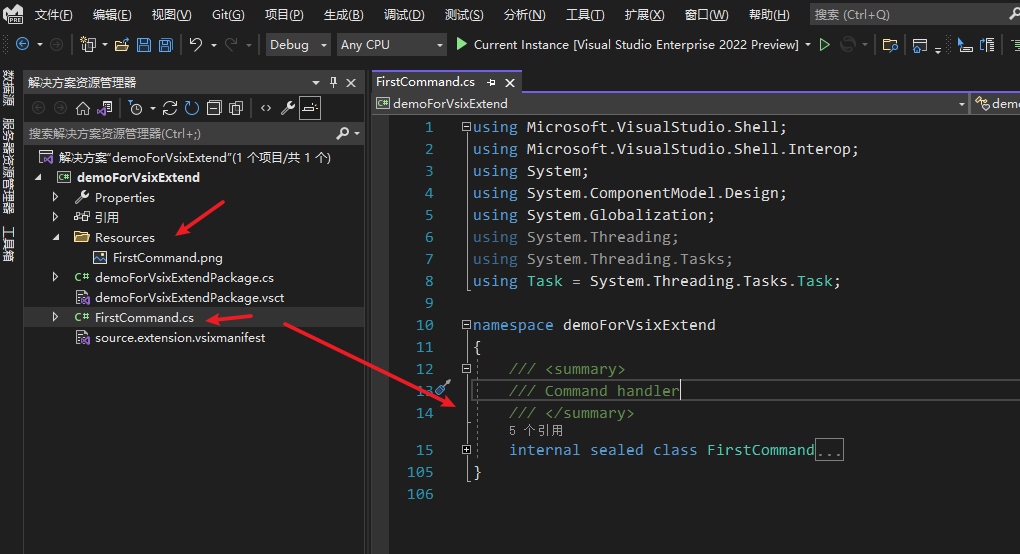
同时,我们还发现自动创建了一个和项目名称相关的.vsct文件,这个文件是定义我们想添加的自定义命令的地方,用于描述命令位于工具菜单的位置、名称、图标等信息。
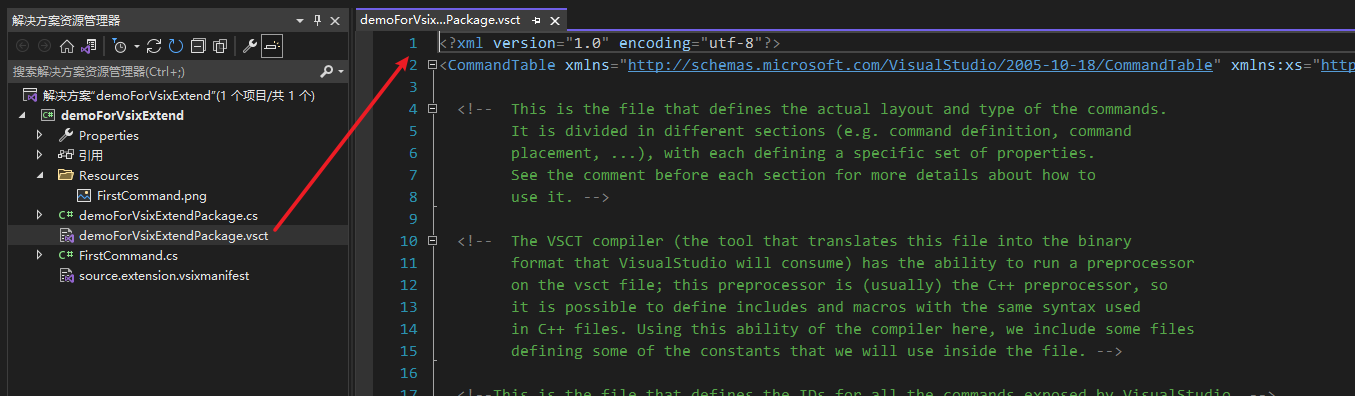
我们单击打开这个文件,可以看到里面已经描述了一个Button按钮和其关联的图标资源。
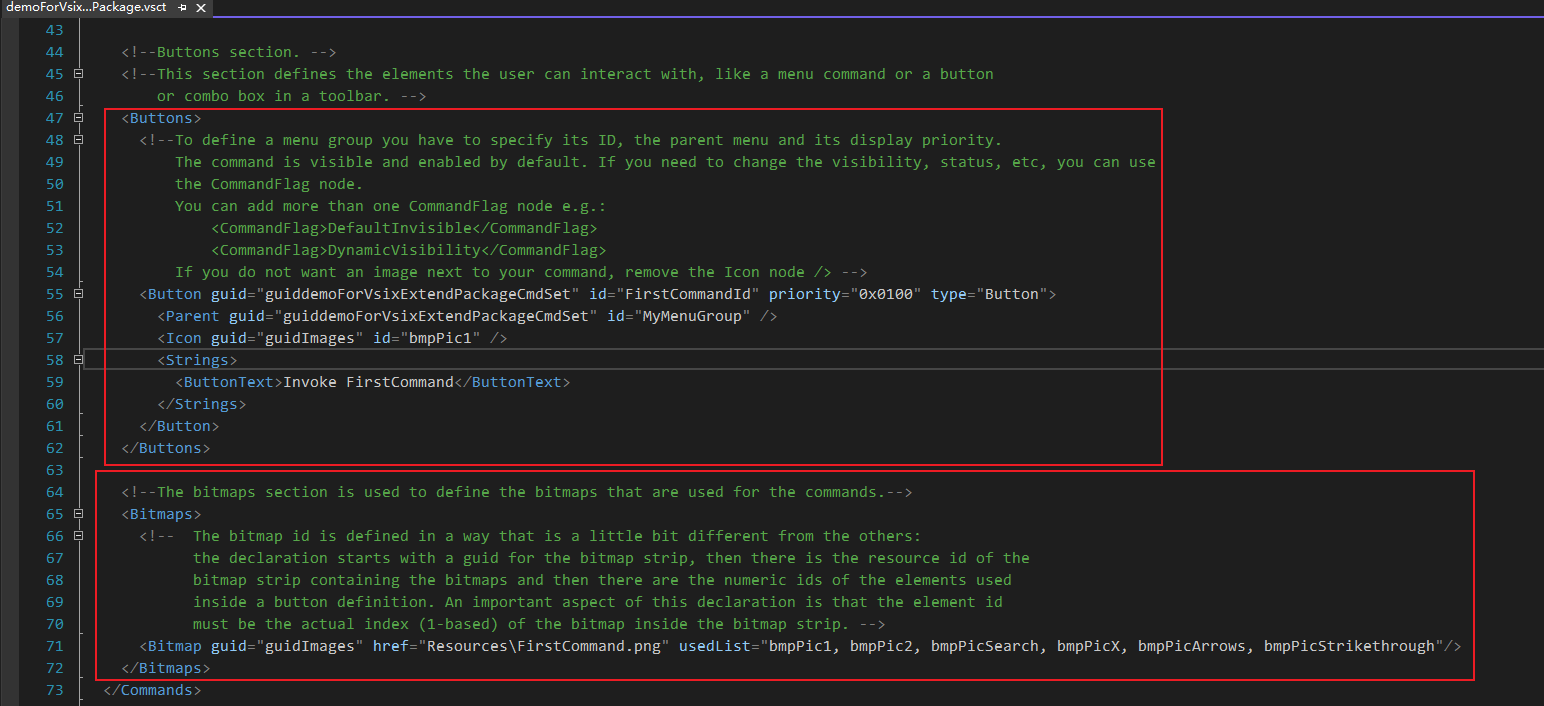
在.vsct这个xml格式文件中,标记了一个Button(FirstCommandId),它的父级指向了一个Group(MyMenuGroup),而这个父级Group的父级指向了顶层的"菜单-工具"(IDM_VS_MENU_TOOLS),并且这个命令的内容文本为Say Hello VsixExtend,且指定了一个图标资源(bmpPic1)。
<Groups>
    <Group guid="guiddemoForVsixExtendPackageCmdSet" id="MyMenuGroup" priority="0x0600">
    <Parent guid="guidSHLMainMenu" id="IDM_VS_MENU_TOOLS"/>
    </Group>
</Groups>

<Buttons>
    <Button guid="guiddemoForVsixExtendPackageCmdSet" id="FirstCommandId" priority="0x0100" type="Button">
    <Parent guid="guiddemoForVsixExtendPackageCmdSet" id="MyMenuGroup" />
    <Icon guid="guidImages" id="bmpPic1" />
    <Strings>
        <ButtonText>Say Hello VsixExtend</ButtonText>
    </Strings>
    </Button>
</Buttons>
值得注意的是,一个Button必须归属到一个Group下面,而一个Group必须归属到顶层的"菜单-工具"里面。
b. 调试自定义命令,查看附加效果
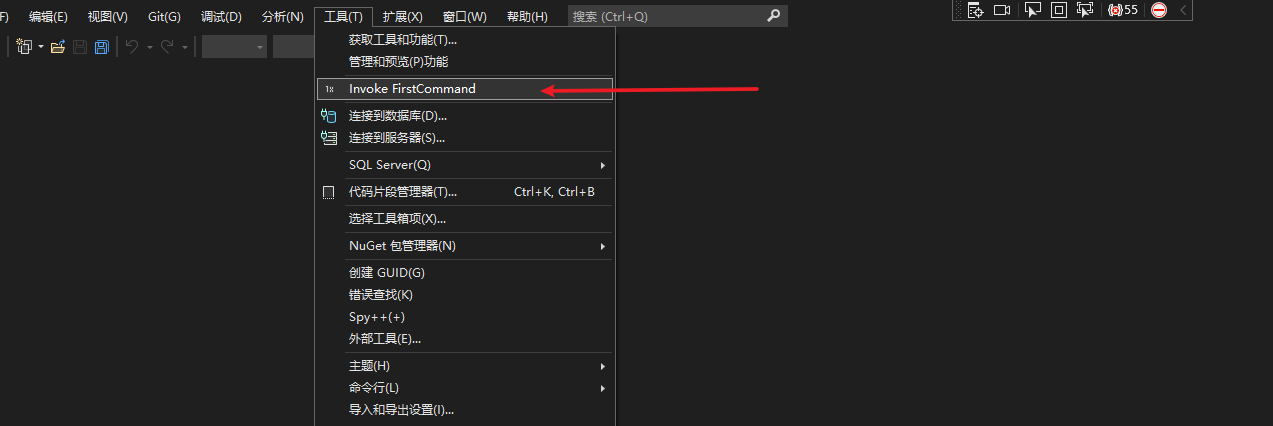
我们启动调试之后,它会再启动另外一个Visual Studio的实例,并且附加了调试,最终我们能在"工具"菜单找到我们新增的Invove FirstCommand菜单项入口。
c. 修改自定义命令文案信息
我们可以试着修改.vsct文件的内容来自定义按钮文案,比如我们将按钮的文案改成Say Hello VsixExtend。
<Buttons>
    <!--To define a menu group you have to specify its ID, the parent menu and its display priority.
        The command is visible and enabled by default. If you need to change the visibility, status, etc, you can use
        the CommandFlag node.
        You can add more than one CommandFlag node e.g.:
            <CommandFlag>DefaultInvisible</CommandFlag>
            <CommandFlag>DynamicVisibility</CommandFlag>
        If you do not want an image next to your command, remove the Icon node /> -->
    <Button guid="guiddemoForVsixExtendPackageCmdSet" id="FirstCommandId" priority="0x0100" type="Button">
    <Parent guid="guiddemoForVsixExtendPackageCmdSet" id="MyMenuGroup" />
    <Icon guid="guidImages" id="bmpPic1" />
    <Strings>
        <ButtonText>Say Hello VsixExtend</ButtonText>
    </Strings>
    </Button>
</Buttons>
并且我们将FirstCommand.cs文件中的Execute函数,将里面的弹窗提示内容文案做一定的修改。
private void Execute(object sender, EventArgs e)
{
ThreadHelper.ThrowIfNotOnUIThread();
//string message = string.Format(CultureInfo.CurrentCulture, "Inside {0}.MenuItemCallback()", this.GetType().FullName);
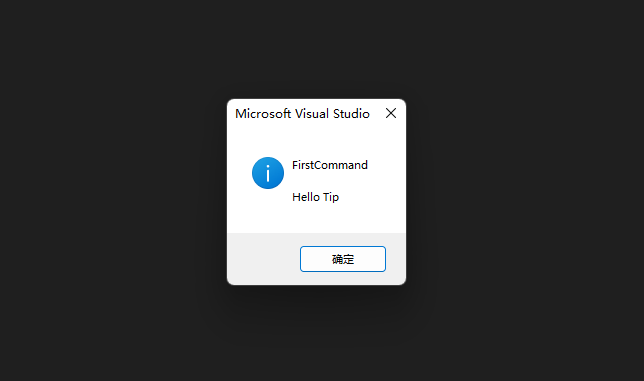
string message = "Hello Tip";
string title = "FirstCommand";
// Show a message box to prove we were here
VsShellUtilities.ShowMessageBox(
this.package,
message,
title,
OLEMSGICON.OLEMSGICON_INFO,
OLEMSGBUTTON.OLEMSGBUTTON_OK,
OLEMSGDEFBUTTON.OLEMSGDEFBUTTON_FIRST);
}
我们再运行一次看看。

点击Say Hello VsixExtend菜单,发现会按预期弹窗和提示。
e. 自定义命令的初始化
在命令的.cs文件FirstCommand.cs中,描述了自定义命令的初始化流程,这里面包含InitializeAsync方法的实现,在它里面有通过FirstCommand的构造函数创建并添加了当前的命令项。
/// <summary>
/// Command handler
/// </summary>
internal sealed class FirstCommand
{

    /// <summary>
    /// Command ID.
    /// </summary>
    public const int CommandId = 0x0100;

    /// <summary>
    /// Command menu group (command set GUID).
    /// </summary>
    public static readonly Guid CommandSet = new Guid("8229a384-5bd5-4a80-9076-ef2b05901d4c");

    /// <summary>
    /// VS Package that provides this command, not null.
    /// </summary>
    private readonly AsyncPackage package;

    /// <summary>
    /// Gets the instance of the command.
    /// </summary>
    public static FirstCommand Instance
    {
        get;
        private set;
    }

    /// <summary>
    /// Initializes a new instance of the <see cref="FirstCommand"/> class.
    /// Adds our command handlers for menu (commands must exist in the command table file)
    /// </summary>
    /// <param name="package">Owner package, not null.</param>
    /// <param name="commandService">Command service to add command to, not null.</param>
    private FirstCommand(AsyncPackage package, OleMenuCommandService commandService)
    {
        this.package = package ?? throw new ArgumentNullException(nameof(package));
        commandService = commandService ?? throw new ArgumentNullException(nameof(commandService));

        var menuCommandID = new CommandID(CommandSet, CommandId);
        var menuItem = new MenuCommand(this.Execute, menuCommandID);
        commandService.AddCommand(menuItem);
    }

    /// <summary>
    /// Initializes the singleton instance of the command.
    /// </summary>
    /// <param name="package">Owner package, not null.</param>
    public static async Task InitializeAsync(AsyncPackage package)
    {
        // Switch to the main thread - the call to AddCommand in FirstCommand's constructor requires
        // the UI thread.
        await ThreadHelper.JoinableTaskFactory.SwitchToMainThreadAsync(package.DisposalToken);

        OleMenuCommandService commandService = await package.GetServiceAsync(typeof(IMenuCommandService)) as OleMenuCommandService;
        Instance = new FirstCommand(package, commandService);
    }
}
f. 扩展包的初始化
在扩展包的.cs文件demoForVsixExtendPackage.cs的初始化方法InitializeAsync中,正是调用了FirstCommand类的InitializeAsync方法完成了自定义命令的初始化。
[PackageRegistration(UseManagedResourcesOnly = true, AllowsBackgroundLoading = true)]
[Guid(demoForVsixExtendPackage.PackageGuidString)]
[ProvideMenuResource("Menus.ctmenu", 1)]
public sealed class demoForVsixExtendPackage : AsyncPackage
{
    /// <summary>
    /// demoForVsixExtendPackage GUID string.
    /// </summary>
    public const string PackageGuidString = "6c3bfb2c-f8a4-40ff-99fa-caf75412fc61";

    #region Package Members

    /// <summary>
    /// Initialization of the package; this method is called right after the package is sited, so this is the place
    /// where you can put all the initialization code that rely on services provided by VisualStudio.
    /// </summary>
    /// <param name="cancellationToken">A cancellation token to monitor for initialization cancellation, which can occur when VS is shutting down.</param>
    /// <param name="progress">A provider for progress updates.</param>
    /// <returns>A task representing the async work of package initialization, or an already completed task if there is none. Do not return null from this method.</returns>
    protected override async Task InitializeAsync(CancellationToken cancellationToken, IProgress<ServiceProgressData> progress)
    {
        // When initialized asynchronously, the current thread may be a background thread at this point.
        // Do any initialization that requires the UI thread after switching to the UI thread.
        await this.JoinableTaskFactory.SwitchToMainThreadAsync(cancellationToken);
        await FirstCommand.InitializeAsync(this);
    }

    #endregion
}
而扩展包的初始化方法InitializeAsync,实际上是继承了统一的Microsoft.VisualStudio.Shell.AsyncPackage类,对原初始化方法进行了重写来实现的。
namespace Microsoft.VisualStudio.Shell
{
    [ComVisible(true)]
    public abstract class AsyncPackage
    {
        //
        // 摘要:
        //     The async initialization portion of the package initialization process. This
        //     method is invoked from a background thread.
        //
        // 参数:
        //   cancellationToken:
        //     A cancellation token to monitor for initialization cancellation, which can occur
        //     when VS is shutting down.
        //
        // 返回结果:
        //     A task representing the async work of package initialization, or an already completed
        //     task if there is none. Do not return null from this method.
        protected virtual Task InitializeAsync(CancellationToken cancellationToken, IProgress<ServiceProgressData> progress)
        {
            return Task.CompletedTask;
        }

        //
        // 摘要:
        //     When overridden by a derived type, may initiate operations with side effects
        //     that are not strictly a part of package load that would belong to Microsoft.VisualStudio.Shell.AsyncPackage.InitializeAsync(System.Threading.CancellationToken,System.IProgress{Microsoft.VisualStudio.Shell.ServiceProgressData})
        //     but that should happen soon after package load (e.g. updating command status).
        //
        // 参数:
        //   cancellationToken:
        //     The package's Microsoft.VisualStudio.Shell.AsyncPackage.DisposalToken.
        //
        // 返回结果:
        //     A task that indicates completion of the extra work.
        //
        // 言论:
        //     This method is invoked on a threadpool thread.
        //     The base Microsoft.VisualStudio.Shell.AsyncPackage.OnAfterPackageLoadedAsync(System.Threading.CancellationToken)
        //     method has an empty implementation, so direct derivations of Microsoft.VisualStudio.Shell.AsyncPackage
        //     needn't call the base method as part of their override method.
        protected virtual Task OnAfterPackageLoadedAsync(CancellationToken cancellationToken)
        {
            return Task.CompletedTask;
        }
    }
}
g. 自定义命令的响应
在命令的.cs文件FirstCommand.cs中,当我们通过构造函数添加自定义命令项时,我们同时传入了命令对应的响应委托EventHandler事件方法Execute,所以如果点击自定义命令的话,会进入Execute这个响应流程。
/// <summary>
/// Command handler
/// </summary>
internal sealed class FirstCommand
{
    /// <summary>
    /// Initializes a new instance of the <see cref="FirstCommand"/> class.
    /// Adds our command handlers for menu (commands must exist in the command table file)
    /// </summary>
    /// <param name="package">Owner package, not null.</param>
    /// <param name="commandService">Command service to add command to, not null.</param>
    private FirstCommand(AsyncPackage package, OleMenuCommandService commandService)
    {
        this.package = package ?? throw new ArgumentNullException(nameof(package));
        commandService = commandService ?? throw new ArgumentNullException(nameof(commandService));

        var menuCommandID = new CommandID(CommandSet, CommandId);
        var menuItem = new MenuCommand(this.Execute, menuCommandID);
        commandService.AddCommand(menuItem);
    }

    /// <summary>
    /// This function is the callback used to execute the command when the menu item is clicked.
    /// See the constructor to see how the menu item is associated with this function using
    /// OleMenuCommandService service and MenuCommand class.
    /// </summary>
    /// <param name="sender">Event sender.</param>
    /// <param name="e">Event args.</param>
    private void Execute(object sender, EventArgs e)
    {
        ThreadHelper.ThrowIfNotOnUIThread();
        //string message = string.Format(CultureInfo.CurrentCulture, "Inside {0}.MenuItemCallback()", this.GetType().FullName);
        string message = "Hello Tip";
        string title = "FirstCommand";

        // Show a message box to prove we were here
        VsShellUtilities.ShowMessageBox(
            this.package,
            message,
            title,
            OLEMSGICON.OLEMSGICON_INFO,
            OLEMSGBUTTON.OLEMSGBUTTON_OK,
            OLEMSGDEFBUTTON.OLEMSGDEFBUTTON_FIRST);
    }
}
向解决方案资源管理器添加自定义命令
a. 首先新建自定义命令项
在demoForVsixExtend项目上右键,"添加"-"新建项",在已安装的Visual C#项中找到Extendsibility分组,选择Command项,我们取个名字叫SecondCommand,然后点击"添加"按钮。
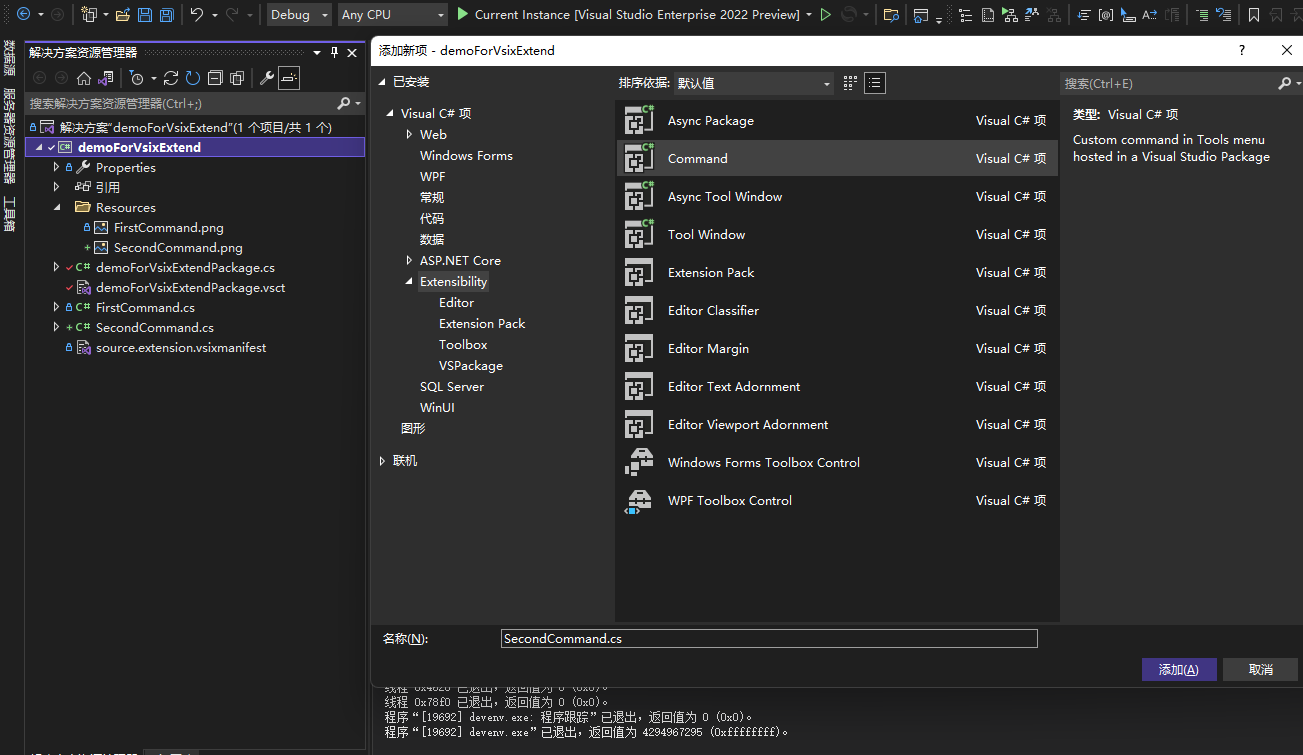
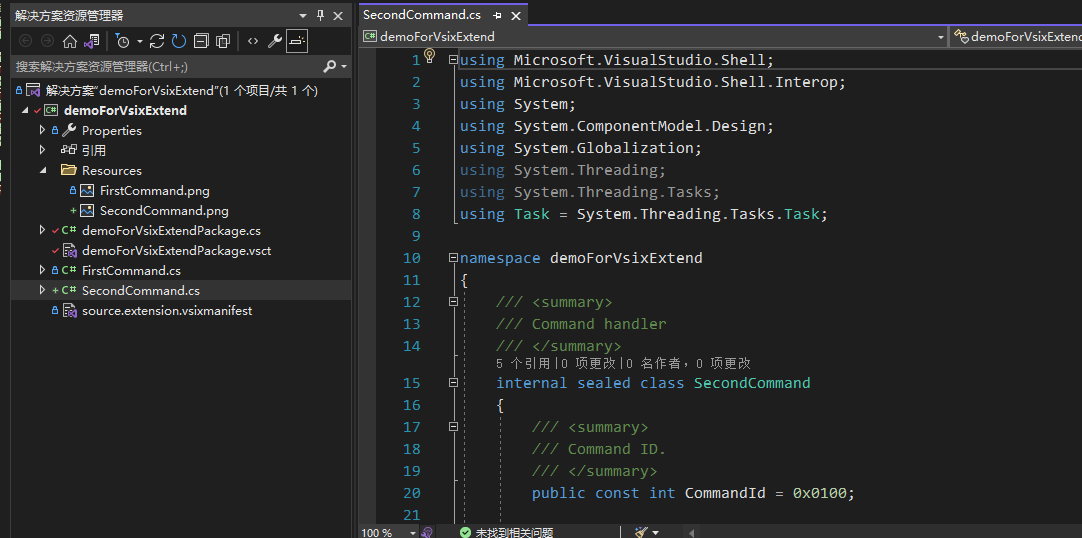
生成后,会帮我们创建SecondCommand.cs、Resources\SecondCommand.png,并且自动将SecondCommand的初始化方法InitializeAsync添加到demoForVsixExtendPackage.cs文件中了。
b. 修改自定义命令项的元数据标记
首先我们前往demoForVsixExtendPackage.vsct文件,查看到Symbols节点下的GuidSymbol组,我们将SecondCommand相关的单独拆出来。
<!-- This is the guid used to group the menu commands together -->
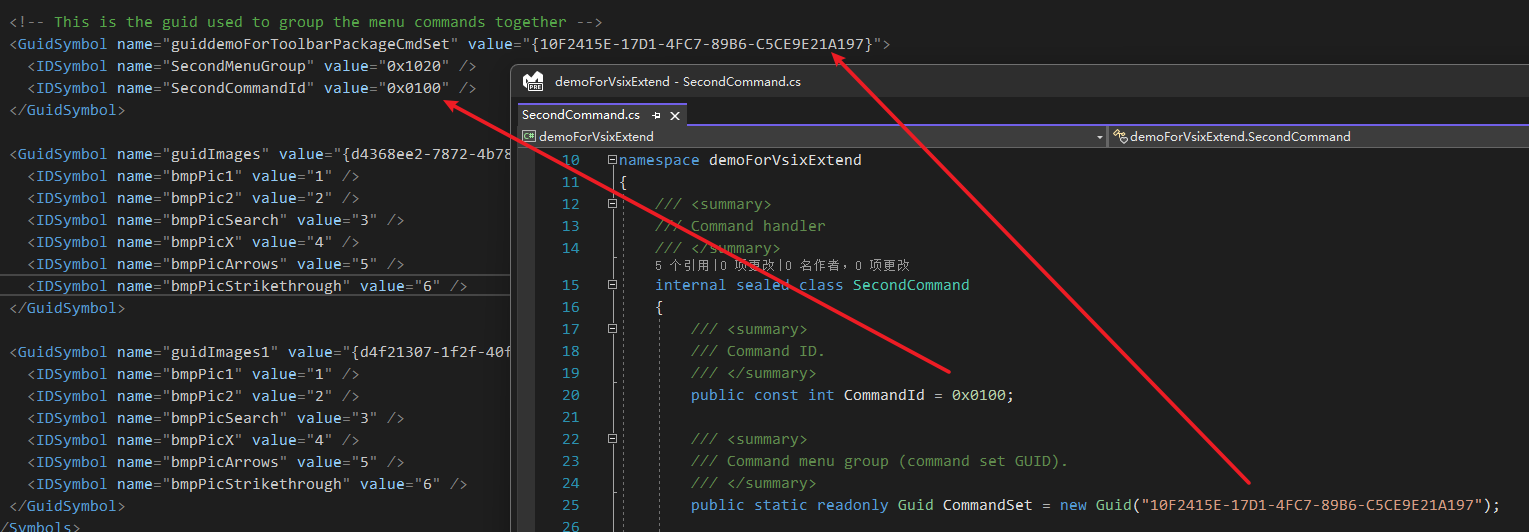
<GuidSymbol name="guiddemoForToolbarPackageCmdSet" value="{10F2415E-17D1-4FC7-89B6-C5CE9E21A197}">
<IDSymbol name="SecondMenuGroup" value="0x1020" />
<IDSymbol name="SecondCommandId" value="0x0100" />
</GuidSymbol>
<GuidSymbol name="guidImages1" value="{d4f21307-1f2f-40fa-a3fc-2bc83dd71b7a}" >
<IDSymbol name="bmpPic1" value="1" />
<IDSymbol name="bmpPic2" value="2" />
<IDSymbol name="bmpPicSearch" value="3" />
<IDSymbol name="bmpPicX" value="4" />
<IDSymbol name="bmpPicArrows" value="5" />
<IDSymbol name="bmpPicStrikethrough" value="6" />
</GuidSymbol>
这里我们看到两组GuidSymbol,后面这个是用于描述图像的,比较好理解,而第一个是整个命令的元数据,这个name要唯一,并且这个value对应的Guid的值,要和SecondCommand.cs里面定义的值一一对应才行,不然无法识别。
接下来我们看到Groups组,该组下面拥有一个新的Group,它的Id也是要额外注意,得唯一,且和GuidSymbol中的定义保持一致:SecondMenuGroup,它的父级指向解决方案资源管理器的标记IDM_VS_TOOL_PROJWIN即可。
<Groups>
    <Group guid="guiddemoForVsixExtendPackageCmdSet" id="MyMenuGroup" priority="0x0600">
    <Parent guid="guidSHLMainMenu" id="IDM_VS_MENU_TOOLS" />
    </Group>
    <Group guid="guiddemoForToolbarPackageCmdSet" id="SecondMenuGroup" priority="0x0600">
    <Parent guid="guidSHLMainMenu" id="IDM_VS_TOOL_PROJWIN" />
    </Group>
</Groups>
然后我们继续看Buttons组,该组下面拥有一个新的Button,它的Name的具备唯一性,并且它的Id得唯一,且和GuidSymbol中的定义保持一致:SecondCommandId,并且它的父级需要指向SecondMenuGroup。
<Buttons>
    <Button guid="guiddemoForToolbarPackageCmdSet" id="SecondCommandId" priority="0x0100" type="Button">
    <Parent guid="guiddemoForToolbarPackageCmdSet" id="SecondMenuGroup" />
    <Icon guid="guidImages1" id="bmpPic1" />
    <CommandFlag>DefaultInvisible</CommandFlag>
    <CommandFlag>DynamicVisibility</CommandFlag>
    <Strings>
        <ButtonText>Invoke SecondCommand</ButtonText>
    </Strings>
    </Button>
</Buttons>
c. 给自定义命令添加显影属性,根据是否打开解决方案自适应
仅仅完成前面的部分,我们会发现,无论是否打开解决方案,这个新增的命令都会出现在解决方案的资源管理器工具栏中,那么我们是否可以做到显影控制,让它根据是否打开解决方案自适应呢?当然显然是可以。
我们首先需要确保在Button的描述里面,追加命令的Flag,一般来说,就在Icon和String之间即可,我们需要追加DefaultInvisible、DynamicVisibility这两个命令标记。
<Buttons>
    <Button guid="guiddemoForToolbarPackageCmdSet" id="SecondCommandId" priority="0x0100" type="Button">
    <Parent guid="guiddemoForToolbarPackageCmdSet" id="SecondMenuGroup" />
    <Icon guid="guidImages1" id="bmpPic1" />
    <CommandFlag>DefaultInvisible</CommandFlag>
    <CommandFlag>DynamicVisibility</CommandFlag>
    <Strings>
        <ButtonText>Invoke SecondCommand</ButtonText>
    </Strings>
    </Button>
</Buttons>
然后在.vsct文件中,我们需要在一级标记节点中添加显影控制描述,一般来说,就在Commands和Symbols之间即可,我们需要追加VisibilityConstraints组,并且含2个VisibilityItem子节点,分别用来处理打开一个或者多个项目的情况。
<Commands>
...
</Commands>

<VisibilityConstraints>
<VisibilityItem guid="guiddemoForToolbarPackageCmdSet"
        id="SecondCommandId"
        context="UICONTEXT_SolutionHasSingleProject" />
<VisibilityItem guid="guiddemoForToolbarPackageCmdSet"
        id="SecondCommandId"
        context="UICONTEXT_SolutionHasMultipleProjects" />
</VisibilityConstraints>

<Symbols>
...
</Symbols>
需要注意的是,这里VisibilityItem的guid值和id值都要和GuidSymbol中的定义保持一致才有效。
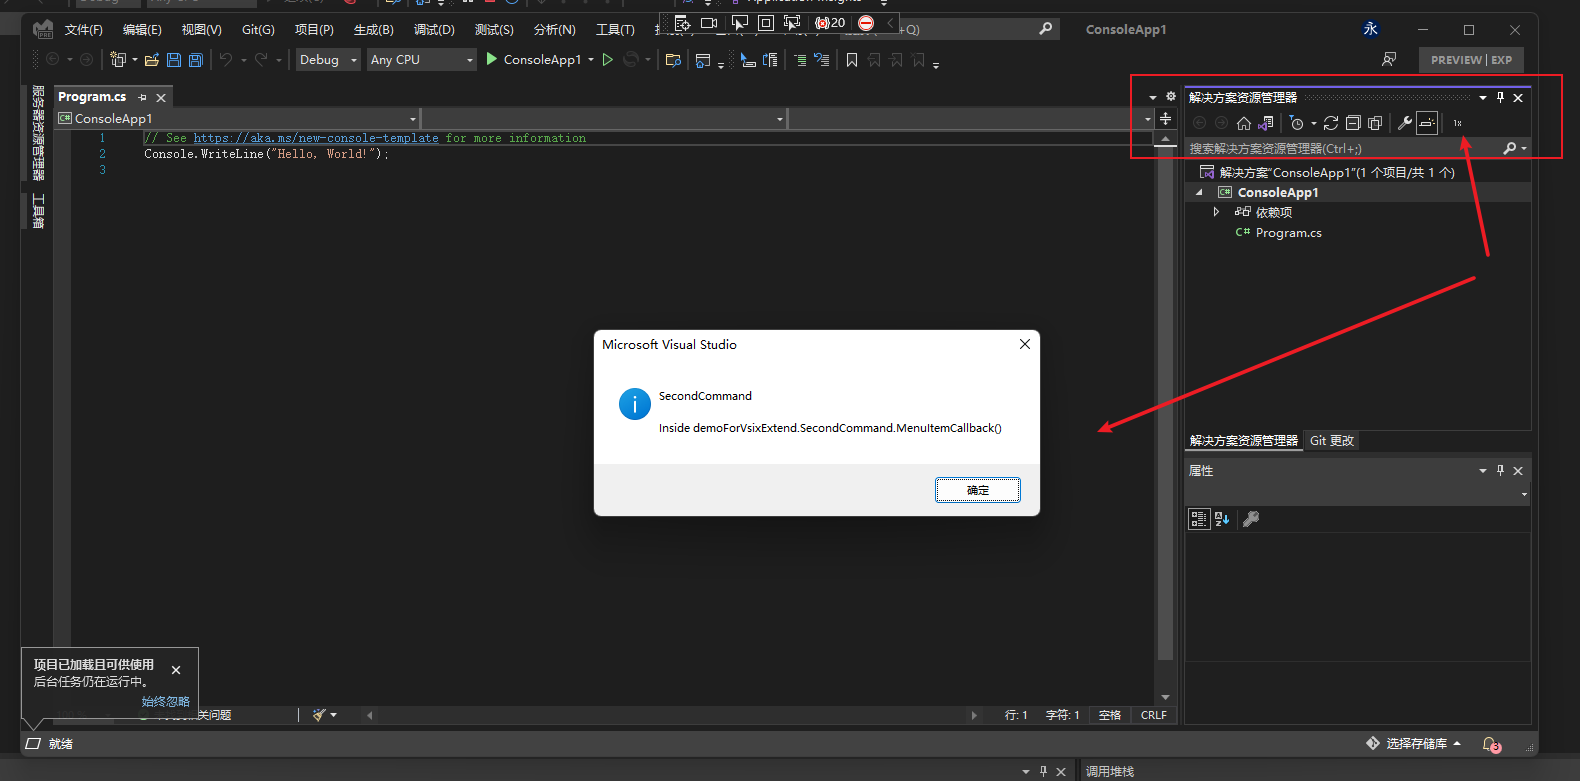
d. 运行查看效果
- 当未打开任何项目的时候,解决方案资源管理器是不会出现自定义命令的。
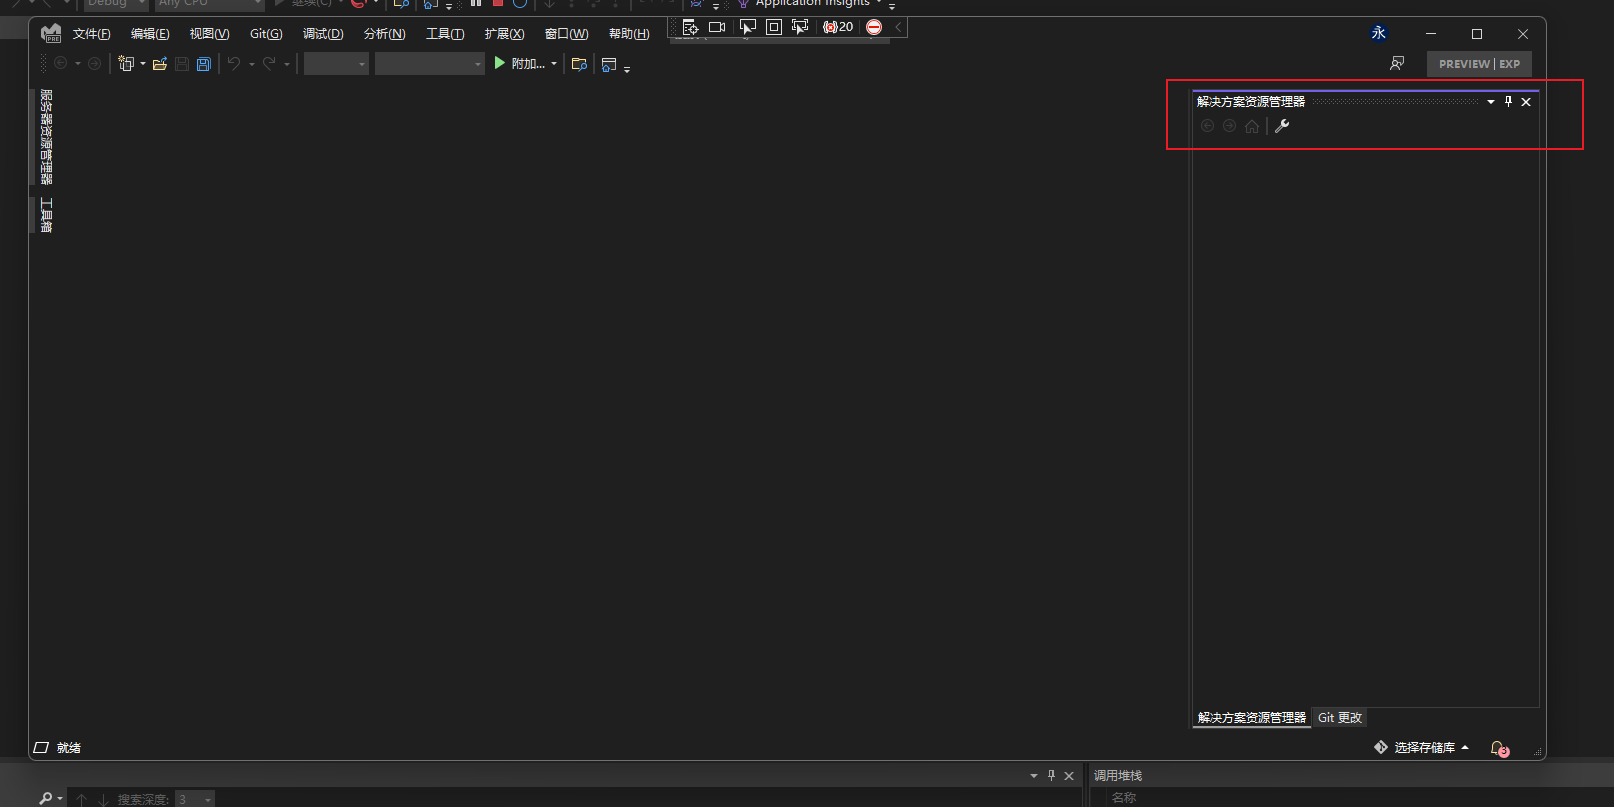
- 当打开一个或者多个项目的时候,这时候解决方案资源管理器才会出现我们的定义的命令。
Visual Studio最高一级的组清单
通过前面的案例我们已经知道了,我们可以把我们自定义的Group的父级指向Visual Studio自带的一级组,这样我们可以把自定义组挂到已有的菜单项上了,前面我们分别介绍了IDM_VS_MENU_TOOLS和IDM_VS_TOOL_PROJWIN这两个父级,那么还有哪些组呢?
- 若要向菜单栏添加新的菜单,可将组的父级设置为如下值:
| 组 | ID |
|---|---|
| 文件/编辑/查看 | IDG_VS_MM_FILEEDITVIEW |
| 重构 | IDG_VS_MM_REFACTORING |
| 项目 | IDG_VS_MM_PROJECT |
| 构建 | IDG_VS_MM_BUILDDEBUGRUN |
| 格式/工具 | IDG_VS_MM_TOOLSADDINS |
| Window/Help/Community | IDG_VS_MM_WINDOWHELP |
| 加载项 | IDG_VS_MM_MACROS |
| FullScreenBar | IDG_VS_MM_FULLSCREENBAR |
比如,如果把"项目(IDG_VS_MM_PROJECT)"作为父级,那么效果可以是:
嗯,你想得美~
- 若要向已有菜单添加新的组,可将组的父级设置为如下值:
| 菜单 | ID |
|---|---|
| 文件 | IDM_VS_MENU_FILE |
| 编辑 | IDM_VS_MENU_EDIT |
| 视图 | IDM_VS_MENU_VIEW |
| 重构 | IDM_VS_MENU_REFACTORING |
| 项目 | IDM_VS_MENU_PROJECT |
| 生成 | IDM_VS_MENU_BUILD |
| 分析 | IDM_VS_MENU_FORMAT |
| 工具 | IDM_VS_MENU_TOOLS |
| 扩展 | IDM_VS_MENU_EXTENSIONS |
| 窗口 | IDM_VS_MENU_WINDOW |
| 加载项 | IDM_VS_MENU_ADDINS |
| 社区 | IDM_VS_MENU_COMMUNITY |
| 帮助 | IDM_VS_MENU_HELP |
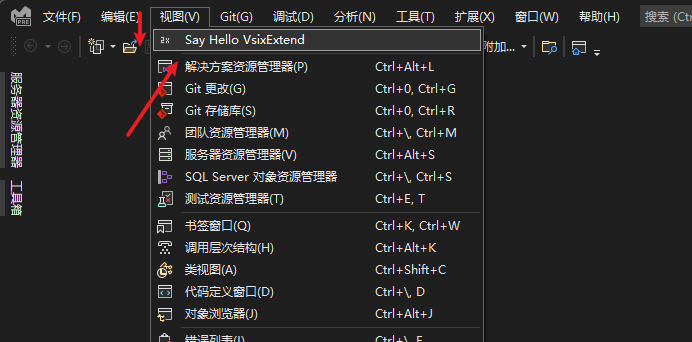
比如,如果把"视图(IDM_VS_MENU_VIEW)"作为父级,那么效果可以是:
- 若要在已有菜单的子菜单中添加组,那么可以将已有菜单的子作为父级:
| 父组 | 子 | 子组 |
|---|---|---|
| IDG_VS_FILE_FILE | IDM_VS_CSCD_NEW | IDG_VS_FILE_NEW_CASCADE |
| IDM_VS_CSCD_OPEN | IDG_VS_FILE_OPENP_CASCADE | |
| IDG_VS_FILE_OPENF_CASCADE | ||
| IDG_VS_FILE_ADD | IDM_VS_CSCD_ADD | IDG_VS_FILE_ADD_PROJECT_NEW |
| IDG_VS_FILE_ADD_PROJECT_EXI | ||
| IDG_VS_FILE_MRU | IDM_VS_CSCD_FILEMRU | IDG_VS_FILE_FMRU_CASCADE |
| IDM_VS_CSCD_PROJMRU | IDG_VS_FILE_PMRU_CASCADE | |
| IDG_VS_FILE_MOVE | IDM_VS_CSCD_MOVETOPRJ | IDG_VS_FILE_MOVE_CASCADE |
| IDG_VS_FILE_MOVE_PICKER | ||
| IDG_VS_VIEW_DEV_WINDOWS | IDM_VS_CSCD_FINDRESULTS | IDG_VS_WNDO_FINDRESULTS |
| IDM_VS_CSCD_WINDOWS | IDG_VS_VIEW_CALLBROWSER | |
| IDG_VS_WNDO_OTRWNDWS1...6 | ||
| IDG_VS_WNDO_WINDOWS2 | ||
| IDG_VS_VIEW_TOOLBARS | IDM_VS_CSCD_COMMANDBARS | |
| IDG_VS_EDIT_GOTO | IDM_VS_EDITOR_FIND_MENU | |
| IDG_VS_EDIT_OBJECTS | IDM_VS_CSCD_MNUDES | IDG_VS_MNUDES_INSERT |
| IDG_VS_MNUDES_EDITNAMES | ||
| IDM_VS_CSCD_OLEVERBS | IDG_VS_EDIT_OLEVERBS | |
| IDG_VS_BUILD_SELECTION | IDM_VS_CSCD_BUILD | IDG_VS_BUILD_CASCADE |
| IDG_VS_BUILD_PROJPICKER | ||
| IDM_VS_CSCD_REBUILD | IDG_VS_REBUILD_CASCADE | |
| IDG_VS_REBUILD_PROJPICKER | ||
| IDM_VS_CSCD_PROJONLY | IDG_VS_PROJONLY_CASCADE | |
| IDM_VS_CSCD_CLEAN | IDG_VS_CLEAN_CASCADE | |
| IDG_VS_CLEAN_PROJPICKER | ||
| IDM_VS_CSCD_DEPLOY | IDG_VS_DEPLOY_CASCADE | |
| IDG_VS_DEPLOY_PROJPICKER | ||
| IDG_VS_PGO_SELECTION | IDM_VS_CSCD_PGO_BUILD | IDG_VS_PGO_BUILD_CASCADE_BUILD |
| IDG_VS_PGO_BUILD_CASCADE_RUN |
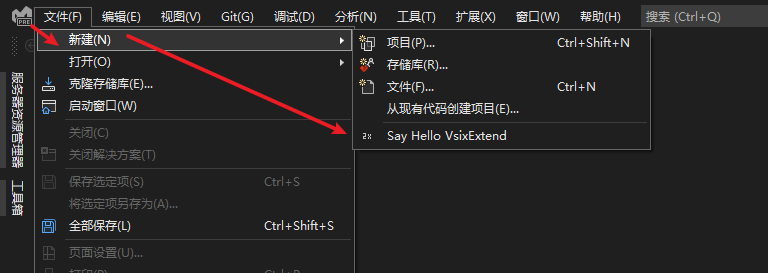
比如,如果把"文件-新建(IDM_VS_CSCD_NEW)"作为父级,那么效果可以是:
发布Visual Studio扩展
参考
- 扩展 Visual Studio IDE
- Visual Studio扩展商店
- 演练:发布 Visual Studio 扩展
- 开始开发 Visual Studio 扩展
- 教程 - 编写自己的第一个扩展:Hello World
- Visual Studio Extensibility Samples
- Community for developers of Visual Studio extensions
- 更新 Visual Studio 2022 Visual Studio扩展
- 从 packages.config 迁移到 PackageReference
- Learn to write Visual Studio extensions


【推荐】国内首个AI IDE,深度理解中文开发场景,立即下载体验Trae
【推荐】编程新体验,更懂你的AI,立即体验豆包MarsCode编程助手
【推荐】抖音旗下AI助手豆包,你的智能百科全书,全免费不限次数
【推荐】轻量又高性能的 SSH 工具 IShell:AI 加持,快人一步
· 基于Microsoft.Extensions.AI核心库实现RAG应用
· Linux系列:如何用heaptrack跟踪.NET程序的非托管内存泄露
· 开发者必知的日志记录最佳实践
· SQL Server 2025 AI相关能力初探
· Linux系列:如何用 C#调用 C方法造成内存泄露
· 无需6万激活码!GitHub神秘组织3小时极速复刻Manus,手把手教你使用OpenManus搭建本
· Manus爆火,是硬核还是营销?
· 终于写完轮子一部分:tcp代理 了,记录一下
· 别再用vector<bool>了!Google高级工程师:这可能是STL最大的设计失误
· 单元测试从入门到精通