
在线教育项目用户登录和注册
🔎这里是在线教育,关注我学习Java不迷路
👍如果对你有帮助,给博主一个免费的点赞以示鼓励
欢迎各位🔎点赞👍评论收藏⭐️
👀专栏介绍
项目目前主要更新在线教育,一起学习一起进步。
👀本期介绍
在线教育项目用户登录和注册
资料获取
链接:https://pan.baidu.com/s/12tchZo7zwmvMqWBNY9BLog
提取码:8888
文章目录
后端用户服务
1.1 数据库
CREATE DATABASE zx_edu_user; USE zx_edu_user; CREATE TABLE `edu_user` ( `id` INT(11) NOT NULL PRIMARY KEY AUTO_INCREMENT, `username` VARCHAR(50) DEFAULT NULL COMMENT '用户名', `password` VARCHAR(255) DEFAULT NULL COMMENT '用户密码', `phone` CHAR(11) DEFAULT NULL COMMENT '电话', `email` VARCHAR(50) DEFAULT NULL COMMENT '邮箱', `roles` VARCHAR(30) DEFAULT NULL COMMENT '角色,多个值使用逗号分隔,例如:admin,editor', `created` DATE DEFAULT NULL ) ; INSERT INTO `edu_user` VALUES (1, 'jack', '1234', '13699282444', 'itcast_lt@126.com', 'admin', '2015-10-20'); INSERT INTO `edu_user` VALUES (2, 'rose', '1234', '13377776666', 'itcast_lt@126.com', 'editor', NULL); INSERT INTO `edu_user` VALUES (3, 'tom', '1234', '15533336666', 'itcast_lt@126.com', 'admin,editor', '2020-02-14');
1.2 创建JavaBean
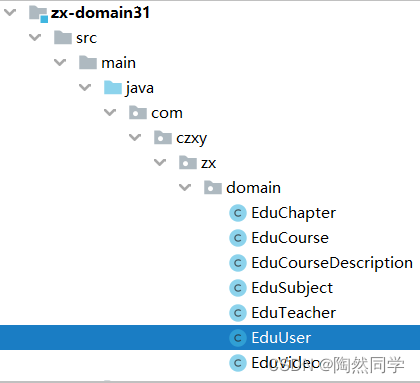
package com.czxy.zx.domain;
import com.baomidou.mybatisplus.annotation.IdType;
import com.baomidou.mybatisplus.annotation.TableId;
import com.baomidou.mybatisplus.annotation.TableName;
import io.swagger.annotations.ApiModel;
import lombok.Data;
import java.io.Serializable;
import java.util.Date;
/**
*
*/
@Data
@TableName("edu_user")
@ApiModel(value = "EduUser对象",description = "用户")
public class EduUser {
@TableId(type = IdType.AUTO)
private Integer id;
//用户名
private String username;
//用户密码
private String password;
//电话
private String phone;
//邮箱
private String email;
//角色,多个值使用逗号分隔,例如:admin,editor
private String roles;
//创建时间
private Date created;
}
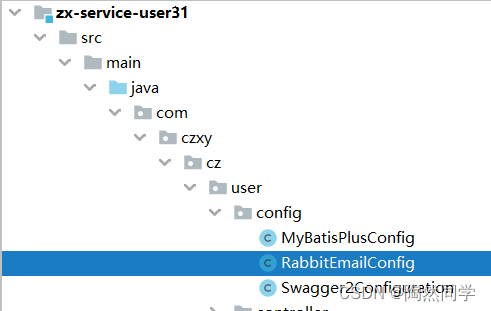
1.3 用户服务环境
-
创建项目:zx-service-user
-
修改pom文件,添加坐标
<?xml version="1.0" encoding="UTF-8"?> <project xmlns="http://maven.apache.org/POM/4.0.0" xmlns:xsi="http://www.w3.org/2001/XMLSchema-instance" xsi:schemaLocation="http://maven.apache.org/POM/4.0.0 http://maven.apache.org/xsd/maven-4.0.0.xsd"> <parent> <artifactId>zx-parent31</artifactId> <groupId>com.czxy.zx</groupId> <version>1.0-SNAPSHOT</version> </parent> <modelVersion>4.0.0</modelVersion> <artifactId>zx-service-user31</artifactId> <dependencies> <!--web起步依赖--> <dependency> <groupId>org.springframework.boot</groupId> <artifactId>spring-boot-starter-web</artifactId> </dependency> <!-- nacos 客户端 --> <dependency> <groupId>com.alibaba.nacos</groupId> <artifactId>nacos-client</artifactId> </dependency> <!-- nacos 服务发现 --> <dependency> <groupId>com.alibaba.cloud</groupId> <artifactId>spring-cloud-starter-alibaba-nacos-discovery</artifactId> </dependency> <!--swagger2--> <dependency> <groupId>io.springfox</groupId> <artifactId>springfox-swagger2</artifactId> </dependency> <dependency> <groupId>io.springfox</groupId> <artifactId>springfox-swagger-ui</artifactId> </dependency> <!-- feign 远程调用 --> <dependency> <groupId>org.springframework.cloud</groupId> <artifactId>spring-cloud-starter-openfeign</artifactId> </dependency> <!--测试--> <dependency> <groupId>org.springframework.boot</groupId> <artifactId>spring-boot-starter-test</artifactId> </dependency> <!-- mybatis plus--> <dependency> <groupId>com.baomidou</groupId> <artifactId>mybatis-plus-boot-starter</artifactId> <version>${mybatis.plus.version}</version> </dependency> <!-- mysql驱动 --> <dependency> <groupId>mysql</groupId> <artifactId>mysql-connector-java</artifactId> </dependency> <!--自定义项目--> <dependency> <groupId>com.czxy.zx</groupId> <artifactId>zx-common31</artifactId> </dependency> <dependency> <groupId>com.czxy.zx</groupId> <artifactId>zx-domain31</artifactId> </dependency> <!-- redis 启动器 --> <dependency> <groupId>org.springframework.boot</groupId> <artifactId>spring-boot-starter-data-redis</artifactId> </dependency> <!-- JavaMail 启动器 --> <dependency> <groupId>org.springframework.boot</groupId> <artifactId>spring-boot-starter-mail</artifactId> </dependency> <!-- MQ 启动器 --> <dependency> <groupId>org.springframework.boot</groupId> <artifactId>spring-boot-starter-amqp</artifactId> </dependency> <!-- fastjson --> <dependency> <groupId>com.alibaba</groupId> <artifactId>fastjson</artifactId> </dependency> <!--开发者工具--> <dependency> <groupId>org.springframework.boot</groupId> <artifactId>spring-boot-devtools</artifactId> <optional>true</optional> </dependency> </dependencies> </project> -
创建yml文件
# 服务端口号 server: port: 9010 # 服务名 spring: application: name: user-service datasource: driverClassName: com.mysql.jdbc.Driver url: jdbc:mysql://127.0.0.1:3306/zx_edu_user?useUnicode=true&characterEncoding=utf8 username: root password: 1234 druid: #druid 连接池配置 initial-size: 1 #初始化连接池大小 min-idle: 1 #最小连接数 max-active: 20 #最大连接数 test-on-borrow: true #获取连接时候验证,会影响性能 cloud: nacos: discovery: server-addr: 127.0.0.1:8848 #nacos服务地址 redis: database: 0 #数据库索引,取值0-15,表示16个库可选择 host: 127.0.0.1 #服务器地址 port: 6379 #服务器连接端口号 mail: host: smtp.126.com #发送邮件服务器 username: itcast_lt@126.com #账号 password: 1qaz2wsx #密码 default-encoding: UTF-8 #默认编码时 rabbitmq: host: 127.0.0.1 port: 5672 username: guest passowrd: guest virtualHost: / devtools: restart: enabled: true #设置开启热部署 additional-paths: src/main/java #重启目录 exclude: WEB-INF/** freemarker: cache: false #页面不加载缓存,修改即时生效 #开启log4j打印SQL语句 logging: level: com: czxy: zx: user: mapper: debug # mp日志打印 mybatis-plus: configuration: log-impl: org.apache.ibatis.logging.stdout.StdOutImpl global-config: db-config: logic-delete-value: 1 logic-not-delete-value: 0
-
启动类
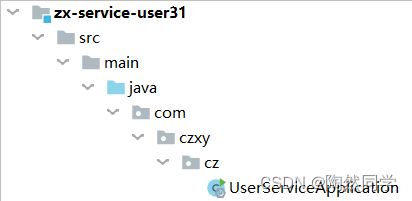
package com.czxy.cz;
import org.springframework.boot.SpringApplication;
import org.springframework.boot.autoconfigure.SpringBootApplication;
import org.springframework.cloud.client.discovery.EnableDiscoveryClient;
import org.springframework.cloud.openfeign.EnableFeignClients;
/**
* @author 桐叔
* @email liangtong@itcast.cn
*/
@SpringBootApplication
@EnableDiscoveryClient
@EnableFeignClients
public class UserServiceApplication {
public static void main(String[] args) {
SpringApplication.run(UserServiceApplication.class,args);
}
}
1.4 用户服务基本模块

-
拷贝配置类
-
编写mapper
package com.czxy.zx.user.mapper; import com.baomidou.mybatisplus.core.mapper.BaseMapper; import com.czxy.zx.domain.EduUser; import org.apache.ibatis.annotations.Mapper; /** * @author 桐叔 * @email liangtong@itcast.cn */ @Mapper public interface EduUserMapper extends BaseMapper<EduUser> { } -
编写service接口
package com.czxy.zx.user.service; import com.baomidou.mybatisplus.extension.service.IService; import com.czxy.zx.domain.EduUser; /** * @author 桐叔 * @email liangtong@itcast.cn */ public interface EduUserService extends IService<EduUser> { } -
编写service实现类
package com.czxy.zx.user.service.impl; import com.baomidou.mybatisplus.extension.service.impl.ServiceImpl; import com.czxy.zx.domain.EduUser; import com.czxy.zx.user.mapper.EduUserMapper; import com.czxy.zx.user.service.EduUserService; import org.springframework.stereotype.Service; import org.springframework.transaction.annotation.Transactional; /** * @author 桐叔 * @email liangtong@itcast.cn */ @Service @Transactional public class EduUserServiceImpl extends ServiceImpl<EduUserMapper, EduUser> implements EduUserService { } -
编写controller
package com.czxy.zx.user.controller;

import com.czxy.zx.user.service.EduUserService;
import org.springframework.web.bind.annotation.RequestMapping;
import org.springframework.web.bind.annotation.RestController;

import javax.annotation.Resource;

/**
 * @author 桐叔
 * @email liangtong@itcast.cn
 */
@RestController
@RequestMapping("/user")
public class EduUserController {

    @Resource
    private EduUserService eduUserService;


}
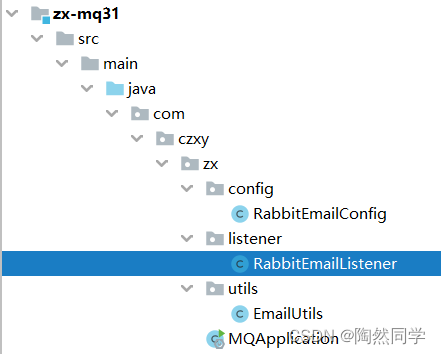
2. MQ服务
-
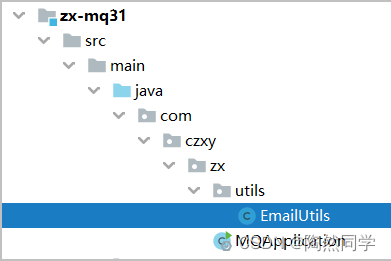
创建项目: zx-mq31
-
编写pom文件
<dependencies> <!-- MQ 启动器 --> <dependency> <groupId>org.springframework.boot</groupId> <artifactId>spring-boot-starter-amqp</artifactId> </dependency> <!-- JavaMail 启动器 --> <dependency> <groupId>org.springframework.boot</groupId> <artifactId>spring-boot-starter-mail</artifactId> </dependency> <!-- https://mvnrepository.com/artifact/com.alibaba/fastjson --> <dependency> <groupId>com.alibaba</groupId> <artifactId>fastjson</artifactId> </dependency> <!--自定义项目--> <dependency> <groupId>com.czxy.zx</groupId> <artifactId>zx-common31</artifactId> </dependency> </dependencies> -
编写yml文件
# 服务端口号 server: port: 8900 # 服务名 spring: application: name: mq-service mail: host: smtp.126.com #发送邮件服务器 username: itcast_lt@126.com #账号 password: 1qaz2wsx #密码 default-encoding: UTF-8 #默认编码时 rabbitmq: host: 127.0.0.1 port: 5672 username: guest passowrd: guest virtualHost: / -
拷贝工具类
-
编写启动类
package com.czxy.zx;

import org.springframework.boot.SpringApplication;
import org.springframework.boot.autoconfigure.SpringBootApplication;

/**
 * @author 桐叔
 * @email liangtong@itcast.cn
 */
@SpringBootApplication
public class MQApplication {
    public static void main(String[] args) {
        SpringApplication.run(MQApplication.class,args);
    }
}
3. 用户登录
-
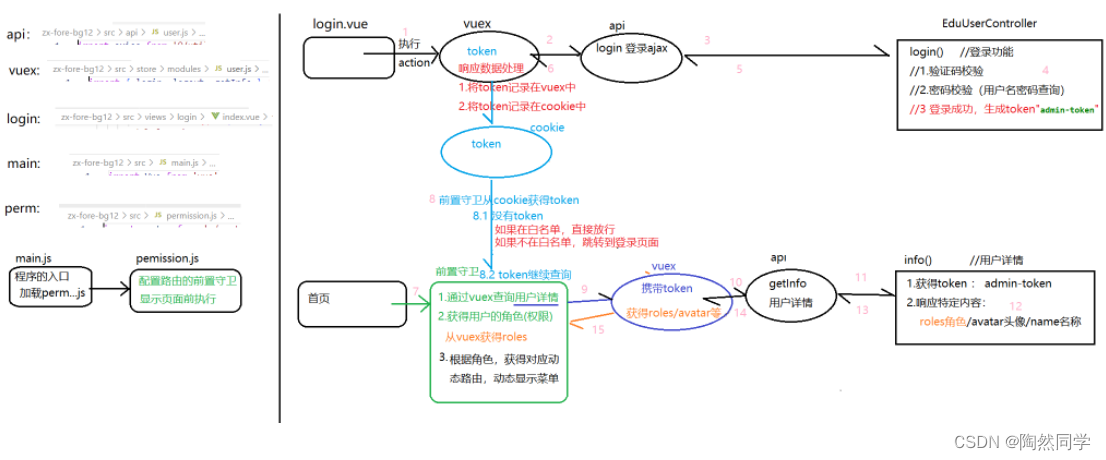
element ui admin 执行流程图
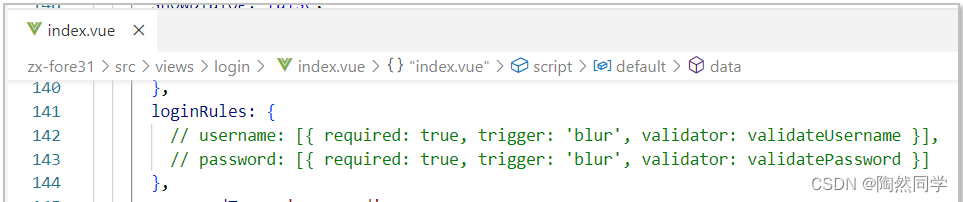
3.0 取消登录表单校验
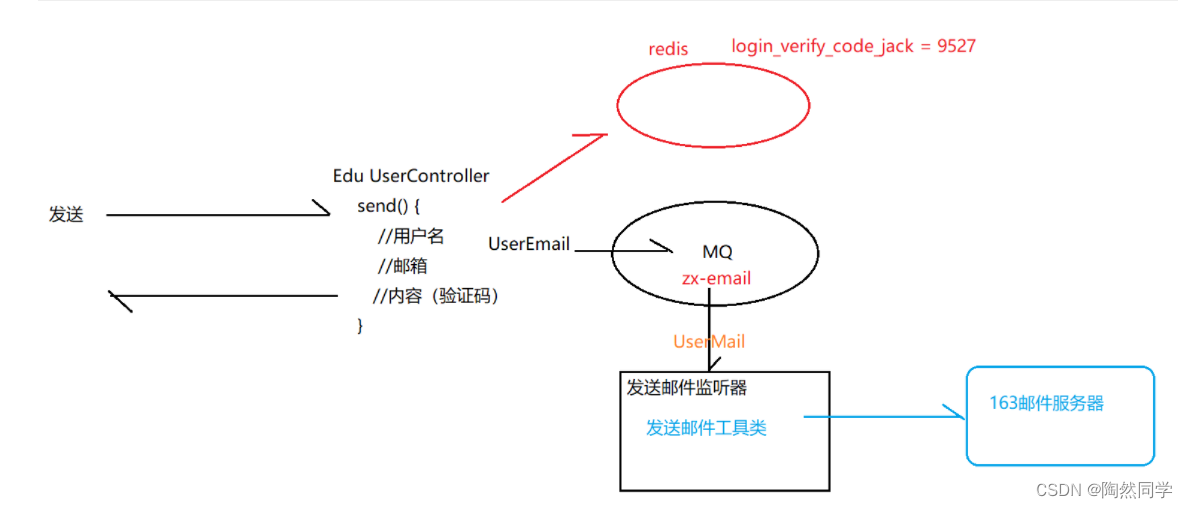
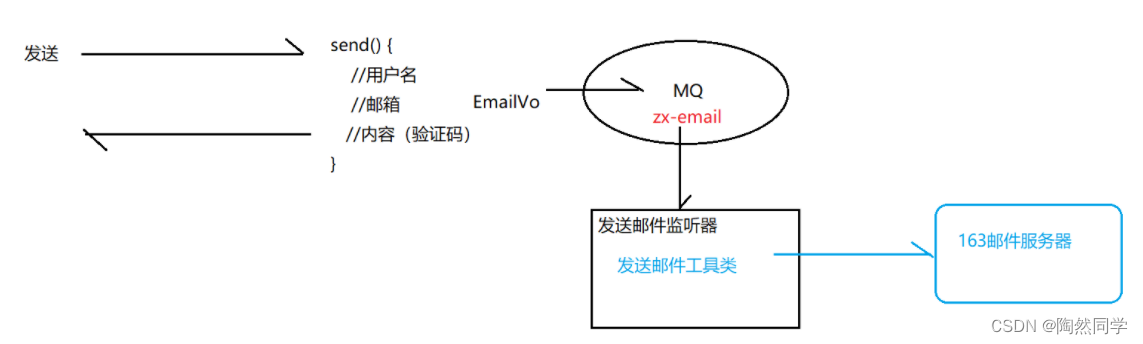
3.1 发送验证码邮件
3.1.1 前端:显示表单
-
登录页面:
@/views/login/index.vue
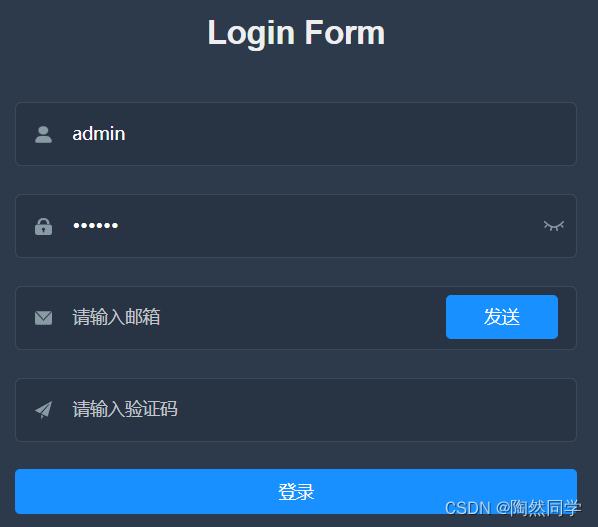
<!-- 邮箱 -->
      <el-form-item prop="email">
        <span class="svg-container">
          <svg-icon icon-class="email" />
        </span>
        <el-input
          ref="email"
          v-model="loginForm.email"
          placeholder="请输入邮箱"
          name="email"
          type="text"
          tabindex="3"
          style="width:70%;"
        />
        <el-button  type="primary" style="width:20%" @click.native.prevent="sendEmail">发送</el-button>
      </el-form-item>
      <!-- 验证码 -->
      <el-form-item prop="verifycode">
        <span class="svg-container">
          <svg-icon icon-class="guide" />
        </span>
        <el-input
          ref="verifycode"
          v-model="loginForm.verifycode"
          placeholder="请输入验证码"
          name="verifycode"
          type="text"
          tabindex="4"
        />
      </el-form-item>
3.1.2 前端:发送邮件
-
编写API,发送邮件
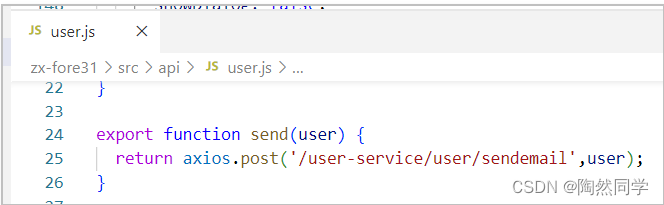
export function send(user) {
  return axios.post('/user-service/user/sendemail',user);
}
-
调用
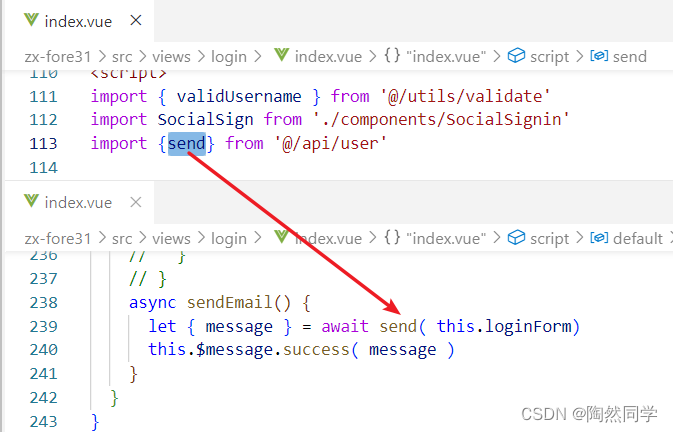
    async sendEmail() {
      let { message } = await send( this.loginForm)
      this.$message.success( message )
    }
3.1.3 完善 EduUser
-
用于封装表单提交的用户数据
package com.czxy.zx.domain;

import com.baomidou.mybatisplus.annotation.IdType;
import com.baomidou.mybatisplus.annotation.TableField;
import com.baomidou.mybatisplus.annotation.TableId;
import com.baomidou.mybatisplus.annotation.TableName;
import io.swagger.annotations.ApiModel;
import lombok.Data;

import java.util.Date;

/**
 *
 */
@Data
//@TableName("edu_user")
@ApiModel(value = "EduUser对象",description = "用户")
public class EduUser {

    @TableId(value="id" , type = IdType.AUTO)
    private Integer id;
    //用户名
    private String username;
    //用户密码
    private String password;
    //电话
    private String phone;
    //邮箱
    private String email;
    //角色,多个值使用逗号分隔,例如:admin,editor
    private String roles;
    //创建时间
    private Date created;
    //状态:0 未激活、1已激活
    private String status;

    @TableField(exist = false)
    private String verifycode;

}
3.1.4 用于封装与MQ交互的数据
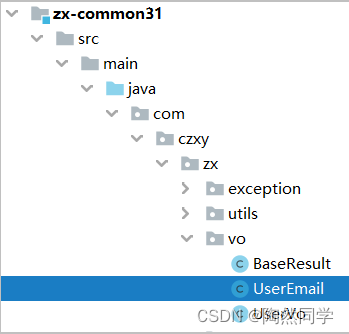
package com.czxy.zx.vo; import lombok.Data; /** * @author 桐叔 * @email liangtong@itcast.cn */ @Data public class UserEmail { private String username; private String email; private String text; }
3.1.5 编写Rabbit配置类
package com.czxy.zx.user.config;

import org.springframework.amqp.core.Queue;
import org.springframework.context.annotation.Bean;
import org.springframework.stereotype.Component;

/**
 * @author 桐叔
 * @email liangtong@itcast.cn
 */
@Component
public class RabbitEmailConfig {
    // 队列的名称
    public static final String QUEUE_NAME = "zx-email";

    @Bean
    public Queue queue() {
        return new Queue(QUEUE_NAME);
    }
}
3.1.6 后端实现
/**
 * @author 桐叔
 * @email liangtong@itcast.cn
 */
@RestController
@RequestMapping("/user")
public class EduUserController {

    @Resource
    private EduUserService eduUserService;

    @Resource
    private StringRedisTemplate stringRedisTemplate;

    @Resource
    private RabbitTemplate rabbitTemplate;

    @PostMapping("/sendemail")
    public BaseResult sendemail(@RequestBody EduUser eduUser) {
        //1 随机字符串
        Random random = new Random();
        // [0,8999) --> [1000,9999)
        int randomNumber = random.nextInt(8999) + 1000;

        //2 发送redis一份
        stringRedisTemplate.opsForValue().set("login" + eduUser.getUsername(), randomNumber + "");

        //3 mq存放
        UserEmail userEmail = new UserEmail();
        userEmail.setUsername(eduUser.getUsername());
        userEmail.setEmail(eduUser.getEmail());
        userEmail.setText("登录验证码是:" + randomNumber);

        String userEmailStr = JSONObject.toJSONString(userEmail);
        rabbitTemplate.convertAndSend(RabbitEmailConfig.QUEUE_NAME , userEmailStr);

        return BaseResult.ok("发送中,请查收");
    }
3.2 编写MQ:发送邮件
3.2.1 拷贝配置类
-
与登录模块使用的配置类相同

package com.czxy.zx.config;

import org.springframework.amqp.core.Queue;
import org.springframework.context.annotation.Bean;
import org.springframework.stereotype.Component;

/**
 * @author 桐叔
 * @email liangtong@itcast.cn
 */
@Component
public class RabbitEmailConfig {
    // 队列的名称
    public static final String QUEUE_NAME = "zx-email";

    @Bean
    public Queue queue() {
        return new Queue(QUEUE_NAME);
    }
}
3.2.2 监听器发送邮件
package com.czxy.zx.listener;

import com.alibaba.fastjson.JSONObject;
import com.czxy.zx.config.RabbitEmailConfig;
import com.czxy.zx.utils.EmailUtils;
import com.czxy.zx.vo.UserEmail;
import org.springframework.amqp.rabbit.annotation.RabbitListener;
import org.springframework.mail.javamail.JavaMailSender;
import org.springframework.stereotype.Component;

import javax.annotation.Resource;

/**
 * @author 桐叔
 * @email liangtong@itcast.cn
 */
@Component
public class RabbitEmailListener {
    @Resource
    private JavaMailSender javaMailSender;

    @RabbitListener(queues = RabbitEmailConfig.QUEUE_NAME)
    public void sendEmail(String message) {
        //1 将消息转换成 UserEmail
        UserEmail userEmail = JSONObject.parseObject(message, UserEmail.class);

        //2 发送邮件,如果邮箱为空,将出现循环异常
       if(userEmail.getEmail() != null) { EmailUtils.sendEmail(javaMailSender,userEmail.getEmail(),userEmail.getText());
       }

    }

}
3.3 后端:用户登录
3.3.0 前端登录流程
-
步骤一:登录页面
@/views/login/index.vue
-
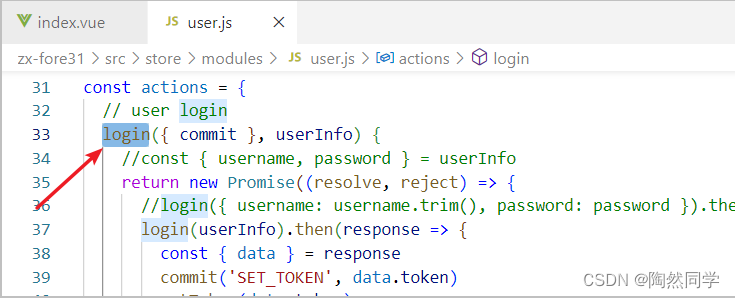
步骤二:登录调用 vuex

-
步骤三:查看vuex
-
步骤四:调用ajax
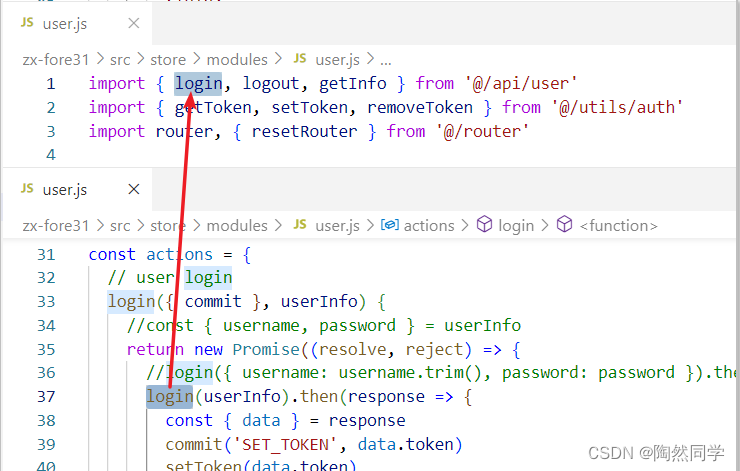
-
步骤五:确定ajax发送位置
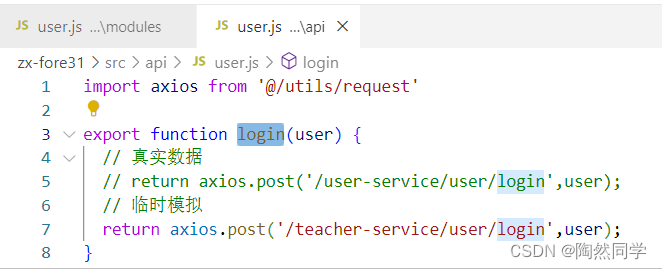
3.3.1 修改前端api
export function login(user) {
  // 真实数据
  return axios.post('/user-service/user/login',user);
  // 临时模拟
  // return axios.post('/teacher-service/user/login',user);
}
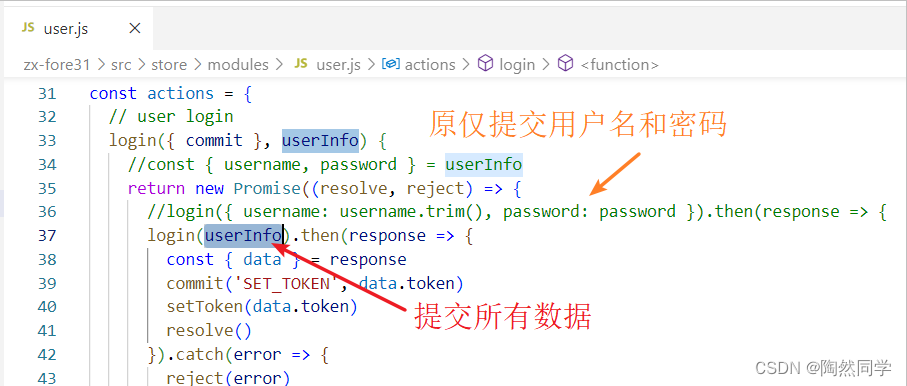
3.3.2 修改前端请求数据
3.3.2 后端实现
-
EduUserController 添加 login 方法
package com.czxy.zx.user.controller;

import com.alibaba.fastjson.JSON;
import com.czxy.zx.domain.EduUser;
import com.czxy.zx.user.config.RabbitEmailConfig;
import com.czxy.zx.user.service.EduUserService;
import com.czxy.zx.vo.BaseResult;
import com.czxy.zx.vo.UserEmail;
import org.apache.commons.lang3.RandomUtils;
import org.springframework.amqp.rabbit.core.RabbitTemplate;
import org.springframework.data.redis.core.StringRedisTemplate;
import org.springframework.web.bind.annotation.PostMapping;
import org.springframework.web.bind.annotation.RequestBody;
import org.springframework.web.bind.annotation.RequestMapping;
import org.springframework.web.bind.annotation.RestController;

import javax.annotation.Resource;

/**
 * @author 桐叔
 * @email liangtong@itcast.cn
 */
@RestController
@RequestMapping("/user")
public class EduUserController {

    @Resource
    private EduUserService eduUserService;

    @Resource
    private RabbitTemplate rabbitTemplate;

    @Resource
    private StringRedisTemplate stringRedisTemplate;

    @PostMapping("/send")
    public BaseResult send(@RequestBody EduUser eduUser) {
        //1 随机生成验证码
        int num = RandomUtils.nextInt(1000, 10000);
        //2 封装发送邮件的数据--
        UserEmail userEmail = new UserEmail();
        userEmail.setEmail(eduUser.getEmail());
        userEmail.setTitle("用户登录验证码");
        userEmail.setText(eduUser.getUsername() + "您好,本次验证码:" + num);

        //3 发送邮件-将邮件信息存放mq
        String jsonStr = JSON.toJSONString(userEmail);
        rabbitTemplate.convertAndSend("", RabbitEmailConfig.QUEUE_NAME, jsonStr);

        //4 将验证码存放redis
        String redisName = "login_verify_code_" + eduUser.getUsername();
        stringRedisTemplate.opsForValue().set(redisName, num + "");

        //5 提示
        return BaseResult.ok("验证码发送成功!");

    }

    @PostMapping("/login")
    public BaseResult login(@RequestBody EduUser eduUser) {
        //1 校验验证码
        // 1.1 获得redis
        String redisName = "login_verify_code_" + eduUser.getUsername();
        String redisVerifyCode = stringRedisTemplate.opsForValue().get(redisName);
        // 1.2 删除redis
        stringRedisTemplate.delete(redisName);
        // 1.3 校验:无效
        if(redisVerifyCode == null) {
            return BaseResult.error("验证码无效");
        }
        // 1.4 校验:错误
        if(!redisVerifyCode.equalsIgnoreCase(eduUser.getVerifycode())) {
            return BaseResult.error("验证码错误");
        }

        //2 通过service用户登录
        EduUser loginUser = eduUserService.login(eduUser);

        //3 提示
        if(loginUser != null) {
            // 需要设置token
            String token = "admin-token";
            return BaseResult.ok("登录成功").append("token", token);
        }
        return BaseResult.error("用户名或密码不匹配");
    }

}
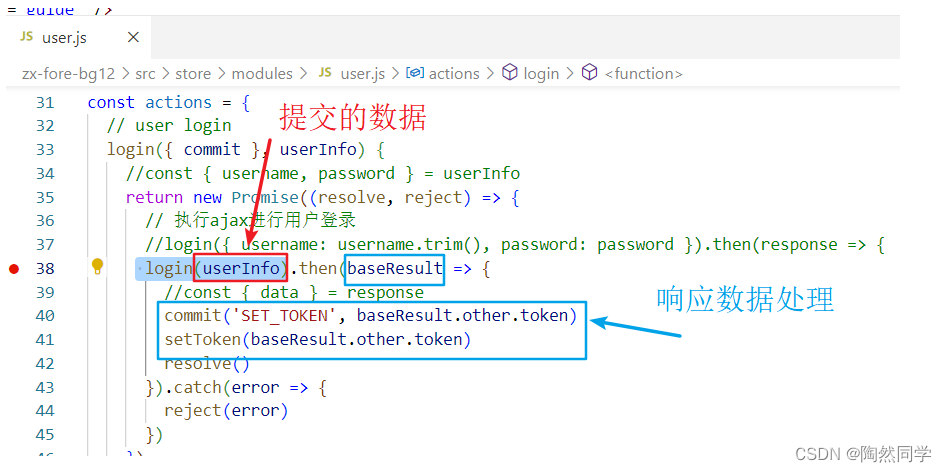
3.3.4 前端修改
3.3.5 数据要求 admin-token
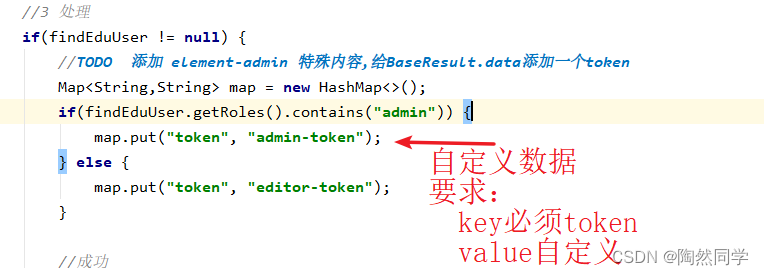 登录成功后,查询用户详情的使用
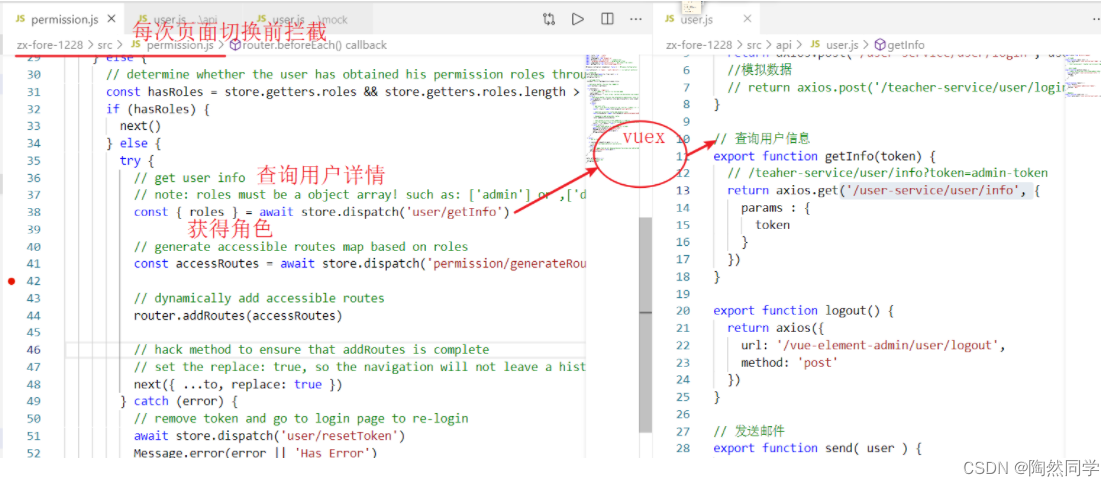
3.4 登录成功后查询权限
3.4.1 分析
-
登录时,返回一个固定的字符串:admin-token 或 editor-token
-
登录成功后,查询用户详情将携带固定字符串

-
根据固定字符串查询用户的权限,并返回固定的信息:
{
	roles: ['admin'],				//用户角色 或 [editor] 或 [admin,editor]
	avatar: '',						//头像图片地址
	name: '',						//用户名
}

-
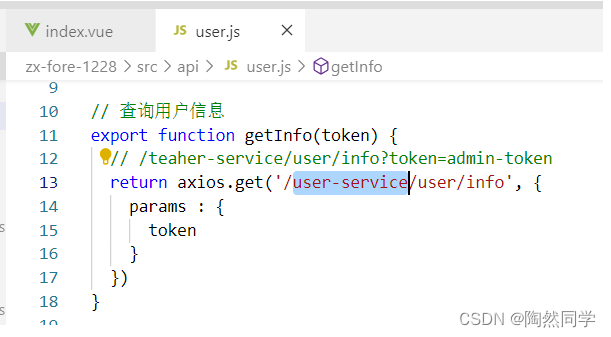
查询详情ajax调用时机
3.4.2 前端完善
3.4.3 后端实现
-
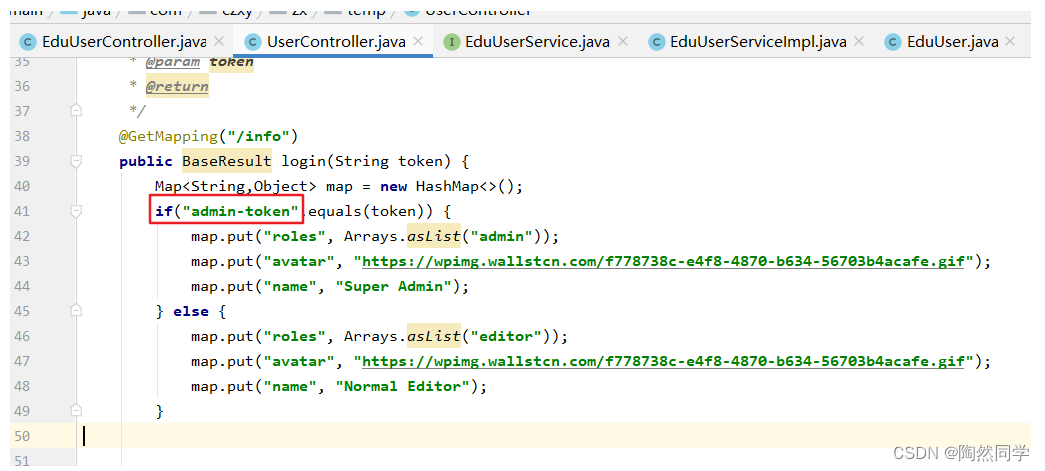
完善 EduUserController,添加查询详情功能
/**
     * 查询详情
     * @param token
     * @return
     */
    @GetMapping("/info")
    public BaseResult info(String token) {
        System.out.println(token);
        Map<String,Object> map = new HashMap<>();
        // 根据固定字符串拼凑数据
        if("admin-token".equals(token)) {
            map.put("roles", Arrays.asList("admin"));
            map.put("avatar","https://wpimg.wallstcn.com/f778738c-e4f8-4870-b634-56703b4acafe.gif");
            map.put("name","Super Admin");
        } else {
            map.put("roles", Arrays.asList("editor"));
            map.put("avatar","https://wpimg.wallstcn.com/f778738c-e4f8-4870-b634-56703b4acafe.gif");
            map.put("name","Normal Editor");
        }

        return BaseResult.ok("成功", map);
    }
4. 用户注册
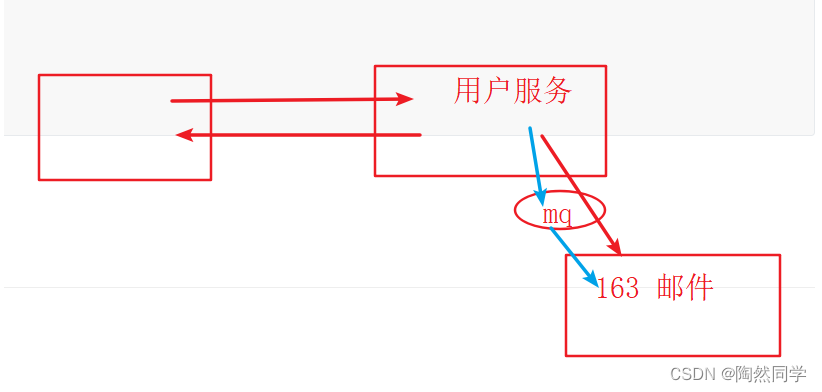
4.0 整体流程
-
示意图
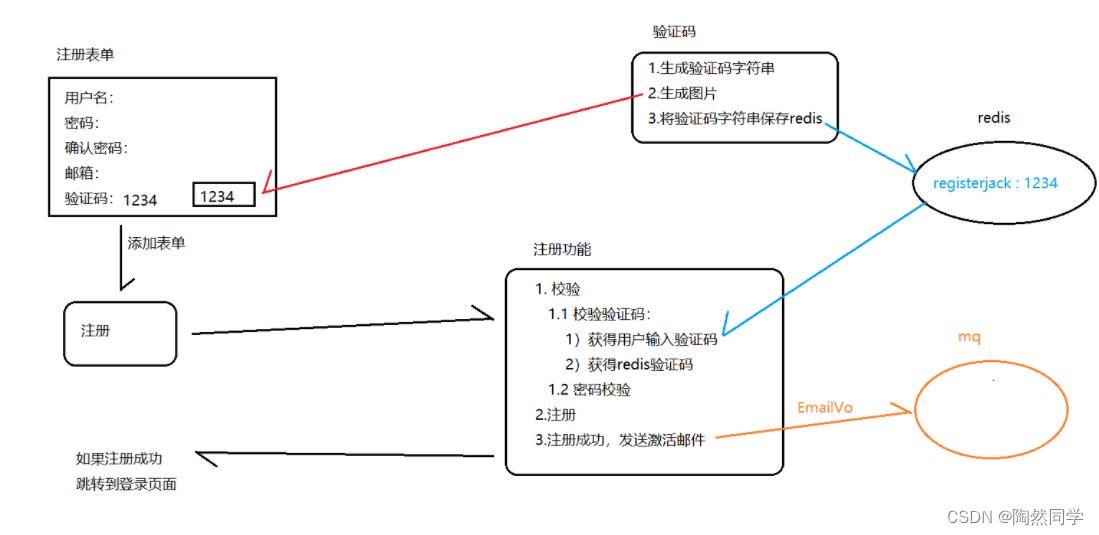
4.1 图片验证码
package com.czxy.zx.user.controller;

import org.springframework.data.redis.core.StringRedisTemplate;
import org.springframework.stereotype.Controller;
import org.springframework.web.bind.annotation.GetMapping;
import org.springframework.web.bind.annotation.PathVariable;
import org.springframework.web.bind.annotation.RequestMapping;

import javax.annotation.Resource;
import javax.imageio.ImageIO;
import javax.servlet.http.HttpServletResponse;
import java.awt.*;
import java.awt.image.BufferedImage;
import java.io.IOException;
import java.util.Random;
import java.util.concurrent.TimeUnit;

/**
 * Created by liangtong.
 */
@Controller
@RequestMapping("/verifycode")
public class VerifyCodeController {

    @Resource
    private StringRedisTemplate stringRedisTemplate;

    //   /verifycode/jack
    @GetMapping("/{username}")
    public void verifyCode(@PathVariable("username") String username , HttpServletResponse response ) throws IOException {

        //字体只显示大写,去掉了1,0,i,o几个容易混淆的字符
        String VERIFY_CODES = "23456789ABCDEFGHJKLMNPQRSTUVWXYZ";

        int IMG_WIDTH = 72;
        int IMG_HEIGTH = 27;
        Random random = new Random();
        //创建图片
        BufferedImage image = new BufferedImage(IMG_WIDTH, IMG_HEIGTH, BufferedImage.TYPE_INT_RGB);
        //画板
        Graphics g = image.getGraphics();
        //填充背景
        g.setColor(Color.WHITE);
        g.fillRect(1,1,IMG_WIDTH-2,IMG_HEIGTH-2);

        g.setFont(new Font("楷体",Font.BOLD,25));

        StringBuilder sb = new StringBuilder();
        //写字
        for(int i = 1 ; i <= 4 ; i ++){
            //随机颜色
            g.setColor(new Color(random.nextInt(255),random.nextInt(255),random.nextInt(255)));
            int len = random.nextInt(VERIFY_CODES.length());
            String str = VERIFY_CODES.substring(len,len+1);
            sb.append(str);
            g.drawString(str, IMG_WIDTH / 6 * i , 22 );
        }

        System.out.println("验证码:" + sb.toString());
        // 将验证码保存redis中
        stringRedisTemplate.opsForValue().set("register" + username , sb.toString() );


        // 生成随机干扰线
        for (int i = 0; i < 30; i++) {
            //随机颜色
            g.setColor(new Color(random.nextInt(255),random.nextInt(255),random.nextInt(255)));
            int x = random.nextInt(IMG_WIDTH - 1);
            int y = random.nextInt(IMG_HEIGTH - 1);
            int x1 = random.nextInt(12) + 1;
            int y1 = random.nextInt(6) + 1;
            g.drawLine(x, y, x - x1, y - y1);
        }

        //响应到浏览器
        ImageIO.write(image,"jpeg", response.getOutputStream());

    }
}
4.2 后端实现
4.2.1 完善EduUser
package com.czxy.zx.domain;

import com.baomidou.mybatisplus.annotation.IdType;
import com.baomidou.mybatisplus.annotation.TableField;
import com.baomidou.mybatisplus.annotation.TableId;
import com.baomidou.mybatisplus.annotation.TableName;
import io.swagger.annotations.ApiModel;
import lombok.Data;

import java.util.Date;

/**
 *
 */
@Data
//@TableName("edu_user")
@ApiModel(value = "EduUser对象",description = "用户")
public class EduUser {

    @TableId(value="id" , type = IdType.AUTO)
    private Integer id;
    //用户名
    private String username;
    //用户密码
    private String password;
    //电话
    private String phone;
    //邮箱
    private String email;
    //角色,多个值使用逗号分隔,例如:admin,editor
    private String roles;
    //创建时间
    private Date created;
    //状态:0 未激活、1已激活
    private String status;

    @TableField(exist = false)
    private String verifycode;

    @TableField(exist = false)
    private String repassword;

}
4.2.2 service实现
-
service 接口
package com.czxy.zx.user.service; import com.baomidou.mybatisplus.extension.service.IService; import com.czxy.zx.domain.EduUser; /** * @author 桐叔 * @email liangtong@itcast.cn */ public interface EduUserService extends IService<EduUser> { boolean register(EduUser eduUser); } -
service实现类
package com.czxy.zx.user.service.impl;

import com.baomidou.mybatisplus.core.conditions.query.QueryWrapper;
import com.baomidou.mybatisplus.extension.service.impl.ServiceImpl;
import com.czxy.zx.domain.EduUser;
import com.czxy.zx.user.mapper.EduUserMapper;
import com.czxy.zx.user.service.EduUserService;
import org.springframework.stereotype.Service;
import org.springframework.transaction.annotation.Transactional;

import java.util.Date;

/**
 * @author 桐叔
 * @email liangtong@itcast.cn
 */
@Service
@Transactional
public class EduUserServiceImpl extends ServiceImpl<EduUserMapper, EduUser> implements EduUserService {
    @Override
    public boolean register(EduUser eduUser) {
        //1 校验,用户名存在不允许注册
        QueryWrapper<EduUser> queryWrapper = new QueryWrapper();
        queryWrapper.eq("username", eduUser.getUsername());
        EduUser findUser = this.baseMapper.selectOne(queryWrapper);
        if(findUser != null) {
            throw new EduException("用户名已存在");
        }

        //2 自动生成数据
        eduUser.setCreated(new Date());    //创建时间
        eduUser.setStatus("0");            //登录状态

        //3 保存
        int insert = this.baseMapper.insert(eduUser);

        //4 提示
        return insert == 1;
    }
}
4.3.3 controller
/**
     * 注册功能
     * @param eduUser
     * @return
     */
    @PostMapping("/register")
    public BaseResult register(@RequestBody EduUser eduUser) {

        //1.1 校验验证码
        String redisVerifyCode = stringRedisTemplate.opsForValue().get("login" + eduUser.getUsername());
        stringRedisTemplate.delete("login" + eduUser.getUsername());
        if(redisVerifyCode == null) {
            return BaseResult.error("验证码无效");
        }
        if(! redisVerifyCode.equalsIgnoreCase(eduUser.getVerifycode())) {
            return BaseResult.error("验证码错误");
        }
        //1.2 密码校验
        if(eduUser.getPassword() == null) {
            return BaseResult.error("密码不能为空");
        }
        if(! eduUser.getPassword().equals(eduUser.getRepassword())) {
            return BaseResult.error("密码和确认密码不一致");
        }

        //2 注册
        boolean result = eduUserService.register(eduUser);

        //3 处理结果
        if(result) {
            // 成功
            // 3.1 生成UUID
            String uuid = UUID.randomUUID().toString().replace("-","");
            // 3.2 生成激活路由
            String url = "http://localhost:8080/active/"+eduUser.getUsername()+"/" + uuid;    //访问前端
            // 3.3 发送激活邮件
            String text = eduUser.getUsername() + "您好:<br/>您使用本网站的激活程序,请<a href='"+url+"'>点击激活</a>";

            // 3.4 发送邮件
            UserEmail userEmail = new UserEmail();
            userEmail.setUsername(eduUser.getUsername());
            userEmail.setEmail(eduUser.getEmail());
            userEmail.setText(text);
            String userEmailStr = JSONObject.toJSONString(userEmail);
            rabbitTemplate.convertAndSend(RabbitEmailConfig.QUEUE_NAME , userEmailStr);
            // 3.5 保存激活状态码
            stringRedisTemplate.opsForValue().set("active" + eduUser.getUsername() , uuid , 5 , TimeUnit.MINUTES);

            return BaseResult.ok("注册成功");
        }

        return BaseResult.ok("注册失败");
    }
4.3 前端实现
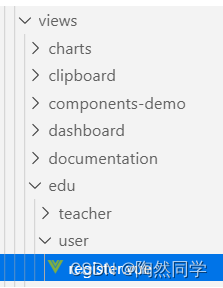
4.3.1 显示页面
-
创建页面
@/views/edu/user/register.vue
<template>
  <div>
    注册
  </div>
</template>

<script>
export default {

}
</script>

<style>

</style>
-
编写路由

  {
    path: '/register',
    component: () => import('@/views/edu/user/register'),
    hidden: true			//登录成功后,左侧菜单中不显示
  }
-
修改登录页面

<el-button class="thirdparty-button" type="primary" style="right:80px;" @click="showDialog=true">
   三方登录
</el-button>
<el-button class="thirdparty-button" type="primary" @click="$router.push('/register')">
    注册
 </el-button>
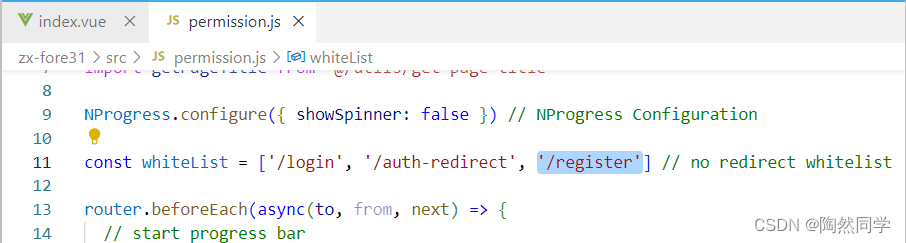
-
将注册连接添加到白名单
4.3.2 前端 api
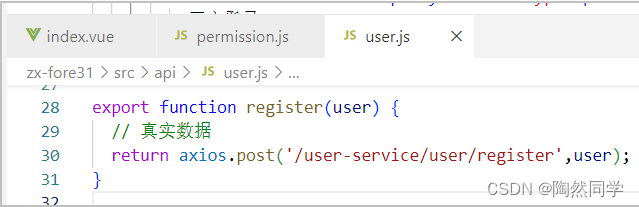
export function register(user) {
  // 真实数据
  return axios.post('/user-service/user/register',user);
}
4.3.3 注册页面

<template>
  <div class="login-container">
    <el-form ref="loginForm" :model="loginForm" class="login-form" >

      <div class="title-container">
        <h3 class="title">注册表单</h3>
      </div>

      <el-form-item prop="username">
        <span class="svg-container">
          <svg-icon icon-class="user" />
        </span>
        <el-input
          ref="username"
          v-model="loginForm.username"
          placeholder="用户名"
          type="text"
          tabindex="1"
          @blur="reload"
        />
      </el-form-item>

      <el-tooltip v-model="capsTooltip" content="Caps lock is On" placement="right" manual>
        <el-form-item prop="password">
          <span class="svg-container">
            <svg-icon icon-class="password" />
          </span>
          <el-input
            :key="passwordType"
            ref="password"
            v-model="loginForm.password"
            :type="passwordType"
            placeholder="密码"
            tabindex="2"
            autocomplete="on"
            @keyup.native="checkCapslock"
            @blur="capsTooltip = false"
            @keyup.enter.native="handleLogin"
          />
          <span class="show-pwd" @click="showPwd">
            <svg-icon :icon-class="passwordType === 'password' ? 'eye' : 'eye-open'" />
          </span>
        </el-form-item>
      </el-tooltip>
      <el-tooltip v-model="recapsTooltip" content="Caps lock is On" placement="right" manual>
        <el-form-item prop="repassword">
          <span class="svg-container">
            <svg-icon icon-class="password" />
          </span>
          <el-input
            :key="repasswordType"
            ref="repassword"
            v-model="loginForm.repassword"
            :type="repasswordType"
            placeholder="确认密码"
            tabindex="3"
            autocomplete="on"
            @keyup.native="recheckCapslock"
            @blur="recapsTooltip = false"
          />
          <span class="show-pwd" @click="reshowPwd">
            <svg-icon :icon-class="repasswordType === 'password' ? 'eye' : 'eye-open'" />
          </span>
        </el-form-item>
      </el-tooltip>

      <!-- 手机 -->
      <el-form-item prop="phone">
        <span class="svg-container">
          <svg-icon icon-class="wechat" />
        </span>
        <el-input
          ref="phone"
          v-model="loginForm.phone"
          placeholder="请输入手机号"
          name="phone"
          type="text"
          tabindex="4"
        />
      </el-form-item>

      <!-- 邮箱 -->
      <el-form-item prop="email">
        <span class="svg-container">
          <svg-icon icon-class="email" />
        </span>
        <el-input
          ref="email"
          v-model="loginForm.email"
          placeholder="请输入邮箱"
          name="email"
          type="text"
          tabindex="5"
        />
      </el-form-item>
      <!-- 验证码 -->
      <el-form-item prop="verifycode">
        <span class="svg-container">
          <svg-icon icon-class="guide" />
        </span>
        <el-input
          ref="verifycode"
          v-model="loginForm.verifycode"
          placeholder="请输入验证码"
          name="verifycode"
          type="text"
          tabindex="6"
          style="width:70%;"
        />
        <img :src="rerifycodeImg" @click="reload" alt="">
      </el-form-item>

      <el-button type="primary" style="width:100%;margin-bottom:30px;" @click.native.prevent="userRegister">注册</el-button>

    </el-form>
  </div>
</template>

<script>
export default {
  data() {
    return {
      loginForm: {

      },
      capsTooltip: false,
      passwordType: 'password',
      recapsTooltip: false,
      repasswordType: 'password',
      rerifycodeImg: '',
    }
  },
  methods: {
    showPwd() {
      if (this.passwordType === 'password') {
        this.passwordType = ''
      } else {
        this.passwordType = 'password'
      }
      this.$nextTick(() => {
        this.$refs.password.focus()
      })
    },
    checkCapslock(e) {
      const { key } = e
      this.capsTooltip = key && key.length === 1 && (key >= 'A' && key <= 'Z')
    },
    reshowPwd() {
      if (this.repasswordType === 'password') {
        this.repasswordType = ''
      } else {
        this.repasswordType = 'password'
      }
      this.$nextTick(() => {
        this.$refs.repassword.focus()
      })
    },
    recheckCapslock(e) {
      const { key } = e
      this.recapsTooltip = key && key.length === 1 && (key >= 'A' && key <= 'Z')
    },
    reload() {
      //  "路径?t=" + new Date() ,提供一个t变量,用于唯一标识每一次访问路径
      this.rerifycodeImg = `http://localhost:10010/v2/user-service/verifycode/${this.loginForm.username}?t=` + new Date().getTime()
    },
    userRegister() {

    }
  },
}
</script>

<style lang="scss">
/* 修复input 背景不协调 和光标变色 */
/* Detail see https://github.com/PanJiaChen/vue-element-admin/pull/927 */

$bg:#283443;
$light_gray:#fff;
$cursor: #fff;

@supports (-webkit-mask: none) and (not (cater-color: $cursor)) {
  .login-container .el-input input {
    color: $cursor;
  }
}

/* reset element-ui css */
.login-container {
  .el-input {
    display: inline-block;
    height: 47px;
    width: 85%;

    input {
      background: transparent;
      border: 0px;
      -webkit-appearance: none;
      border-radius: 0px;
      padding: 12px 5px 12px 15px;
      color: $light_gray;
      height: 47px;
      caret-color: $cursor;

      &:-webkit-autofill {
        box-shadow: 0 0 0px 1000px $bg inset !important;
        -webkit-text-fill-color: $cursor !important;
      }
    }
  }

  .el-form-item {
    border: 1px solid rgba(255, 255, 255, 0.1);
    background: rgba(0, 0, 0, 0.1);
    border-radius: 5px;
    color: #454545;
  }
}
</style>

<style lang="scss" scoped>
$bg:#2d3a4b;
$dark_gray:#889aa4;
$light_gray:#eee;

.login-container {
  min-height: 100%;
  width: 100%;
  background-color: $bg;
  overflow: hidden;

  .login-form {
    position: relative;
    width: 520px;
    max-width: 100%;
    padding: 160px 35px 0;
    margin: 0 auto;
    overflow: hidden;
  }

  .tips {
    font-size: 14px;
    color: #fff;
    margin-bottom: 10px;

    span {
      &:first-of-type {
        margin-right: 16px;
      }
    }
  }

  .svg-container {
    padding: 6px 5px 6px 15px;
    color: $dark_gray;
    vertical-align: middle;
    width: 30px;
    display: inline-block;
  }

  .title-container {
    position: relative;

    .title {
      font-size: 26px;
      color: $light_gray;
      margin: 0px auto 40px auto;
      text-align: center;
      font-weight: bold;
    }
  }

  .show-pwd {
    position: absolute;
    right: 10px;
    top: 7px;
    font-size: 16px;
    color: $dark_gray;
    cursor: pointer;
    user-select: none;
  }

  .thirdparty-button {
    position: absolute;
    right: 0;
    bottom: 6px;
  }

  @media only screen and (max-width: 470px) {
    .thirdparty-button {
      display: none;
    }
  }
}
</style>
-
获得
.env.development文件中配置内容
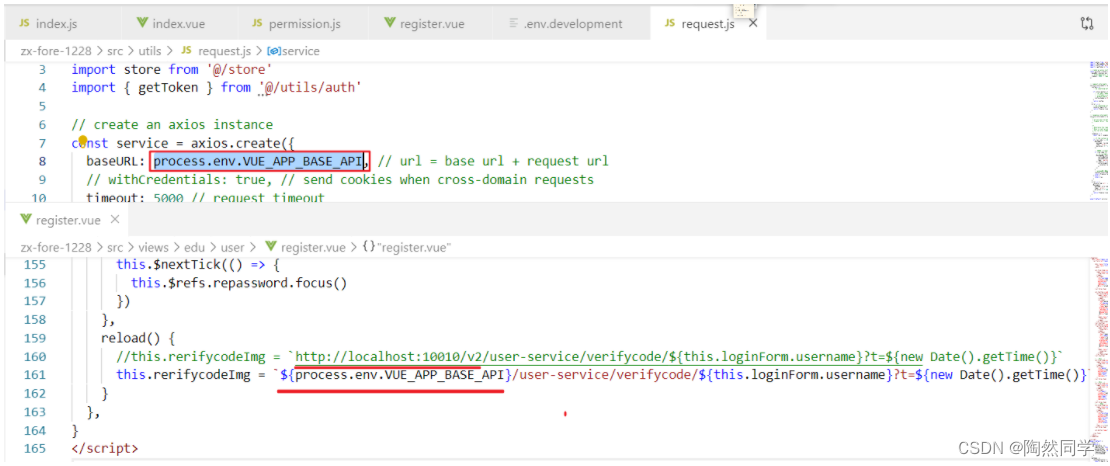
    reload() {
      //this.rerifycodeImg = `http://localhost:10010/v2/user-service/verifycode/${this.loginForm.username}?t=${new Date().getTime()}`
      this.rerifycodeImg = `${process.env.VUE_APP_BASE_API}/user-service/verifycode/${this.loginForm.username}?t=${new Date().getTime()}`
    }
4.3.4 注册功能
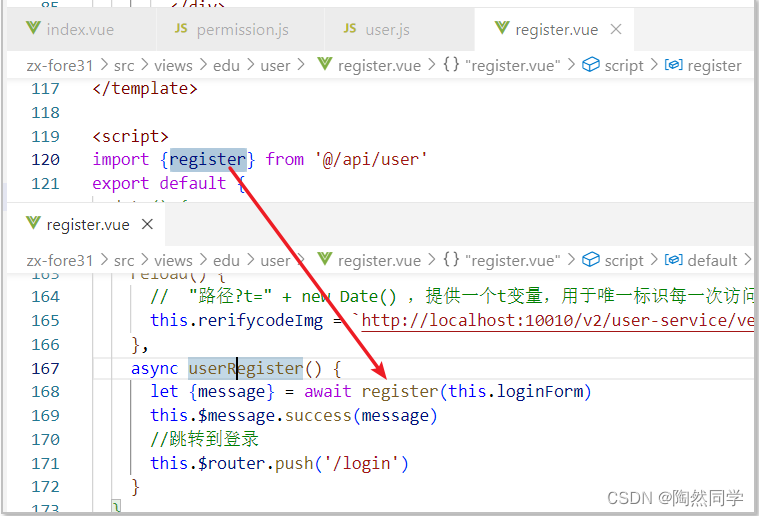
    async userRegister() {
      let {message} = await register(this.loginForm)
      this.$message.success(message)
      //跳转到登录
      this.$router.push('/login')
    }
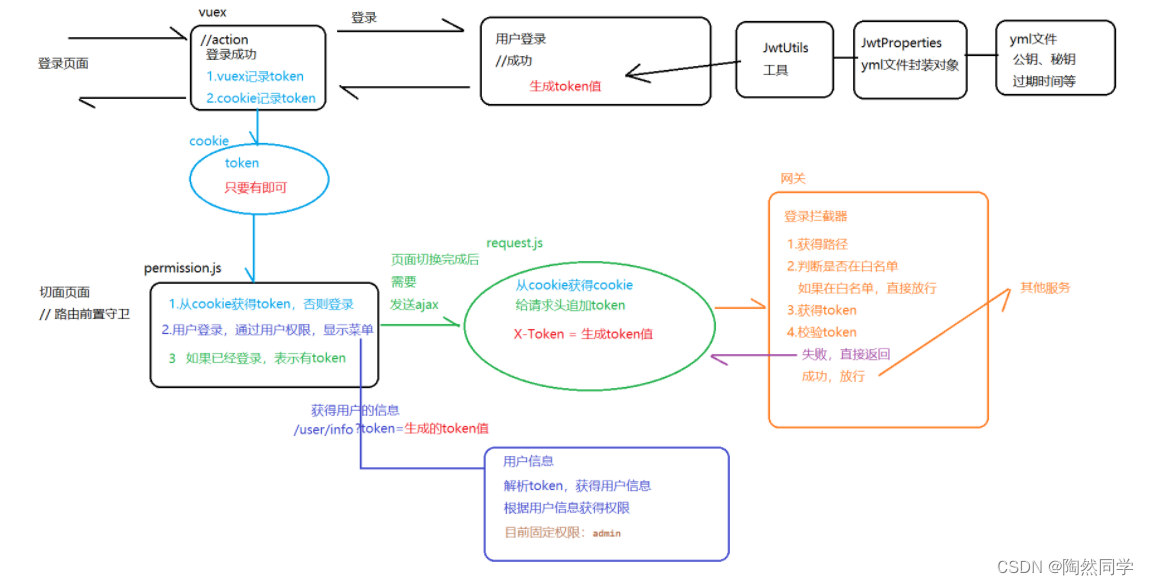
5 整合JWT
5.0 分析
5.1 搭建环境
5.1.1 拷贝坐标
        <!--JavaBean工具类,用于JavaBean数据封装-->
        <dependency>
            <groupId>commons-beanutils</groupId>
            <artifactId>commons-beanutils</artifactId>
        </dependency>
        <!--jwt工具-->
        <dependency>
            <groupId>io.jsonwebtoken</groupId>
            <artifactId>jjwt</artifactId>
        </dependency>

        <!--joda 时间工具类 -->
        <dependency>
            <groupId>joda-time</groupId>
            <artifactId>joda-time</artifactId>
        </dependency>
5.1.2 复制yml配置
sc:
jwt:
secret: sc@Login(Auth}*^31)&czxy% # 登录校验的密钥
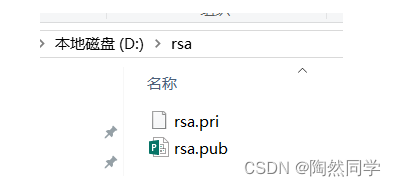
pubKeyPath: D:/rsa/rsa.pub # 公钥地址
priKeyPath: D:/rsa/rsa.pri # 私钥地址
expire: 360 # 过期时间,单位分钟
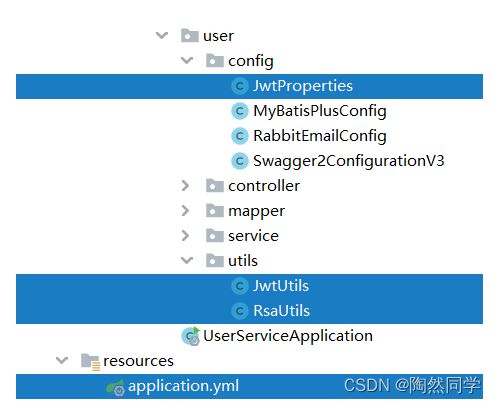
5.1.3 拷贝配合类
-
拷贝:JwtProperties
package com.czxy.zx.user.config;

import com.czxy.zx.user.utils.RsaUtils;
import lombok.Data;
import org.springframework.boot.context.properties.ConfigurationProperties;
import org.springframework.context.annotation.Configuration;

import javax.annotation.PostConstruct;
import java.io.File;
import java.security.PrivateKey;
import java.security.PublicKey;

/**
 * @author 桐叔
 * @email liangtong@itcast.cn
 */
@Configuration
@ConfigurationProperties(prefix = "sc.jwt")
@Data
public class JwtProperties {
    private String secret;
    private String pubKeyPath;
    private String priKeyPath;
    private Integer expire;
    private PublicKey publicKey;
    private PrivateKey privateKey;

    @PostConstruct      //初始化方法注解
    public void init() {
        try {
            File pubFile = new File(pubKeyPath);
            File priFile = new File(priKeyPath);
            if(!pubFile.exists() || ! priFile.exists()) {
                RsaUtils.generateKey(pubKeyPath,priKeyPath,secret);
            }
            // 获得公钥和私钥对象
            this.publicKey = RsaUtils.getPublicKey(pubKeyPath);
            this.privateKey = RsaUtils.getPrivateKey(priKeyPath);
        } catch (Exception e) {
            e.printStackTrace();
        }
    }
}
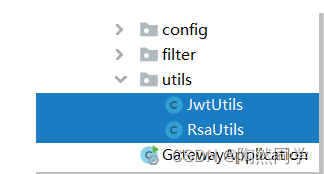
5.1.4 拷贝工具类
-
拷贝工具类
5.1.5 生成秘钥(可选)
-
如果已经存在,此步省略
-
编写测试类,生成公钥和私钥
package com.czxy.zx.utils;

/**
 * @author 桐叔
 * @email liangtong@itcast.cn
 */
public class TestRsa {
    //公钥的位置
    private static final String pubKeyPath = "D:\\rsa\\rsa.pub";
    //私钥的位置
    private static final String priKeyPath = "D:\\rsa\\rsa.pri";

    public static void main(String[] args) throws Exception {
        RsaUtils.generateKey(pubKeyPath,priKeyPath,"1234");
    }

}
5.2 登录成功:生成token
-
准备工作已完成
-
登录成功,将 EduUser 转换成token,并响应给用户
@PostMapping("/login")
public BaseResult login(@RequestBody EduUser eduUser) {
//1 校验验证码
// 1.1 获得redis
String redisName = "login_verify_code_" + eduUser.getUsername();
String redisVerifyCode = stringRedisTemplate.opsForValue().get(redisName);
// 1.2 删除redis
stringRedisTemplate.delete(redisName);
// 1.3 校验:无效
if(redisVerifyCode == null) {
return BaseResult.error("验证码无效");
}
// 1.4 校验:错误
if(!redisVerifyCode.equalsIgnoreCase(eduUser.getVerifycode())) {
return BaseResult.error("验证码错误");
}
//2 通过service用户登录
EduUser loginUser = eduUserService.login(eduUser);
//3 提示
if(loginUser != null) {
if("0".equals(loginUser.getStatus())) {
return BaseResult.error("用户未激活,请先激活");
}
if("2".equals(loginUser.getStatus())) {
return BaseResult.error("临时冻结,36小时");
}
if("3".equals(loginUser.getStatus())) {
return BaseResult.error("该账号已冻结");
}
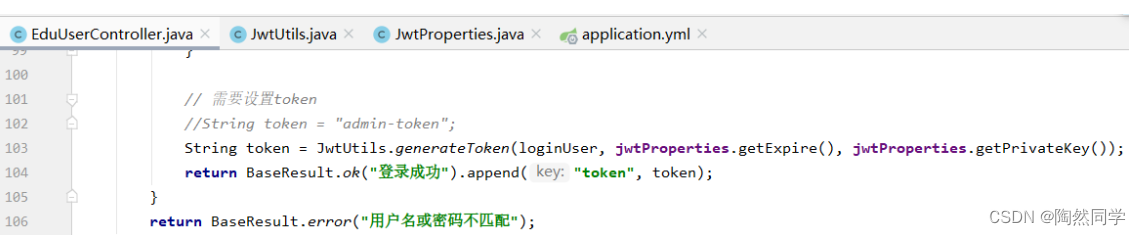
// 需要设置token
//String token = "admin-token";
String token = JwtUtils.generateToken(loginUser, jwtProperties.getExpire(), jwtProperties.getPrivateKey());
return BaseResult.ok("登录成功").append("token", token);
}
return BaseResult.error("用户名或密码不匹配");
}
5.3 查询详情:获得token
5.3.1 基本流程
-
登录成功后,默认跳转到 / 页面
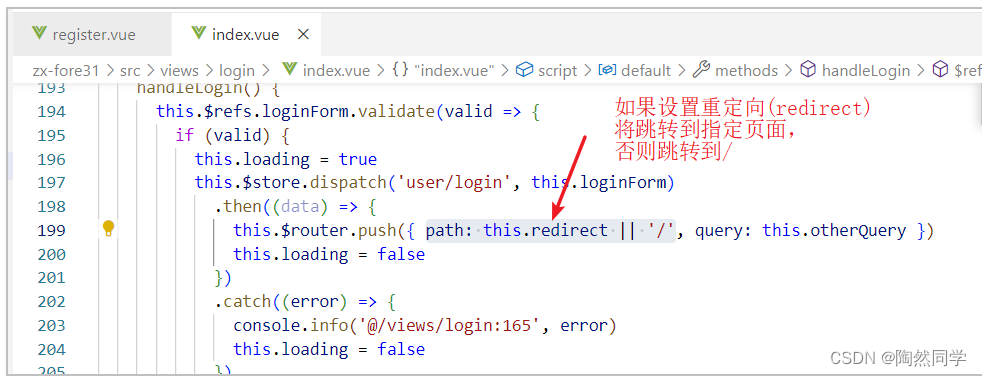
-
访问 / ,在路由中配置跳转的位置
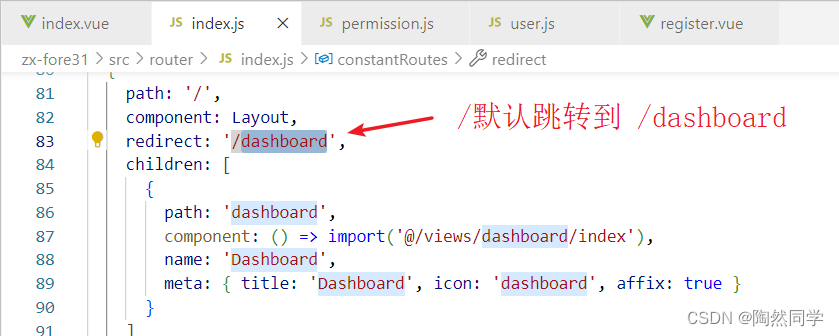
-
在跳转 / 页面前,执行vuex中
user/getInfo
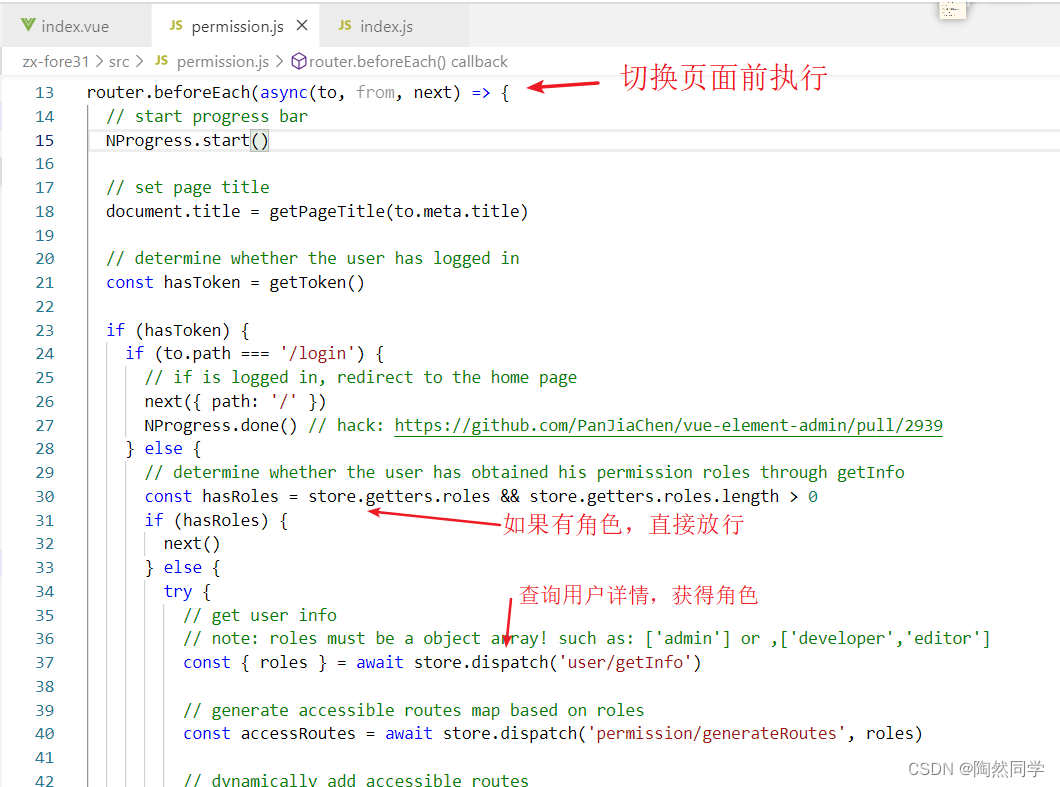
-
通过vuex执行ajax请求,查询详情
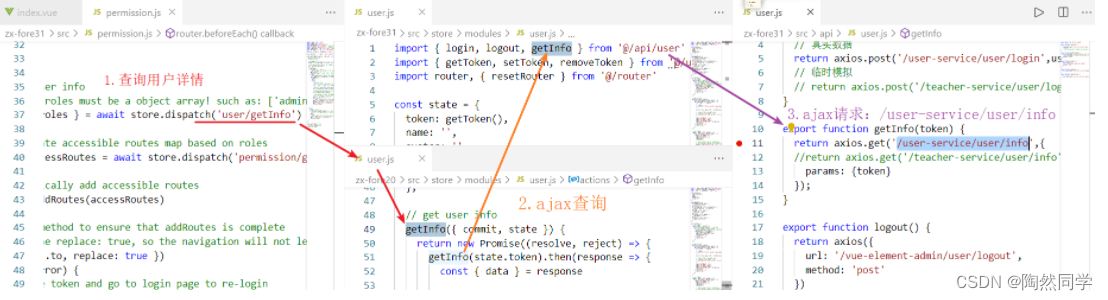
5.3.2 查询详情
-
修改 EduUserController 添加方法
    @GetMapping("/info")
    public BaseResult info( String token) {
        try {
            //1 通过token 获得用户信息
            EduUser eduUser = JwtUtils.getObjectFromToken(token, jwtProperties.getPublicKey(), EduUser.class);

            //2 模拟数据
/*        Map<String,Object> map = new HashMap<>();
        if("admin-token".equalsIgnoreCase(token)) {
            map.put("roles", Arrays.asList("admin"));        //角色的值必须是数组
            map.put("avatar","https://wpimg.wallstcn.com/f778738c-e4f8-4870-b634-56703b4acafe.gif");
            map.put("name","张三三");
        } else {
            // 非管理员的权限
        }*/

            //3 真实数据
            Map<String,Object> map = new HashMap<>();
            if(eduUser.getRoles() != null) {
                map.put("roles", eduUser.getRoles().split(","));        //角色的值必须是数组
            } else {
                map.put("roles", Arrays.asList("editor"));        //没有权限的固定:editor
            }
            map.put("avatar","https://wpimg.wallstcn.com/f778738c-e4f8-4870-b634-56703b4acafe.gif");    //需要完善用户头像
            map.put("name",eduUser.getUsername());


            // 数据返回  baseResult.data --> Map
            return BaseResult.ok("获得权限成功", map);
        } catch (Exception e) {
            return BaseResult.error("获得权限失败");
        }
    }
5.4 过滤器
5.4.1 配置yml
sc:
  jwt:
    secret: sc@Login(Auth}*^31)&czxy% # 登录校验的密钥
    pubKeyPath: D:/rsa/rsa.pub # 公钥地址
    priKeyPath: D:/rsa/rsa.pri # 私钥地址
    expire: 360 # 过期时间,单位分钟
  filter:
    allowPaths:
      - swagger
      - /api-docs
      - /user/login
      - /user/info
      - /user/register
      - /user/sendemail
      - /user/verifycode
5.4.2 配置类

-
FilterProperties
package com.czxy.zx.config; import lombok.Data; import org.springframework.boot.context.properties.ConfigurationProperties; import org.springframework.stereotype.Component; import java.util.List; /** * @author 桐叔 * @email liangtong@itcast.cn */ @Data @ConfigurationProperties(prefix = "sc.filter") public class FilterProperties { private List<String> allowPaths; } -
JwtProperties
package com.czxy.zx.config;

import com.czxy.zx.utils.RsaUtils;
import lombok.Data;
import org.springframework.boot.context.properties.ConfigurationProperties;
import org.springframework.context.annotation.Configuration;

import javax.annotation.PostConstruct;
import java.io.File;
import java.security.PrivateKey;
import java.security.PublicKey;

/**
 * @author 桐叔
 * @email liangtong@itcast.cn
 */
@Configuration
@ConfigurationProperties(prefix = "sc.jwt")
@Data
public class JwtProperties {
    private String secret;
    private String pubKeyPath;
    private String priKeyPath;
    private Integer expire;
    private PublicKey publicKey;
    private PrivateKey privateKey;

    @PostConstruct      //初始化方法注解
    public void init() {
        try {
            File pubFile = new File(pubKeyPath);
            File priFile = new File(priKeyPath);
            if(!pubFile.exists() || ! priFile.exists()) {
                RsaUtils.generateKey(pubKeyPath,priKeyPath,secret);
            }
            // 获得公钥和私钥对象
            this.publicKey = RsaUtils.getPublicKey(pubKeyPath);
            this.privateKey = RsaUtils.getPrivateKey(priKeyPath);
        } catch (Exception e) {
            e.printStackTrace();
        }
    }
}
5.4.3 过滤器
package com.czxy.zx.filter;

import com.czxy.zx.config.FilterProperties;
import com.czxy.zx.config.JwtProperties;
import com.czxy.zx.domain.EduUser;
import com.czxy.zx.utils.JwtUtils;
import org.springframework.boot.context.properties.EnableConfigurationProperties;
import org.springframework.cloud.gateway.filter.GatewayFilterChain;
import org.springframework.cloud.gateway.filter.GlobalFilter;
import org.springframework.core.Ordered;
import org.springframework.core.io.buffer.DataBuffer;
import org.springframework.http.HttpStatus;
import org.springframework.http.server.reactive.ServerHttpRequest;
import org.springframework.http.server.reactive.ServerHttpResponse;
import org.springframework.stereotype.Component;
import org.springframework.web.server.ServerWebExchange;
import reactor.core.publisher.Flux;
import reactor.core.publisher.Mono;

import javax.annotation.Resource;
import java.nio.charset.StandardCharsets;
import java.util.List;

/**
 * @author 桐叔
 * @email liangtong@itcast.cn
 */
@Component
@EnableConfigurationProperties(FilterProperties.class)
public class LoginFilter implements GlobalFilter, Ordered {

    @Resource
    private FilterProperties filterProperties;

    @Resource
    private JwtProperties jwtProperties;
    @Override
    public Mono<Void> filter(ServerWebExchange exchange, GatewayFilterChain chain) {
        try {
            //1 获得请求路径
            ServerHttpRequest request = exchange.getRequest();
            String path = request.getURI().getPath();
            System.out.println(path);
            //2 白名单
            List<String> allowPaths = filterProperties.getAllowPaths();
            for (String allowPath : allowPaths) {
                if(path.contains(allowPath)) {
                    // 放行
                    return chain.filter(exchange);
                }
            }

            //3 获得token
            String token = request.getHeaders().getFirst("X-Token");
            //4 校验token
            JwtUtils.getObjectFromToken(token, jwtProperties.getPublicKey(), EduUser.class);
            //5.1  成功,放行
            return chain.filter(exchange);
        } catch (Exception e) {
            e.printStackTrace();
            //5.2 失败,返回提示`token失效`
            ServerHttpResponse response = exchange.getResponse();
            // 响应状态 401 没有权限
            response.setStatusCode(HttpStatus.UNAUTHORIZED);
            // 响应数据的编码
            response.getHeaders().add("Content-Type","application/json;charset=UTF-8");
            // 响应“没有权限”提示
            DataBuffer wrap = response.bufferFactory().wrap("没有权限".getBytes(StandardCharsets.UTF_8));
            return exchange.getResponse().writeWith(Flux.just(wrap));

        }

    }

    @Override
    public int getOrder() {
        return 1;
    }
}
5.5 token 无效
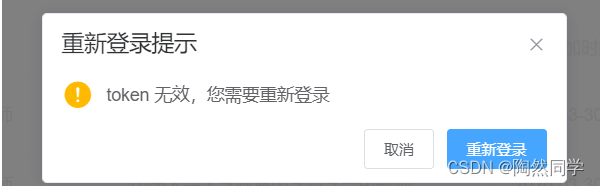
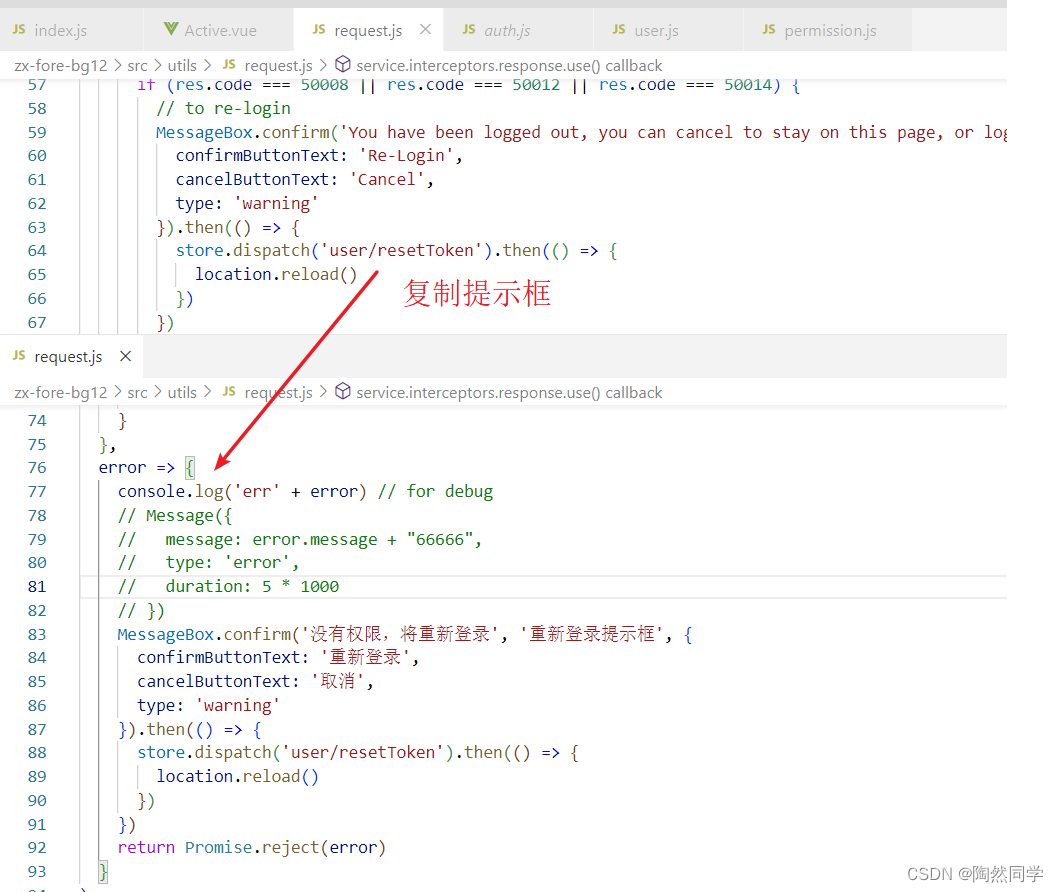
    MessageBox.confirm('没有权限,将重新登录', '重新登录提示框', {
      confirmButtonText: '重新登录',
      cancelButtonText: '取消',
      type: 'warning'
    }).then(() => {
      store.dispatch('user/resetToken').then(() => {
        location.reload()
      })
    })
6.作业:激活
6.1 分析
-
需求:
-
用户点击链接后可以进行账号激活,将用户的状态0改成1
-
用户重复点击,提示“账号已经激活,无需重复激活”
-
需要防止其他人帮着激活
-
激活成功了,跳转到登录页面,“账号已激活,请登录”
-
1天不激活,激活链接失效,需要重新发送
-
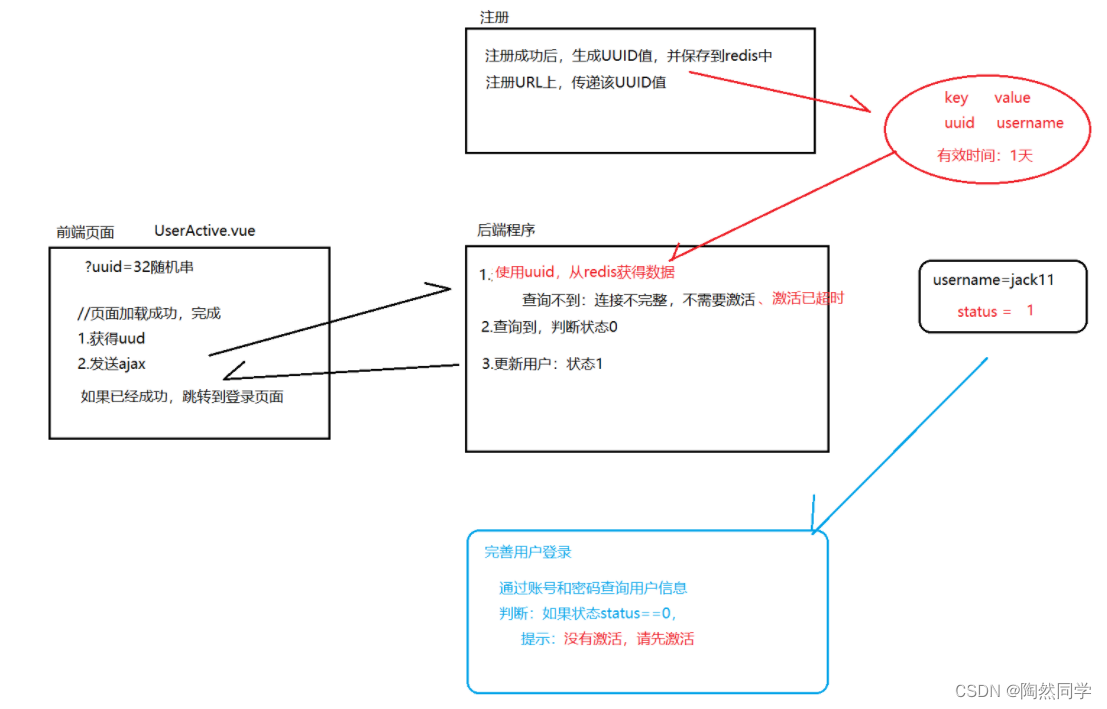
6.2 完善用户注册
@PostMapping("/register")
public BaseResult register(@RequestBody EduUser eduUser) {
//1 校验
// 1.1 密码
if(StringUtils.isBlank(eduUser.getPassword())) {
ExceptionUtils.cast("密码不能为空");
}
if(! eduUser.getPassword().equals(eduUser.getRepassword())) {
ExceptionUtils.cast("确认密码和密码不一致");
}
// 1.2 验证码
// 1) 获得redis验证码
String key = "register" + eduUser.getUsername() ;
String redisVerifyCode = stringRedisTemplate.opsForValue().get(key);
// 2) 删除redis验证码
stringRedisTemplate.delete(key);
// 3) 无效
if(redisVerifyCode == null) {
ExceptionUtils.cast("验证码无效");
}
// 4) 不对
if(! redisVerifyCode.equalsIgnoreCase(eduUser.getVerifycode())) {
ExceptionUtils.cast("验证码错误");
}
//2 注册
boolean register = eduUserService.register(eduUser);
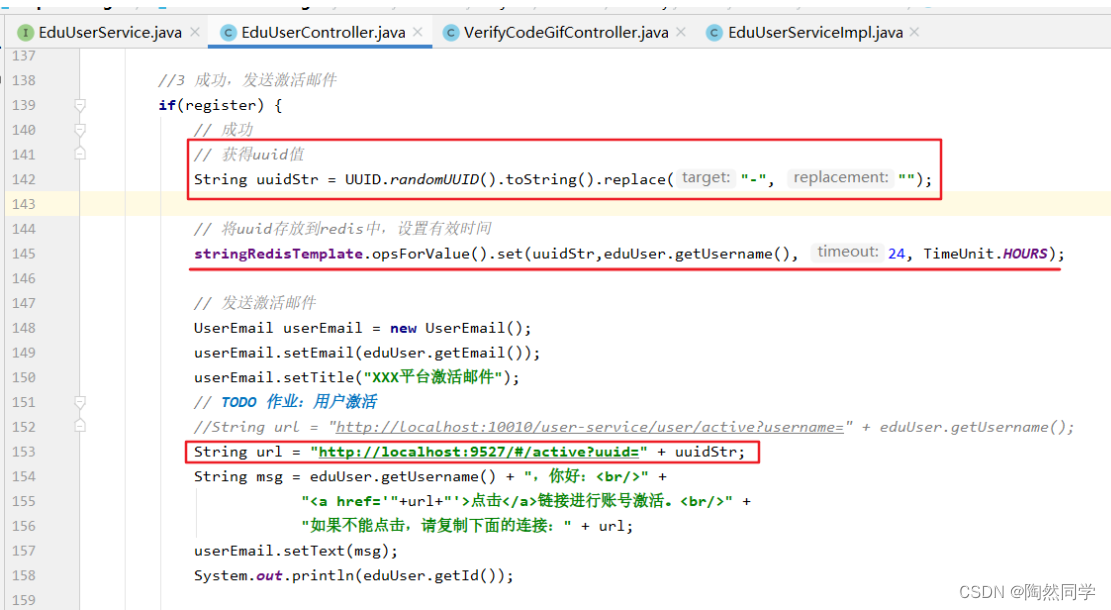
//3 成功,发送激活邮件
if(register) {
// 成功
// 获得uuid值
String uuidStr = UUID.randomUUID().toString().replace("-", "");
// 将uuid存放到redis中,设置有效时间
stringRedisTemplate.opsForValue().set(uuidStr,eduUser.getUsername(), 24, TimeUnit.HOURS);
// 发送激活邮件
UserEmail userEmail = new UserEmail();
userEmail.setEmail(eduUser.getEmail());
userEmail.setTitle("XXX平台激活邮件");
// TODO 作业:用户激活
//String url = "http://localhost:10010/user-service/user/active?username=" + eduUser.getUsername();
String url = "http://localhost:9527/#/active?uuid=" + uuidStr;
String msg = eduUser.getUsername() + ",你好:<br/>" +
"<a href='"+url+"'>点击</a>链接进行账号激活。<br/>" +
"如果不能点击,请复制下面的连接:" + url;
userEmail.setText(msg);
System.out.println(eduUser.getId());
//3 发送邮件-将邮件信息存放mq
String jsonStr = JSON.toJSONString(userEmail);
rabbitTemplate.convertAndSend("", RabbitEmailConfig.QUEUE_NAME, jsonStr);
return BaseResult.ok("注册成功,请进行账号激活");
}
return BaseResult.error("注册失败");
}
6.3 用户激活
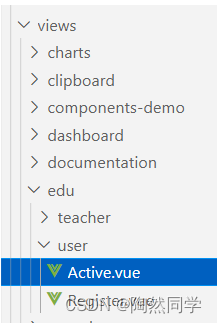
6.3.1 前端实现
-
步骤:
-
步骤1:编写激活页面
-
步骤2:编写ajax函数
-
步骤3:添加白名单
-
-
步骤1:编写激活页面
<template>
  <div>用户激活页面</div>
</template>

<script>
import { active } from "@/api/user";
export default {
  methods: {
    async activeUserFn(uuid) {
      let baseResult = await active(uuid);
      this.$message.success(baseResult.message);
      this.$router.push('/login')
    }
  },
  mounted() {
    // 获得参数uuid
    let uuid = this.$route.query.uuid
    // 如果没有调整到登录页面
    if(! uuid) {
      this.$message.error('激活链接无效,请重新访问');
      this.$router.push('/login')
    } else {
      // 发送ajax进行激活
      this.activeUserFn(uuid);
    }
  },
}
</script>

<style>

</style>
-
步骤2:编写ajax函数

//激活
export function active(uuid) {
  return axios.get(`/user-service/user/active?uuid=${uuid}`)
}
-
步骤3:添加白名单

6.3.2 后端实现
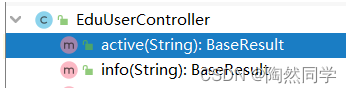
 @GetMapping("/active")
    public BaseResult active(String uuid) {
        //1 使用uuid从redis获得信息
        String username = stringRedisTemplate.opsForValue().get(uuid);
        //2 判断,如果不存在给出提示
        if(username == null) {
            return BaseResult.ok("链接不完整or不需要激活or链接已超时");
        }
        //3 通过用户名查询用户
        QueryWrapper<EduUser> queryWrapper = new QueryWrapper<>();
        queryWrapper.eq("username", username);
        EduUser eduUser = eduUserService.getOne(queryWrapper);
        if(eduUser == null) {
            return BaseResult.ok("激活账号不存在");
        }
        //4 修改用户的状态 0 --> 1
        if(! "0".equals(eduUser.getStatus()) ) {
            return BaseResult.ok("账号不需要激活");
        }
        eduUser.setStatus("1");
        eduUserService.updateById(eduUser);
        //5 删除redis信息
        stringRedisTemplate.delete(uuid);
        //6 激活成功的提示
        return BaseResult.ok("激活成功");
    }
6.4 完善用户登录
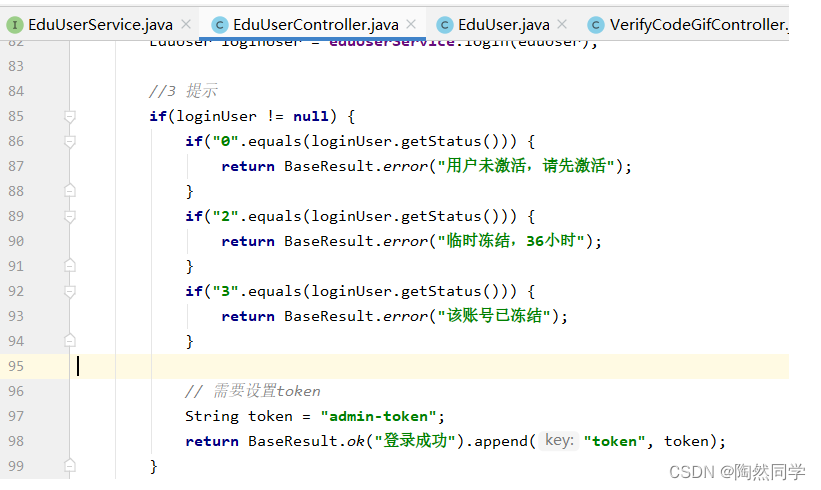
@PostMapping("/login")
    public BaseResult login(@RequestBody EduUser eduUser) {
        //1 校验验证码
        // 1.1 获得redis
        String redisName = "login_verify_code_" + eduUser.getUsername();
        String redisVerifyCode = stringRedisTemplate.opsForValue().get(redisName);
        // 1.2 删除redis
        stringRedisTemplate.delete(redisName);
        // 1.3 校验:无效
        if(redisVerifyCode == null) {
            return BaseResult.error("验证码无效");
        }
        // 1.4 校验:错误
        if(!redisVerifyCode.equalsIgnoreCase(eduUser.getVerifycode())) {
            return BaseResult.error("验证码错误");
        }

        //2 通过service用户登录
        EduUser loginUser = eduUserService.login(eduUser);

        //3 提示
        if(loginUser != null) {
            if("0".equals(loginUser.getStatus())) {
                return BaseResult.error("用户未激活,请先激活");
            }
            if("2".equals(loginUser.getStatus())) {
                return BaseResult.error("临时冻结,36小时");
            }
            if("3".equals(loginUser.getStatus())) {
                return BaseResult.error("该账号已冻结");
            }

            // 需要设置token
            String token = "admin-token";
            return BaseResult.ok("登录成功").append("token", token);
        }
        return BaseResult.error("用户名或密码不匹配");
    }

