
【畅购商城】用户注册以及整合JWT
-
- 用户注册
- 接口
- 用户注册
POST http://localhost:10010/web-service/user/register
{
"mobile":"13612345677",
"password":"1234",
"username":"jack3",
"code":"3919"
}
-
-
- 后端
-
- 保存前需要再次进行服务端校验
- 用户名是否注册
- 手机号是否注册
- 验证码是否失效
- 验证码是否错误
- 密码需要使用 BCrypt进行加密
- 步骤一:修改UserService接口,添加register方法
/**
* 用户注册
* @param user
* @return
*/
public boolean register(User user) ;
- 步骤二:完善UserServiceImpl实现类
@Override
public boolean register(User user) {
//密码加密
String newPassword = BCrypt.hashpw(user.getPassword());
user.setPassword(newPassword);
//处理数据
user.setCreatedAt(new Date());
user.setUpdatedAt(user.getCreatedAt());
int insert = baseMapper.insert(user);
return insert == 1;
}
- 步骤三:修改UserController,添加register方法
/**
* 用户注册
* @param user
* @return
*/
@PostMapping("/register")
public BaseResult register(@RequestBody User user){
//服务端校验
User findUser = userService.findByUsername(user.getUsername());
if(findUser != null) {
return BaseResult.error("用户名已经存在");
}
findUser = userService.findByMobile(user.getMobile());
if(findUser != null) {
return BaseResult.error("电话号码已经存在");
}
//验证码
String code = stringRedisTemplate.opsForValue().get("sms_register" + user.getMobile());
//删除redis中的验证码
stringRedisTemplate.delete("sms_register" + user.getMobile());
if(code == null) {
return BaseResult.error("验证码失效");
}
if(!code.equals(user.getCode())) {
return BaseResult.error("验证码不正确");
}
//注册
boolean register = userService.register(user);
if(register) {
return BaseResult.ok("注册成功");
}
return BaseResult.error("注册失败");
}
-
-
- 日期处理(可选)
-
- 编写 DateMetaObjectHandler 用于处理“创建时间”和“修改日期”
package com.czxy.changgou4.handler;
import com.baomidou.mybatisplus.core.handlers.MetaObjectHandler;
import org.apache.ibatis.reflection.MetaObject;
import org.springframework.stereotype.Component;
import java.util.Date;
/**
* @author 桐叔
* @email liangtong@itcast.cn
*/
@Component
public class DateMetaObjectHandler implements MetaObjectHandler {
@Override
public void insertFill(MetaObject metaObject) {
this.setFieldValByName("createdAt", new Date(), metaObject);
this.setFieldValByName("updatedAt", new Date(), metaObject);
}
@Override
public void updateFill(MetaObject metaObject) {
this.setFieldValByName("updatedAt", new Date(), metaObject);
}
}
- 完善User JavaBean,设置填充方式
@TableField(value="created_at",fill = FieldFill.INSERT)
private Date createdAt;
@TableField(value="updated_at",fill = FieldFill.INSERT_UPDATE)
private Date updatedAt;
-
-
- 前端
-
- 步骤一:修改 api.js ,添加注册函数
//注册
register : ( user )=> {
return axios.post('/web-service/user/register', user )
}
- 步骤二:处理表单,验证码input绑定数据,提交按钮绑定事件
<li class="checkcode">
<label for="">验证码:</label>
<input type="text" name="checkcode" v-model="user.code" />
<button :disabled="btnDisabled" @click.prevent="sendSmsFn" >
发送验证码<span v-show="btnDisabled">{{seconds}}秒</span>
</button>
<p :class="userMsg.smsData.code == 1 ? 'success' : 'error'">{{userMsg.smsData.message}} </p>
</li>
<li>
<label for=""> </label>
<input type="checkbox" class="chb" checked="checked" /> 我已阅读并同意《用户注册协议》
</li>
<li>
<label for=""> </label>
<input type="submit" value="" @click.prevent="registerFn" class="login_btn" />
</li>
- 步骤三:完善data区域的user数据
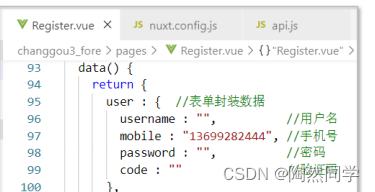
user : { //表单封装数据
username : "", //用户名
mobile : "13699282444", //手机号
password : "", //密码
code : "" //验证码
},
- 步骤四:编写registerFn函数
async registerFn() {
let { data } = await this.$request.register( this.user )
if( data.code == 20000) {
//成功
this.$router.push('/login')
} else {
//失败--与发送验证码使用一个位置显示错误信息
this.userMsg.smsData = data
}
}
-
- 整合JWT
- 整合分析
- 整合JWT
- 生成token:在用户登录成功,根据用户的登录信息,生成登录标识token,并返回给浏览器。
- 使用token:完善ajax请求,在请求之前添加请求头,设置token
- 校验token:在网关中编写过滤器,进行请求进行拦截,并校验token。
- 白名单:在白名单中的请求,是不需要token可以直接访问的。
-
- 生成Token
-
- 用户登录成功,生成token,并将token响应给浏览器。(认证服务 AuthService)
- 步骤一:查看 application.yml文件,确定 jwt配置信息
- 步骤二:创建JwtProperties文件,用于加载sc.jwt配置信息

package com.czxy.changgou4.config;
import com.czxy.changgou4.utils.RsaUtils;
import lombok.Data;
import org.slf4j.Logger;
import org.slf4j.LoggerFactory;
import org.springframework.boot.context.properties.ConfigurationProperties;
import org.springframework.stereotype.Component;
import javax.annotation.PostConstruct;
import java.io.File;
import java.security.PrivateKey;
import java.security.PublicKey;
/**
* @author 桐叔
* @email liangtong@itcast.cn
*/
@Data
@ConfigurationProperties(prefix = "sc.jwt")
@Component
public class JwtProperties {
private String secret; // 密钥
private String pubKeyPath;// 公钥
private String priKeyPath;// 私钥
private int expire;// token过期时间
private PublicKey publicKey; // 公钥
private PrivateKey privateKey; // 私钥
private static final Logger logger = LoggerFactory.getLogger(JwtProperties.class);
@PostConstruct
public void init(){
try {
File pubFile = new File(this.pubKeyPath);
File priFile = new File(this.priKeyPath);
if( !pubFile.exists() || !priFile.exists()){
RsaUtils.generateKey( this.pubKeyPath ,this.priKeyPath , this.secret);
}
this.publicKey = RsaUtils.getPublicKey( this.pubKeyPath );
this.privateKey = RsaUtils.getPrivateKey( this.priKeyPath );
} catch (Exception e) {
throw new RuntimeException(e.getMessage());
}
}
}
- 步骤三:修改AuthController,注入JwtProperties,并使用JwtUtils生成token
package com.czxy.changgou4.controller;
/**
* @author 桐叔
* @email liangtong@itcast.cn
*/
import com.czxy.changgou4.config.JwtProperties;
import com.czxy.changgou4.domain.AuthUser;
import com.czxy.changgou4.service.AuthService;
import com.czxy.changgou4.utils.JwtUtils;
import com.czxy.changgou4.vo.BaseResult;
import org.springframework.data.redis.core.StringRedisTemplate;
import org.springframework.web.bind.annotation.PostMapping;
import org.springframework.web.bind.annotation.RequestBody;
import org.springframework.web.bind.annotation.RequestMapping;
import org.springframework.web.bind.annotation.RestController;
import javax.annotation.Resource;
/**
* Created by liangtong.
*/
@RestController
@RequestMapping("/auth")
public class AuthController {
@Resource
private AuthService authService;
@Resource
private StringRedisTemplate stringRedisTemplate;
@Resource
private JwtProperties jwtProperties;
@PostMapping("/login")
public BaseResult login(@RequestBody AuthUser user){
//校验验证码--使用后删除
String redisCode = stringRedisTemplate.opsForValue().get( "login" + user.getUsername() );
stringRedisTemplate.delete( "login" + user.getUsername() );
if(redisCode == null) {
return BaseResult.error("验证码无效");
}
if(! redisCode.equalsIgnoreCase(user.getCode())) {
return BaseResult.error("验证码错误");
}
//登录
AuthUser loginUser = authService.login(user);
if(loginUser != null ) {
//生成Token
String token = JwtUtils.generateToken(loginUser, jwtProperties.getExpire(), jwtProperties.getPrivateKey());
return BaseResult.ok("登录成功").append("loginUser",loginUser).append("token", token);
} else {
return BaseResult.error("用户名或密码不匹配");
}
}
}
-
-
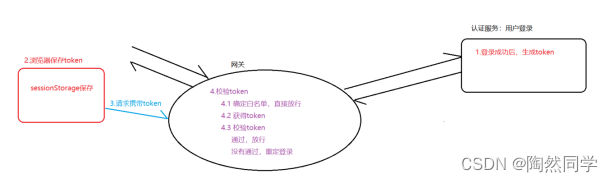
- 使用token
-
- 步骤一:登录成功后保存token,修改 Login.vue页面

async loginFn() {
let { data } = await this.$request.login( this.user )
if( data.code == 20000) {
//成功
sessionStorage.setItem('user' , JSON.stringify(data.other.loginUser) )
//保存token
sessionStorage.setItem('token' , data.other.token )
//跳转到首页
this.$router.push('/')
} else {
this.errorMsg = data.message
}
}
- 步骤二:请求是自动携带token,修改apiclient.js,将token添加到请求头

//参考 https://axios.nuxtjs.org/helpers
let token = sessionStorage.getItem('token')
if( token ) {
// Adds header: `Authorization: 123` to all requests
// this.$axios.setToken('123')
$axios.setToken( token )
}
- 步骤三:检查 nuxt.conf.js,插件模式改成“client”
- 否则抛异常“sessionStorage is not defined”
plugins: [
{ src: '~plugins/apiclient.js', mode: 'client' }
],
-
-
- 校验token
-
- token的校验在网关项目处完成
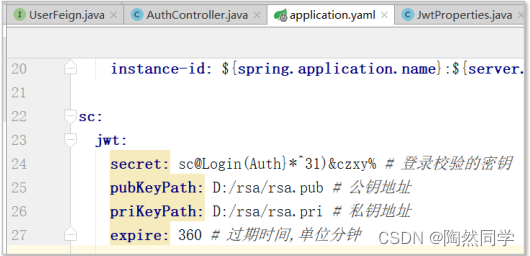
- 步骤一:修改application.yml添加jwt配置
#自定义内容
sc:
jwt:
secret: sc@Login(Auth}*^31)&czxy% # 登录校验的密钥
pubKeyPath: D:/rsa/rsa.pub # 公钥地址
priKeyPath: D:/rsa/rsa.pri # 私钥地址
expire: 360 # 过期时间,单位分钟
- 步骤二:创建 JwtProperties,用于加载配置文件
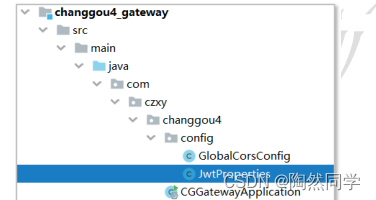
package com.czxy.changgou4.config;
import com.czxy.changgou4.utils.RsaUtils;
import lombok.Data;
import org.slf4j.Logger;
import org.slf4j.LoggerFactory;
import org.springframework.boot.context.properties.ConfigurationProperties;
import org.springframework.stereotype.Component;
import javax.annotation.PostConstruct;
import java.io.File;
import java.security.PrivateKey;
import java.security.PublicKey;
/**
* @author 桐叔
* @email liangtong@itcast.cn
*/
@Data
@ConfigurationProperties(prefix = "sc.jwt")
public class JwtProperties {
private String secret; // 密钥
private String pubKeyPath;// 公钥
private String priKeyPath;// 私钥
private int expire;// token过期时间
private PublicKey publicKey; // 公钥
private PrivateKey privateKey; // 私钥
private static final Logger logger = LoggerFactory.getLogger(JwtProperties.class);
@PostConstruct
public void init(){
try {
File pubFile = new File(this.pubKeyPath);
File priFile = new File(this.priKeyPath);
if( !pubFile.exists() || !priFile.exists()){
RsaUtils.generateKey( this.pubKeyPath ,this.priKeyPath , this.secret);
}
this.publicKey = RsaUtils.getPublicKey( this.pubKeyPath );
this.privateKey = RsaUtils.getPrivateKey( this.priKeyPath );
} catch (Exception e) {
throw new RuntimeException(e.getMessage());
}
}
}
- 步骤三:编写过滤器,对所有路径进行拦截
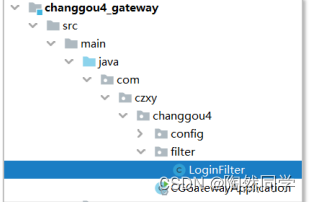
package com.czxy.changgou4.filter;
import com.czxy.changgou4.config.FilterProperties;
import com.czxy.changgou4.config.JwtProperties;
import com.czxy.changgou4.pojo.User;
import com.czxy.changgou4.utils.JwtUtils;
import com.czxy.changgou4.utils.RsaUtils;
import org.springframework.boot.context.properties.EnableConfigurationProperties;
import org.springframework.cloud.gateway.filter.GatewayFilterChain;
import org.springframework.cloud.gateway.filter.GlobalFilter;
import org.springframework.core.Ordered;
import org.springframework.core.io.buffer.DataBuffer;
import org.springframework.http.HttpStatus;
import org.springframework.http.server.reactive.ServerHttpRequest;
import org.springframework.http.server.reactive.ServerHttpResponse;
import org.springframework.stereotype.Component;
import org.springframework.web.server.ServerWebExchange;
import reactor.core.publisher.Flux;
import reactor.core.publisher.Mono;
import javax.annotation.Resource;
import java.nio.charset.StandardCharsets;
/**
* @author 桐叔
* @email liangtong@itcast.cn
*/
@Component
public class LoginFilter implements GlobalFilter, Ordered {
@Resource
private JwtProperties jwtProperties;
@Override
public Mono<Void> filter(ServerWebExchange exchange, GatewayFilterChain chain) {
//1 获得请求路径
ServerHttpRequest request = exchange.getRequest();
String path = request.getURI().getPath();
System.out.println(path);
//2 白名单放行
//3 获得token
String token = request.getHeaders().getFirst("Authorization");
//4 校验token
try {
JwtUtils.getObjectFromToken(token, RsaUtils.getPublicKey(jwtProperties.getPubKeyPath()), User.class);
return chain.filter(exchange);
} catch (Exception e) {
ServerHttpResponse response = exchange.getResponse();
response.setStatusCode(HttpStatus.UNAUTHORIZED);
response.getHeaders().add("Content-Type","application/json;charset=UTF-8");
DataBuffer wrap = response.bufferFactory().wrap("没有权限".getBytes(StandardCharsets.UTF_8));
return exchange.getResponse().writeWith(Flux.just(wrap));
}
}
@Override
public int getOrder() {
return 1;
}
}
- 步骤四:修改前端 apiclient.js 文件,用于处理401异常

//处理响应异常
$axios.onError(error => {
// token失效,服务器响应401
if(error.response.status === 401) {
console.error(error.response.data)
redirect('/login')
}
})
- api.js 完整代码
var axios = null
export default ({ $axios, redirect, process }, inject) => {
//参考 https://axios.nuxtjs.org/helpers
let token = sessionStorage.getItem('token')
if( token ) {
// Adds header: `Authorization: 123` to all requests
// this.$axios.setToken('123')
$axios.setToken( token )
}
//处理响应异常
$axios.onError(error => {
// token失效,服务器响应401
if(error.response.status === 401) {
console.error(error.response.data)
redirect('/login')
}
})
//赋值
axios = $axios
//4) 将自定义函数交于nuxt
// 使用方式1:在vue中,this.$request.xxx()
// 使用方式2:在nuxt的asyncData中,content.app.$request.xxx()
inject('request', request)
}
-
-
- 白名单
-
- 不需要拦截的资源都配置到yml文件中,在过滤器直接放行
- 步骤一:修改application.yml文件
#自定义内容
sc:
jwt:
secret: sc@Login(Auth}*^31)&czxy% # 登录校验的密钥
pubKeyPath: D:/rsa/rsa.pub # 公钥地址
priKeyPath: D:/rsa/rsa.pri # 私钥地址
expire: 360 # 过期时间,单位分钟
filter:
allowPaths:
- /checkusername
- /checkmobile
- /sms
- /register
- /login
- /verifycode
- /categorys
- /news
- /brands
- /specifications
- /search
- /goods
- /comments
- swagger
- /api-docs
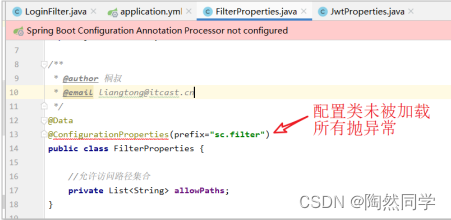
- 步骤二:创建FilterProperties配置文件,用于存放允许放行的路径
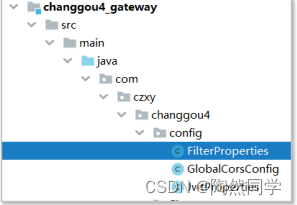
package com.czxy.changgou4.config;
import lombok.Data;
import org.springframework.boot.context.properties.ConfigurationProperties;
import java.util.List;
/**
* @author 桐叔
* @email liangtong@itcast.cn
*/
@Data
@ConfigurationProperties(prefix="sc.filter")
public class FilterProperties {
//允许访问路径集合
private List<String> allowPaths;
}
- 步骤三:修改 LoginFilter,放行名单中配置的路径
package com.czxy.changgou4.filter;
import com.czxy.changgou4.config.FilterProperties;
import com.czxy.changgou4.config.JwtProperties;
import com.czxy.changgou4.pojo.User;
import com.czxy.changgou4.utils.JwtUtils;
import com.czxy.changgou4.utils.RsaUtils;
import org.springframework.boot.context.properties.EnableConfigurationProperties;
import org.springframework.cloud.gateway.filter.GatewayFilterChain;
import org.springframework.cloud.gateway.filter.GlobalFilter;
import org.springframework.core.Ordered;
import org.springframework.core.io.buffer.DataBuffer;
import org.springframework.http.HttpStatus;
import org.springframework.http.server.reactive.ServerHttpRequest;
import org.springframework.http.server.reactive.ServerHttpResponse;
import org.springframework.stereotype.Component;
import org.springframework.web.server.ServerWebExchange;
import reactor.core.publisher.Flux;
import reactor.core.publisher.Mono;
import javax.annotation.Resource;
import java.nio.charset.StandardCharsets;
/**
* @author 桐叔
* @email liangtong@itcast.cn
*/
@Component
//2.1 加载JWT配置类
@EnableConfigurationProperties({FilterProperties.class} ) //加载配置类
public class LoginFilter implements GlobalFilter, Ordered {
@Resource
private FilterProperties filterProperties;
@Resource
private JwtProperties jwtProperties;
@Override
public Mono<Void> filter(ServerWebExchange exchange, GatewayFilterChain chain) {
//1 获得请求路径
ServerHttpRequest request = exchange.getRequest();
String path = request.getURI().getPath();
System.out.println(path);
//2 白名单放行
for (String allowPath : filterProperties.getAllowPaths()) {
//判断包含
if(path.contains(allowPath)){
return chain.filter(exchange);
}
}
//3 获得token
String token = request.getHeaders().getFirst("Authorization");
//4 校验token
try {
JwtUtils.getObjectFromToken(token, RsaUtils.getPublicKey(jwtProperties.getPubKeyPath()), User.class);
return chain.filter(exchange);
} catch (Exception e) {
ServerHttpResponse response = exchange.getResponse();
response.setStatusCode(HttpStatus.UNAUTHORIZED);
response.getHeaders().add("Content-Type","application/json;charset=UTF-8");
DataBuffer wrap = response.bufferFactory().wrap("没有权限".getBytes(StandardCharsets.UTF_8));
return exchange.getResponse().writeWith(Flux.just(wrap));
}
}
@Override
public int getOrder() {
return 1;
}
}

