Nexus 私有仓库搭建与 Maven 集成
Nexus 私有仓库搭建与 Maven 集成
|作者:RexFang
|出处:http://www.cnblogs.com/rexfang/
|关于作者:Java 程序员一枚
|版权:本文版权归作者和博客园共有,欢迎转载,但未经作者同意必须保留此段声明,且在文章页面明显位置给出原文连接。如有问题,可以邮件:fangruitao.work@foxmail.com
Maven 是日常开发过程中,都会接触到的项目管理工具。Maven 可以将开发人员从繁杂的文档管理、项目打包等工作中解放出来,把更多的精力放在业务开发上。Maven 带来的便利这里就不多说了,但是只是单单使用 Maven,有时候也会遇到依赖文件无法下载的情况,原因有很多,有可能是中央仓库的问题,也有可能是网络问题等等;与此同时,有一部分的第三方的类库是没有发布到 Maven 上的,因此并没有 Maven 相关的依赖信息,这就给我们使用 Maven 构建项目带来了一定的麻烦。例如以下的这个例子,就是经常会遇到的问题。
在最近的一个测试项目中,由于个人比较喜欢有条不紊,所以一直是使用 Maven 作为项目构建的工具,但是在构建 Hibernate 相关依赖的过程中,发现有一部分相关的 Jar 无法正常下载,中间也换过各种软件仓库,但是最后都是无法正常构建项目。
|
1
2
3
4
5
6
|
<dependency> <groupId>org.hibernate</groupId> <artifactId>hibernate-distribution</artifactId> <version>3.6.0.Beta2</version> <type>pom</type></dependency> |
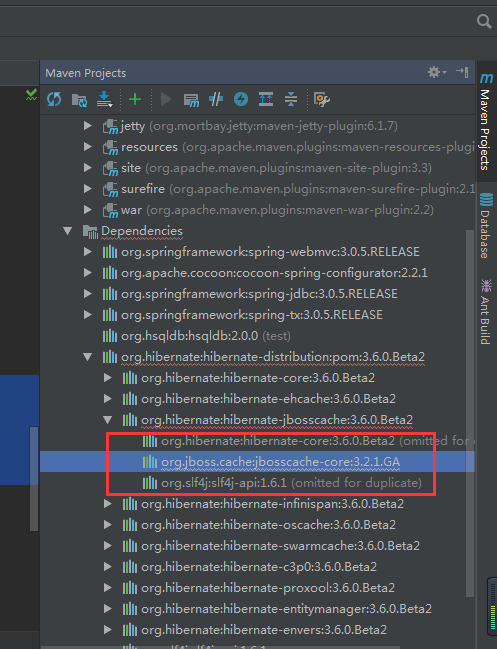
最后,实在没辙了,想起了要搭建一个私有仓库。本文主要介绍 Nexus 私有仓库的搭建过程,以及 Nexus 与 Maven 的整合。本文使用的 Nexus 版本为 Nexus Repository Manager OSS 2.14.5-02 ,之所以不使用最新的 Nexus Repository Manager OSS 3 是因为个人感觉版本3还没有版本2友好,特别是在图形管理界面的操作上。
首先需要到官网上下载 Nexus Repository Manager OSS 2.14.5-02 的安装包,下载地址为:https://www.sonatype.com/download-oss-sonatype,解压后的目录结构:

在命令行窗口,进入 \nexus-2.14.5-02-bundle\nexus-2.14.5-02\bin 目录,输入 nexus install 命令,安装 Nexus(需要等待一小段时间)。安装成功后,进入服务管理界面,找到一个名为 nexus 的服务,启动该服务,服务启动完成后,打开浏览器,输入 http://localhost:8081/nexus ,如果可以看到欢迎界面,说明 Nexus 安装成功了。
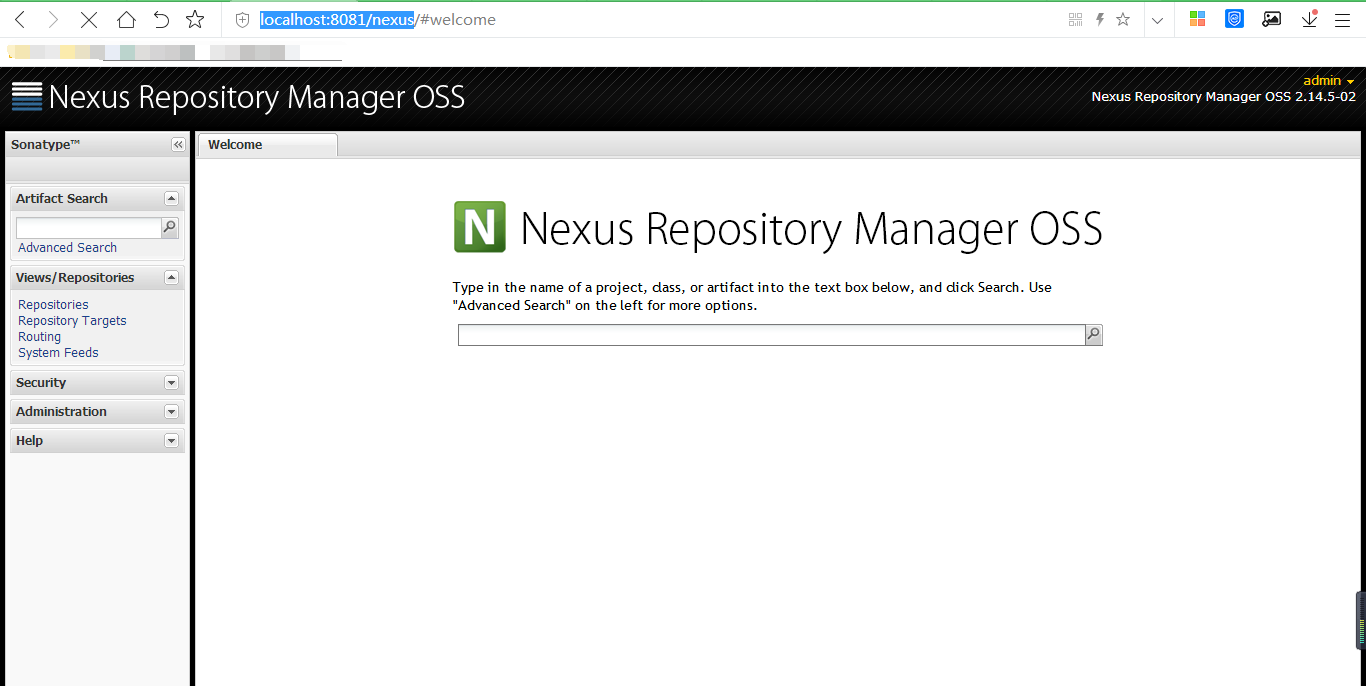
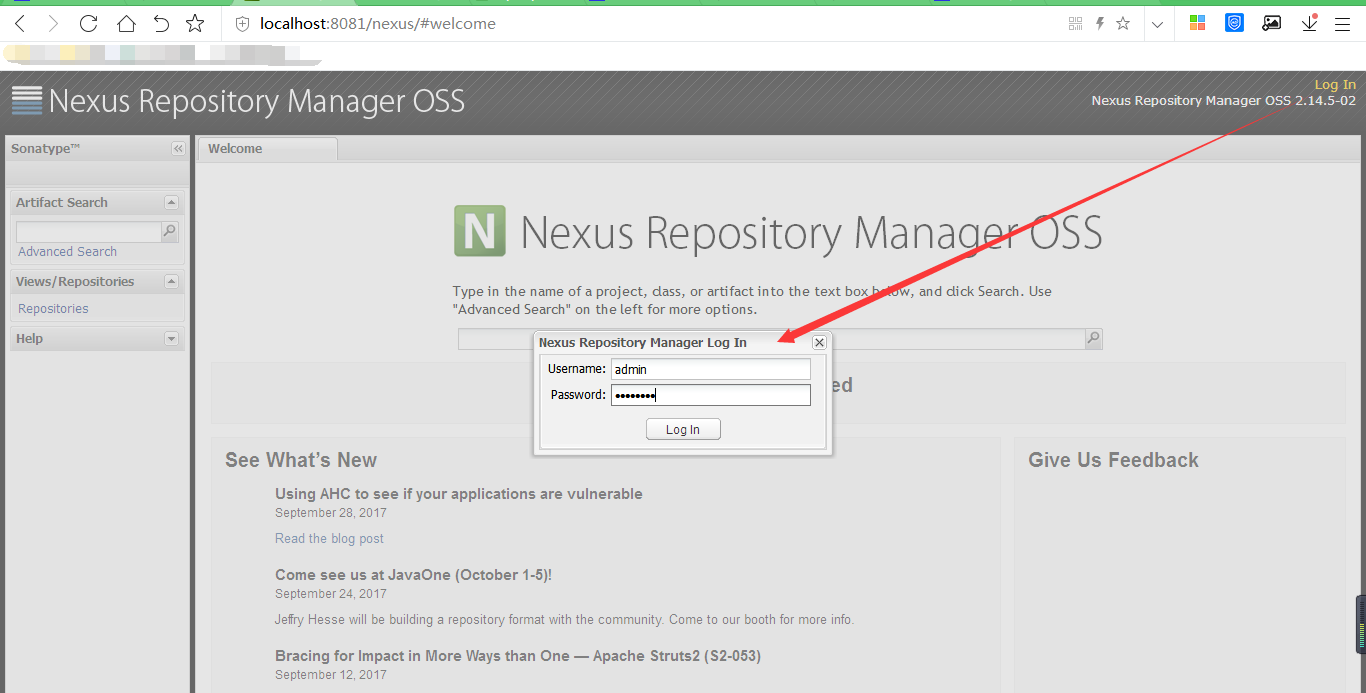
点击右上角的登录按钮,输入管理员账号和密码(默认账号:admin,密码:admin123)登录。
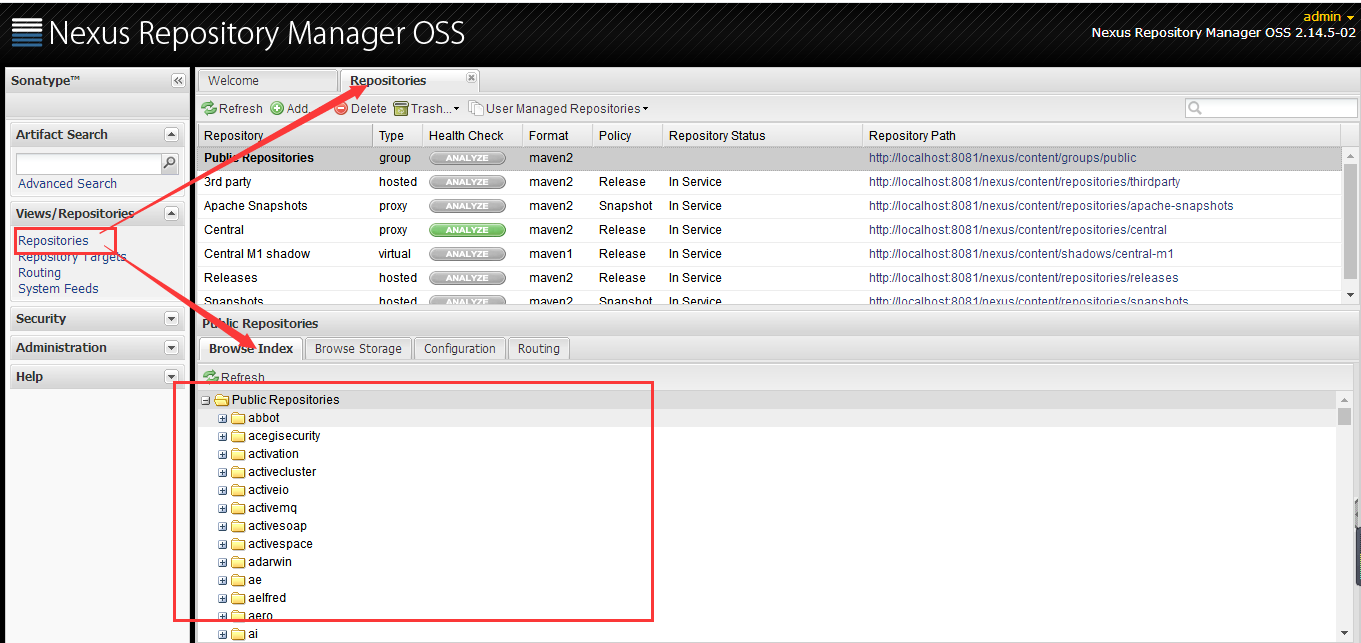
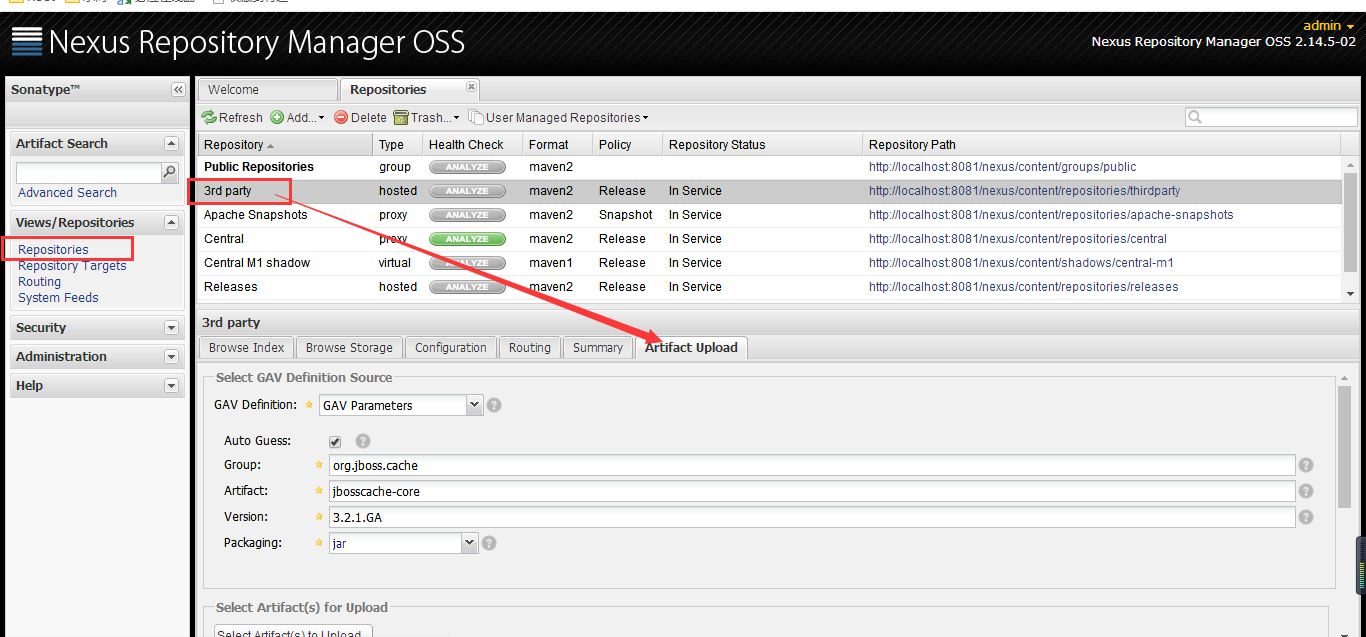
登录成功后,选择左边 Views/Repositories 菜单下的 Repositories,可以看到一些预设的仓库,我们会用到的一般只有 Public Repositories 和 3rd party , Public Repositories 为公共仓库,3rd party 为第三方仓库,可以上传第三方的 Jar (当然也可以是自己封装的 Jar)。

Nexus 安装成功后,接下来需要修改 Maven 的配置文件(settings.xml),整合 Nexus。
找到 <servers> 标签,添加 Nexus 默认认证信息:
|
1
2
3
4
5
6
7
8
9
10
|
<server> <id>my-nexus-releases</id> <username>admin</username> <password>admin123</password> </server> <server> <id>my-nexus-snapshot</id> <username>admin</username> <password>admin123</password> </server> |
找到 <mirrors> 标签,添加镜像:
|
1
2
3
4
5
6
|
<mirror> <!--This sends everything else to /public --> <id>nexus</id> <mirrorOf>*</mirrorOf> <url>http://localhost:8081/nexus/content/groups/public/</url></mirror> |
找到 <profiles> 标签,添加仓库信息:
|
1
2
3
4
5
6
7
8
9
10
11
12
13
14
15
16
17
18
19
20
21
|
<profile> <id>nexus</id> <!--Enable snapshots for the built in central repo to direct --> <!--all requests to nexus via the mirror --> <repositories> <repository> <id>central</id> <url>http://central</url> <releases><enabled>true</enabled></releases> <snapshots><enabled>true</enabled></snapshots> </repository> </repositories> <pluginRepositories> <pluginRepository> <id>central</id> <url>http://central</url> <releases><enabled>true</enabled></releases> <snapshots><enabled>true</enabled></snapshots> </pluginRepository> </pluginRepositories></profile> |
激活仓库:
|
1
2
3
4
|
<activeProfiles> <!--make the profile active all the time --> <activeProfile>nexus</activeProfile></activeProfiles> |
配置完成后保存,并重启 nexus 服务。
重启 nexus 服务 完成后,在命令行窗口进入一个使用 Maven 构建的项目,输入 mvn package clean 命令,清理完成后,登录 nexus 的 admin 账号可以看到 Public Repositories 下出现了一些 Jar 包。
此时刷新之前报错的项目,发现 Maven 依赖仍然有问题,无法正常下载 jboss 的一个 Jar 包。这个时候我们可以利用我们刚刚搭建的 Nexus 私有仓库,在网上自己下载缺失的 Jar 包,然后以第三方 Jar 的形式上传到私有仓库,依赖信息可以设置跟中央仓库一样。例如添加 jbosscache-core-3.2.1.GA.jar ,在外网上的依赖为:
|
1
2
3
4
5
|
<dependency> <groupId>org.jboss.cache</groupId> <artifactId>jbosscache-core</artifactId> <version>3.2.1.GA</version></dependency> |
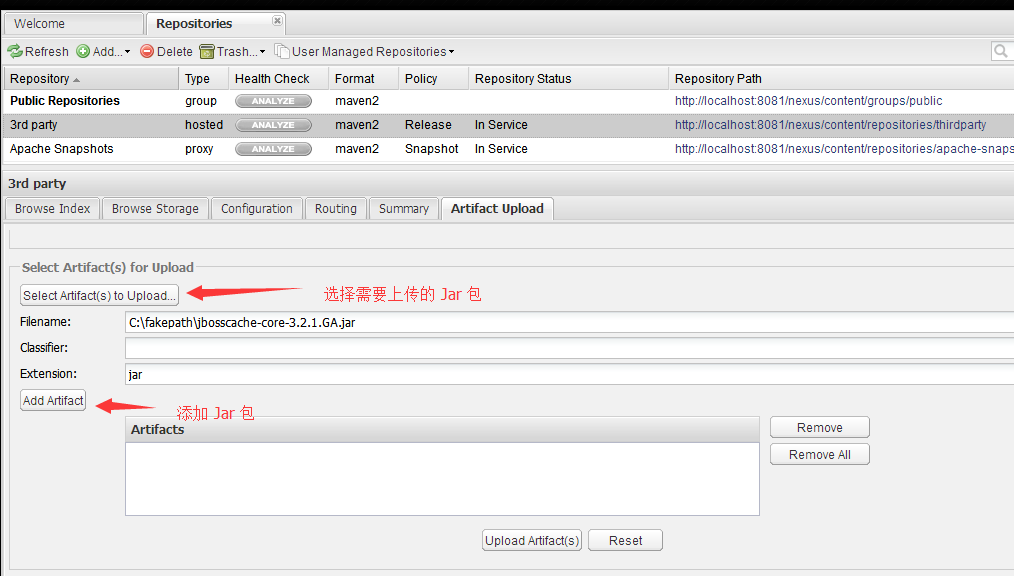
选择 3rd party,把我们自己下载的 jbosscache-core-3.2.1.GA.jar 上传到 3rd party。在 Artifact Upload 选择卡页面,点击 Select Artifact(s) to Upload 按钮,选择需要上传的 Jar 包,选择完成后点击 Add Artifact 按钮。然后设置 Jar 的 Maven 依赖信息(后续引用 Jar 包需要用到),其中 Maven 依赖的相关信息可以设置成和中央仓库一致,如下图:

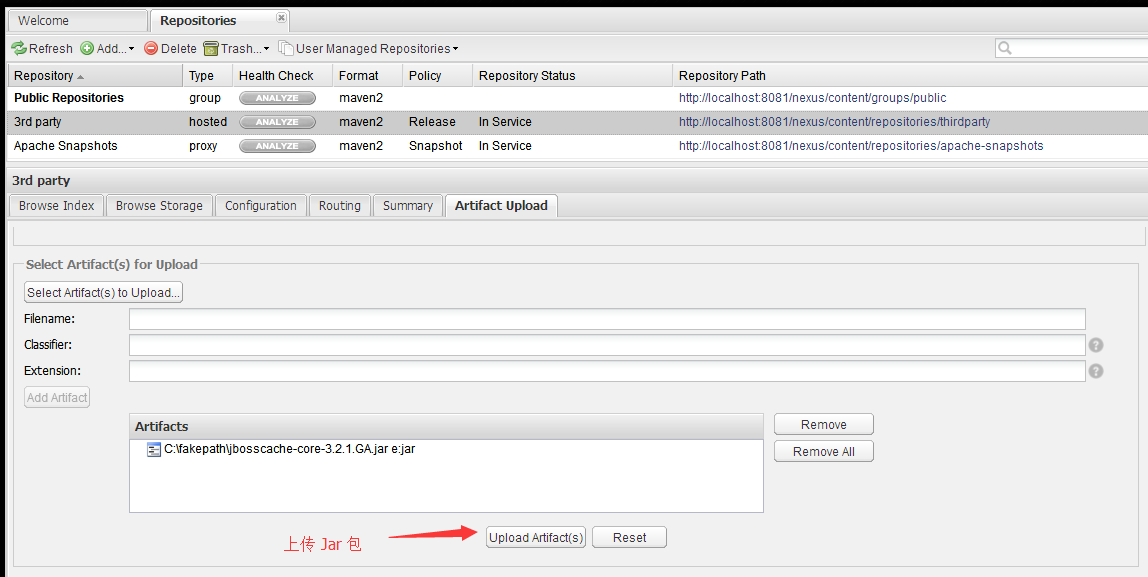
Jar 包上传成功后,切换到 Browse Index 选项卡页面,点击刷新按钮,可以看到我们刚刚上传的 Jar 包,选中 Jar 包我们可以在右边看到 Jar 包对应的 Maven 依赖信息,可以用于项目的构建。

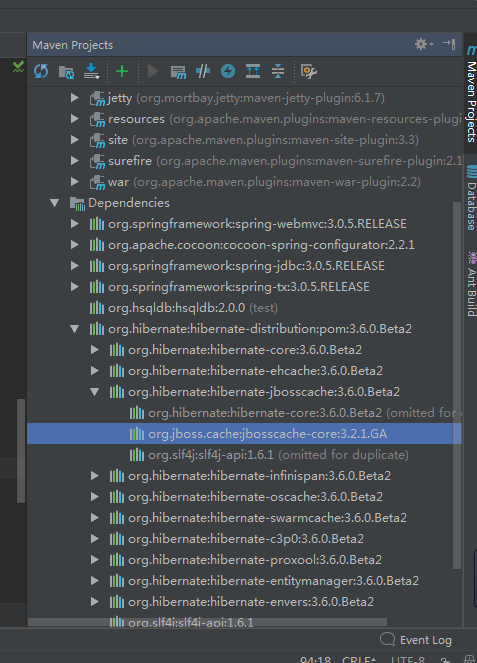
进入本地仓库删除 \.m2\org\jboss\cache\jbosscache-core\3.2.1.GA 目录下的所有文件(重要,否则会构建失败),此时,再次回到刚刚构建失败的项目,刷新 Maven,可以看到项目已经可以正常构建了。
如果本地安装了 Maven,可以在 Maven 的安装目录找到一些常用的软件仓库,位置为:${MAVEN_HOME}\lib\maven-model-builder-3.3.3.jar 下 \org\apache\maven\model\pom-4.0.0.xml ,其中 ${MAVEN_HOME} 为 Maven 的安装目录,用编辑器打开 pom-4.0.0.xml 可以看到很多预设的软件仓库。
此处,也提供一些常用的软件仓库:
http://maven.aliyun.com/nexus/content/groups/public(阿里云,推荐)
这里,也提供一些 Maven 的参考资料:


