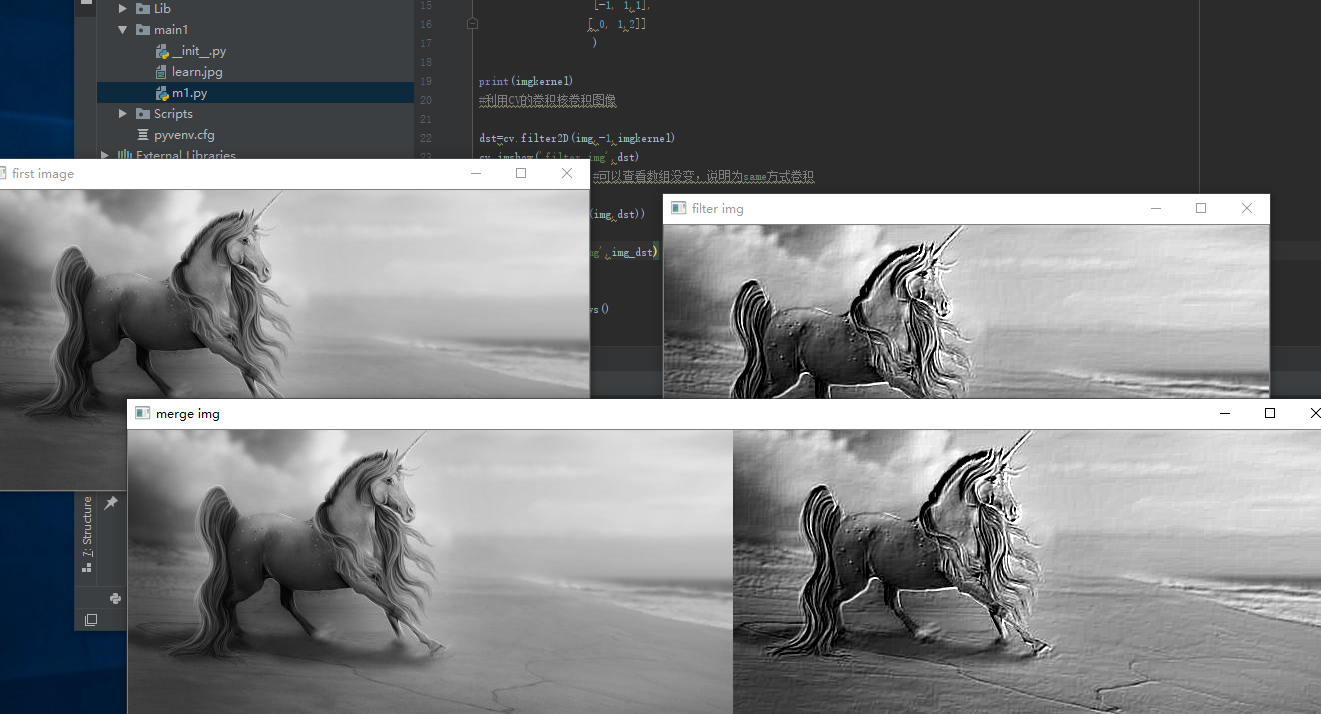
import  cv2 as cv

import numpy as np

img=cv.imread('learn.jpg',cv.IMREAD_GRAYSCALE)

cv.imshow('first image',img)
img_size=img.shape
print(img_size)

imgkernel=np.array([[-2,-1,0],
                   [-1, 1,1],
                  [ 0, 1,2]]
                   )

print(imgkernel)
#利用CV的卷积核卷积图像

dst=cv.filter2D(img,-1,imgkernel)
cv.imshow('filter img',dst)
print(dst.shape)   #可以查看数组没变,说明为same方式卷积

img_dst=np.hstack((img,dst))

cv.imshow('merge img',img_dst)

cv.waitKey()
cv.destroyAllWindows()
![]()
import  cv2 as cv

import numpy as np
img=cv.imread('learn.jpg',cv.IMREAD_GRAYSCALE)
cv.imshow('first image',img)
img_size=img.shape
print(img_size)
imgkernel=np.array([[-2,-1,0],
                   [-1, 1,1],
                  [ 0, 1,2]]
                   )
# print(imgkernel)
#利用CV的卷积核卷积图像
dst=cv.filter2D(img,-1,imgkernel)
# cv.imshow('filter img',dst)
# print(dst.shape)   #可以查看数组没变,说明为same方式卷积
img_dst=np.hstack((img,dst))
cv.imshow('merge img',img_dst)
img_cany=cv.Canny(img,100,200)
# print(img_cany)
# cv.imshow('canny image',img_cany)
img_dst_canny=np.hstack((img_cany,img_cany))
img_total=np.vstack(( img_dst,img_dst_canny))
cv.imshow('all image',img_total)
cv.waitKey()
cv.destroyAllWindows()
![]()
import  cv2 as cv
import numpy as np
img=cv.imread('learn.jpg',cv.IMREAD_GRAYSCALE)
# cv.imshow('first image',img)
# img_size=img.shape
# print(img_size)
imgkernel=np.array([[-2,-1,0],
                   [-1, 1,1],
                  [ 0, 1,2]]
                   )
# print(imgkernel)
#利用CV的卷积核卷积图像
dst=cv.filter2D(img,-1,imgkernel)
# cv.imshow('filter img',dst)
# print(dst.shape)   #可以查看数组没变,说明为same方式卷积
img_dst=np.hstack((img,dst))
# cv.imshow('merge img',img_dst)
img_cany=cv.Canny(img,100,200)
# print(img_cany)
# cv.imshow('canny image',img_cany)
img_dst_canny=np.hstack((img_cany,img_cany))
img_total=np.vstack(( img_dst,img_dst_canny))
# cv.imshow('all image',img_total)
ret,threshold=cv.threshold(img,100,200,0)
print(ret)
print(threshold)
cv.imshow('threshold',threshold)
img1=threshold-img
ret1,threshold1=cv.threshold(img1,10,200,0)
print(ret1)
cv.imshow('threshold1',threshold1)
cv.waitKey()
cv.destroyAllWindows()


 浙公网安备 33010602011771号