VUE|组件基础
1 快速体验
步聚
- 定义组件
- 导入组件
- 引用组件
语法
<template>
  模板
</template>
<script setup>
  // 逻辑
</script>
<style>
/* 样式 */
</style>
1) 定义组件
在components目录下, 创建组件文件TheCounter.vue
<template>
  <!-- 组件的模板部分 -->
  计数器:{{ count }}
  <button @click="handleClick">点击+1</button>
</template>

<script setup>
import { ref } from 'vue'

// 组件的逻辑部分
// 1. 在setup语法中定义变量, 可以直接在模板中使用
// 2. 在setup语法中定义函数, 可以直接在模板中使用
// 3. 导入的组件对象, 可以直接在模板中使用

const count = ref(0)
console.log(count)

function handleClick() {
  count.value++
}
</script>

<style>
/* 组件的样式 */
</style>
2) 导入组件
在App.vue中, 通过import语法导入组件对象
<script setup>
// 2. 导入组件对象
import TheCounter from './components/TheCounter.vue'
</script>
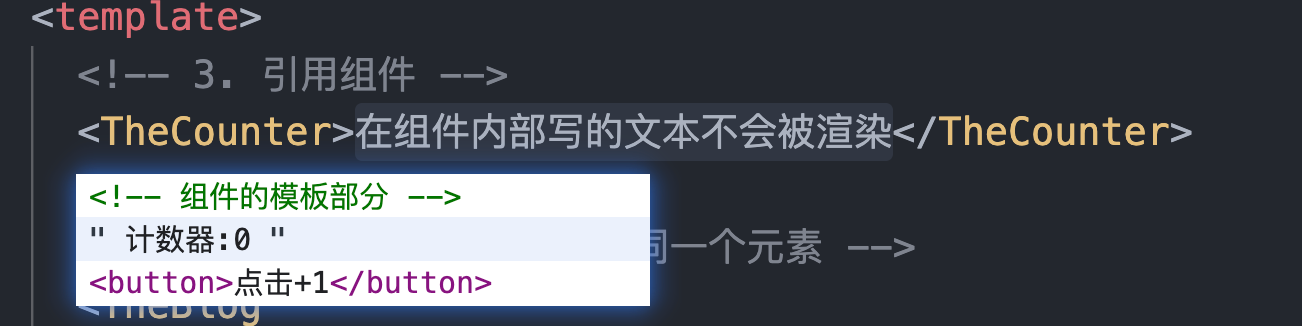
3) 引用组件
在App.vue的模板中, 通过组件名引用组件
<template>
  <!-- 3. 引用组件 -->
  <TheCounter></TheCounter>
</template>
4) 确定父子关系
在模板渲染时, 确定父子关系
2 父传子
父组件向子组件传递数据
- 在父组件中, 借助自定义属性
- 在子组件中, 通过
defineProps接受
1) 静态绑定
示例
<template>
  <!-- 3. 引用组件 -->
  <TheCounter></TheCounter>

  <!-- 给组件传递参数
    1. 在父组件的模板中, 使用自定义属性
  -->
  <TheBlog title="01-vue"></TheBlog>
  <TheBlog title="02-gis"></TheBlog>
  <TheBlog title="03-js"></TheBlog>
</template>

<script setup>
// 2. 导入组件对象
import TheCounter from './components/TheCounter.vue'
import TheBlog from './components/TheBlog.vue'
</script>
在子组件中, 通过defineProps接收
<template>
  <div>{{ title }}</div>
</template>

<script setup>
// 通过defineProps()接受
const props = defineProps({
  // 属性名: {配置对象}
  title: {
    type: String,
    required: true,
  },
})
</script>
2) 动态绑定
<template>
  <!-- 3. 引用组件 -->
  <TheCounter></TheCounter>

  <!-- 给组件传递参数
    1. 在父组件的模板中, 使用自定义属性
  -->
  <TheBlog title="01-vue"></TheBlog>
  <TheBlog title="02-gis"></TheBlog>
  <!-- 将属性值和App组件中的一个状态动态绑定 -->
  <TheBlog :title="t"></TheBlog>
</template>

<script setup>
// 2. 导入组件对象
import TheCounter from './components/TheCounter.vue'
import TheBlog from './components/TheBlog.vue'
import { ref } from 'vue'

const t = ref('03-标题')
</script>
3 子传父
子组件向父组件传递数据
- 在子组件中, 触发自定义事件
- 在父组件中, 监听自定义事件, 在回调函数中通过参数获取
1) 关闭单个组件
定义事件
// 通过defineEmits()定义自定义事件
const emits = defineEmits(['close'])
绑定按钮点击事件
<template>
  <div>
    {{ title }}
    <button @click="handleClick">关闭</button>
  </div>
</template>
function handleClick() {
  emits('close')
}
完整示例
<template>
  <div>
    {{ title }}
    <button @click="handleClick">关闭</button>
  </div>
</template>

<script setup>
// 通过defineProps()接受
const props = defineProps({
  // 属性名: {配置对象}
  title: {
    type: String,
    required: true,
  },
})
// 通过defineEmits()定义自定义事件
const emits = defineEmits(['close'])

function handleClick() {
  // 触发自定义事件
  emits('close')
}
</script>
监听自定义事件
在父组件中监听事件
<template>
  <!-- 3. 引用组件 -->
  <TheCounter></TheCounter>

  <!-- 给组件传递参数
  1. 在父组件的模板中, 使用自定义属性
  -->
  <TheBlog title="01-vue" @close="handleClose" v-if="flag"></TheBlog>
  <TheBlog title="02-gis"></TheBlog>
  <!-- 将属性值和App组件中的一个状态动态绑定 -->
  <TheBlog :title="t"></TheBlog>
</template>
<script setup>
// 2. 导入组件对象
import TheCounter from './components/TheCounter.vue'
import TheBlog from './components/TheBlog.vue'
import { ref } from 'vue'

const t = ref('03-标题')
// 通过flag状态控制显示和隐藏
const flag = ref(true)

function handleClose() {
  flag.value = false
}
</script>
完整示例
<template>
  <!-- 3. 引用组件 -->
  <TheCounter></TheCounter>

  <!-- 给组件传递参数
    1. 在父组件的模板中, 使用自定义属性
  -->
  <TheBlog title="01-vue" @close="handleClose" v-if="flag"></TheBlog>
  <TheBlog title="02-gis"></TheBlog>
  <!-- 将属性值和App组件中的一个状态动态绑定 -->
  <TheBlog :title="t"></TheBlog>
</template>

<script setup>
// 2. 导入组件对象
import TheCounter from './components/TheCounter.vue'
import TheBlog from './components/TheBlog.vue'
import { ref } from 'vue'

const t = ref('03-标题')
const flag = ref(true)

function handleClose() {
  flag.value = false
}
</script>
2) 根据id关闭指定组件
示例
<template>
  <div>
    {{ title }}
    <button @click="handleClick">关闭</button>
  </div>
</template>

<script setup>
// 通过defineProps()接受
const props = defineProps({
  // 属性名: {配置对象}
  title: {
    type: String,
    required: true,
  },
  id: {
    type: Number,
    required: true,
  },
})
// 通过defineEmits()定义自定义事件
const emits = defineEmits(['close'])

function handleClick() {
  emits('close', props.id)
}
</script>
<template>
  <!-- 3. 引用组件 -->
  <TheCounter></TheCounter>

  <!-- v-if和v-for不能应用于同一个元素 -->
  <TheBlog
    v-for="blog in showBlogs"
    :key="blog.id"
    :title="blog.title"
    :id="blog.id"
    @close="handleClose"
  ></TheBlog>
</template>

<script setup>
// 2. 导入组件对象
import TheCounter from './components/TheCounter.vue'
import TheBlog from './components/TheBlog.vue'
import { ref, computed } from 'vue'

// 定义数据
const blogs = ref([
  { id: 1, title: '01-vue', isShow: true },
  { id: 2, title: '02-gis', isShow: true },
  { id: 3, title: '03-mapbox', isShow: true },
])

// 定义计算属性
const showBlogs = computed(() => {
  return blogs.value.filter((item) => item.isShow)
})
function handleClose(id) {
  console.log(id)
  // 根据id查找
  const blog = blogs.value.find((item) => item.id == id)

  blog.isShow = false
}
</script>
4 provide和inject
属性组件间通信, 传递数组的一种方式
- provide: 提供. 数据由祖先组件提供
- inject: 注入. 由后代组件获取数据
多应用于处理全局变量
示例
在app应用实例上挂载
const app = createApp(App)
// 通过app定义全局的对象: $map
app.provide('$map', { map: 'world' })
在app对应的子组件中, 可以直接引用
import { inject } from 'vue'

const map = inject('$map')
console.log(map)
5 插槽
1) 为什么需要插槽
组件的执行过程
编译组件的模板, 替换组件的引用
要组件内部写的内容不会被渲染出来.
但是, 很多时候需要扩展组件的功能
- 在组件中预留一个
slot插槽 - 在组件渲染时, 将内容
插入到slot中
2) 常用的插槽
普通插槽
在子组件定时时, 预留插槽
<template>
  <!-- 预留一个slot插槽 -->
  <slot></slot>
</template>

<script setup></script>

<style scoped></style>
在渲染子组件时, 会使用组件内部的内容替换掉slot部分
<TheComputer>
  <div>
    <h3>名称: MacBookPro</h3>
    <p>型号: MBP 14 M1</p>
  </div>
</TheComputer>
普通插槽
在定义slot插槽时, 设置name属性
<template>
  <!-- 预留一个slot普通插槽(默认插槽) -->
  <slot></slot>
  <!--  具名插槽 -->
  <slot name="cpu"></slot>
  <slot name="memery"></slot>
</template>

<script setup></script>

<style scoped></style>
在渲染时, 通过v-slot指令指定插槽的名称
<TheComputer>
  <template v-slot:cpu>
    <!-- 这里的内容插入到名字叫cpu的插槽中 -->
    CPU: M1 Pro
  </template>
  <template v-slot:memery> Memery: 16G </template>
</TheComputer
