angular 英雄之旅
安装
1 先安装 node.js
2 安装淘宝cnpm
第一种:
直接安装cnpm 安装淘宝提供的cnpm,并更改服务器地址为淘宝的国内地址, 命令:npm install -g cnpm --registry=https://registry.npm.taobao.org,以后安装直接采用cpm替代npm, 例如原生npm命令为:npm install uniq --save,cnpm命令为:cnpm install uniq --save
第二种:
替换npm仓库地址为淘宝镜像地址(推荐) 命令:npm config set registry https://registry.npm.taobao.org, 查看是否更改成功:npm config get registry,以后安装时,依然用npm命令,但是实际是从淘宝国内服务器下载的
3 安装typescript
npm install -g typescript
3.1 安装VScode调试工具code runner和运行环境ts-node
npm install -g ts-node
4 安装 Angular CLI
Angular CLI 的主版本会跟随它所支持的 Angular 主版本,不过其小版本可能会独立发布。
使用npm包管理器来安装 CLI:
npm install -g @angular/cli
不要用 cnpm,被坑了
报错
setTimeout is not defined
编译
tsc index.ts
创建Angular
ng new angularApp --skip-install
E:\我的学习\1.Web前端\Angular\angularDemo>ng new angularApp
? Would you like to add Angular routing? No
? Which stylesheet format would you like to use? css
再使用
cnpm installcd E:\我的学习\1.Web前端\Angular\angularDemo\angularApp\ ... E:\我的学习\1.Web前端\Angular\angularDemo\angularApp>cnpm install
启动应用服务器
进入工作区目录,并启动这个应用。
content_copycd angular-tour-of-heroes ng serve --open
ng serve?命令会构建本应用、启动开发服务器、监听源文件,并且当那些文件发生变化时重新构建本应用。
--open?标志会打开浏览器,并访问?http://localhost:4200/。
你会发现本应用正运行在浏览器中。
npm启动
..\angular-tour-of-heroes\package.json
npm start
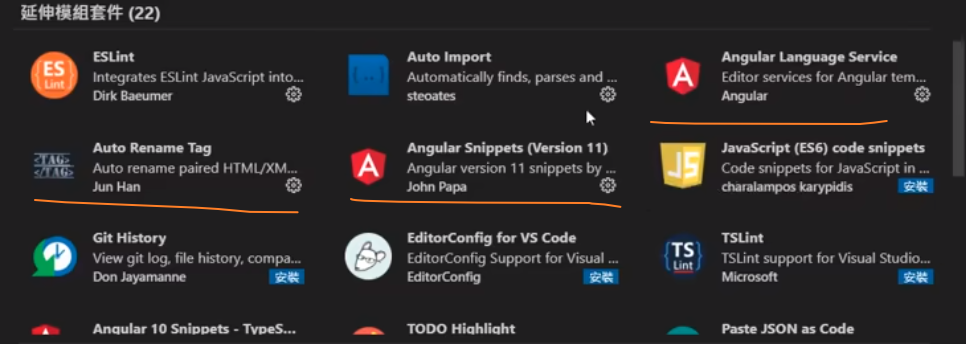
必备扩展
教程:英雄之旅
1 英雄编辑器
创建组件
使用 Angular CLI 创建一个名为 heroes 的新组件
ng generate component heroes

//简写:ng g c heroes
结果
\angular-tour-of-heroes\src\app>ng g c heroes
CREATE src/app/heroes/heroes.component.html (21 bytes)
CREATE src/app/heroes/heroes.component.spec.ts (599 bytes)
CREATE src/app/heroes/heroes.component.ts (202 bytes)
CREATE src/app/heroes/heroes.component.css (0 bytes)
UPDATE src/app/app.module.ts (449 bytes)
大小写
uppercase 和 lowercase
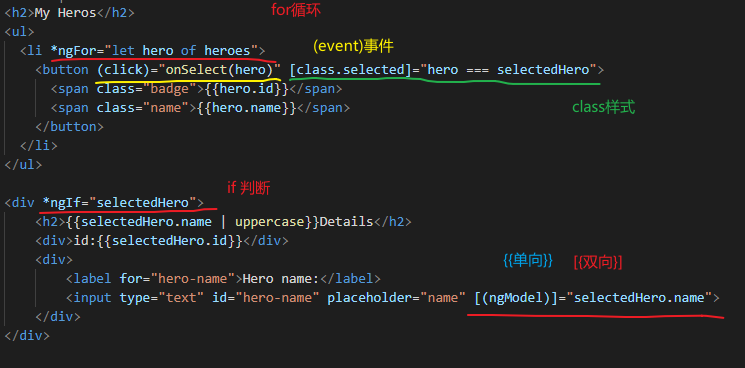
<h2>{{hero.name | uppercase}} Details</h2>
双向绑定
[(ngModel)] 是 Angular 的双向数据绑定语法。
ngModel: 根据领域对象创建一个?FormControl?实例,并把它绑定到一个表单控件元素上。
<input id="name" [(ngModel)]="hero.name" placeholder="name" type="text">
缺少 FormsModule
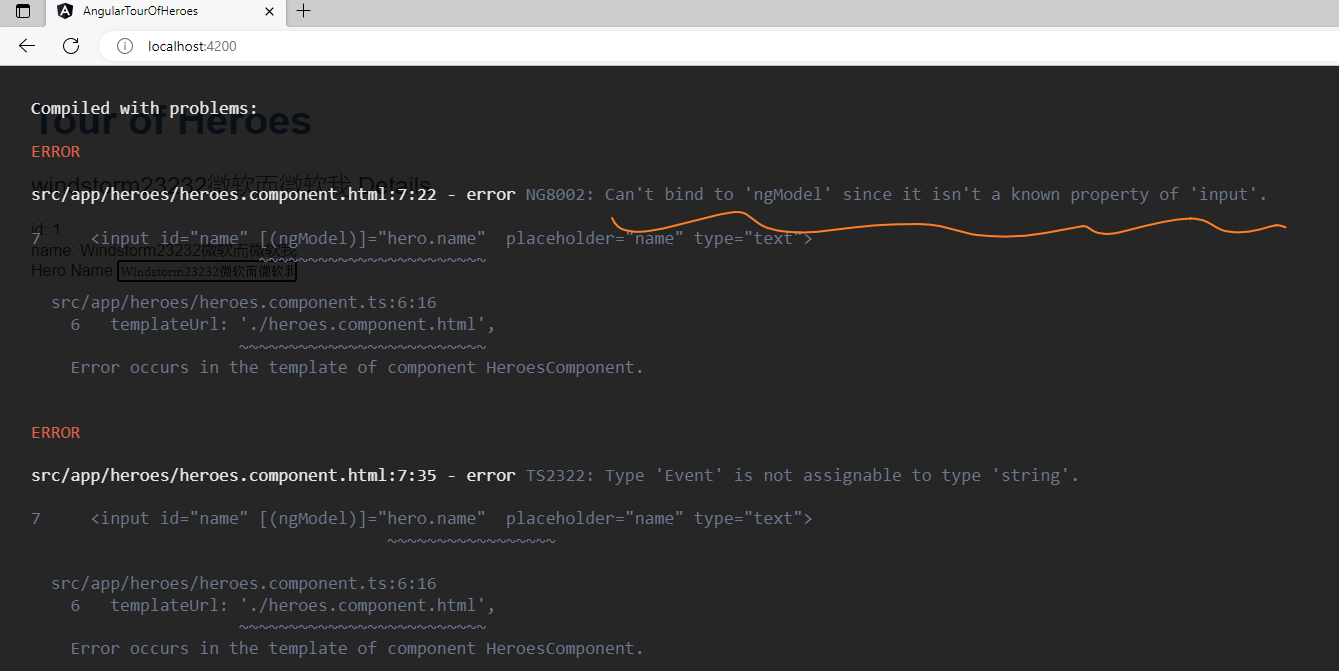
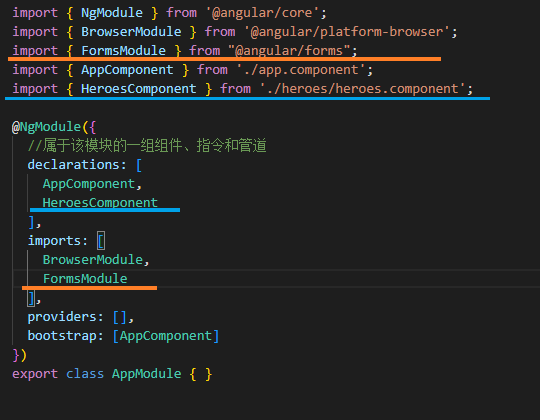
导入 FormsModule
打开 AppModule (app.module.ts) 并从 @angular/forms 库中导入 FormsModule 符号。
直接在 imports 打 FormsModule, 上面就会自动引用
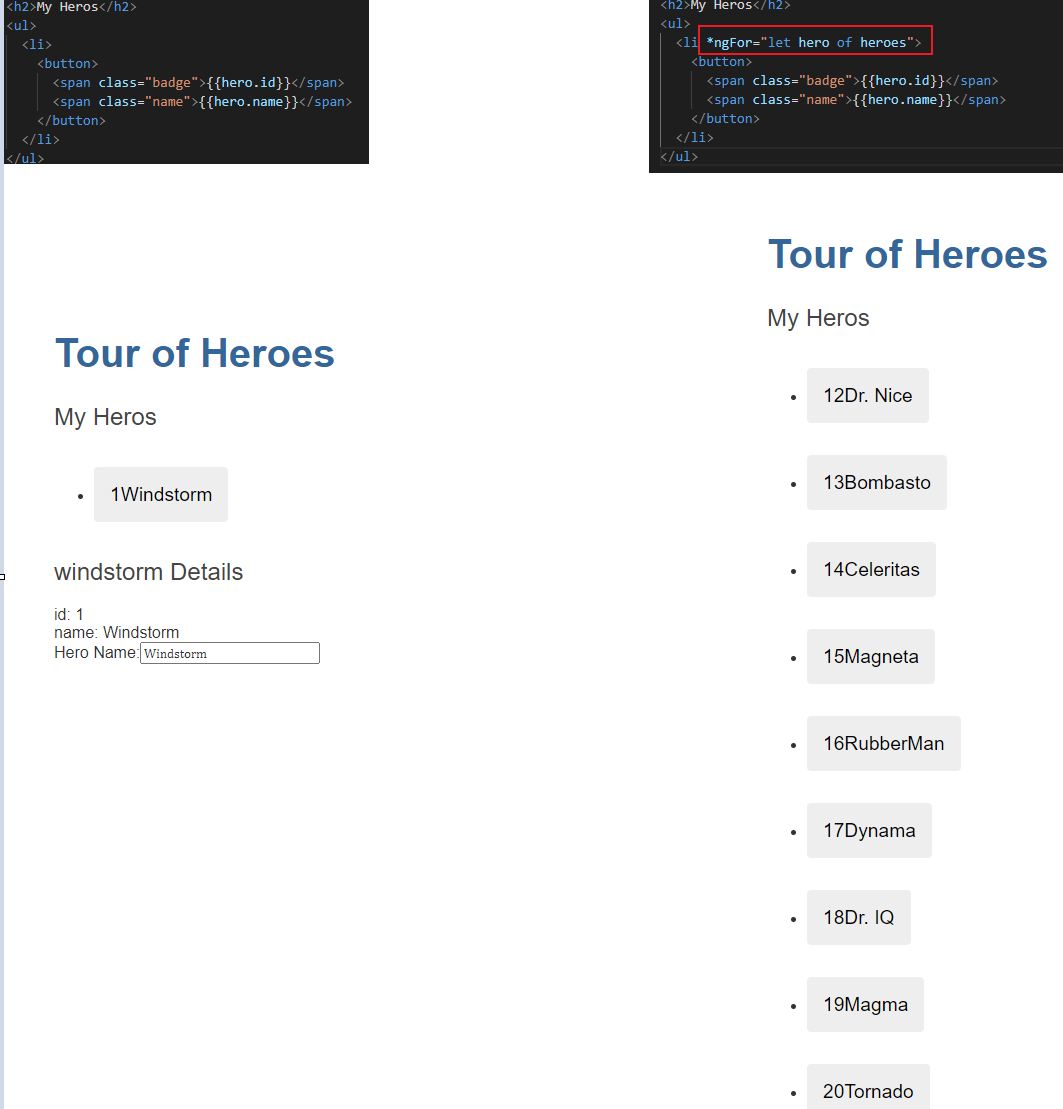
2 显示列表
在 src/app/ 文件夹中创建一个名叫 mock-heroes.ts 的文件
import { Hero } from './hero';

export const HEROES: Hero[] = [
  { id: 12, name: 'Dr. Nice' },
  { id: 13, name: 'Bombasto' },
  { id: 14, name: 'Celeritas' },
  { id: 15, name: 'Magneta' },
  { id: 16, name: 'RubberMan' },
  { id: 17, name: 'Dynama' },
  { id: 18, name: 'Dr. IQ' },
  { id: 19, name: 'Magma' },
  { id: 20, name: 'Tornado' }
];
*ngFor 是一个 Angular 的复写器(repeater)指令
| 语法 | 详情 |
|---|---|
<li> |
宿主元素。 |
heroes |
来自 HeroesComponent 类的存放模拟(mock)英雄的列表。 |
hero |
保存列表每次迭代的当前 hero 对象。 |
添加 click 事件绑定
事件监听器
可以声明事件监听器来监听并响应用户的操作,比如按键、鼠标移动、单击和触摸等。你可以通过在圆括号中指定事件名称来声明一个事件监听器:
<li *ngFor="let hero of heroes">
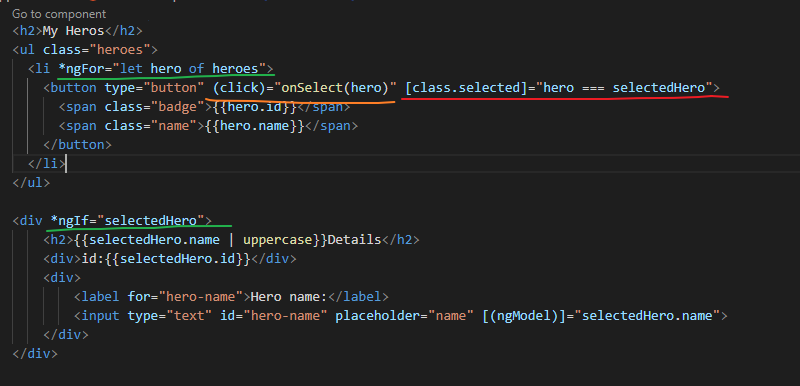
<button type="button" (click)="onSelect(hero)">
<!-- ... -->
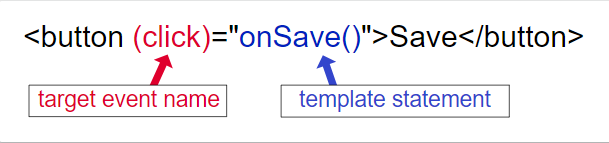
click 外面的圆括号会让 Angular 监听这个 <button> 元素的 click 事件。 当用户点击 <button> 时,Angular 就会执行表达式 onSelect(hero)。
if 绑定
<div *ngIf="selectedHero">
class 绑定
[class.selected]="hero === selectedHero"
结果:
HTML
TS
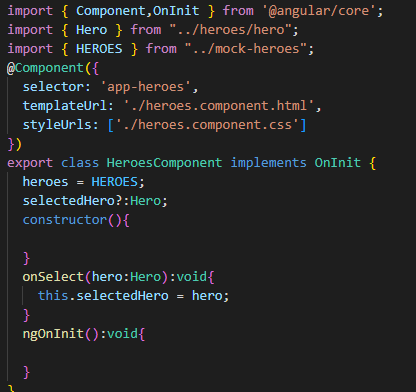
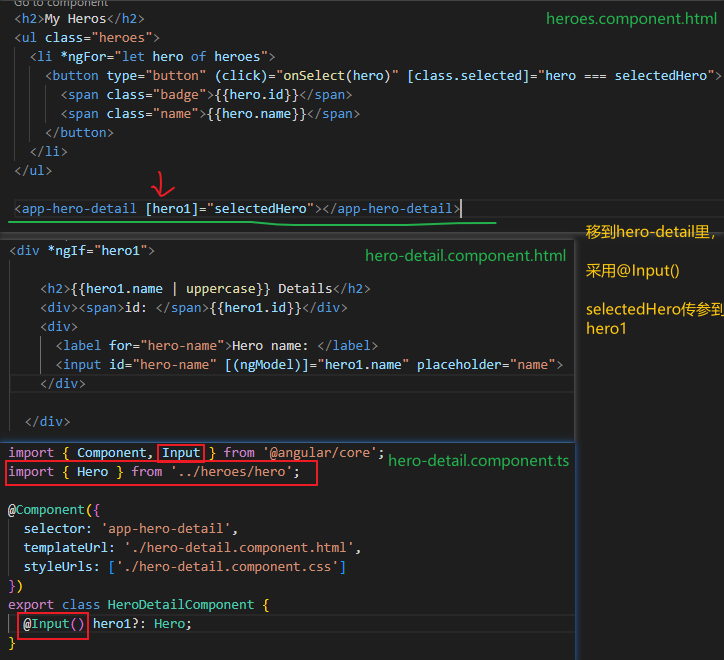
3 创建特性组件
主从组件
此刻,HeroesComponent 同时显示了英雄列表和所选英雄的详情。
把所有特性都放在同一个组件中,将会使应用“长大”后变得不可维护。你要把大型组件拆分成小一点的子组件,每个子组件都要集中精力处理某个特定的任务或工作流。
本页面中,你将迈出第一步 —— 把英雄详情移入一个独立的、可复用的 HeroDetailComponent。
HeroesComponent 将仅仅用来表示英雄列表。HeroDetailComponent 将用来表示所选英雄的详情

 浙公网安备 33010602011771号