Eclipse创建一个简单的Spring Boot项目
1.准备好apache-maven-3.6.3-bin.zip,下载地址为https://maven.apache.org/download.cgi,并将其解压了
2.在Eclipse中配置maven,将刚刚解压的路径加进来
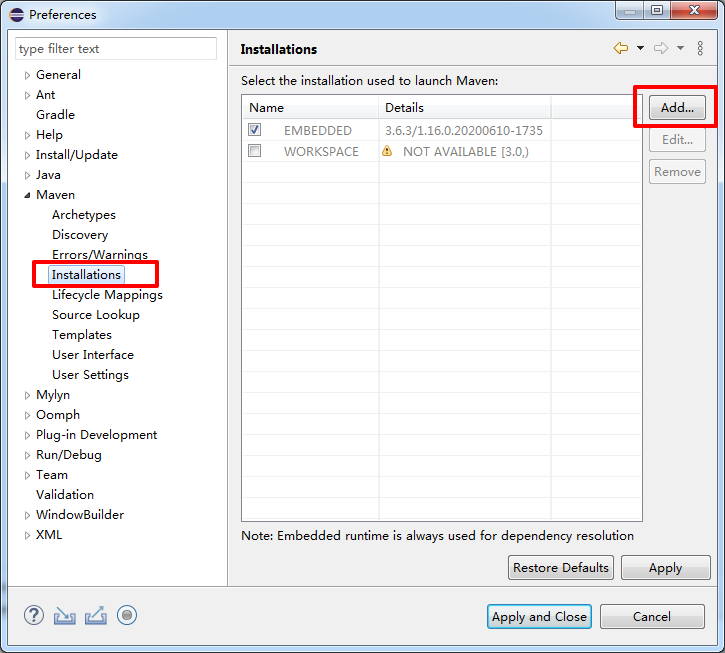
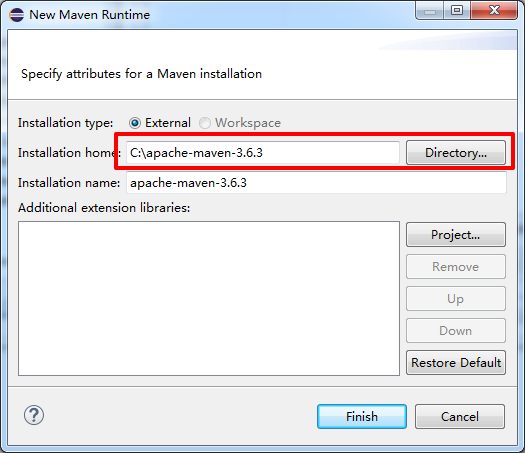
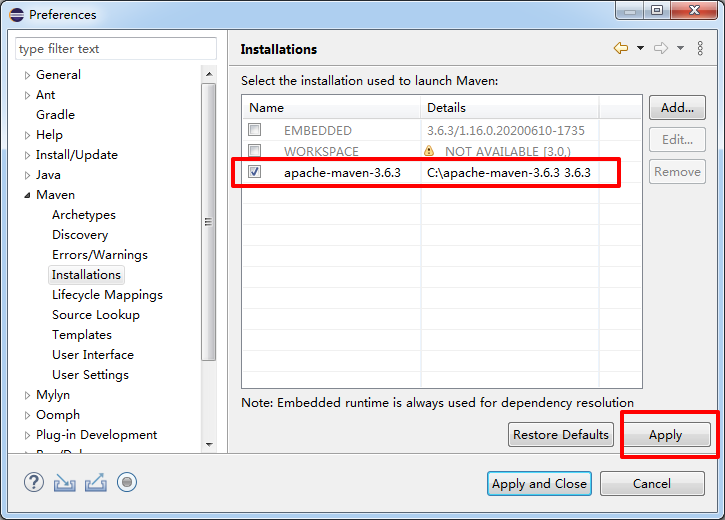
3.配置meven的settings.xml,并点击open file,编辑xml文件,
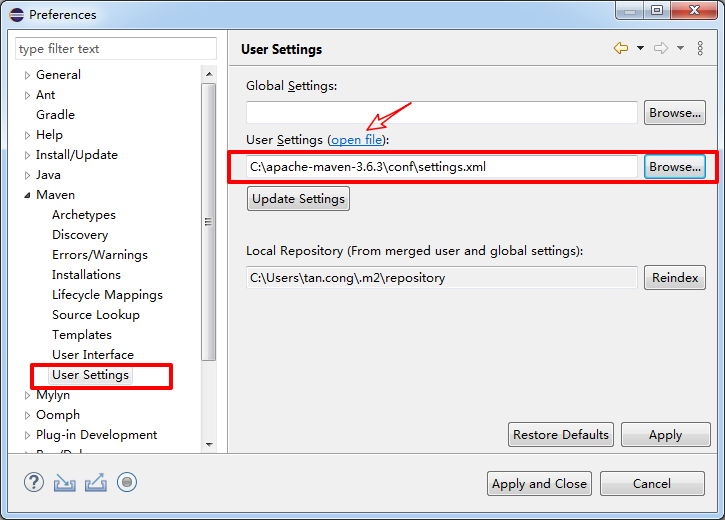
4.在settings.xml中配置仓库地址,镜像仓库,jdk版本
<!--仓库地址-->
<localRepository>E:/eclipse-2020-06Workspace/maven-repository</localRepository>
<!--镜像仓库-->
<mirror>
      <id>repo1</id>
      <mirrorOf>central</mirrorOf>
      <name>Human Readable Name for this Mirror.</name>
      <url>https://repo1.maven.org/maven2/</url>
</mirror>
<!--jdk版本-->
<profile>
    <id>jdk-1.8</id>

    <activation>
        <activeByDefault>true</activeByDefault>
        <jdk>1.8</jdk>
    </activation>

    <properties>
        <maven.compiler.source>1.8</maven.compiler.source>
        <maven.compiler.target>1.8</maven.compiler.target>
        <maven.compiler.compilerVersion>1.8<maven.compiler.compilerVersion>
</properties> </profile>
5.新建Maven项目
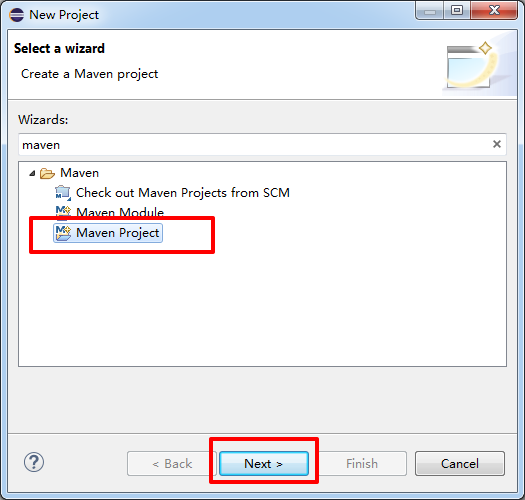
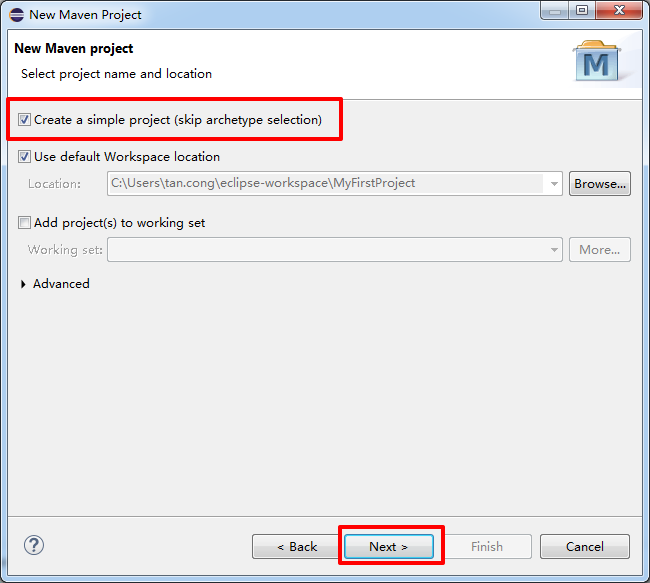
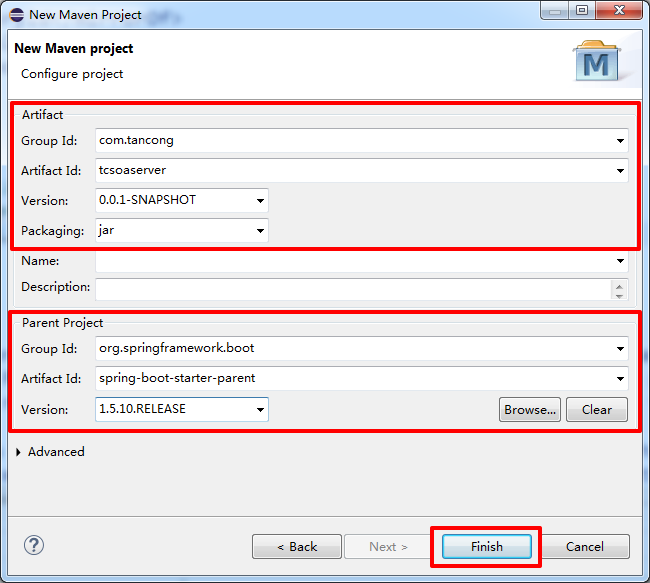
6.项目新建完成之后,等待其自动下载需要的jar包,下载完成之后,在pom.xml中添加启动依赖项
<dependencies>
    <dependency>
        <groupId>org.springframework.boot</groupId>
        <artifactId>spring-boot-starter-web</artifactId>
    </dependency>
</dependencies>
7.建立代码,结构及代码如下
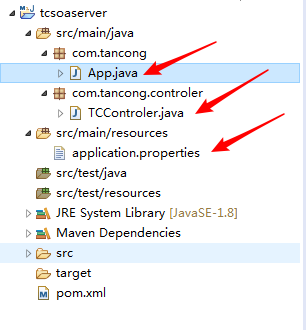
1) App.java
package com.tancong;

import org.springframework.boot.SpringApplication;
import org.springframework.boot.autoconfigure.SpringBootApplication;

@SpringBootApplication
public class App {
    public static void main(String[] args) {
        SpringApplication.run(App.class, args);
    }
}
2) TCControler.java
package com.tancong.controler;

import java.util.HashMap;
import java.util.Map;

import org.springframework.stereotype.Controller;
import org.springframework.web.bind.annotation.RequestMapping;
import org.springframework.web.bind.annotation.ResponseBody;

@Controller
@RequestMapping("/nj")
public class TCControler {

    @RequestMapping("/hello")
    @ResponseBody
    public Map<String, Object> showHelloWorld(){

        Map<String, Object> map = new HashMap<>();
        map.put("msg", "2020-09-30");
        return map;

    }
}
3)application.properties
server.port=8571
8.运行App.java代码,用浏览器访问url地址http://localhost:8571/nj/hello,可以看到浏览器正确返回了信息。


