CentOS7安装nginx和热部署
1 初识 nginx
nginx 是一个开源的,支持高性能,高并发的www服务和代理服务软件。它是由俄罗斯人 Igor Sysoev 开发,最初被应用在俄罗斯的大型网站 www.rambler.ru 上,后来作者将源代码以类BSD许可证的形式开源出来。
nginx 的主要应用场景
- 静态资源服务:通过本地文件系统提供服务
- 反向代理服务:缓存和负载均衡
- API服务:Opensty
2 安装 nginx
nginx 的安装有两种方式:
- 通过系统自带的包管理工具,比如
yum、apt-get等 - 通过源码包进行编译安装
一般建议使用编译安装,因为 nginx 会把模块编译进 nginx 的可执行二进制文件,用包管理工具安装的 nginx 在安装扩展模块时麻烦,而编译安装的 nginx 可以很方便地进行扩展模块的安装。
下面开始编译安装nginx:
环境说明
[root@web01 ~]# cat /etc/redhat-release
CentOS Linux release 7.9.2009 (Core)

[root@web01 ~]# uname -a
Linux web01 3.10.0-1160.el7.x86_64 #1 SMP Mon Oct 19 16:18:59 UTC 2020 x86_64 x86_64 x86_64 GNU/Linux

[root@web01 ~]# hostname -I
192.168.83.35
编译安装 nginx
首先先到 nginx官网 下载nginx,这里我选择下载官方最新稳定版(2022-6-29),nginx-1.22.0 版本。
# 下载 nginx 源码包
[root@web01 ~]# wget http://nginx.org/download/nginx-1.22.0.tar.gz

# 安装依赖包
[root@web01 ~]# yum -y install gcc pcre pcre-devel zlib zlib-devel openssl openssl-devel

# 解压
[root@web01 ~]# tar -zxvf nginx-1.22.0.tar.gz

# 进入解压目录
[root@web01 ~]# cd nginx-1.22.0/

# 目录结构如下
[root@web01 nginx-1.22.0]# ll
total 800
drwxr-xr-x 6 1001 1001    326 Jun 29 22:21 auto
-rw-r--r-- 1 1001 1001 317070 May 24 07:59 CHANGES		# 版本变更信息
-rw-r--r-- 1 1001 1001 484445 May 24 07:59 CHANGES.ru	# 俄罗斯版的版本变更信息
drwxr-xr-x 2 1001 1001    168 Jun 29 22:21 conf			# 示例文件,编译安装完成会将示例文件拷贝到安装目录
-rwxr-xr-x 1 1001 1001   2590 May 24 07:59 configure	# 用来生成中间文件,执行编译前的必备动作
drwxr-xr-x 4 1001 1001     72 Jun 29 22:21 contrib		# 提供了pl脚本和vim工具,可以配置vim编辑nignx配置文件时语法高亮
drwxr-xr-x 2 1001 1001     40 Jun 29 22:21 html
-rw-r--r-- 1 1001 1001   1397 May 24 07:59 LICENSE
drwxr-xr-x 2 1001 1001     21 Jun 29 22:21 man
-rw-r--r-- 1 1001 1001     49 May 24 07:59 README
drwxr-xr-x 9 1001 1001     91 Jun 29 22:21 src


# 编译安装
$ ./configure --prefix=/usr/local/nginx --with-http_ssl_module --with-http_stub_status_module --with-http_realip_module --with-threads

$ make && make install

# 安装完成之后,nginx安装的目录都可以在这里找到
  ......
  nginx path prefix: "/usr/local/nginx"
  nginx binary file: "/usr/local/nginx/sbin/nginx"
  nginx modules path: "/usr/local/nginx/modules"
  nginx configuration prefix: "/usr/local/nginx/conf"
  nginx configuration file: "/usr/local/nginx/conf/nginx.conf"
  nginx pid file: "/usr/local/nginx/logs/nginx.pid"
  nginx error log file: "/usr/local/nginx/logs/error.log"
  nginx http access log file: "/usr/local/nginx/logs/access.log"
  nginx http client request body temporary files: "client_body_temp"
  nginx http proxy temporary files: "proxy_temp"
  nginx http fastcgi temporary files: "fastcgi_temp"
  nginx http uwsgi temporary files: "uwsgi_temp"
  nginx http scgi temporary files: "scgi_temp"
添加 nginx 环境变量
# 创建文件
$ cat <<'EOF'> /etc/profile.d/nginx.sh
export PATH="/usr/local/nginx/sbin:$PATH"
EOF

# 重新加载环境变量
$ source /etc/profile

# 检查是否生效
$ nginx -t
nginx: the configuration file /usr/local/nginx/conf/nginx.conf syntax is ok
nginx: configuration file /usr/local/nginx/conf/nginx.conf test is successful
systemd 管理 nginx
# 创建 nginx 的服务配置文件
[root@web01 ~]#  cat << \EOF > /usr/lib/systemd/system/nginx.service
[Unit]
Description=nginx - high performance web server
Documentation=http://nginx.org/en/docs/
After=network-online.target remote-fs.target nss-lookup.target
Wants=network-online.target

[Service]
Type=forking
PIDFile=/usr/local/nginx/logs/nginx.pid
ExecStart=/usr/local/nginx/sbin/nginx -c /usr/local/nginx/conf/nginx.conf
ExecReload=/bin/kill -s HUP $MAINPID
ExecStop=/bin/kill -s TERM $MAINPID

[Install]
WantedBy=multi-user.target
EOF

# 重载配置文件
[root@web01 ~]# systemctl daemon-reload

# 启动nginx
[root@web01 ~]# systemctl start nginx

# 检查端口
[root@web01 ~]# netstat -lntp | grep nginx
tcp        0      0 0.0.0.0:80              0.0.0.0:*               LISTEN      4358/nginx: master
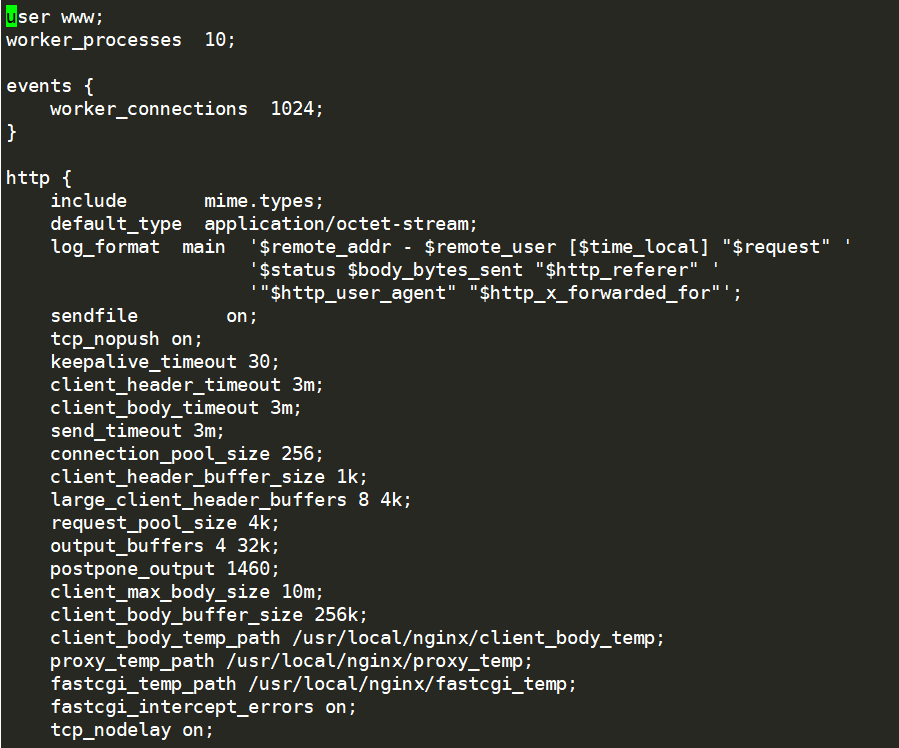
vim工具编辑nginx配置文件语法高亮
没有配置前,xshell 连接虚拟机,然后使用 vim nginx.conf 显示的效果:
ps:实际效果还与 xshell 的配色方案有关系

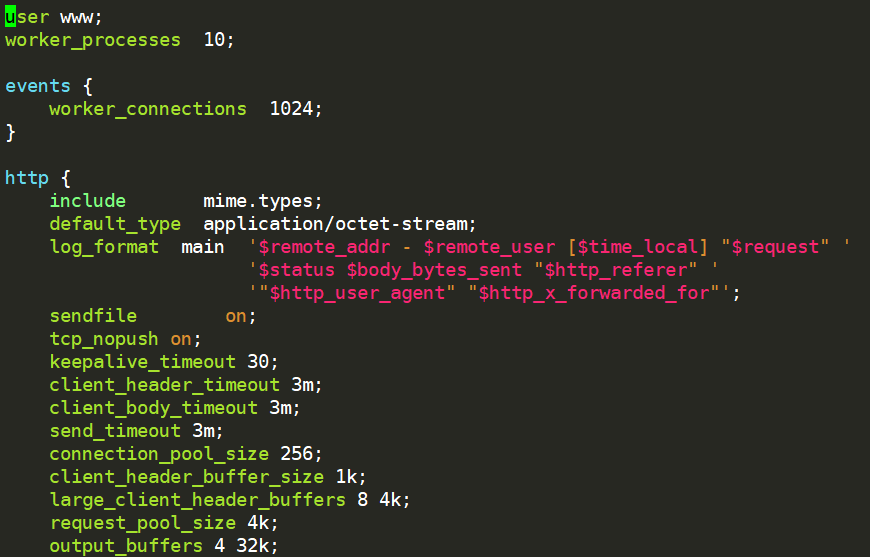
配置语法高亮:
[root@web01 ~]# mkdir -p ~/.vim/
[root@web01 ~]# cd nginx-1.22.0/
[root@web01 nginx-1.22.0]# cp -r contrib/vim/* ~/.vim/
配置完成之后,使用 vim 编辑 nginx 配置文件的效果:

3 nginx 热部署
当从老版本替换为新版本的 nginx 的时候,如果不热部署的话,需要取消 nginx 服务并重启服务才能替换成功,这样的话会使正在访问的用户在断开连接,所以为了在不影响用户的体验下进行版本升级,就需要热部署来升级版本。
下面来进行一次热部署吧,这次热部署将 nginx-1.22.0 升级到 nginx-1.23.0
因为升级主要是通过更换 nginx 的二进制文件,所以在升级前先备份一下旧的二进制文件
[root@web01 ~]# cp /usr/local/nginx/sbin/nginx /usr/local/nginx/sbin/nginx.bak
下载新版本的 nginx,解压后进行编译,然后替换原先 nginx 的二进制文件
[root@web01 ~]# wget http://nginx.org/download/nginx-1.23.0.tar.gz

[root@web01 ~]# tar -zxvf nginx-1.23.0.tar.gz

# 编译,编译后的nginx二进制文件会在objs目录下
[root@web01 ~]# cd nginx-1.23.0/
[root@web01 nginx-1.23.0]# ./configure --prefix=/usr/local/nginx --with-http_ssl_module --with-http_stub_status_module --with-http_realip_module --with-threads

# 然后make生成二进制的nginx文件,不能make install
[root@web01 nginx-1.23.0]# make

# 替换旧的nginx二进制文件
[root@web01 nginx-1.23.0]# cp -f objs/nginx /usr/local/nginx/sbin/
cp: overwrite ‘/usr/local/nginx/sbin/nginx’? y
然后,给现在正在运行的 nginx 主进程发送一个信号,告诉它我们开始进行热部署,发送一个 USR2 信号。
通过 ps 命令查看当前 nginx 主进程的进程号为 19651

然后,给 nginx 主进程发送 USR2信号:
[root@web01 nginx-1.23.0]# kill -USR2 19651
发送 USR2 信号给 nginx 主进程,告诉 master 进程要平滑重启,此时会开启新的 master 进程和 新的 worker 进程,新开启的进程都使用了上面拷贝过去的 nginx 二进制文件。

接下来,向老的 nginx 进程发送信号,告诉它优雅地关闭所有老 nginx 的 worker 进程
[root@web01 nginx-1.23.0]# kill -WINCH 19651

但是老 nginx 的主进程还是存在,它的意义是:如果存在问题,需要退回到老版本中,我们可以给它发送 reload 命令,让他重新把 worker 进程拉起来、把新版本关掉。保留在这里方便我们做版本回退。
如果要退出保留的 master 进程,可以通过 kill -QUIT 命令来完成

执行完后,19651 进程退出,通过 netstat -lntp 可以看到 80 端口已经被 19669 进程监听了(新版本 nginx 的进程)。

检查版本也可以看到升级效果:
[root@web01 nginx-1.23.0]# /usr/local/nginx/sbin/nginx -V
nginx version: nginx/1.23.0
built by gcc 4.8.5 20150623 (Red Hat 4.8.5-44) (GCC)
built with OpenSSL 1.0.2k-fips  26 Jan 2017
TLS SNI support enabled
configure arguments: --prefix=/usr/local/nginx --with-http_ssl_module --with-http_stub_status_module --with-http_realip_module --with-threads
这样,一个 nginx 热部署过程就完成了,给 nginx 安装扩展模块也可以用这种方法。

