学习swagger
Swagger的介绍
你可能尝试过写完一个接口后,自己去创建接口文档,或者修改接口后修改接口文档。多了之后,你肯定会发生一个操作,那就是忘记了修改文档或者创建文档(除非你们公司把接口文档和写接口要求得很紧密😓忘记写文档就扣工资?,否则两个分离的工作总是有可能遗漏的)。而swagger就是一个在你写接口的时候自动帮你生成接口文档的东西,只要你遵循它的规范并写一些接口的说明注解即可。
springboot整合Swagger
- 配置依赖
<dependency>
    <groupId>io.springfox</groupId>
    <artifactId>springfox-swagger2</artifactId>
    <version>2.9.2</version>
</dependency>
<dependency>
    <groupId>io.springfox</groupId>
    <artifactId>springfox-swagger-ui</artifactId>
    <version>2.9.2</version>
</dependency>
2.新建一个配置类SwaggerConfig
package com.example.swaggerdemo.config;
import org.springframework.context.annotation.Bean;
import org.springframework.context.annotation.Configuration;
import org.springframework.context.annotation.Profile;
import org.springframework.core.env.Environment;
import org.springframework.core.env.Profiles;
import springfox.documentation.builders.PathSelectors;
import springfox.documentation.builders.RequestHandlerSelectors;
import springfox.documentation.service.ApiInfo;
import springfox.documentation.service.Contact;
import springfox.documentation.spi.DocumentationType;
import springfox.documentation.spring.web.plugins.Docket;
import springfox.documentation.swagger2.annotations.EnableSwagger2;
import java.util.ArrayList;
@Configuration
@EnableSwagger2 //开启Swagger2
public class SwaggerConfig {
//配置了Swagger的Docket的实例
@Bean
public Docket docket(Environment environment)
{
//设置要显示的swagger环境
Profiles profiles= Profiles.of("dev","test");
//通过environment.acceptsProfiles判断是否处在自己设定的环境当中
boolean flag = environment.acceptsProfiles(profiles);
return new Docket(DocumentationType.SWAGGER_2)
.apiInfo(apiInfo())
.enable(flag)//enable是否启动swagger 如果为flase 则不能访问swagger
.select()
//RequestHandlerSelectors,配置要扫描接口的方式
//basePackage指定要扫描的包
//any()扫描全部的包
//none()不扫描
//withClassAnnotation扫描类上的注解,参数是一个注解的放射对象
//withMethodAnnotation扫描方法上的注解
.apis(RequestHandlerSelectors.basePackage("com.example.swaggerdemo.controller"))
//paths()过滤什么路径
//.paths(PathSelectors.ant("/example/**"))
.build();
}
//配置Swagger信息=apiInfo
private ApiInfo apiInfo()
{
//作者信息
Contact contact = new Contact("syk", "https://www.cnblogs.com/sykswagger", "1172648124@qq.com");
return new ApiInfo(
"这里对应 Api Documentation",
"这里对应 Api Documentation",
"这里对应 v1.0",
"https://www.cnblogs.com/sykswagger",
contact,
"Apache 2.0",
"http://www.apache.org/licenses/LICENSE-2.0",
new ArrayList());
}
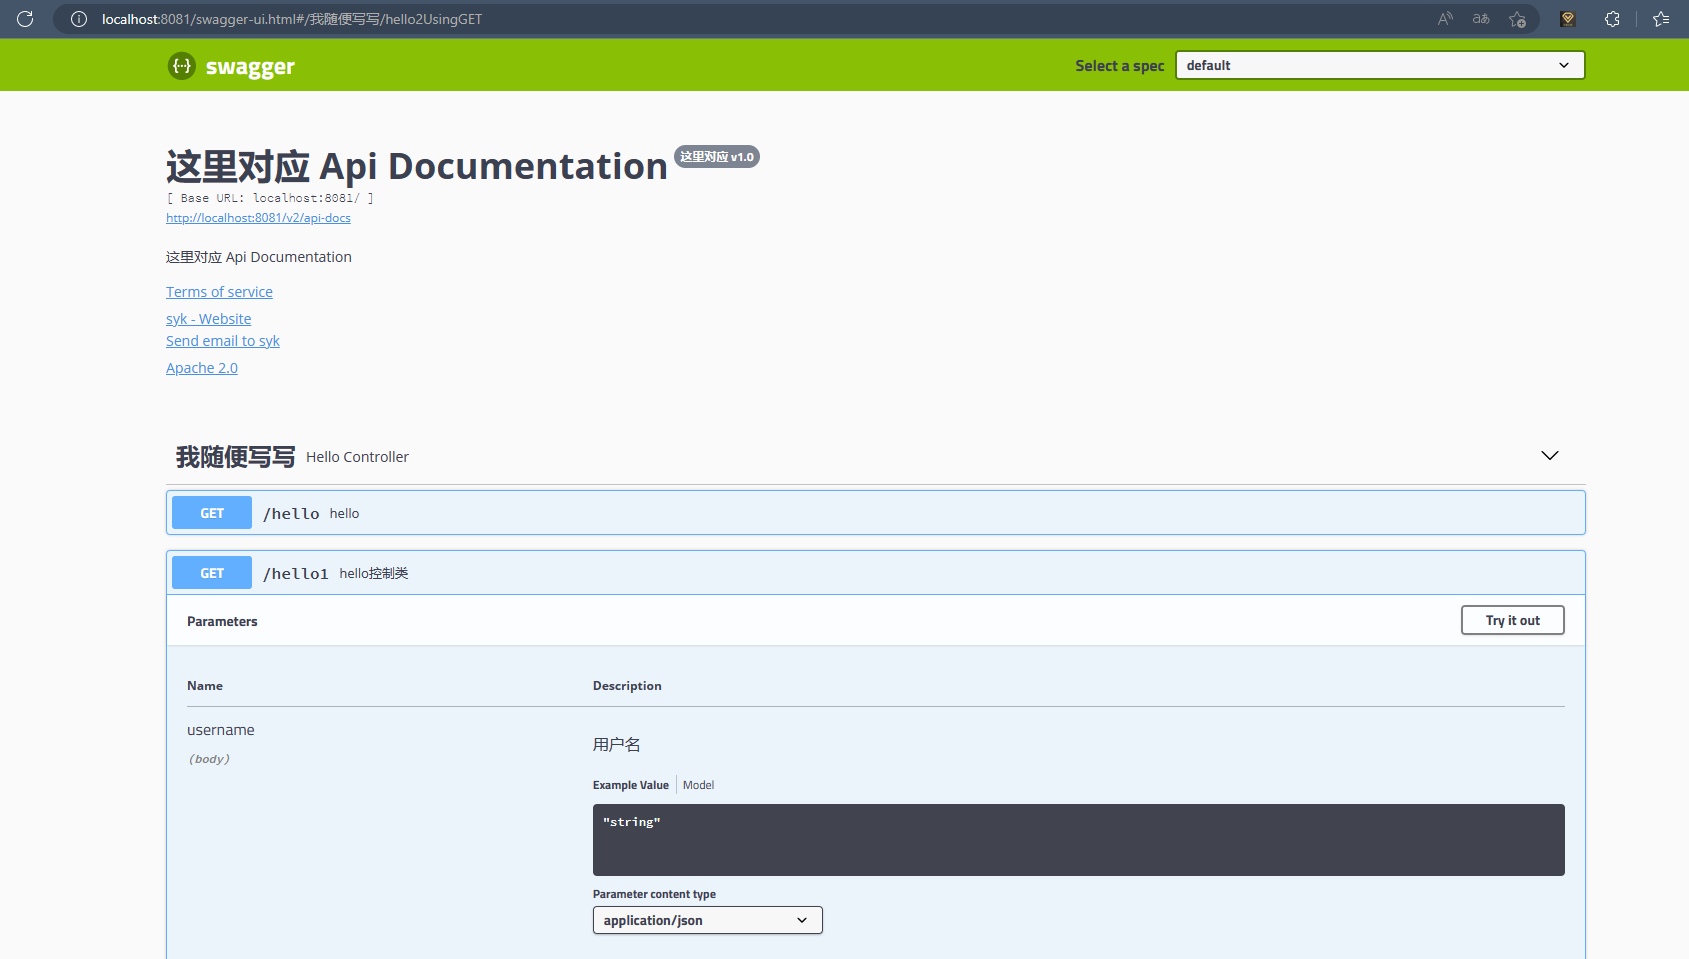
}3.编写一个HelloController类
package com.example.swaggerdemo.controller;

import com.example.swaggerdemo.pojo.User;
import io.swagger.annotations.*;
import org.springframework.web.bind.annotation.GetMapping;
import org.springframework.web.bind.annotation.PostMapping;
import org.springframework.web.bind.annotation.RequestMapping;
import org.springframework.web.bind.annotation.RestController;

@RestController
@Api(tags = "我随便写写")
@ApiResponses({
        @ApiResponse(code = 200, message = "请求成功"),
        @ApiResponse(code = 400, message = "请求参数没填好"),
        @ApiResponse(code = 404, message = "请求路径没有或页面跳转路径不对")
})

public class HelloController {
    @GetMapping("/hello")
    public  String hello()
    {
        return "hello";
    }
    @PostMapping("/user")
    public User user()
    {
        return new User();
    }
    @ApiOperation("hello控制类")
    @GetMapping("/hello1")
    public  String hello2(@ApiParam("用户名")String username)
    {
        return "hello"+username;
    }
}
进入swagger页面
常用注解
1.@Api
|
属性
|
描述 |
| value | url的路径值 |
| tags | 如果设置这个值、value的值会被覆盖 |
| description | 对api资源的描述 |
| basePath | 基本路径可以不配置 |
| position | 如果配置多个Api 想改变显示的顺序位置 |
| produces | For example, "application/json, application/xml" |
| consumes | For example, "application/json, application/xml" |
| protocols | Possible values: http, https, ws, wss. |
| authorizations | 高级特性认证时配置 |
| hidden | 配置为true 将在文档中隐藏 |
2.@ApiOperation
|
属性
|
描述 |
| value | url的路径值 |
| tags | 如果设置这个值、value的值会被覆盖 |
| description | 对api资源的描述 |
| basePath | 基本路径可以不配置 |
| position | 如果配置多个Api 想改变显示的顺序位置 |
| produces | For example, "application/json, application/xml" |
| consumes | For example, "application/json, application/xml" |
| protocols | Possible values: http, https, ws, wss. |
| authorizations | 高级特性认证时配置 |
| hidden | 配置为true 将在文档中隐藏 |
| response | 返回的对象 |
| responseContainer | 这些对象是有效的 "List", "Set" or "Map".,其他无效 |
| httpMethod | "GET", "HEAD", "POST", "PUT", "DELETE", "OPTIONS" and "PATCH" |
| code | http的状态码 默认 200 |
| extensions |
扩展属性
|
3.@ApiParam
| 属性 | 描述 |
| name | 属性名称 |
| value | 属性值 |
| defaultValue | 默认属性值 |
| allowableValues | 可以不配置 |
| required | 是否属性必填 |
| access | 不过多描述 |
| allowMultiple | 默认为false |
| hidden | 隐藏该属性 |
| example | 举例子 |
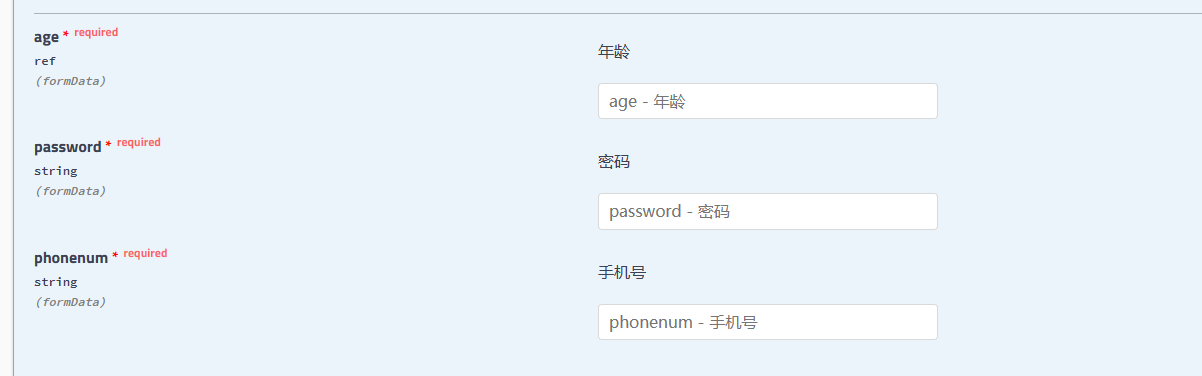
4.@ApilmplicitParams,@AplimplicitParam
(1).@ApiImplicitParams:用在请求的方法上,包含一组参数说明
(2).@ApiImplicitParam:对单个参数的说明
| 属性 | 描述 |
| name | 参数名 |
| value | 参数的说明、描述 |
| required | 参数是否必须必填 |
| paramType | 参数放在哪个地方 query --> 请求参数的获取:@RequestParam header --> 请求参数的获取:@RequestHeader path(用于restful接口)--> 请求参数的获取:@PathVariable body(请求体)--> @RequestBody User user form(普通表单提交) |
| dataType | 参数类型,默认String,其它值dataType="Integer" |
| defaultValue | 参数的默认值 |
代码示例:
@ApiImplicitParams({
        //参数效验
		@ApiImplicitParam(name="phonenum",value="手机号",required=true,paramType="form"),
		@ApiImplicitParam(name="password",value="密码",required=true,paramType="form"),
		@ApiImplicitParam(name="age",value="年龄",required=true,paramType="form",dataType="Integer")
	})
效果如下
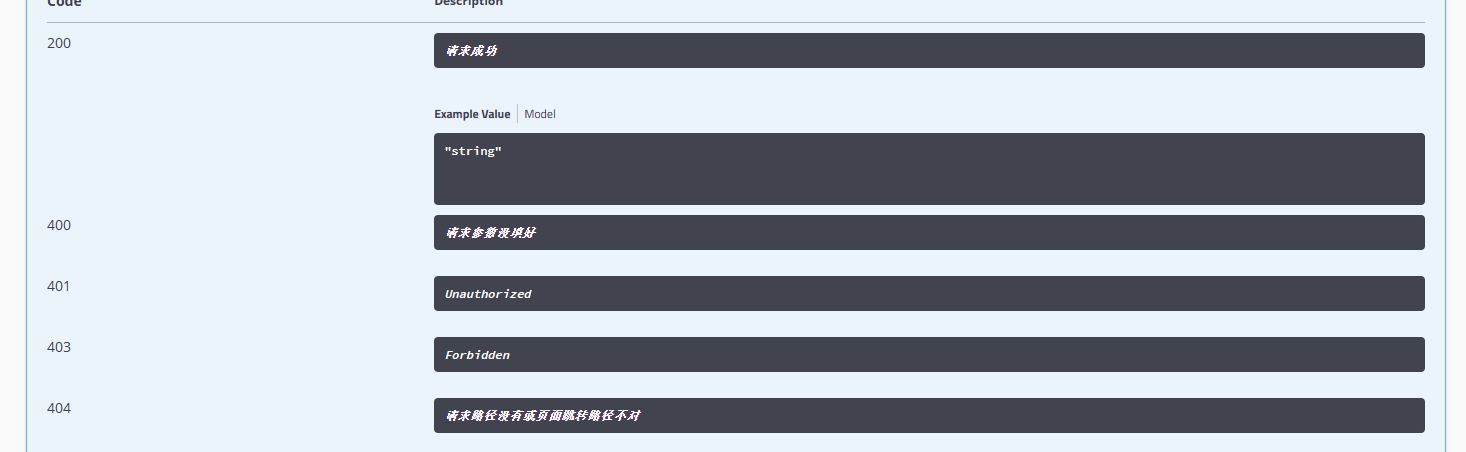
5.@ApiResponses、@ApiResponse
| 属性 | 描述 |
| code | 数字,例如400 |
| message | 信息,例如"请求参数没填好" |
| response | 抛出异常的类 |
示例代码如下
@ApiResponses({
        @ApiResponse(code = 200, message = "请求成功"),
        @ApiResponse(code = 400, message = "请求参数没填好"),
        @ApiResponse(code = 404, message = "请求路径没有或页面跳转路径不对")
})
效果如下
6.@ApiModel、@ApiModelProperty
@ApiModel 用在模型类上,对模型类作注解
@ApiModelProperty 用在属性上,对属性作注解
代码示例
package com.example.swaggerdemo.pojo;

import io.swagger.annotations.ApiModel;
import io.swagger.annotations.ApiModelProperty;

@ApiModel("用户实体类")
public class User {
    @ApiModelProperty("用户名")
    public String username;
    @ApiModelProperty("密码")
    public String password;
}
效果如下


 浙公网安备 33010602011771号