1.下载,配置环境变量
下载地址:https://github.com/google/protobuf/releases,选择protoc-xxx-win64.zip下载
把.exe文件的位置加入到Path中
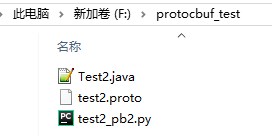
2.建立一个protoc文件test2.protoc
文件位置:最好跟环境变量不在一个盘,不知道什么原因,我环境变量在D盘,protoc文件也在D盘就不认识,放到F盘就可以。
test2.protoc内容:
syntax = "proto2";
message testinfo
{
required int32 devtype = 1;
required int32 devid = 2;
required int32 unitid = 3;
required int32 chlid = 4;
optional int32 testid = 5 [default = 0];
required bytes stepdata = 6;
}
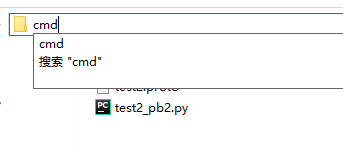
在文件路径输入cmd,回车,进入命令窗口

执行命令:
#第一个是protoc文件的路径,第二个是编译文件的路径

#protoc -I=源地址 --java_out=目标地址 xxx.proto
protoc -I=F:\protocbuf_test --java_out=F:\protocbuf_test test2.proto

#此处生成python文件
protoc --python_out=./ test2.proto

#默认生成.java文件
protoc -I=F:\protocbuf_test --java_out=F:\protocbuf_test test2.proto

3.在目录下新建文件 test.py,写入代码
import test2_pb2

testinfo = test2_pb2.testinfo()
testinfo.devtype = 100
testinfo.devid = 2
testinfo.unitid = 3
testinfo.chlid = 4
testinfo.testid = 250
testinfo.stepdata = b'abd'

print(testinfo, testinfo.devtype)  # 打印 protobuf 结构的内容
out = testinfo.SerializeToString()
print(out)  # 打印 Protobuf 序列字符串


decode = test2_pb2.testinfo()
decode.ParseFromString(out)

print(decode) # 打印 解析Protobuf后的内容
运行python代码,报错:

因为测试,使用的是系统默认的临时python环境,没有安装相关模块,需要安装一下 :
pip install protobuf
pip install google
再执行:
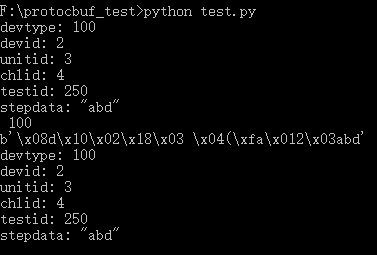
python test.py
出现下面情况,表示成功:

参考:
https://www.cnblogs.com/luyanjie/p/10403869.html
https://blog.csdn.net/liupeifeng3514/article/details/78985575
https://stackoverflow.com/questions/38680593/importerror-no-module-named-google-protobuf
作者:西伯尔
出处:http://www.cnblogs.com/sybil-hxl/
本文版权归作者和博客园共有,欢迎转载,但未经作者同意必须保留此段声明,且在文章页面明显位置给出原文连接,否则保留追究法律责任的权利。

