Gitlab安装部署
安装依赖软件
10.x以后开始依赖policycoreutils-python,我之前在使用9.x时还没有依赖该项 升级时会提示 rpm -Uvh gitlab-ce-10.1.0-ce.0.el7.x86_64.rpm...
[root@linux-node1 ~]# yum -y install policycoreutils openssh-server openssh-clients postfix policycoreutils-python
设置postfix开机自启,并启动,postfix支持gitlab发信功能
[root@linux-node1 ~]# systemctl enable postfix && systemctl start postfix
下载gitlab安装包,然后安装
centos 6系统的下载地址:https://mirrors.tuna.tsinghua.edu.cn/gitlab-ce/yum/el6
centos 7系统的下载地址:https://mirrors.tuna.tsinghua.edu.cn/gitlab-ce/yum/el7
下载rpm包并安装:
[root@linux-node1 ~]# wget https://mirrors.tuna.tsinghua.edu.cn/gitlab-ce/yum/el7/gitlab-ce-8.0.0-ce.0.el7.x86_64.rpm
[root@linux-node1 ~]# rpm -i gitlab-ce-8.0.0-ce.0.el7.x86_64.rpm
修改gitlab配置文件指定服务器ip和自定义端口
[root@linux-node1 ~]# vim /etc/gitlab/gitlab.rb

external_url 'http://192.168.1.80'
退出并保存
ps:注意这里设置的端口不能被占用,默认是8080端口,如果8080已经使用,请自定义其它端口,并在防火墙设置开放相对应得端口
重置并启动GitLab
[root@linux-node1 ~]# gitlab-ctl reconfigure #重新配置
关闭gitlab:
[root@linux-node1 ~]# gitlab-ctl stop
启动gitlab:
[root@linux-node1 ~]# gitlab-ctl start
重启gitlab:
[root@linux-node1 ~]# gitlab-ctl restart
访问 GitLab页面
直接在浏览器输入IP地址: http://10.0.0.11
初始账户: root 密码: 5iveL!fe
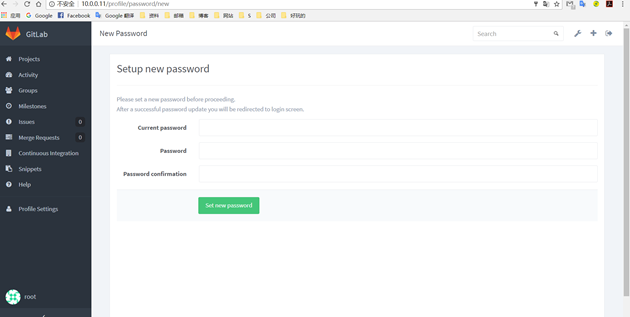
第一次登录修改密码
http://10.0.0.11/users/sign


 浙公网安备 33010602011771号