

【spring bean】bean的配置和创建方式
---恢复内容开始---
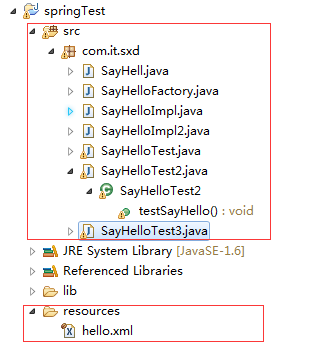
项目结构如下:
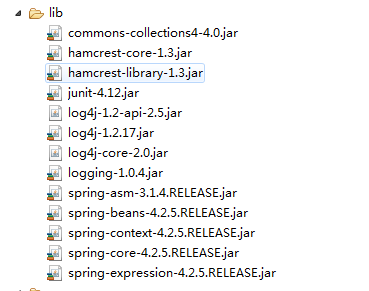
lib如下:
1.首先建立SayHell.java接口


1 package com.it.sxd;
2
3 public interface SayHell {
4         public void sayHello();
5 }
2.下面有它的两个实现类
SayHelloImpl.java
 1 package com.it.sxd;
 2
 3 public class SayHelloImpl implements SayHell {
 4
 5     @Override
 6     public void sayHello() {
 7         System.out.println("hello");
 8     }
 9
10 }
SayHelloImpl2.java
 1 package com.it.sxd;
 2
 3 public class SayHelloImpl2 implements SayHell {
 4     private String message;
 5
 6     public SayHelloImpl2() {
 7         this.message = "无参的构造器";
 8     }
 9
10     public SayHelloImpl2(String message) {
11         super();
12         this.message = message;
13     }
14
15     @Override
16     public void sayHello() {
17         System.out.println(message);
18     }
19
20 }
还有一个静态工厂SayHelloFactory.java
 1 package com.it.sxd;
 2
 3 public class SayHelloFactory {
 4
 5     public static SayHell  sayhell(String message){
 6         return new SayHelloImpl2(message);
 7     }
 8
 9     public  static void  sayAmount(){
10         double b= 9/3;
11         System.out.println(b);
12     }
13
14 }
3.配置文件hello.xml【bean都是在这里配置好的】
 1 <?xml version="1.0" encoding="UTF-8"?>
 2 <beans
 3 xmlns="http://www.springframework.org/schema/beans"
 4 xmlns:xsi="http://www.w3.org/2001/XMLSchema-instance"
 5 xmlns:context="http://www.springframework.org/schema/context"
 6 xsi:schemaLocation="
 7 http://www.springframework.org/schema/beans        http://www.springframework.org/schema/beans/spring-beans-3.0.xsd
 8 http://www.springframework.org/schema/context                http://www.springframework.org/schema/context/spring-context-3.0.xsd">
 9
10
11      <!--测试1 :bean就是Ioc容器初始化。装配,管理的对象,除此之外,bean与应用程序中的对象没有任何区别, id 表示你这个组件的名字,class表示组件类,也就是位置 -->
12     <bean id="hello1" class="com.it.sxd.SayHelloImpl">
13     </bean>
14
15     <!--测试2 无参的构造方法  使用标签alisa起别名   -->
16     <bean id="hello3" class="com.it.sxd.SayHelloImpl2">
17     </bean>
18     <alias name="hello3" alias="alisa3"/>
19
20     <!-- 测试2  有参数的构造方法  使用name,给多个值起别名-->
21     <bean id="hello2" name="alisa1,alisa2" class="com.it.sxd.SayHelloImpl2">
22         <constructor-arg index="0" value="hello有参构造方法"></constructor-arg><!-- 默认的为构造方法传值,index代表第几个参数,0代表第一个,value就是给构造器传递的值 -->
23     </bean>
24
25     <!-- 测试3  静态工厂创建bean factory-method就代表初始化这个class类的时候,就执行了这个类中的"sayhell"方法,并且要求这个方法必须是static -->
26     <bean id="hello4" class="com.it.sxd.SayHelloFactory"  factory-method="sayhell">
27         <constructor-arg type="java.lang.String" value="静态工厂创建bean"></constructor-arg><!-- 为这个sayhell方法传递参数,参数类型是String类型,值是value -->
28     </bean>
29
30     <!-- 测试3  静态工厂创建bean ,init-method初始化执行的方法 -->
31     <bean id="hello5" class="com.it.sxd.SayHelloFactory" init-method="sayAmount">
32     </bean>
33
34
35
36 </beans>
4.分别测试一下上面的两个实现类的对不同bean的组合配置
SayHelloTest.java 最基本的测试 ,对应SayHelloImpl.java
 1 package com.it.sxd;
 2
 3
 4 import org.junit.Test;
 5 import org.springframework.context.ApplicationContext;
 6 import org.springframework.context.support.ClassPathXmlApplicationContext;
 7 import org.springframework.context.support.FileSystemXmlApplicationContext;
 8
 9 public class SayHelloTest {
10
11     @Test
12     public void testSayHello(){
13         //System.out.println(SayHelloTest.class.getResource(""));
14         //1.读取hello。xml配置文件,实例化一个Ioc容器
15         ApplicationContext context = new FileSystemXmlApplicationContext("resources/hello.xml");
16         //2.从Ioc容器中获取ID为"hello1"的bean ,此处是“面向接口编程   而不是面向实现编程”
17         SayHell sayHell = context.getBean("hello1",SayHell.class);
18         //3.实现功能
19         sayHell.sayHello();
20     }
21
22 }
SayHelloTest2.java 有无参数的构造方法 对应SayHelloImpl2.java
 1 package com.it.sxd;
 2
 3 import org.junit.Test;
 4 import org.springframework.context.ApplicationContext;
 5 import org.springframework.context.support.FileSystemXmlApplicationContext;
 6
 7 public class SayHelloTest2 {
 8
 9     @Test
10     public  void testSayHello() {
11         ApplicationContext context = new FileSystemXmlApplicationContext("resources/hello.xml");
12         SayHell syahell = context.getBean("hello2",SayHell.class);//getBean()方法传进来两个参数  参数1:配置文件中bean的id   参数2:SayHell.class就是这个bean返回的结果强转为SayHell类型的
13         syahell.sayHello();
14
15         SayHell sayhell2 = (SayHell) context.getBean("alisa3");//如果geyBean()方法不传进来第二个参数,那就需要自己进行强转
16         sayhell2.sayHello();
17
18         String [] attr = context.getAliases("hello2");//getAliases() 获取id为hello2的bean的别名
19         for (String string : attr) {
20             System.out.println(string);
21         }
22     }
23
24 }
SayHelloTest3.java
 1 package com.it.sxd;
 2
 3 import org.junit.Test;
 4 import org.springframework.context.ApplicationContext;
 5 import org.springframework.context.support.FileSystemXmlApplicationContext;
 6
 7 public class SayHelloTest3 {
 8     @Test
 9     public void sayHello(){
10         //1。通过加载配置文件来实例化一个Ioc容器,
11         ApplicationContext context = new FileSystemXmlApplicationContext("resources/hello.xml");
12         //2.从Ioc容器得到对应的bean
13         SayHell sayhell = context.getBean("hello4",SayHell.class);
14         //3.执行bean的方法
15         sayhell.sayHello();
16
17
18         SayHelloFactory sa = (SayHelloFactory) context.getBean("hello5");
19
20
21     }
22 }
运行的时候 右键 JUnit运行
---恢复内容结束---
---恢复内容结束---
