

【Django】【四】测试
【Testing in Django】
通过参数可控制Django项目不同级别的测试。
1. 运行sign应用下所有的测试用例:
\\guest\python manage.py test sign
2. 运行sign应用下的tests.py测试文件
\\guest\python manage.py test sign.tests
3. 运行sign应用tests.py测试文件下的ModelTest测试类
\\guest\python manage.py test sign.tests.ModelTest
4. 运行sign应用tests.py测试文件下的ModelTest测试类下面的test_event_models测试方法(用例)
\\guest\python manage.py test sign.tests.ModelTest.test_event_models
Creating test database for alias 'default'...
.-
---------------------------------------------------------------------
Ran 1 test in 0.226s
OK
Destroying test database for alias 'default'...
5. 除此之外,还可以使用-p (或--pattern)参数模糊匹配测试文件
\\guest\python manage.py test -p test*.py
【The test views】
用Django自带的TestCase执行测试用例时,要将视图函数中@login_required标签去掉,因为个函数依赖于登录, 然而, Client()所提供的 get()和 post()方法并没有验
证登录的参数。
【代码】
tests.py
from django.test import TestCase
from sign.models import Event,Guest


class ModelTest(TestCase):
    def setUp(self):
        Event.objects.create(id=10,name='oneplus 3 event',status=True,limit=2000,address='shenzhen',start_time='2017-12-12 02:00:56')
        Guest.objects.create(id=10,event_id=10,realname='alen',phone='13711001101',email='alen@mail.com',sign=True)

    def test_event_models(self):
        result = Event.objects.get(name='oneplus 3 event')
        self.assertEqual(result.address,'shenzhen')
        self.assertTrue(result.status)

    def test_guest_models(self):
        result = Guest.objects.get(phone='13711001101')
        self.assertEqual(result.realname,'alen')
        self.assertTrue(result.sign)

class IndexPageTest(TestCase):
    '''测试index登录首页'''

    def test_index_page_renders_index_template(self):
        response = self.client.get('/')
        self.assertEqual(response.status_code,200)
        self.assertTemplateUsed(response,'index.html')


from django.contrib.auth.models import User
from django.test import Client
class LoginActionTest(TestCase):
    '''测试登录函数'''
    def setUp(self):
        User.objects.create_user('wxue', 'admin@mail.com', 'admin123456')  #创建登录用户,不过不好用,第三个case总是不过,具体原因不明
        self.c = Client()

    def test_login_action_username_password_null(self):
        '''用户名密码为空'''
        test_data = {'username':'','password':''}
        response = self.c.post('/login_action/',data=test_data)
        self.assertEqual(response.status_code,200)
        self.assertIn(b'username or password error',response.content)

    def test_login_action_username_password_error(self):
        '''用户名密码错误'''
        test_data = {'username':'abc','password':'123'}
        response = self.c.post('/login_action/',data=test_data)
        self.assertEqual(response.status_code,200)
        self.assertIn(b'username or password error',response.content)

    def test_login_action_success(self):
        '''登录成功'''
        test_data = {'username':'wxue','password':'admin123456'}
        response = self.c.post('/login_action/',data=test_data)
        self.assertEqual(response.status_code,302)

from sign.models import Event,Guest
from django.test import Client

class EventManageTest(TestCase):
    #此 用 例 要 想 运 行 通 过 , 需 要 在 views.py 视 图 文 件 中 将 event_manage() 和 search_name() 函 数 的@login_required 装饰器去掉, 因为这两个函数依赖于登录, 然而, Client()所提供的 get()和 post()方法并没有验证登录的参数。
    '''发布会管理'''
    def setUp(self):
        Event.objects.create(id=10,name='xiaomi5',limit=2000,status=True,address='beijing',start_time='2017-12-12 12:00:01')
        self.c = Client()

    def test_event_manage_success(self):
        '''测试发布会:xiaomi5'''
        response = self.c.post('/event_manage/')
        self.assertEqual(response.status_code,200)
        self.assertIn(b'xiaomi5',response.content)
        self.assertIn(b'beijing',response.content)

    def test_event_manage_search_success(self):
        '''测试发布会搜索'''
        response = self.c.get('/search_name/',{'name':'xiaomi5'})
        self.assertEqual(response.status_code,200)
        self.assertIn(b'xiaomi5',response.content)
        self.assertIn(b'beijing',response.content)


class GuestManageTest(TestCase): #views.py 视图文件中将 sign_index_action()函数的@login_required 装饰器去掉, 原因同上
    '''嘉宾管理'''
    def setUp(self):
        Event.objects.create(id=10,name='xiaomi5',limit=2000,address='beijing',status=1,start_time='2017-12-12 12:00:02')
        Guest.objects.create(realname='alen',phone=18611001100,email='alen@mail.com',sign=0,event_id=10)
        self.c = Client()

    def test_guest_manage_success(self):
        '''测试嘉宾信息:alen'''
        response = self.c.post('/guest_manage/')
        self.assertEqual(response.status_code,200)
        self.assertIn(b'alen',response.content)
        self.assertIn(b'18611001100',response.content)

    def test_guest_manage_search_success(self):
        '''测试嘉宾搜索'''
        response = self.c.get('/search_phone',{'phone':18611001100})
        self.assertEqual(response.status_code,200)
        self.assertIn(b'alen',response.content)
        self.assertIn(b'18611001100',response.content)

class SignIndexActionTest(TestCase):
    '''发布会签到'''

    def setUp(self):
        Event.objects.create(id=1,name='xiaomi5',limit=2000,address='beijing',status=1,start_time='2017-12-12 12:12:00')
        Event.objects.create(id=2,name='oneplus4',limit=2000,address='shenzhen',status=1,start_time='2017-12-13 12:56:56')
        Guest.objects.create(realname='alen',phone=18611001100,email='alen@mail.com',sign=0,event_id=1)
        Guest.objects.create(realname='una',phone=18611001101,email='una@mail.com',sign=1,event_id=2)
        self.c = Client()

    def test_sign_index_action_phone_null(self):
        '''手机号为kong'''
        response = self.c.post('/sign_index_action/1/',{'phone':''})
        self.assertEqual(response.status_code,200)
        self.assertIn(b'phone error',response.content)

    def test_sign_index_action_phone_or_event_id_error(self):
        '''手机号或发布会id错误'''
        response = self.c.post('/sign_index_action/2/',{'phone':'18611001100'})
        self.assertEqual(response.status_code,200)
        self.assertIn(b'event id or phone error',response.content)

    def test_sign_index_action_user_sign_has(self):
        '''用户已经签到'''
        response = self.c.post('/sign_index_action/2/',{'phone':'18611001101'})
        self.assertEqual(response.status_code,200)
        self.assertIn(b'user has sign in',response.content)

    def test_sign_index_action_sign_success(self):
        '''签到成功'''
        response = self.c.post('/sign_index_action/1/',{'phone':'18611001100'})
        self.assertEqual(response.status_code,200)
        self.assertIn(b'sign in success',response.content)


-------------------------------------------------以下都是前期练习------------------------------------------------
6.1 unittest 单元测试框架

6.1.1 单元测试框架

单元测试 unittest
HTTP 接口自动化测试: unittest + Requests
Web UI 自动化测试: unittest + Selenium
移动自动化测试 : unittest + Appium

6.1.2 编写单元测试用例
开发一个简单的计算器,用于计算两个数的加、减、乘、除

module.py
class Calculator():
    '''实现两个数的加、减、乘、除'''

    def __init__(self, a, b):
        self.a = int(a)
        self.b = int(b)

    # 加
    def add(self):
        return self.a + self.b

    # 减
    def sub(self):
        return self.a - self.b

    # 乘
    def mul(self):
        return self.a * self.b

    # 除
    def div(self):
        return self.a / self.b


同级创建 test.py
import unittest
from module import Calculator

class ModuleTest(unittest.TestCase):

    def setUp(self):
        self.cal = Calculator(8, 4)

    def tearDown(self):
        pass

    def test_add(self):
        result = self.cal.add()
        self.assertEqual(result, 12)

    def test_sub(self):
        result = self.cal.sub()
        self.assertEqual(result, 4)

    def test_mul(self):
        result = self.cal.mul()
        self.assertEqual(result, 32)

    def test_div(self):
        result = self.cal.div()
        self.assertEqual(result, 2)

if __name__ == '__main__':
    # unittest.main()
    # 构造测试集
    suite = unittest.TestSuite()
    suite.addTest(ModuleTest('test_add'))
    suite.addTest(ModuleTest('test_sub'))
    suite.addTest(ModuleTest('test_mul'))
    suite.addTest(ModuleTest('test_div'))
    #执行测试
    runner = unittest.TextTestRunner()
    runner.run(suite)


cmd.exe
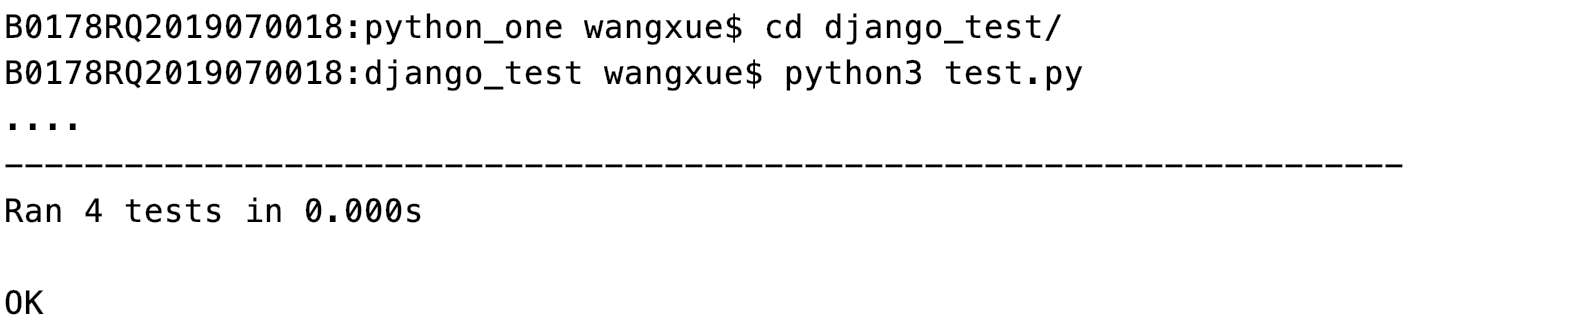
从执行结果可以看到, 点号"."用来表示一条运行通过的用例,总共运行4条测试用例, 用时0.000秒
6.2 Django测试
Django的单元测试类django.test.TestCase 从unittest.TestCase继承而来。
6.2.1 一个简单的例子
在创建Django应用时,默认已经生成了tests.py, 打开sign应用下的此文件
from django.test import TestCase
from sign.models import Event, Guest

# Create your tests here.
class ModelTest(TestCase):

    def setUp(self):
        Event.objects.create(id=1, name='oneplus 3 event', status=True,
                             limit=2000, address='shenzhen', start_time='2016-08-31 02:18:22')
        Guest.objects.create(id=1, event_id=1, realname='alen',
                             phone='13711001101', email='alen@mail.com',
                             sign=False)

    def test_event_models(self):
        result = Event.objects.get(name='oneplus 3 event')
        self.assertEqual(result.address, 'shenzhen')
        self.assertTrue(result.status)

    def test_guest_models(self):
        result = Guest.objects.get(phone=13711001101)
        self.assertEqual(result.realname, 'alen')
        self.assertFalse(result.sign)
千万不要单独执行tests.py Django专门提供了'test'命令来运行测试。
cmd.exe. 【备注】忽略掉3135 3090 两个 warning 下面的例子我都会删掉
B0178RQ2019070018:guest wangxue$ python3 manage.py test
Creating test database for alias 'default'...
/Library/Frameworks/Python.framework/Versions/3.7/lib/python3.7/site-packages/pymysql/cursors.py:166: Warning: (3135, "'NO_ZERO_DATE', 'NO_ZERO_IN_DATE' and 'ERROR_FOR_DIVISION_BY_ZERO' sql modes should be used with strict mode. They will be merged with strict mode in a future release.")
result = self._query(query)
/Library/Frameworks/Python.framework/Versions/3.7/lib/python3.7/site-packages/pymysql/cursors.py:166: Warning: (3090, "Changing sql mode 'NO_AUTO_CREATE_USER' is deprecated. It will be removed in a future release.")
result = self._query(query)
System check identified no issues (0 silenced).
..
----------------------------------------------------------------------
Ran 2 tests in 0.006s
OK
Destroying test database for alias 'default'...
/Library/Frameworks/Python.framework/Versions/3.7/lib/python3.7/site-packages/pymysql/cursors.py:166: Warning: (3135, "'NO_ZERO_DATE', 'NO_ZERO_IN_DATE' and 'ERROR_FOR_DIVISION_BY_ZERO' sql modes should be used with strict mode. They will be merged with strict mode in a future release.")
result = self._query(query)
/Library/Frameworks/Python.framework/Versions/3.7/lib/python3.7/site-packages/pymysql/cursors.py:166: Warning: (3090, "Changing sql mode 'NO_AUTO_CREATE_USER' is deprecated. It will be removed in a future release.")
result = self._query(query)
当Django在执行setUp()部分的操作时候,并不会真的向数据库表中插入数据。所以,不用关心产生测试数据之后的清理工作。
修改用例中的预期结果,把断言结果由‘shenzhen’改成‘beijing', 使测试执行失败
B0178RQ2019070018:guest wangxue$ python3 manage.py test
Creating test database for alias 'default'...
F.
======================================================================
FAIL: test_event_models (sign.tests.ModelTest)
----------------------------------------------------------------------
Traceback (most recent call last):
File "/Users/wangxue/Library/Python/3.7/bin/guest/sign/tests.py", line 16, in test_event_models
self.assertEqual(result.address, 'beijing')
AssertionError: 'shenzhen' != 'beijing'
- shenzhen
+ beijing
----------------------------------------------------------------------
Ran 2 tests in 0.006s
FAILED (failures=1)
Destroying test database for alias 'default'...
6.2.2 运行测试用例
随着测试用例越来越多,测试时间也会变得越来越长;并不是每一次都希望执行全部用例 有时只想执行某个某一条或某一个模块的测试用例。‘test’命令提供了可以控制用例执行的级别。
运行sign应用下所有的测试用例
B0178RQ2019070018:guest wangxue$ python3 manage.py test sign
Creating test database for alias 'default'...
..
----------------------------------------------------------------------
Ran 2 tests in 0.006s
OK
Destroying test database for alias 'default'...
运行sign应用下 tests.py 测试文件
B0178RQ2019070018:guest wangxue$ python3 manage.py test sign.tests
Creating test database for alias 'default'...
..
----------------------------------------------------------------------
Ran 2 tests in 0.006s
OK
Destroying test database for alias 'default'...
运行sign应用tests.py测试文件下ModelTest测试类
B0178RQ2019070018:guest wangxue$ python3 manage.py test sign.tests.ModelTest
Creating test database for alias 'default'...
..
----------------------------------------------------------------------
Ran 2 tests in 0.006s
OK
Destroying test database for alias 'default'...
执行ModelTest测试类下面的test_event_models测试方法
B0178RQ2019070018:guest wangxue$ python3 manage.py test sign.tests.ModelTest.test_event_models
Creating test database for alias 'default'...
..
----------------------------------------------------------------------
Ran 2 tests in 0.006s
OK
Destroying test database for alias 'default'...
我们还可以使用-p --pattern 模糊匹配测试文件 指定匹配运行的测试文件: test*.py 即匹配以'test'开头,以‘.py'结尾的测试文件,星号匹配任意字符。
B0178RQ2019070018:guest wangxue$ python3 manage.py test test*.py
Creating test database for alias 'default'...
..
----------------------------------------------------------------------
Ran 2 tests in 0.006s
OK
Destroying test database for alias 'default'...
6.3 客户端测试
在Django中 django.test.Client类充当一个虚拟的网络浏览器,可以测试视图views与Django的应用程序以编程方式交互。
django.test.Client类可以做事情:
- 模拟'GET' 'POST' 请求,观察响应结果,从HTTP (headers , status codes)到页面内容。
- 检查重定向链(如果有的话), 再每一步检查URL和status code
- 用一个包括特定值的模版context来测试一个request 被Django模版渲染。
进入Django Shell模式
>>> from django.test.utils import setup_test_environment
>>> setup_test_environment()
>>> from django.test import Client
>>> c = Client()
>>> response = c.get('/index/')
>>> response.status_code
200
6.3.1 测试首页
打开.../sign/tests.py 编写index视图的测试用例
from django.test import TestCase
from sign.models import Event, Guest

# Create your tests here.
class IndexPageTest(TestCase):
    '''测试index登陆首页'''

    def test_index_page_renders_templates(self):
        '''测试index视图'''
        response = self.client.get('/index/')
        self.assertEqual(response.status_code, 200)
        self.assertTemplateUsed(response, 'index.html')

虽然这里没有导入django.test.Client类。但self.client最终调用的依然是django.test.Client类的方法,通过client.get()方法请求'/index/'路径。
status_code获取HTTP返回的状态码。
self.assertTemplateUsed断言服务器是否用给定的是index.html模版响应。

6.3.2 测试登陆动作
.../sign/tests.py
...
from django.contrib.auth.models import User
...
class LoginActionTest(TestCase):
    '''测试登陆动作'''

    def setUp(self):
        User.objects.create_user('admin', 'admin@mail.com', 'admin123456')

    def test_add_admin(self):
        '''测试添加用户'''
        user = User.objects.get(username='admin')
        self.assertEqual(user.username, 'admin')
        self.assertEqual(user.email, 'admin@mail.com')

    def test_login_action_username_password_null(self):
        test_data = {'username': '', 'password': ''}
        response = self.client.post('/login_action/', data=test_data)
        self.assertEqual(response.status_code, 200)
        self.assertIn(b'username or password error!', response.content)

    def test_login_action_username_password_error(self):
        test_data = {'username': 'abc', 'password': '123'}
        response = self.client.post('/login_action/', data=test_data)
        self.assertEqual(response.status_code, 200)
        self.assertIn(b'username or password error!', response.content)

    def test_login_action_success(self):
        '''登陆成功'''
        test_data = {'username': 'admin', 'password': 'admin123456'}
        response = self.client.post('/login_action/', data=test_data)
        self.assertEqual(response.status_code, 302)


6.3.3 测试发布会管理
.../sign/tests.py
class EventManageTest(TestCase):
    '''发布会管理'''

    def setUp(self):
        User.objects.create_user('admin', 'admin@mail.com', 'admin123456')
        Event.objects.create(name='xiaomi5', limit=2000, address='beijing',
                             status=1, start_time='2017-8-10 12:30:00')
        self.login_user = {'username': 'admin', 'password': 'admin123456'}

    def test_event_manage_success(self):
        response = self.client.post('/login_action/', data=self.login_user)
        response = self.client.post('/event_manage/')
        self.assertEqual(response.status_code, 200)
        self.assertIn(b'xiaomi5', response.content)
        self.assertIn(b'beijing', response.content)

    def test_event_manage_search_success(self):
        '''测试发布搜索'''
        response = self.client.post('/login_action/', data=self.login_user)
        response = self.client.post('/search_name/', {'name': 'xiaomi5'})
        self.assertEqual(response.status_code, 200)
        self.assertIn(b'xiaomi5', response.content)
        self.assertIn(b'beijing', response.content)


由于发布会管理event_manage和发布会搜索search_name两个视图函数被@login_required修饰,所以要测试这两个功能,必须要登陆成功,并且需要构造登陆用户的数据。

6.3.4 测试嘉宾管理
class GuestManageTest(TestCase):
    '''嘉宾管理'''


    def setUp(self):
        User.objects.create_user('admin', 'admin@mail.com', 'admin123456')
        Event.objects.create(id=1, name='xiaomi5', limit=2000,
                             address='beijing', status=1, start_time='2017-08-10 12:30:00')
        Guest.objects.create(realname='alen', phone=18611001100, event_id=1,
                             email='alen@mail.com', sign=0)
        self.login_user = {'username': 'admin', 'password': 'admin123456'}


    def test_event_manage_success(self):
        '''测试嘉宾信息:alen'''
        response = self.client.post('/login_action/', data=self.login_user)
        response = self.client.post('/guest_manage/')
        self.assertEqual(response.status_code, 200)
        self.assertIn(b'alen', response.content)
        self.assertIn(b'18611001100', response.content)

    def test_event_manage_search_success(self):
        '''测试嘉宾搜索'''
        response = self.client.post('/login_action/', data=self.login_user)
        response = self.client.post('/search_phone/', {'phone': '18611001100'})
        self.assertEqual(response.status_code, 200)
        self.assertIn(b'alen', response.content)
        self.assertIn(b'18611001100', response.content)

6.3.5 测试用户签到
.../sign/tests.py
class SignIndexActionTest(TestCase):
    '''发布会签到'''

    def setUp(self):
        User.objects.create_user('admin', 'admin@mail.com', 'admin123456')
        Event.objects.create(id=1, name='xiaomi5', limit=2000,
                             address='beijing', status=1, start_time='2017-8-10 12:30:00')
        Event.objects.create(id=2, name='oneplus4', limit=2000,
                             address='shenzhen', status=1, start_time='2017-6-10 12:30:00')
        Guest.objects.create(realname='alen', phone=18611001100,
                             email='alen@mail.com', sign=0, event_id=1)
        Guest.objects.create(realname='una', phone=18611001101,
                             email='una@mail.com', sign=1, event_id=2)
        self.login_user = {'username': 'admin', 'password': 'admin123456'}

    def test_sign_index_action_phone_null(self):
        '''手机号空'''
        response = self.client.post('/login_action/', data=self.login_user)
        response = self.client.post('/sign_index_action/1/', {'phone': ''})
        self.assertEqual(response.status_code, 200)
        self.assertIn(b'phone error.', response.content)

    def test_sign_index_action_phone_or_event_id_error(self):
        response = self.client.post('/login_action/', data=self.login_user)
        response = self.client.post('/sign_index_action/2/', {'phone': '18611001100'})
        self.assertEqual(response.status_code, 200)
        self.assertIn(b'event id or phone error.', response.content)

    def test_sign_index_action_user_sign_has(self):
        '''用户已签到'''
        response = self.client.post('/login_action/', data=self.login_user)
        response = self.client.post('/sign_index_action/2/', {'phone': 18611001101})
        self.assertEqual(response.status_code, 200)
        self.assertIn(b'user has sign in.', response.content)

    def test_sign_index_action_sign_success(self):
        response = self.client.post('/login_action/', data=self.login_user)
        response = self.client.post('/sign_index_action/1/', {'phone': 18611001100})
        self.assertEqual(response.status_code, 200)
        self.assertIn(b'sign in success!', response.content)


关于Django测试的讨论到此为止,更多使用方法和技巧请参考Django官方文档。
https://docs.djangoproject.com/en/1.10/topics/testing/.

 浙公网安备 33010602011771号