Halo2简单使用-斐波那契数列
电路设计
Halo2是基于PLONK算法的零知识证明框架,使用Rust语言。
在Halo2中要证明你掌握斐波那契数列,例如Fib(10)=55。则需要将你的每一步计算过程(秘密的)罗列出来。并由程序(电路)来进行验证,生成证明。
在PLONK算法里,我们使用表格来进行计算跟踪,例如:
| a | b | c |
|---|---|---|
| 1 | 1 | 2 |
| 1 | 2 | 3 |
| 2 | 3 | 5 |
| 3 | 5 | 8 |
| 5 | 8 | 13 |
| 8 | 13 | 21 |
| 13 | 21 | 34 |
| 21 | 34 | 55 |
程序(电路)验证的约束为:
- next_a = b, next_b = r (相等约束)
- a + b - r = 0 (自定义门约束)
一般,我们还需要使用选择器列(约束是否启用的开关),以及最终的输入输出(目标结果)列,因此表格可以设计为v1
| selector | a | b | c | target |
|---|---|---|---|---|
| 1 | 1 | 1 | 2 | 55 |
| 1 | 1 | 2 | 3 | |
| 1 | 2 | 3 | 5 | |
| 1 | 3 | 5 | 8 | |
| 1 | 5 | 8 | 13 | |
| 1 | 8 | 13 | 21 | |
| 1 | 13 | 21 | 34 | |
| 1 | 21 | 34 | 55 |
程序(电路)验证的约束为:
- selector * (a + b - c) = 0 (自定义门约束)
- next_a = b, next_b = c (相等约束)
要输出(暴露)的最终结果是最后一行b的值55
因此电路要实现的步骤为
- 填写第一行a=1, b=1,返回当前b列和c列
- 循环(7次),填写下一行
- 拷贝上一行b列到当前a列
- 拷贝上一行c列到当前行b列
- 计算和并填写当前c列
- 返回当前b列和c列
- 暴露最后一行c列的值(结果)
在电路方法中,填写(分配)值、计算等函数之间一般通过单元格
AssignedCell<F,F>来作为参数和返回值来进行传递。
我们使用一个名为FibChip的结构体来实现这些操作
FibChip
- configure(): 实现芯片配置和(自定义门)约束
- assign_first_row(): 填写第一行的值a=1, b=1, 计算c,返回分配的单元格b和c
- assign_next_row(): 填写下一行,拷贝上一行的b和c到当前行的a和b,并计算填写c,返回当前单元格b和c
- expose_public(): 将最后一行的c暴露为最终结果以供验证
实现方法
- 新建Cargo项目
cargo new halo2_fib --bin
- Cargo.toml添加halo2_proofs包依赖
[package]
name = "halo2_fib"
version = "0.1.0"
edition = "2021"

[dependencies]
halo2_proofs = { git = "https://github.com/zcash/halo2.git" }
- 修改src/main.rs为src/fib.rs,并新建src/lib.rs,内容为
mod fib;
项目结构如下
halo2_fib
├── src
|    ├── fib.rs
|    └── lib.rs
├── Cargo.lock
└── Cargo.toml
- fib.rs实现
芯片配置
#[derive(Clone, Debug, Copy)]
struct FibConfig {
    selector: Selector,
    a: Column<Advice>,
    b: Column<Advice>,
    c: Column<Advice>,
    target: Column<Instance>,
}
芯片及功能实现
struct FibChip {
    config: FibConfig
}
impl FibChip {
    // 生成配置及实现约束
    fn configure<F: Field>(meta: &mut ConstraintSystem<F>) -> FibConfig {
        let selector = meta.selector();
        let a = meta.advice_column();
        let b = meta.advice_column();
        let c = meta.advice_column();
        let target = meta.instance_column();

        meta.enable_equality(a);
        meta.enable_equality(b);
        meta.enable_equality(c);
        meta.enable_equality(target);
        // 自定义门约束
        meta.create_gate("斐波那契(相加)", |meta| {
            let selector = meta.query_selector(selector);
            let num_a = meta.query_advice(a, Rotation::cur());
            let num_b = meta.query_advice(b, Rotation::cur());
            let num_c = meta.query_advice(c, Rotation::cur());
            vec![
                ("a + b = c", selector * (num_a + num_b - num_c)),
            ]
        });
        FibConfig { selector, a, b, c, target }
    }
    // 填写第一行,并返回当前单元格b和c
    fn assign_first_row<F: Field>(&self, mut layouter: impl Layouter<F>, a: Value<F>, b: Value<F>) -> Result<(AssignedCell<F, F>, AssignedCell<F, F>), Error> {
        layouter.assign_region(|| "填写第一行", |mut region| {
            self.config.selector.enable(&mut region, 0)?;
            region.assign_advice(|| "加载a", self.config.a,  0, || a).expect("加载a失败");
            let cur_b = region.assign_advice(|| "加载b", self.config.b,  0, || b).expect("加载b失败");
            let cur_c = region.assign_advice(|| "计算当前c", self.config.c,  0, || a+b).expect("填写c失败");
            Ok((cur_b, cur_c))  // 返回当前单元格b和单元格c
        })
    }
    // 填写下一行,并返回当前单元格b和c
    fn assign_next_row<F: Field>(&self, mut layouter: impl Layouter<F>, pre_b: &AssignedCell<F,F>, pre_c: &AssignedCell<F, F>) -> Result<(AssignedCell<F, F>, AssignedCell<F, F>), Error> {
        layouter.assign_region(|| "填写下一行", |mut region| {
            self.config.selector.enable(&mut region, 0)?;
            let cur_a = pre_b.copy_advice(|| "拷贝上一行b到当前a", &mut region, self.config.a, 0).expect("拷贝到a失败");
            let cur_b = pre_c.copy_advice(|| "拷贝上一行c到当前b", &mut region, self.config.b, 0).expect("拷贝到b失败");
            let value_c = cur_a.value_field().evaluate() + cur_b.value_field().evaluate();
            let cur_c = region.assign_advice(|| "计算当前c", self.config.c, 0, || value_c).expect("填写c失败");
            Ok((cur_b, cur_c))  // 返回当前单元格b和单元格c
        })
    }
    // 将某单元格暴露为最终结果
    fn expose_public<F:Field>( &self, mut layouter: impl Layouter<F>, cell: &AssignedCell<F,F>, row: usize ) -> Result<(), Error> {
        layouter.constrain_instance(cell.cell(), self.config.target, row)
    }
}
电路实现
#[derive(Default)]
struct FibCircuit<F: Field> {
    a: Value<F>, // 初始a=1
    b: Value<F>, // 初始b=1
}

impl<F: Field> Circuit<F> for FibCircuit<F> {
    type Config = FibConfig;
    type FloorPlanner = SimpleFloorPlanner;

    fn without_witnesses(&self) -> Self { Self::default() }

    fn configure(meta: &mut ConstraintSystem<F>) -> Self::Config { FibChip::configure(meta) }

    fn synthesize(&self, config: Self::Config, mut layouter: impl Layouter<F>) -> Result<(), Error> {
        let fib = FibChip { config };
        // 初始化第一行
        let (mut b, mut c) = fib.assign_first_row(layouter.namespace(||"填写第一行"), self.a, self.b).expect("填写第一行失败");
        // 循环填写下一行(循环7次)
        for _i in 3..10 {
            let (next_b, next_c) = fib.assign_next_row(layouter.namespace(||"填写下一行"), &b, &c).expect("填写下一行失败");
            b = next_b;
            c = next_c;
        }
        // 暴露结果
        fib.expose_public(layouter, &c, 0)?;
        Ok(())
    }
}
测试电路
#[test]
fn test_fib() {
    let circuit = FibCircuit {a: Value::known(Fp::one()),b: Value::known(Fp::one())};
    let target = Fp::from(55);
    let public_input = vec![target];
    let prover = MockProver::run(4, &circuit, vec![public_input]).unwrap();  // 最大可用2^4=16行
    prover.assert_satisfied();
}
- 生成电路layout布局
- Cargo.toml中增加features/dev,饮用"halo2_proofs/dev-graph"和"plotters",并添加plotters依赖
[package]
name = "halo2_fib"
version = "0.1.0"
edition = "2021"

[features]
dev = ["halo2_proofs/dev-graph", "plotters"]

[dependencies]
halo2_proofs = { git = "https://github.com/zcash/halo2.git" }
plotters = { version = "0.3.5", optional = true }
- fib.rs中添加生成layout方法
#[cfg(feature = "dev")]
#[test]
fn print_fib() {
    use plotters::prelude::*;
    let root = BitMapBackend::new("fib-layout.png", (1024, 3096)).into_drawing_area();
    root.fill(&WHITE).unwrap();
    let root = root.titled("Fib Layout", ("sans-serif", 60)).unwrap();

    let circuit = FibCircuit {
        a: Value::known(Fp::one()),
        b: Value::known(Fp::one()),
    };
    halo2_proofs::dev::CircuitLayout::default()
        .render(5, &circuit, &root)
        .unwrap();

    let dot_string = halo2_proofs::dev::circuit_dot_graph(&circuit);
    print!("{}", dot_string);
}
- 命令后运行features=dev的测试
cargo test --features=dev
完整代码:https://github.com/hanzhichao/halo2-fib/blob/master/src/fib.rs
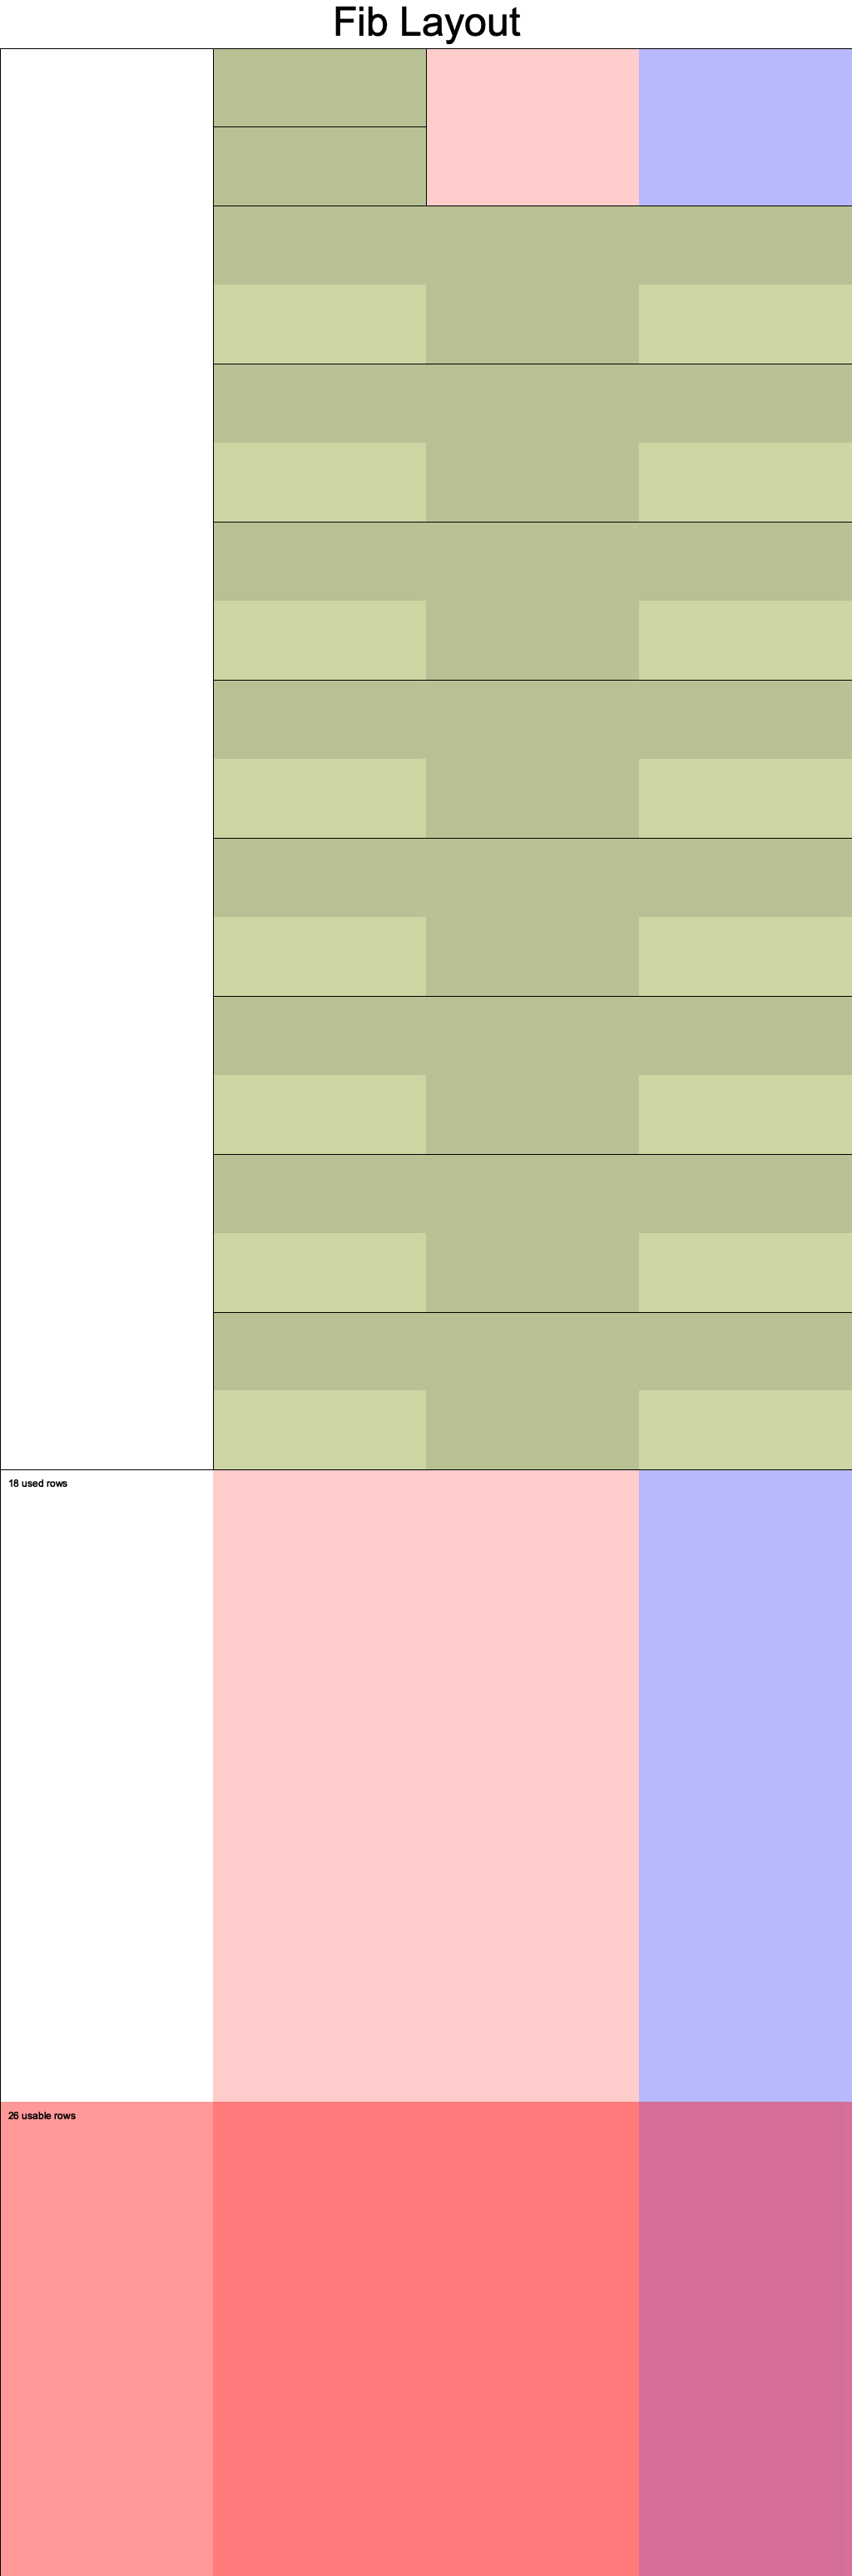
电路布局

v2-使用两个advice列
当然我们也可以不使用c列,这样可以减少成本,不过使用的行数则会增加一点。
| selector | a | b | target |
|---|---|---|---|
| 1 | 1 | 1 | 55 |
| 2 | |||
| 1 | 1 | 2 | |
| 3 | |||
| 1 | 2 | 3 | |
| 5 | |||
| 1 | 3 | 5 | |
| 8 | |||
| 1 | 5 | 8 | |
| 13 | |||
| 1 | 8 | 13 | |
| 21 | |||
| 1 | 13 | 21 | |
| 34 | |||
| 1 | 21 | 34 | |
| 55 |
实现步骤:
- configure() 电路配置及约束
- assign_first_row(): 填写第一行和下一行,返回b和next_b两个单元格
- assign_next_row(): 循环7次,填写下一行,返回b和next_b两个单元格
- 暴露b最后一个值
完整代码:https://github.com/hanzhichao/halo2-fib/blob/v2/src/fib.rs
电路布局
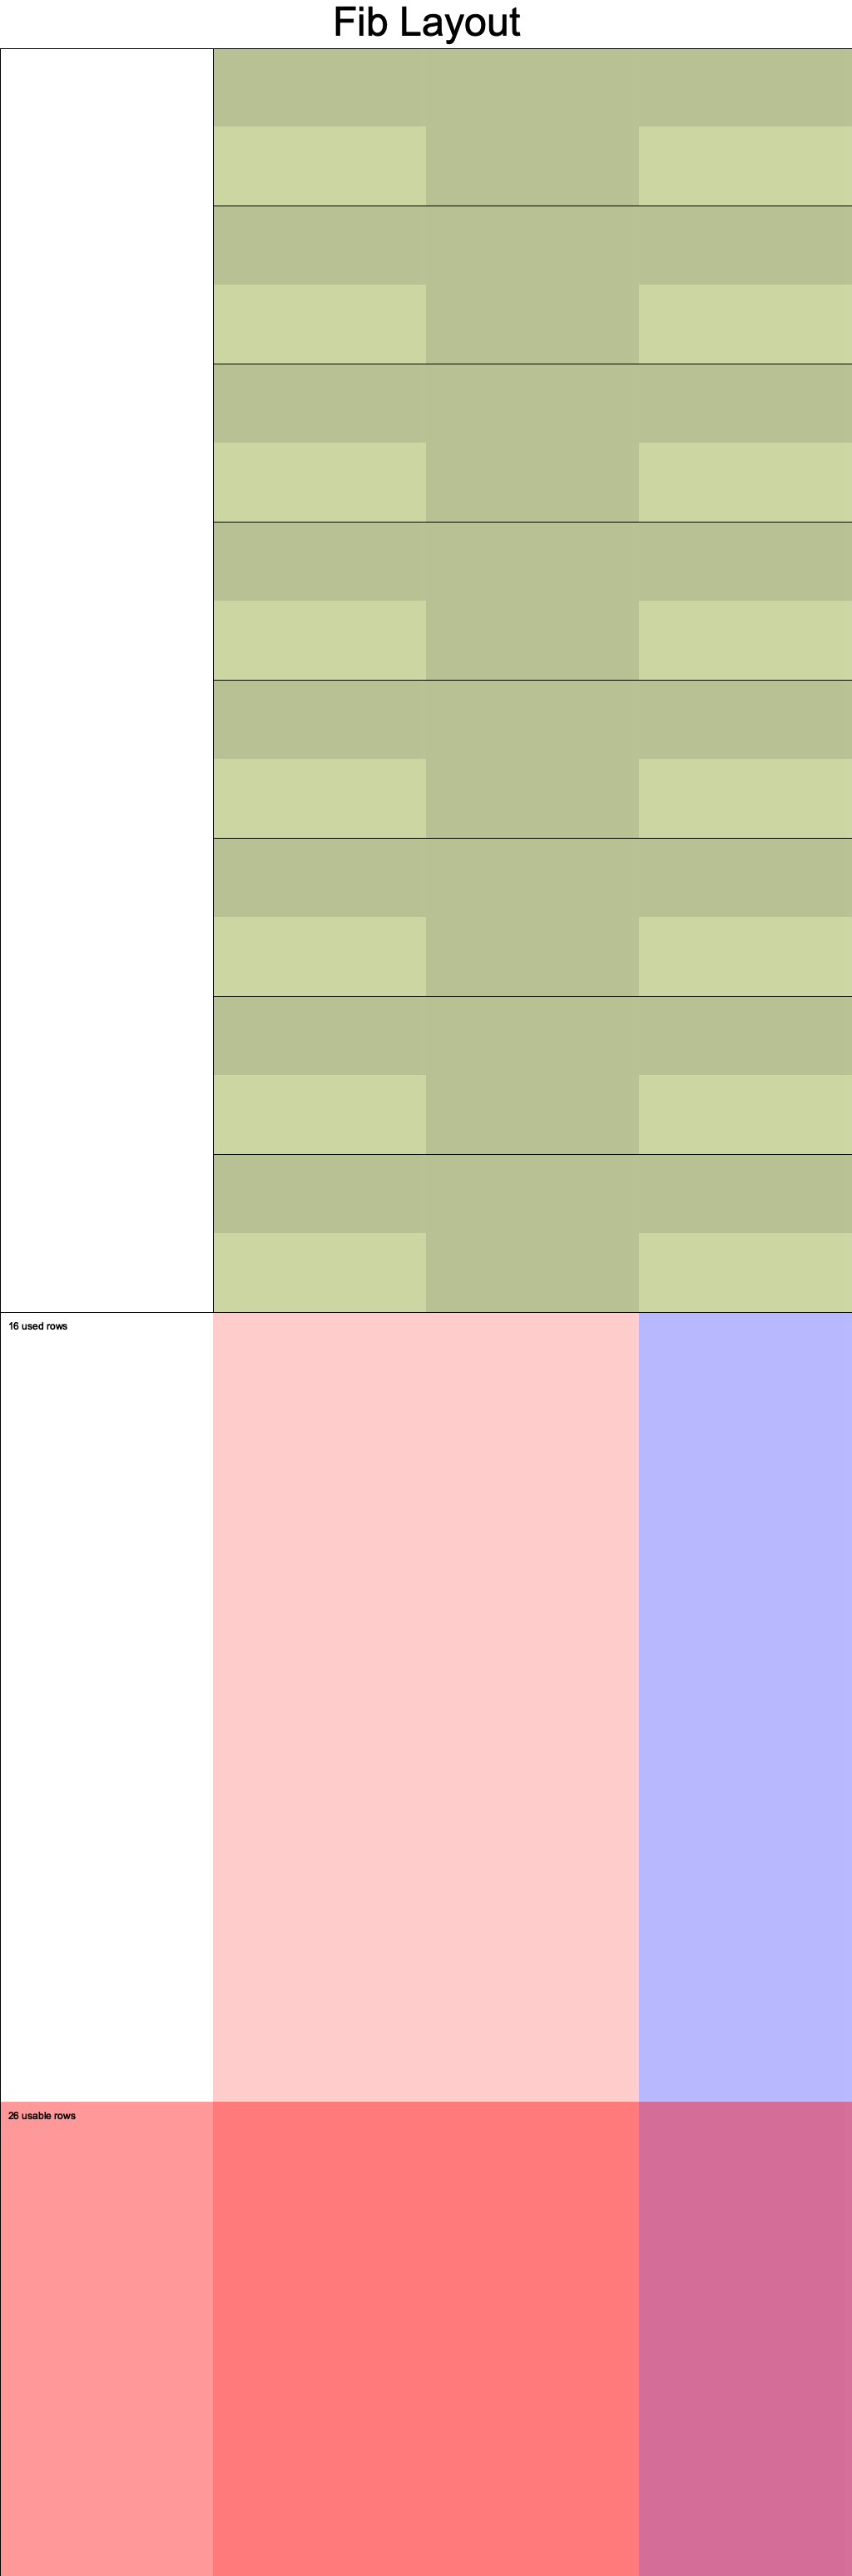
v3-合并填写第一行和下一行逻辑
由于v2填写第一行和填写第2行逻辑一样,我们可以使用同一个函数,但是函数的输入需要两个初始单元格,此时,表格可以设计为
| selector | a | b | target |
|---|---|---|---|
| 1 | 55 | ||
| 1 | |||
| 1 | 1 | 1 | |
| 2 | |||
| 1 | 1 | 2 | |
| 3 | |||
| 1 | 2 | 3 | |
| 5 | |||
| 1 | 3 | 5 | |
| 8 | |||
| 1 | 5 | 8 | |
| 13 | |||
| 1 | 8 | 13 | |
| 21 | |||
| 1 | 13 | 21 | |
| 34 | |||
| 1 | 21 | 34 | |
| 55 |
实现步骤:
- configure() 电路配置及约束
- load_private(): 填写a=1到a列,得到单元格a
- load_private(): 填写b=1到a列,得到单元格b
- assign_next_row(): 循环8次,填写下一行,返回b和next_b两个单元格
- 暴露b最后一个值
完整代码:https://github.com/hanzhichao/halo2-fib/blob/v3/src/fib.rs
电路布局