发布Python包到Pypi
注册及配置pypi
- pypi分发配置
编辑根目录的.pypirc文件
vim ~/.pypirc
内容如下:
[distutils]
index-servers=pypi

[pypi]
repository = https://upload.pypi.org/legacy/
username = <Pypi用户名>
password = <Pypi密码>
项目结构参考
项目结构参考
.
├── LICENSE
├── MANIFEST.in
├── README.md
├── logz
│   └── __init__.py
├── setup.py
└── tests
    ├── __init__.py
    └── test_logz.py
pytest插件项目结构参考
├── LICENSE
├── MANIFEST.in
├── README.md
├── pytest_owner
│   ├── __init__.py
│   └── plugin.py
├── setup.py
└── tests
    └── test_pytest_owner.py
可以使用cookiecutter根据模板快速生成标准项目结构:参考 https://note.qidong.name/2018/10/cookiecutter/
可用cookiecutter模板列表:https://github.com/cookiecutter/cookiecutter/tree/db14e06a1dcc0187beeafde72685c3acef93eb68#a-pantry-full-of-cookiecutters
编写setup.py
setup.py参考
import os
from setuptools import setup, find_packages

this_directory = os.path.abspath(os.path.dirname(__file__))
setup_requirements = []


def read_file(filename):  # 读取README.md文件到 long_description
    with open(os.path.join(this_directory, filename), encoding='utf-8') as f:
        long_description = f.read()
    return long_description


setup(
    name='logz',
    version='0.16',
    author="Han Zhichao",
    author_email='superhin@126.com',
    license="MIT license",
    description='easy log use for extra infos',
    long_description=read_file('README.md'),
    long_description_content_type="text/markdown",
    url='https://github.com/hanzhichao/logz',
    keywords=['logz', 'extra', 'log'],

    packages=find_packages(include=['logz']),
    include_package_data=True,
    zip_safe=True,

    setup_requires=setup_requirements,
    install_requires=[],
    classifiers=[
        'Programming Language :: Python',
        'Programming Language :: Python :: 2.7',
        'Programming Language :: Python :: 3.7',
    ],
)
从源码中看setup()函数支持的参数如下
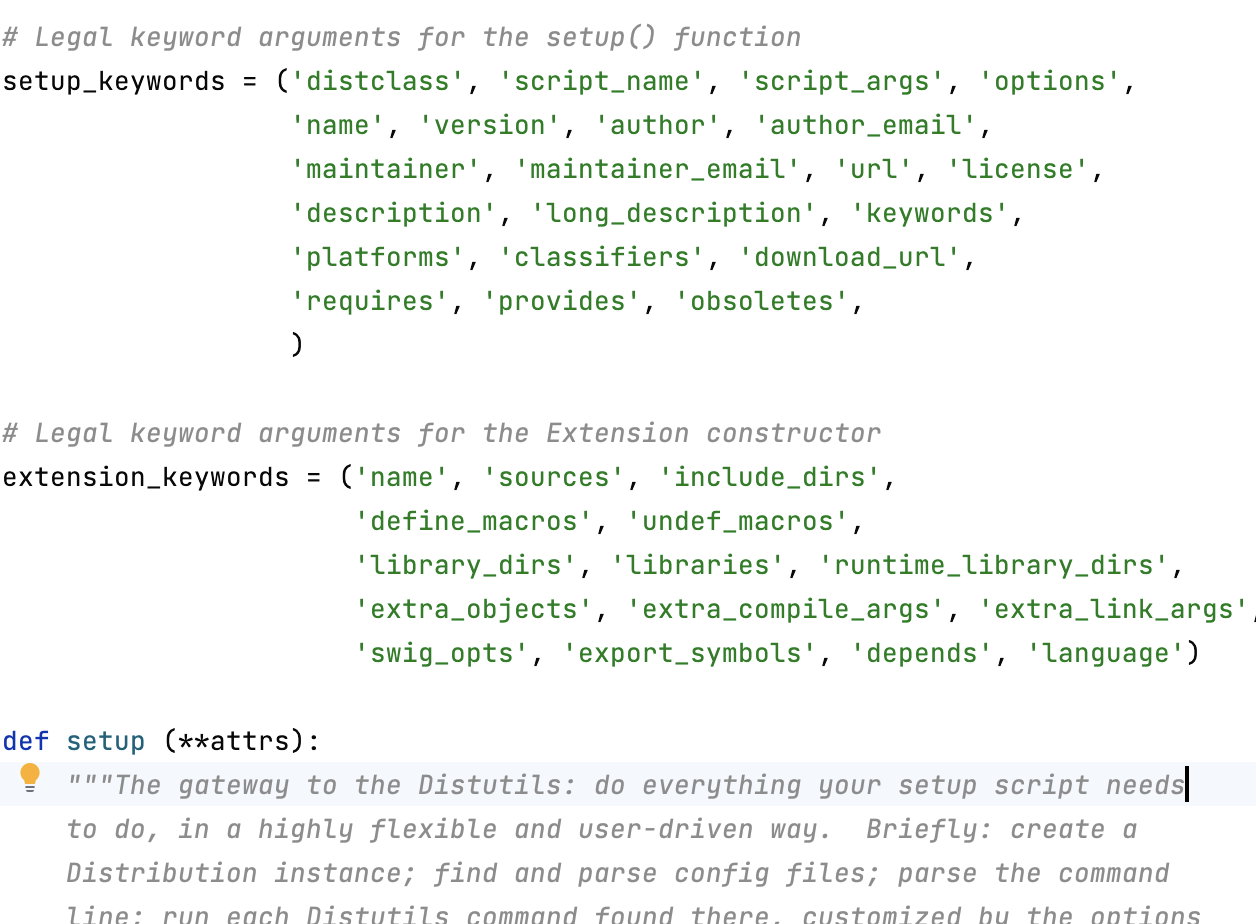
setup参数说明
-
基本参数:
- name: 应用名称(安装后的包名)- 必填
- version: 当前版本
- author: 作者
- author_email: 作者邮箱
- maintainer: 维护者
- maintainer_email: 维护者邮箱
- description: 简单描述
- long_descritpion: 详细描述
- url: 应用主页链接
- download_url: 下载链接
- keywords: 应用关键词
- license: 许可协议
- classifies: 适用Python版本
- platforms: 适用平台
- provides:
- obsoletes:
- script_name:
- script_args:
- options:
-
选项
- packages: 子包
- python_requires:Python版本要求
- install_requires: 依赖的其他三方包
- extras_require: 开发或测试时的额外依赖
- entry_points: 使用入口(可以指定生成命令行)
- package_data:包数据
pytest插件setup.py参考
import os
from setuptools import setup, find_packages

this_directory = os.path.abspath(os.path.dirname(__file__))
setup_requirements = ['pytest-runner', ]


def read_file(filename):
    with open(os.path.join(this_directory, filename), encoding='utf-8') as f:
        long_description = f.read()
    return long_description

setup(
    name='pytest-owner',
    version='0.1',
    author="Han Zhichao",
    author_email='superhin@126.com',
    license="MIT license",
    description='Add owner mark for tests',
    long_description=read_file('README.md'),
    long_description_content_type="text/markdown",
    url='https://github.com/hanzhichao/pytest-owner',
    keywords=['pytest', 'py.test', 'pytest-owner', 'test owner', 'pytest tester'],

    classifiers=[
        'Framework :: Pytest',
        'Programming Language :: Python',
        'Topic :: Software Development :: Testing',
        'Programming Language :: Python :: 3.6',
    ],

   include_package_data=True,
   packages=find_packages(include=['pytest_owner']),
   zip_safe=True,

   setup_requires=setup_requirements,
   install_requires=[ 'pytest', 'pytest-runner'],

   entry_points={'pytest11': [ 'pytest-owner = pytest_owner.plugin']}
)
pytest插件的关键在于entry_points的入口指定,pytest运行时可以自动加载所有entryp_points设置了pytest11的包。
也可以使用setup.cfg进行配置,参考:https://github.com/octodns/octodns/blob/4b44ab14b1f0a52f1051c67656d6e3dd6f0ba903/setup.cfg
使用setup.py版参考:https://github.com/octodns/octodns/blob/main/setup.py
setup.py生成命令行命令参考:https://zhuanlan.zhihu.com/p/503252479 项目地址:https://github.com/deltahedge1/snek
使用twine打包及发布
安装twine包
pip install twine
在项目中运行以下命令发布项目
python setup.py sdist
twine upload dist/*

 浙公网安备 33010602011771号