vue 发起get请求和post请求
一、vite方式初始化vue3项目
C:\Users\Administrator>npm init vite-app his-project

> npx
> create-vite-app his-project

Scaffolding project in C:\Users\Administrator\his-project...

Done. Now run:

  cd his-project
  npm install (or `yarn`)
  npm run dev (or `yarn dev`)


C:\Users\Administrator>cd his-project

C:\Users\Administrator\his-project>npm install
npm warn deprecated inflight@1.0.6: This module is not supported, and leaks memory. Do not use it. Check out lru-cache if you want a good and tested way to coalesce async requests by a key value, which is much more comprehensive and powerful.
npm warn deprecated glob@7.2.3: Glob versions prior to v9 are no longer supported
npm warn deprecated rollup-plugin-terser@7.0.2: This package has been deprecated and is no longer maintained. Please use @rollup/plugin-terser
npm warn deprecated sourcemap-codec@1.4.8: Please use @jridgewell/sourcemap-codec instead

added 299 packages, and audited 300 packages in 1m

39 packages are looking for funding
  run `npm fund` for details

7 vulnerabilities (1 low, 3 moderate, 3 high)

To address issues that do not require attention, run:
  npm audit fix

To address all issues (including breaking changes), run:
  npm audit fix --force

Run `npm audit` for details.

C:\Users\Administrator\his-project>npm run dev

> his-project@0.0.0 dev
> vite

[vite] Optimizable dependencies detected:
vue

  Dev server running at:
  > Network:  http://10.111.40.30:3000/
  > Network:  http://192.168.10.225:3000/
  > Local:    http://localhost:3000/
二、vue3
修改his-project\src\components\HelloWorld.vue文件,支持发起get请求和post请求
<template>
<div>
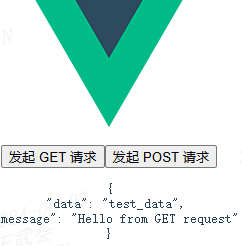
<button @click="fetchData">发起 GET 请求</button>
<button @click="postData">发起 POST 请求</button>
<!-- 你可以在这里添加用于显示响应数据的元素 -->
<div v-if="responseData">
<pre>{{ responseData }}</pre>
</div>
</div>
</template>
<script>
import axios from 'axios';
export default {
data() {
return {
responseData: null, // 用于存储响应数据的变量
};
},
methods: {
// 发起 GET 请求的方法
fetchData() {
axios.get('http://127.0.0.1:5000/get_data') // 替换为你的 API URL
.then(response => {
this.responseData = response.data; // 存储响应数据
})
.catch(error => {
console.error('GET 请求失败:', error);
});
},
// 发起 POST 请求的方法
postData() {
const postData = {
key1: 'value1',
message: 'value2' // 根据你的 API 要求设置数据
};
axios.post('http://127.0.0.1:5000/post_data', postData) // 替换为你的 API URL
.then(response => {
this.responseData = response.data; // 存储响应数据
})
.catch(error => {
console.error('POST 请求失败:', error);
});
},
},
};
</script>
三、后端flask配置get请求接口和post请求接口
from flask import Flask, request, jsonify
from flask_cors import CORS

app = Flask(__name__)
CORS(app, resources=r'/*')
@app.route('/get_data', methods=['GET'])
def get_data():
    # 这里可以添加获取数据的逻辑
    data = {'message': 'Hello from GET request','data':'test_data'}
    return jsonify(data)


@app.route('/post_data', methods=['POST'])
def post_data():
    # 假设我们期望收到一个 JSON 数据体
    data = request.get_json()  # 从请求中获取 JSON 数据
    # 你可以在这里添加处理数据的逻辑
    message = data.get('message', 'No message provided')
    response = {'message': f'Received: {message}'}
    return jsonify(response), 201  # 201 是CREATED状态码,表示资源已成功创建

if __name__ == '__main__':
    app.run(debug=True)
四、页面效果,点击按钮发起请求,显示接口返回信息