如何在kubesphere优雅的使用jmeter集群进行性能测试
一、前提条件:
Kubernetes > v1.16
kubesphere > v3.0.0 参考文档 https://v3-0.docs.kubesphere.io/docs/quick-start/all-in-one-on-linux/
1 master + 3 node
二、在kubesphere部署
备注:步骤二仍适用于仅在K8S环境部署jmeter集群
在kubesphere后台的master节点执行以下操作:
1、下载代码
https://github.com/wenxin-01/k8s-jmeter-cluster.git
2、部署组件
执行jmeter_cluster_create.sh,并输入一个唯一的 namespace, 如 jmeter
./jmeter_cluster_create.sh
查看pods安装情况
[root@master ~]# kubectl get pod -n jmeter
NAME                               READY   STATUS    RESTARTS   AGE
influxdb-jmeter-5f7dd64975-xkgqc   1/1     Running   0          21h
jmeter-grafana-5856f7b855-rw4lp    1/1     Running   0          21h
jmeter-master-75c7d64449-46pjm     1/1     Running   0          21h
jmeter-slaves-d69c647d-dd6sb       1/1     Running   0          21h
jmeter-slaves-d69c647d-glbjn       1/1     Running   0          21h
jmeter-slaves-d69c647d-nsfgf       1/1     Running   0          21h
3、 初始化dashboard
3.1 启动dashboard脚本
$ ./dashboard.sh
检查 service 部署情况:
[root@master ~]# kubectl get svc -n jmeter
NAME                TYPE        CLUSTER-IP      EXTERNAL-IP   PORT(S)                        AGE
jmeter-grafana      NodePort    10.233.22.208   <none>        3000:30157/TCP                 22h
jmeter-influxdb     ClusterIP   10.233.26.95    <none>        8083/TCP,8086/TCP,2003/TCP     22h
jmeter-slaves-svc   ClusterIP   None            <none>        1099/TCP,50000/TCP,50001/TCP   22h
通过 http:// 节点IP:30157 即可访问 grafana
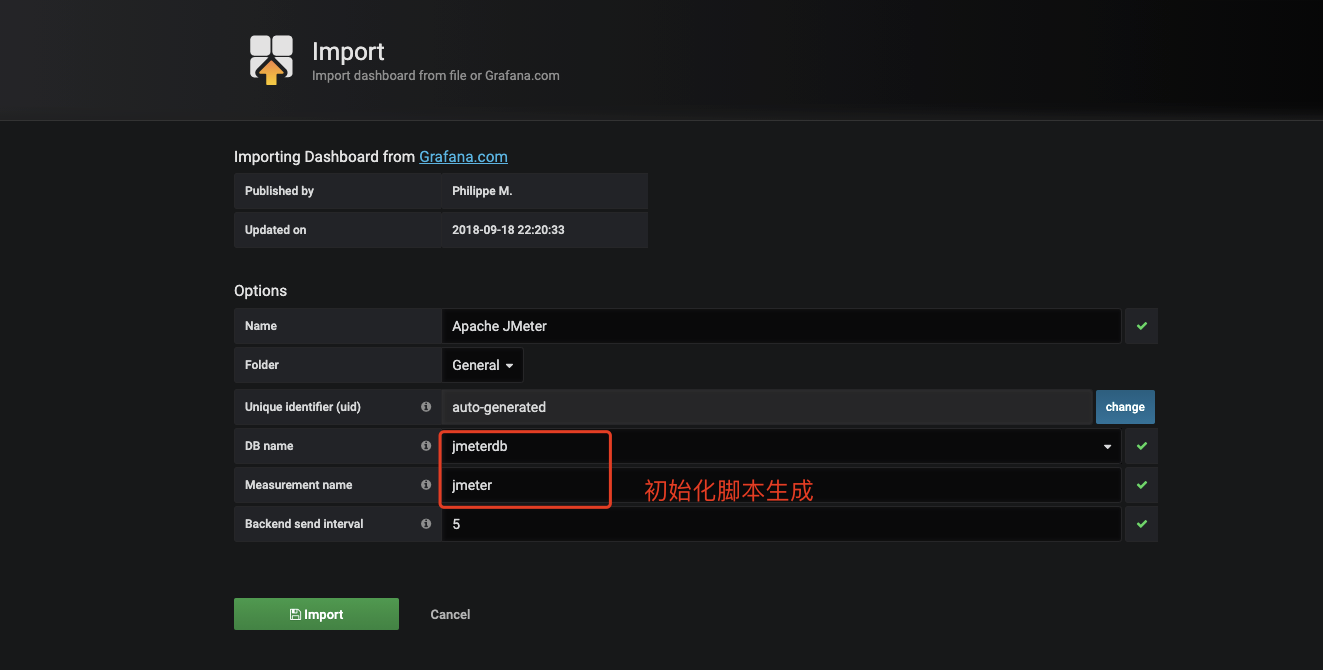
在granafa导入dashboard模版(5496),选择数据库即可。


4、 启动测试
4.1 执行脚本
$ ./start_test.sh
需要一个jmeter测试脚本
4.2 jmeter脚本说明
需要在jmeter脚本中添加 backend listener, 内容如下:

4.3 脚本说明
start_test.sh(此脚本用于自动运行 Jmeter 测试脚本,而无需手动登录 Jmeter 主 shell,它将询问 Jmeter 测试脚本的位置,然后将其复制到 Jmeter master pod 并启动自动对 Jmeter slave 进行测试):
#!/usr/bin/env bash
#Script created to launch Jmeter tests directly from the current terminal without accessing the jmeter master pod.
#It requires that you supply the path to the jmx file
#After execution, test script jmx file may be deleted from the pod itself but not locally.

#直接从当前终端启动 Jmeter 测试而创建的脚本,无需访问 Jmeter master pod。
#要求提供 jmx 文件的路径
#执行后,测试脚本 jmx 文件不会从 pod 本身删除,也不会在本地删除。

working_dir="`pwd`"

# 获取 namesapce 变量
tenant=`awk '{print $NF}' "$working_dir/tenant_export"`

jmx="$1"
[ -n "$jmx" ] || read -p 'Enter path to the jmx file ' jmx

if [ ! -f "$jmx" ];
then
    echo "Test script file was not found in PATH"
    echo "Kindly check and input the correct file path"
    exit
fi

test_name="$(basename "$jmx")"

# 获取 master pod 详细信息
master_pod=`kubectl get po -n $tenant | grep jmeter-master | awk '{print $1}'`
kubectl cp "$jmx" -n $tenant "$master_pod:/$test_name"

## 启动 Jmeter 压测
kubectl exec -ti -n $tenant $master_pod -- /bin/bash /load_test "$test_name"
5、停止测试
执行脚本 jmeter_stop.sh(停止测试):
$ ./jmeter-stop.sh
三、使用kubesphere管理jmeter集群:
1、新建企业空间

2、进入集群管理-->项目管理-->用户项目
将项目jmeter分配到企业空间wx

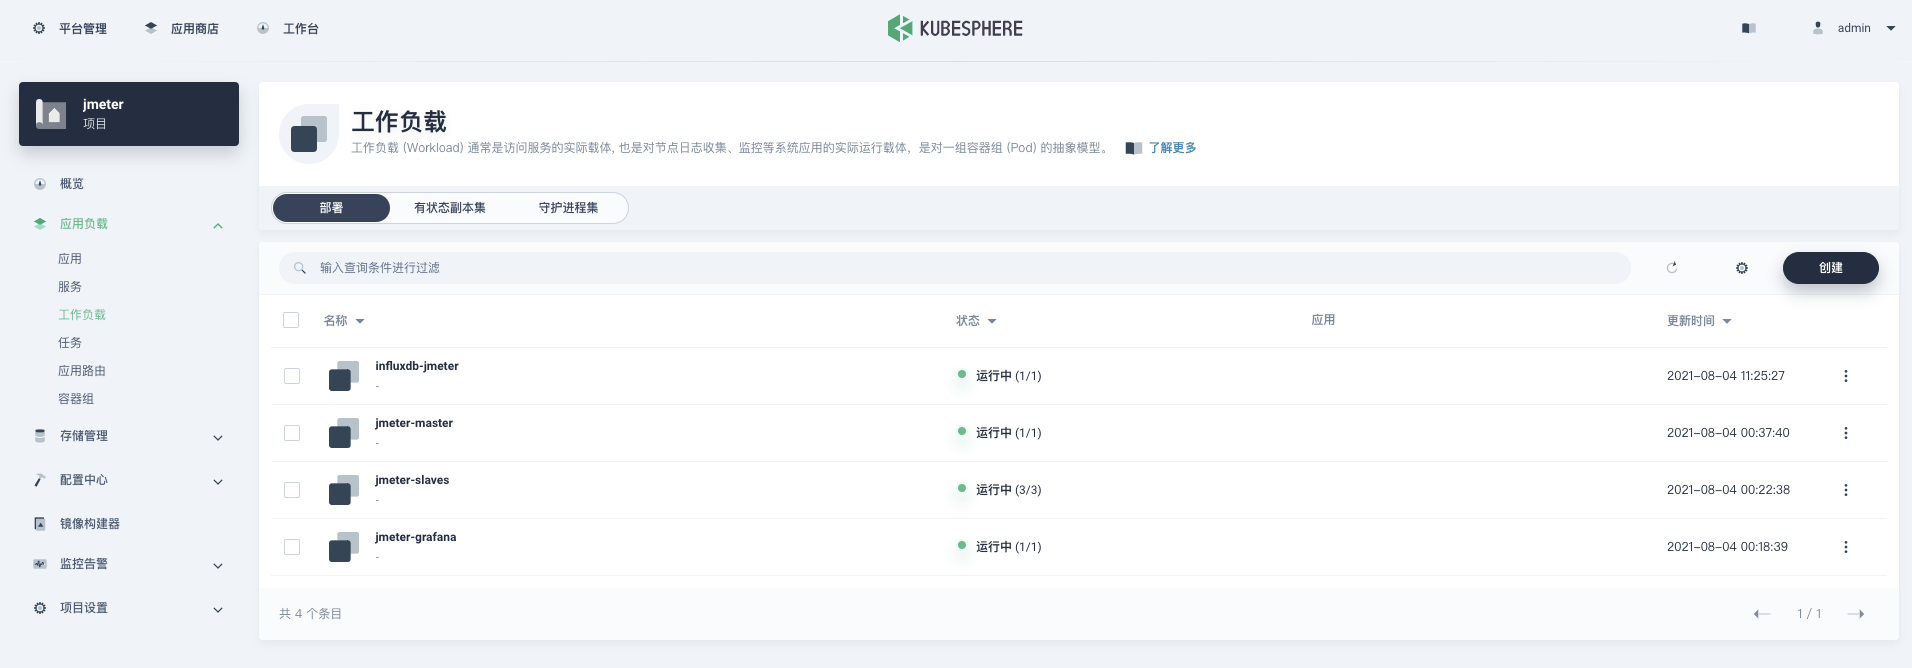
3、通过工作台-->企业空间wx-->项目jmeter,查看和管理jmeter集群。

参考资料:
- [1]:https://github.com/kubernauts/jmeter-kubernetes
所有的努力都值得期许,所有的梦想都应该灌溉!

