
uniapp + 微信小程序:新版canvas常用api及注意事项
关于新旧canvas的比较我以前写过一篇博客 :https://www.cnblogs.com/sunshine233/p/17014701.html ,这里就不重复了。
但在正文开始之前,我不得不再说一遍微信的文档写的真垃圾。很多问题的答案都是在微信开发者社区里找到的。
一、新版canvas 基础用法:
<template>
<view>
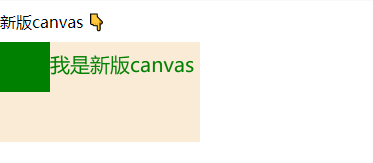
<view class="divider">新版canvas 👇</view>
<!-- 1. canvas-id 换成了 id -->
<!-- 2. 增加了 type="2d" 表示新版canvas -->
<canvas id="myCanvas" type="2d" ></canvas>
</view>
</template>
<script>
export default {
data() {
return {}
},
mounted() {
this.newCanvas();
},
methods: {
newCanvas() {
// 3. 获取canvas节点的方式变了,必须按照这个格式写
// 3.1 如果不是直接页面而是子页面,把 wx 改成 this,否则获取不到 node节点
// 也就是 wx.createSelectorQuery() 其她部分一样
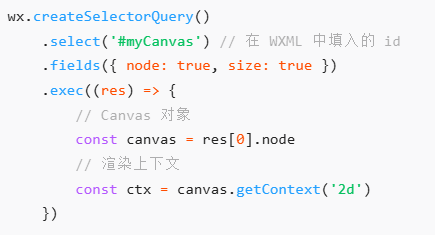
wx.createSelectorQuery()
.select('#myCanvas')
.node(({
node: canvas
}) => {
//4. 获取正确实例
const ctx = canvas.getContext('2d');
ctx.fillStyle = "green";
ctx.fillRect(0, 0, 50, 50);
// 4.1 设置字体大小(两个参数必须都写)
ctx.font = "20px sans-serif";
// 4.2 写文字
ctx.fillText("我是新版canvas", 50, 30);
// 4.3 新版 canvas 不需要调用 draw()
// ctx.draw();
}).exec();
},
}
}
</script>
<style scoped>
.divider {
margin: 10px 0;
}
canvas {
background-color: antiquewhite;
}
</style>
代码中获取实例的写法和官方实例效果一样
运行结果:
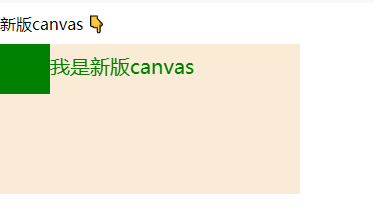
二、新版canvas画图模糊失真
但canvas实际上有两种设置尺寸的方式:
- 一种是默认尺寸300*150(文档中写可以直接用 <canvas id="myCanvas" type="2d" width="300" height="300"></canvas> 修改,但我2025/2/24尝试好像不起效了);
- 一种是在css中设置 canvas { width: 300px; height: 300px; }
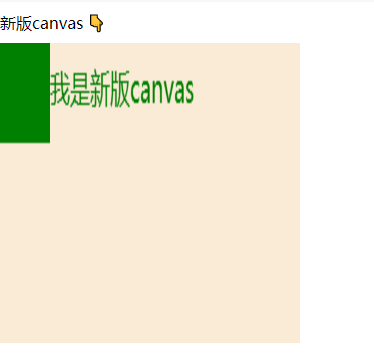
这两个尺寸被成为渲染宽高和逻辑宽高。但我觉得微信文档写的似乎有点问题且模糊不清。

查了别的文档 + 实践,我发现如果在css中手动设置了canvas的宽高,画图就会出现模糊(因为canvaWidth和styleWidth不一致)。
和上一段代码差异只增加了css
<template>
    <view>
        <view class="divider">新版canvas 👇</view>
        <!-- 1. canvas-id 换成了 id -->
        <!-- 2. 增加了 type="2d" 表示新版canvas -->
        <canvas id="myCanvas" type="2d" ></canvas>
    </view>
</template>

<script>
    export default {
        data() {
            return {}
        },
        mounted() {
            this.newCanvas();
        },
        methods: {
            newCanvas() {
                // 3. 获取canvas节点的方式变了,必须按照这个格式写
                // 3.1 如果不是直接页面而是子页面,把 wx 改成 this,否则获取不到 node节点
                // 也就是 wx.createSelectorQuery()  其她部分一样
                wx.createSelectorQuery()
                    .select('#myCanvas')
                    .node(({
                        node: canvas
                    }) => {
                        //4. 获取正确实例
                        const ctx = canvas.getContext('2d');

                        ctx.fillStyle = "green";
                        ctx.fillRect(0, 0, 50, 50);
                        // 4.1 设置字体大小(两个参数必须都写)
                        ctx.font = "20px sans-serif";
                        // 4.2 写文字
                        ctx.fillText("我是新版canvas", 50, 30);

                        // 4.3 新版 canvas 不需要调用 draw()
                        // ctx.draw();
                    }).exec();
            },
        }
    }
</script>

<style scoped>
    .divider {
        margin: 10px 0;
    }

    canvas {
        background-color: antiquewhite;
        width: 300px;
        height: 300px;
    }
</style>
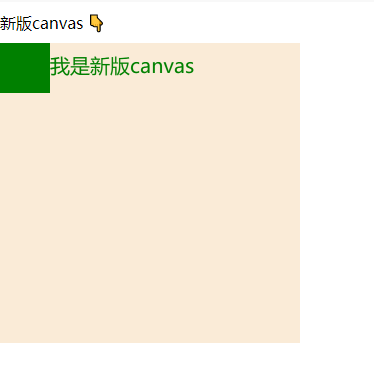
想解决模糊失真的问题就要使用 canvas.width = styleWidth*dpr; canvas.height = styleHeight*dpr; 也就是重新设置canvas的尺寸等于css中的尺寸*像素比。
获取像素比微信已经给出了api : const dpr = wx.getWindowInfo().pixelRatio;
现在css中宽高设置的都是300, 所以要设置 canvas.width = 300* dpr; canvas.height = 300 * dpr; 最后缩放 ctx.scale(dpr, dpr);
<template>
    <view>
        <view class="divider">新版canvas 👇</view>
        <!-- 1. canvas-id 换成了 id -->
        <!-- 2. 增加了 type="2d" 表示新版canvas -->
        <canvas id="myCanvas" type="2d" ></canvas>
    </view>
</template>

<script>
    export default {
        data() {
            return {}
        },
        mounted() {
            this.newCanvas();
        },
        methods: {
            newCanvas() {
                // 3. 获取canvas节点的方式变了,必须按照这个格式写
                // 3.1 如果不是直接页面而是子页面,把 wx 改成 this,否则获取不到 node节点
                // 也就是 wx.createSelectorQuery()  其她部分一样
                wx.createSelectorQuery()
                    .select('#myCanvas')
                    .node(({
                        node: canvas
                    }) => {
                        //4. 获取正确实例
                        const ctx = canvas.getContext('2d');

                        const dpr = wx.getWindowInfo().pixelRatio;
                        console.log("default canvas.width:", canvas.width,
                         " default canvas.height:", canvas.height);
                        console.log("dpr:", dpr);
                        canvas.width = 300* dpr;
                        canvas.height = 300 * dpr;
                        ctx.scale(dpr, dpr);

                        ctx.fillStyle = "green";
                        ctx.fillRect(0, 0, 50, 50);
                        // 4.1 设置字体大小(两个参数必须都写)
                        ctx.font = "20px sans-serif";
                        // 4.2 写文字
                        ctx.fillText("我是新版canvas", 50, 30);

                        // 4.3 新版 canvas 不需要调用 draw()
                        // ctx.draw();
                    }).exec();
            },
        }
    }
</script>

<style scoped>
    .divider {
        margin: 10px 0;
    }

    canvas {
        background-color: antiquewhite;
        width: 300px;
        height: 300px;
    }
</style>
如果想用动态数据可以用
<template>
    <view>
        <view class="divider">新版canvas 👇</view>
        <!-- 1. canvas-id 换成了 id -->
        <!-- 2. 增加了 type="2d" 表示新版canvas -->
        <canvas id="myCanvas" type="2d" :style="{width:styleWidth+'px',height:styleHeight+'px'}" ></canvas>
    </view>
</template>

<script>
    export default {
        data() {
            return {
                styleWidth:200,
                styleHeight:100
            }
        },
        mounted() {
            this.newCanvas();
        },
        methods: {
            newCanvas() {
                // 3. 获取canvas节点的方式变了,必须按照这个格式写
                // 3.1 如果不是直接页面而是子页面,把 wx 改成 this,否则获取不到 node节点
                // 也就是 wx.createSelectorQuery()  其她部分一样
                wx.createSelectorQuery()
                    .select('#myCanvas')
                    .node(({
                        node: canvas
                    }) => {
                        //4. 获取正确实例
                        const ctx = canvas.getContext('2d');

                        const dpr = wx.getWindowInfo().pixelRatio;
                        console.log("default canvas.width:", canvas.width,
                         " default canvas.height:", canvas.height);
                        console.log("dpr:", dpr);
                        canvas.width = this.styleWidth* dpr;
                        canvas.height = this.styleHeight * dpr;
                        ctx.scale(dpr, dpr);

                        ctx.fillStyle = "green";
                        ctx.fillRect(0, 0, 50, 50);
                        // 4.1 设置字体大小(两个参数必须都写)
                        ctx.font = "20px sans-serif";
                        // 4.2 写文字
                        ctx.fillText("我是新版canvas", 50, 30);

                        // 4.3 新版 canvas 不需要调用 draw()
                        // ctx.draw();
                    }).exec();
            },
        }
    }
</script>

<style scoped>
    .divider {
        margin: 10px 0;
    }

    canvas {
        background-color: antiquewhite;
    }
</style>
三、新版canvas易错api
id不能用数字开头,字符串的数字也不行
括号赋值变成了等号赋值
旧版: ctx.setFillStyle("red"); ctx.fillRect(50, 50, 75, 75);
新版: // 设置的方式从 ctx.setFillStyle("red") 改成了 ctx.fillStyle = "red"; ctx.fillStyle = "red"; ctx.fillRect(50, 50, 75, 75);
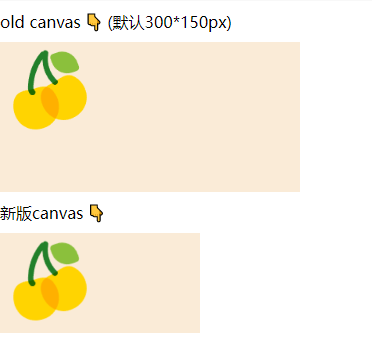
画图片
旧版: ctx.drawImage("/static/cherry.png, 0,0,100,100");
新版:
const image = canvas.createImage();
image.src = "/static/cherry.png";
image.onload = () => {
    //等待图片资源加载完成才可以画
    ctx.drawImage(image, 0, 0,100,100);
}
设置文字大小
旧版: ctx.setFontSize(20); ctx.fillText('20', 20, 20);
新版: ctx.font = "20px sans-serif"; ctx.fillText("我是新版canvas", 50, 30);
实时刷新抖动白屏
还有一点要注意,如果需要实时更新数据,就需要canvas不同绘画,但不要多次运行 const ctx = canvas.getContext('2d'); 否则页面刷新时会有白屏抖动。
正确的做法是分两个函数,一个初始化context,一个只专心画内容。
下面是我的一部分代码(不能直接运行,删去了部分敏感信息)
<template>
    <view>
        <view v-for="item in tankList">
            <canvas type="2d" :id="item.id" class="canvas" ></canvas>
        </view>
    </view>
</template>

<script>

export default {
    props: {
        tankList: {
            type: Array,
            default: []
        }
    },
    data() {
        return {
            // 油罐图片的宽高
            bgimgWidth: 200,
            bgimgHeight: 150,

            context: [],
            bgImg: null
        }
    },
    mounted() {
        this.createContexts(this.bgimgWidth, this.bgimgHeight);//每次进来的时候先画一次
    },
    watch: {
        tankList(newValue, oldValue) {
            // if 防止没有context还要画图报错
            if (this.context.length != 0) {
                this.refreshCanvas(this.bgimgWidth, this.bgimgHeight);
            }
        }
    },
    methods: {
        // 这个页面只运行一次
        createContexts() {
            // ❗❗❗ 新版canvas需要消除锯齿
            const windowInfo = wx.getWindowInfo();
            const availableWidth = windowInfo.windowWidth;
            const dpr = windowInfo.pixelRatio;//设备像素比

            // 1. 给 context[] 赋值(在这个页面只创建一次)
            this.tankList.forEach((tank, index) => {
                this.createSelectorQuery()
                    .select(`#${tank.id}`)
                    .node(({ node: canvas }) => {
                        this.context[index] = canvas.getContext('2d');
                        console.log('this.context[] 建立成功');

                        canvas.width = availableWidth * dpr;
                        canvas.height = availableWidth * 0.4 * dpr; //按照下面css的尺寸比例
                        this.context[index].scale(dpr, dpr); //必须有

                        //这里调用一遍,防止等待时间过长
                        this.refreshCanvas(this.bgimgWidth, this.bgimgHeight);
                    }).exec();
            })
        },
        refreshCanvas(bgimgWidth, bgimgHeight) {
            const context = this.context;

            // 2. 设置不同油罐油品的颜色
            let oilColors = [];//存储不同油罐油品的颜色
            this.tankList.forEach(tank => {
                oilColors.push(converIntToRgb(tank.oilColor));
            });

            this.tankList.forEach((tank, index) => {
                this.createSelectorQuery()
                    .select(`#hc${tank.id}`)
                    .node(({ node: canvas }) => {
                        this.bgImg = canvas.createImage();
                        this.bgImg.src = "/static/hcbgimg.png";
                        this.bgImg.onload = () => {
                            // ❗❗❗ 每次画新的之前先清空画布(包括图片)
                            this.context[index].clearRect(0, 0, bgimgWidth, bgimgHeight);

                            // 新版canvas画背景图片,将图片绘制到 canvas 上
                            this.context[index].drawImage(this.bgImg, 0, 0, bgimgWidth, bgimgHeight);

                            // 写详细信息(放外面会被图片挡住,因为图片加载较慢)
                            const textColor = tank.connect ? "black" : "red";
                            context[index].fillStyle = textColor;
                            context[index].font = "20px sans-serif";
                            context[index].fillText(tank.id, bgimgWidth * 0.06, bgimgHeight * 0.6);
                        }
                    }).exec();
            });
        },

    }
}
</script>

<style scoped>
.canvas {
    width: 750rpx;
    height: 300rpx;
    margin-top: 30rpx;
    margin-left: 37rpx;
    margin-right: 37rpx;
}
</style>

 浙公网安备 33010602011771号