


Blazor Server访问Identity Server 4单点登录2-集成Asp.Net角色
采用内存用户集合的模板创建的项目,是不能用于生产环境的,毕竟用户信息只存在于内存。Id4有一个模板是可以采用Asp.Net内置的用户数据库的,直接创建这个模板的项目即可。
创建AspNet用户数据库的Identity Server 4项目
在控制台进入解决方案目录,创建is4aspid模板项目。
D:\Software\gitee\blzid4\BlzId4Web>dotnet new is4aspid -n AspNetId4Web
已成功创建模板“IdentityServer4 with ASP.NET Core Identity”。
正在处理创建后操作...
模板配置为运行以下操作:
说明:
手动说明: Seeds the initial user database
实际命令: dotnet run /seed
是否要运行此操作 [Y(是)|N(否)]?
y
正在运行命令:“dotnet run /seed”...
命令已成功。
参考前文《Blazor Server访问Identity Server 4单点登录》
https://www.cnblogs.com/sunnytrudeau/p/15145388.html
Config.cs新增2个客户端定义
1 2 3 4 5 6 7 8 9 10 11 12 13 14 15 16 17 18 19 20 21 22 23 24 25 26 27 28 29 | new Client(){ ClientId="BlazorServer1", ClientName = "BlazorServer1", ClientSecrets=new []{new Secret("BlazorServer1.Secret".Sha256())}, AllowedGrantTypes = GrantTypes.Code, AllowedCorsOrigins = { "https://localhost:5101" }, RedirectUris = { "https://localhost:5101/signin-oidc" }, PostLogoutRedirectUris = { "https://localhost:5101/signout-callback-oidc" }, AllowedScopes = { "openid", "profile", "scope1" }},new Client(){ ClientId="BlazorServer2", ClientName = "BlazorServer2", ClientSecrets=new []{new Secret("BlazorServer2.Secret".Sha256())}, AllowedGrantTypes = GrantTypes.Code, AllowedCorsOrigins = { "https://localhost:5201" }, RedirectUris = { "https://localhost:5201/signin-oidc" }, PostLogoutRedirectUris = { "https://localhost:5201/signout-callback-oidc" }, AllowedScopes = { "openid", "profile", "scope1" }}, |
创建Blazor Server项目
参考前文《Blazor Server访问Identity Server 4单点登录》,创见2个Blazor Server客户端项目。
然后运行3个项目,测试验证id4单点登录。
增加角色
Asp.Net项目最常见的授权策略就是基于角色,默认创建的Identity Server 4项目是没有角色的,得手工加上。这个还相当麻烦。
首先要给用户增加角色,在SeedData增加函数AddRole。
1 2 3 4 5 6 7 8 9 10 11 12 13 14 15 16 17 18 19 20 21 22 23 24 25 26 27 28 29 30 31 32 33 34 35 36 37 38 39 40 41 42 43 44 45 46 | /// <summary> /// 给测试用户增加角色 /// </summary> /// <param name="serviceProvider"></param> public static void AddRole(IServiceProvider serviceProvider) { using var scope = serviceProvider.CreateScope(); using var roleManager = scope.ServiceProvider.GetRequiredService<RoleManager<IdentityRole>>(); using var userMgr = scope.ServiceProvider.GetRequiredService<UserManager<ApplicationUser>>(); bool roleExists = roleManager.RoleExistsAsync("Admin").Result; if (!roleExists) { var result = roleManager.CreateAsync(new IdentityRole("Admin")); } roleExists = roleManager.RoleExistsAsync("Guest").Result; if (!roleExists) { var result = roleManager.CreateAsync(new IdentityRole("Guest")); } var alice = userMgr.FindByNameAsync("alice").Result; if (alice != null) { var roles = userMgr.GetRolesAsync(alice).Result; if (!roles.Contains("Admin")) { var result = userMgr.AddToRoleAsync(alice, "Admin"); } if (!roles.Contains("Guest")) { var result = userMgr.AddToRoleAsync(alice, "Guest"); } } var bob = userMgr.FindByNameAsync("bob").Result; if (bob != null) { var roles = userMgr.GetRolesAsync(bob).Result; if (!roles.Contains("Guest")) { var result = userMgr.AddToRoleAsync(bob, "Guest"); } } } |
在id4项目初始化阶段检查执行,增加角色。
SeedData.AddRole(host.Services);
id4项目config增加role资源
1 2 3 4 5 6 7 | public static IEnumerable<IdentityResource> IdentityResources => new IdentityResource[] { new IdentityResources.OpenId(), new IdentityResources.Profile(), new IdentityResource("role", new string[]{JwtClaimTypes.Role }) }; |
客户端配置AllowedScopes也增加role
1 2 3 4 5 6 7 8 9 10 11 12 13 14 15 16 17 | new Client() { ClientId="BlazorServer1", ClientName = "BlazorServer1", ClientSecrets=new []{new Secret("BlazorServer1.Secret".Sha256())}, AllowedGrantTypes = GrantTypes.Code, AllowedCorsOrigins = { "https://localhost:5101" }, RedirectUris = { "https://localhost:5101/signin-oidc" }, PostLogoutRedirectUris = { "https://localhost:5101/signout-callback-oidc" }, //效果等同客户端项目配置options.GetClaimsFromUserInfoEndpoint = true //AlwaysIncludeUserClaimsInIdToken = true, AllowedScopes = { "openid", "profile", "scope1", "role", } }, |
Blazor Server项目增加获取role的scope,并且在id4用户信息端点拿到role之后要手工解析,因为id4返回的role可能是单个字符串,也可能是字符串数组,Blazor Server不认识。
1 2 3 4 5 6 7 8 9 10 11 12 13 14 15 16 17 18 19 20 21 22 23 24 25 26 27 28 29 30 31 32 33 34 35 36 37 38 39 40 41 42 43 44 45 46 47 48 49 50 51 52 53 54 55 | //默认采用cookie认证方案,添加oidc认证方案 services.AddAuthentication(options => { options.DefaultScheme = "cookies"; options.DefaultChallengeScheme = "oidc"; }) //配置cookie认证 .AddCookie("cookies") .AddOpenIdConnect("oidc", options => { //id4服务的地址 options.Authority = "https://localhost:5001"; //id4配置的ClientId以及ClientSecrets options.ClientId = "BlazorServer1"; options.ClientSecret = "BlazorServer1.Secret"; //认证模式 options.ResponseType = "code"; //保存token到本地 options.SaveTokens = true; //很重要,指定从Identity Server的UserInfo地址来取Claim //效果等同id4配置AlwaysIncludeUserClaimsInIdToken = true options.GetClaimsFromUserInfoEndpoint = true; //指定要取哪些资料(除Profile之外,Profile是默认包含的) options.Scope.Add("scope1"); options.Scope.Add("role"); //这里是个ClaimType的转换,Identity Server的ClaimType和Blazor中间件使用的名称有区别,需要统一。 //User.Identity.Name=JwtClaimTypes.Name options.TokenValidationParameters.NameClaimType = "name"; options.TokenValidationParameters.RoleClaimType = "role"; options.Events.OnUserInformationReceived = (context) => { //id4返回的角色是字符串数组或者字符串,blazor server的角色是字符串,需要转换,不然无法获取到角色 ClaimsIdentity claimsId = context.Principal.Identity as ClaimsIdentity; var roleElement = context.User.RootElement.GetProperty(JwtClaimTypes.Role); if (roleElement.ValueKind == System.Text.Json.JsonValueKind.Array) { var roles = roleElement.EnumerateArray().Select(e => e.ToString()); claimsId.AddClaims(roles.Select(r => new Claim(JwtClaimTypes.Role, r))); } else { claimsId.AddClaim(new Claim(JwtClaimTypes.Role, roleElement.ToString())); } return Task.CompletedTask; }; }); |
测试获取角色
同时运行3个项目,在Blazor Server项目主页用alice登录,可以看到正确获取到了role。
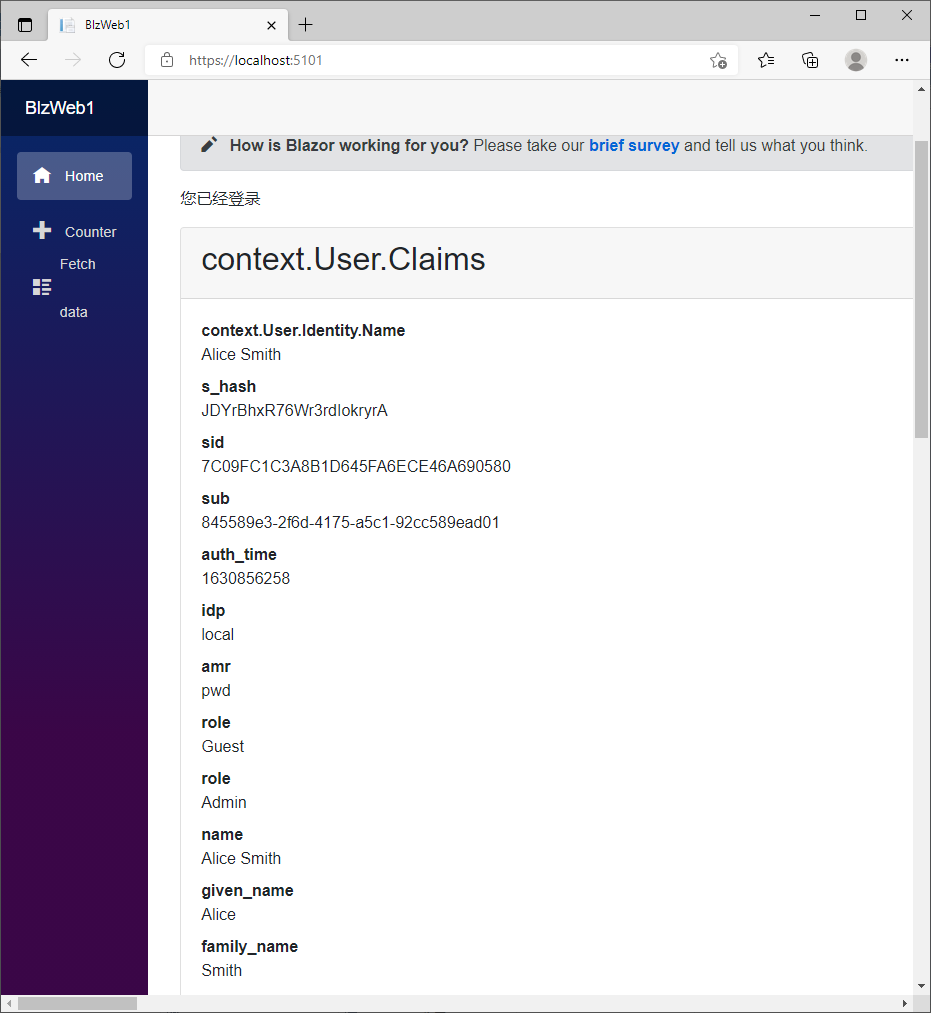
在id4控制台信息可以看到,Blazor Server客户端请求用户信息时,返回了role字段。
[23:37:38 Debug] IdentityServer4.Validation.TokenValidator
Token validation success
{"ClientId": null, "ClientName": null, "ValidateLifetime": true, "AccessTokenType": "Jwt", "ExpectedScope": "openid", "TokenHandle": null, "JwtId": "3223AFCB3DB832A92A69A04470AE144F", "Claims": {"nbf": 1630856258, "exp": 1630859858, "iss": "https://localhost:5001", "aud": "https://localhost:5001/resources", "client_id": "BlazorServer1", "sub": "845589e3-2f6d-4175-a5c1-92cc589ead01", "auth_time": 1630856258, "idp": "local", "jti": "3223AFCB3DB832A92A69A04470AE144F", "sid": "7C09FC1C3A8B1D645FA6ECE46A690580", "iat": 1630856258, "scope": ["openid", "profile", "scope1", "role"], "amr": "pwd"}, "$type": "TokenValidationLog"}
[23:37:38 Debug] IdentityServer4.ResponseHandling.UserInfoResponseGenerator
Creating userinfo response
[23:37:38 Debug] IdentityServer4.ResponseHandling.UserInfoResponseGenerator
Scopes in access token: openid profile scope1 role
[23:37:38 Debug] IdentityServer4.ResponseHandling.UserInfoResponseGenerator
Requested claim types: sub name family_name given_name middle_name nickname preferred_username profile picture website gender birthdate zoneinfo locale updated_at role
[23:37:38 Information] IdentityServer4.ResponseHandling.UserInfoResponseGenerator
Profile service returned the following claim types: sub name given_name family_name website role role preferred_username
[23:37:38 Debug] IdentityServer4.Endpoints.UserInfoEndpoint
End userinfo request
测试角色授权
给counter页面增加认证要求,只要登录用户都能访问
@attribute [Authorize]
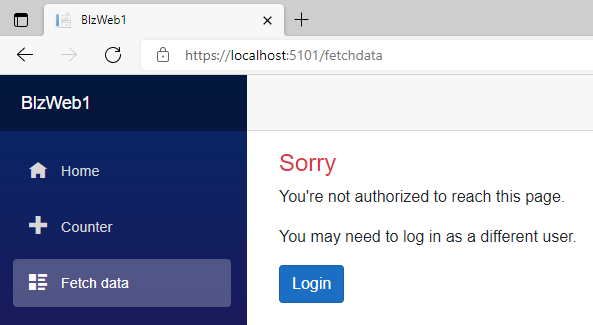
给FetchData页面增加Admin角色授权要求,只有Admin角色可以访问
@attribute [Authorize(Roles ="Admin")]
用alice登录,两个页面都可以访问,用bob登录,访问counter页面没问题,访问FetchData页面提示没有权限
这样就可以用于真实的产品项目中去了。
DEMO代码地址:https://gitee.com/woodsun/blzid4


【推荐】国内首个AI IDE,深度理解中文开发场景,立即下载体验Trae
【推荐】编程新体验,更懂你的AI,立即体验豆包MarsCode编程助手
【推荐】抖音旗下AI助手豆包,你的智能百科全书,全免费不限次数
【推荐】轻量又高性能的 SSH 工具 IShell:AI 加持,快人一步
· AI与.NET技术实操系列:基于图像分类模型对图像进行分类
· go语言实现终端里的倒计时
· 如何编写易于单元测试的代码
· 10年+ .NET Coder 心语,封装的思维:从隐藏、稳定开始理解其本质意义
· .NET Core 中如何实现缓存的预热?
· 分享一个免费、快速、无限量使用的满血 DeepSeek R1 模型,支持深度思考和联网搜索!
· 基于 Docker 搭建 FRP 内网穿透开源项目(很简单哒)
· ollama系列01:轻松3步本地部署deepseek,普通电脑可用
· 25岁的心里话
· 按钮权限的设计及实现