


Blazor Server访问Identity Server 4单点登录
网上有大量Asp.Net Core访问id4单点登录的介绍,但是Blazor Server的不多,我参考网上文章练习了一下,做一个记录。
参考文章,感谢作者:
Blazor与IdentityServer4的集成 - towerbit - 博客园 (cnblogs.com)
Blazor.Server以正确的方式集成Ids4_dotNET跨平台-CSDN博客
创建Identity Server 4项目
在控制台进入解决方案目录,安装id4项目模板。
D:\software\gitee\blzid4>dotnet new -i IdentityServer4.Templates
新建一个测试用的id4项目,带有UI和测试用户。
D:\software\gitee\blzid4>dotnet new is4inmem -n Id4Web
已成功创建模板“IdentityServer4 with In-Memory Stores and Test Users”。
新增2个客户端定义
1 2 3 4 5 6 7 8 9 10 11 12 13 14 15 16 17 18 19 20 21 22 23 24 25 26 27 28 29 | new Client(){ ClientId="BlazorServer1", ClientName = "BlazorServer1", ClientSecrets=new []{new Secret("BlazorServer1.Secret".Sha256())}, AllowedGrantTypes = GrantTypes.Code, AllowedCorsOrigins = { "https://localhost:5101" }, RedirectUris = { "https://localhost:5101/signin-oidc" }, PostLogoutRedirectUris = { "https://localhost:5101/signout-callback-oidc" }, AllowedScopes = { "openid", "profile", "scope1" }},new Client(){ ClientId="BlazorServer2", ClientName = "BlazorServer2", ClientSecrets=new []{new Secret("BlazorServer2.Secret".Sha256())}, AllowedGrantTypes = GrantTypes.Code, AllowedCorsOrigins = { "https://localhost:5201" }, RedirectUris = { "https://localhost:5201/signin-oidc" }, PostLogoutRedirectUris = { "https://localhost:5201/signout-callback-oidc" }, AllowedScopes = { "openid", "profile", "scope1" }}, |
创建Blazor Server项目
创建Blazor Server项目。NuGet安装
<PackageReference Include="Microsoft.AspNetCore.Authentication.OpenIdConnect" Version="5.0.9" />
修改App.razor实现未登录用户自动跳转登录
1 2 3 4 5 6 7 8 9 10 11 12 13 14 15 16 17 18 19 20 21 22 23 24 25 26 27 28 29 30 31 | @inject IJSRuntime _jsRuntime@inject NavigationManager _navManager<CascadingAuthenticationState> <Router AppAssembly="@typeof(Program).Assembly" PreferExactMatches="@true"> <Found Context="routeData"> <AuthorizeRouteView RouteData="@routeData" DefaultLayout="@typeof(MainLayout)"> <NotAuthorized> @if (!context.User.Identity.IsAuthenticated) { //如果用户未登录,跳转到Account控制器Login函数,发起登录 _jsRuntime.InvokeVoidAsync("window.location.assign", $"account/login?returnUrl={Uri.EscapeDataString(_navManager.Uri)}"); } else { <h4 class="text-danger">Sorry</h4> <p>You're not authorized to reach this page.</p> <p>You may need to log in as a different user.</p> <a href="/account/login" class="btn btn-primary">Login</a> } </NotAuthorized> </AuthorizeRouteView> </Found> <NotFound> <LayoutView Layout="@typeof(MainLayout)"> <p>Sorry, there's nothing at this address.</p> </LayoutView> </NotFound> </Router></CascadingAuthenticationState> |
修改program默认端口
1 2 3 4 5 6 7 8 | public static IHostBuilder CreateHostBuilder(string[] args) => Host.CreateDefaultBuilder(args) .ConfigureWebHostDefaults(webBuilder => { webBuilder .UseUrls("https://*:5101") .UseStartup<Startup>(); }); |
修改launchSettings.json默认端口
"applicationUrl": "https://localhost:5101",
修改startup添加oidc认证服务
1 2 3 4 5 6 7 8 9 10 11 12 13 14 15 16 17 18 19 20 21 22 23 24 25 26 27 | //默认采用cookie认证方案,添加oidc认证方案services.AddAuthentication(options => { options.DefaultScheme = "cookies"; options.DefaultChallengeScheme = "oidc"; }) //配置cookie认证 .AddCookie("cookies") .AddOpenIdConnect("oidc", options => { //id4服务的地址 options.Authority = "https://localhost:5001"; //id4配置的ClientId以及ClientSecrets options.ClientId = "BlazorServer1"; options.ClientSecret = "BlazorServer1.Secret"; //认证模式 options.ResponseType = "code"; //保存token到本地 options.SaveTokens = true; //很重要,指定从Identity Server的UserInfo地址来取Claim options.GetClaimsFromUserInfoEndpoint = true; }); |
开启认证和授权服务
1 2 3 4 5 6 7 | app.UseRouting();//开启认证和授权服务app.UseAuthentication();app.UseAuthorization();app.UseEndpoints(endpoints => |
添加登录用的MVC控制器AccountController,这个真是Blazor Server的痛点了,非要借助MVC做一次跳转,Net 7是不是能安排解决一下?
1 2 3 4 5 6 7 8 9 10 11 12 13 14 15 16 17 18 19 20 21 22 23 24 25 26 27 28 29 30 31 32 33 34 35 36 37 38 39 40 41 42 43 44 45 46 47 48 49 50 51 52 53 54 55 56 57 | public class AccountController : Controller { private readonly ILogger _logger; public AccountController(ILogger<AccountController> logger) { _logger = logger; } /// <summary> /// 跳转到Identity Server 4统一登录 /// </summary> /// <param name="returnUrl">登录成功后,返回之前的网页路由</param> /// <returns></returns> [HttpGet] public IActionResult Login(string returnUrl = "") { if (string.IsNullOrEmpty(returnUrl)) returnUrl = "/"; var properties = new AuthenticationProperties { //记住登录状态 IsPersistent = true, RedirectUri = returnUrl }; _logger.LogInformation($"id4跳转登录, returnUrl={returnUrl}"); //跳转到Identity Server 4统一登录 return Challenge(properties, "oidc"); } /// <summary> /// 退出登录 /// </summary> /// <param name="returnUrl"></param> /// <returns></returns> [HttpGet] public async Task<IActionResult> Logout() { var userName = HttpContext.User.Identity?.Name; _logger.LogInformation($"{userName}退出登录。"); //删除登录状态cookies await HttpContext.SignOutAsync("cookies"); var properties = new AuthenticationProperties { RedirectUri = "/" }; //跳转到Identity Server 4统一退出登录 return SignOut(properties, "oidc"); } |
还要修改startup让系统支持MVC路由。
1 2 3 4 5 6 7 8 | app.UseEndpoints(endpoints =>{ //支持MVC路由,跳转登录 endpoints.MapDefaultControllerRoute(); endpoints.MapBlazorHub(); endpoints.MapFallbackToPage("/_Host");}); |
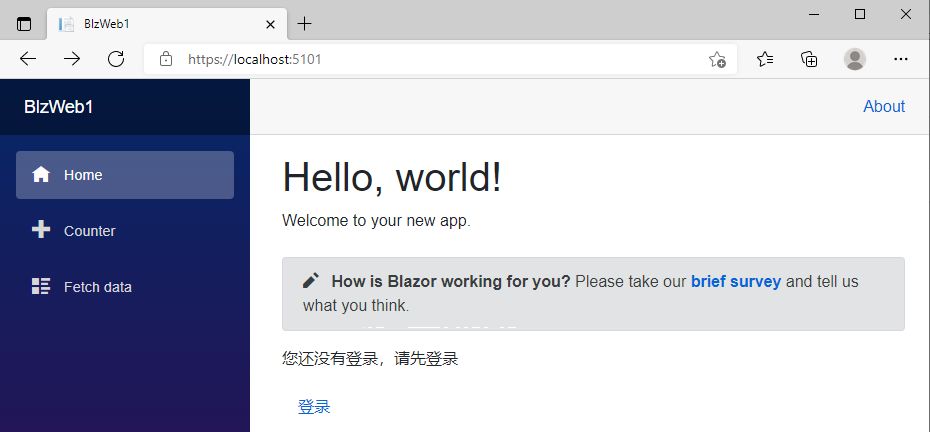
在Index页面显示一下登录用户信息
1 2 3 4 5 6 7 8 9 10 11 12 13 14 15 16 17 18 19 20 21 22 23 24 25 26 27 28 29 30 31 | <AuthorizeView> <Authorized> <p>您已经登录</p> <div class="card"> <div class="card-header"> <h2>context.User.Claims</h2> </div> <div class="card-body"> <dl> <dt>context.User.Identity.Name</dt> <dd>@context.User.Identity.Name</dd> @foreach (var claim in context.User.Claims) { <dt>@claim.Type</dt> <dd>@claim.Value</dd> } </dl> </div> </div> <a class="nav-link" href="Account/Logout">退出登录</a> </Authorized> <NotAuthorized> <p>您还没有登录,请先登录</p> <a class="nav-link" href="Account/Login">登录</a> </NotAuthorized></AuthorizeView> |
给counter页面增加认证要求,这样如果没有登录的状态下,点击counter页面就会触发自动跳转登录
@attribute [Authorize]
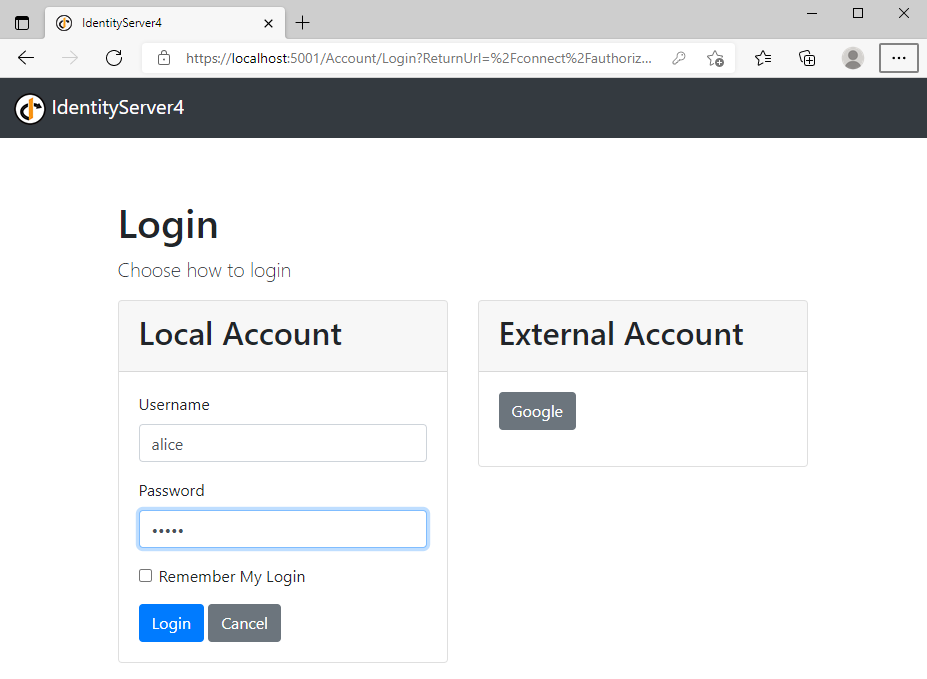
把id4项目和blazor server项目一起运行,点击BlzWeb1主页的登录,即可跳转到id4登录页面
输入id4提供的测试账号aclie和密码alice。
登录成功,跳转回到BlzWeb1主页,看一下用户身份信息。

可以通过HttpContext获取更多信息。
修改startup添加服务。
services.AddSingleton<IHttpContextAccessor, HttpContextAccessor>();
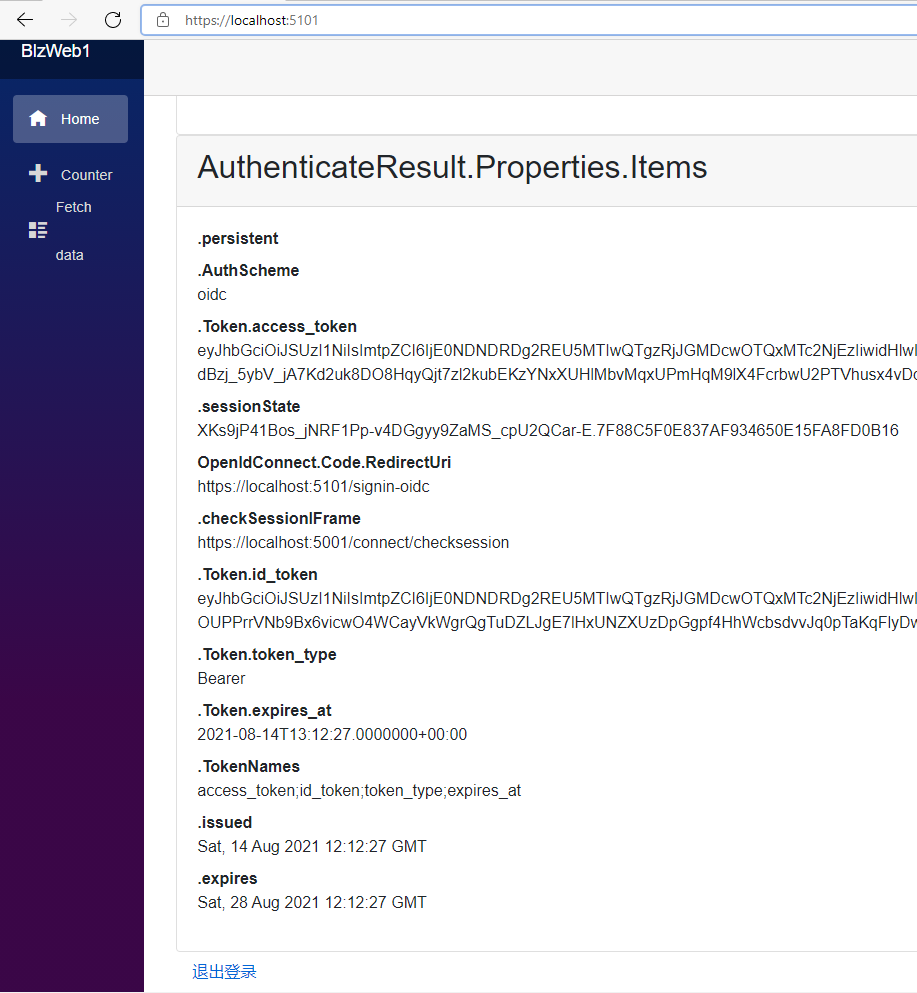
修改BlzWeb1主页
1 2 3 4 5 6 7 8 9 10 11 12 13 14 15 16 17 18 19 20 21 22 23 24 25 26 27 28 29 30 31 32 33 34 35 36 37 38 39 40 41 42 43 44 45 46 47 48 49 50 51 52 53 | @using Microsoft.AspNetCore.Authentication@using Microsoft.AspNetCore.Http@inject IHttpContextAccessor httpContextAccessor@if (AuthResult is not null) { <p>AuthResult.Principal.Identity.Name: <strong>@AuthResult.Principal.Identity.Name</strong></p> <div class="card"> <div class="card-header"> <h2>AuthenticateResult.Principal</h2> </div> <div class="card-body"> <dl> @foreach (var claim in AuthResult.Principal.Claims) { <dt>@claim.Type</dt> <dd>@claim.Value</dd> } </dl> </div> </div> <div class="card"> <div class="card-header"> <h2>AuthenticateResult.Properties.Items</h2> </div> <div class="card-body"> <dl> @foreach (var prop in AuthResult.Properties.Items) { <dt>@prop.Key</dt> <dd>@prop.Value</dd> } </dl> </div> </div> }@code{ private AuthenticateResult AuthResult; protected override async Task OnAfterRenderAsync(bool firstRender) { if (firstRender) { AuthResult = await httpContextAccessor.HttpContext.AuthenticateAsync(); StateHasChanged(); } }} |
可以看到token等信息。
但是获取不到context.User.Identity.Name,这也是一个痛点,为什么id4就是不爽快地返回Username呢?
修改startup可以把id4用户的name字段赋值给User.Identity.Name,然而我想要的是id4用户的Username。
//这里是个ClaimType的转换,Identity Server的ClaimType和Blazor中间件使用的名称有区别,需要统一。
//User.Identity.Name=JwtClaimTypes.Name
options.TokenValidationParameters.NameClaimType = "name";
//options.TokenValidationParameters.RoleClaimType = "role";
有一个鸵鸟办法,就是自己定义的用户class中,让name跟Username保持同一个值。
获取role则更麻烦,还要转换数据类型,补充添加到cliams,这些最常用的功能都没衔接好,心很累。
接着创建第二个Blazor Server项目。
测试验证
注意这里有坑!
测试方案一:
在VS2019同时调试运行id4项目和2个Blazor Server项目,自动打开了3个Edge浏览器窗口。在BlzWeb1网页登录,然后刷新BlzWeb2网页,点击主页的登录按钮,会发现还要再次跳转到id4网页登录,根本没有实现单点登录!为什么会这样!我也不知道。
百度查资料,没有结果。
测试方案二:
后来我改变了一下测试方法,在BlzWeb1浏览器新建一个页卡,然后访问BlzWeb2主页,然后再点击BlzWeb2主页的登录按钮,这次自动登录了。
然后在BlzWeb1主页退出登录,再次刷新BlzWeb2主页地址栏,它又提示当前是未登录状态了,实现了单点登录。
如果在测试过程中,反复在两个Edge浏览器登录,退出,很任意导致网页死机,不知道是什么问题。
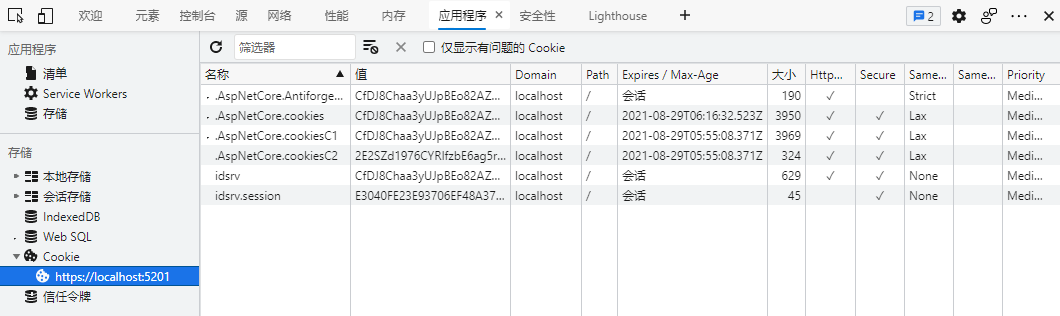
查看Edge的cookies,可以看到在同一个浏览器的2个页卡运行的BlzWeb1和BlzWeb2的登录状态相同,共享了cookies,这是单点登录的原理和基础。

注意,如果部署BlzWeb1和BlzWeb2到云服务器测试,需要共用一个数据保护秘钥,因为Asp.Net Core采用数据保护秘钥加密cookies,要确保2个项目能够互认cookies,详情参见:
DataProtection设置问题引起不同ASP.NET Core站点无法共享用户验证Cookie - dudu - 博客园 (cnblogs.com)
DEMO代码地址:https://gitee.com/woodsun/blzid4


【推荐】国内首个AI IDE,深度理解中文开发场景,立即下载体验Trae
【推荐】编程新体验,更懂你的AI,立即体验豆包MarsCode编程助手
【推荐】抖音旗下AI助手豆包,你的智能百科全书,全免费不限次数
【推荐】轻量又高性能的 SSH 工具 IShell:AI 加持,快人一步
· AI与.NET技术实操系列:基于图像分类模型对图像进行分类
· go语言实现终端里的倒计时
· 如何编写易于单元测试的代码
· 10年+ .NET Coder 心语,封装的思维:从隐藏、稳定开始理解其本质意义
· .NET Core 中如何实现缓存的预热?
· 分享一个免费、快速、无限量使用的满血 DeepSeek R1 模型,支持深度思考和联网搜索!
· 基于 Docker 搭建 FRP 内网穿透开源项目(很简单哒)
· ollama系列01:轻松3步本地部署deepseek,普通电脑可用
· 25岁的心里话
· 按钮权限的设计及实现